
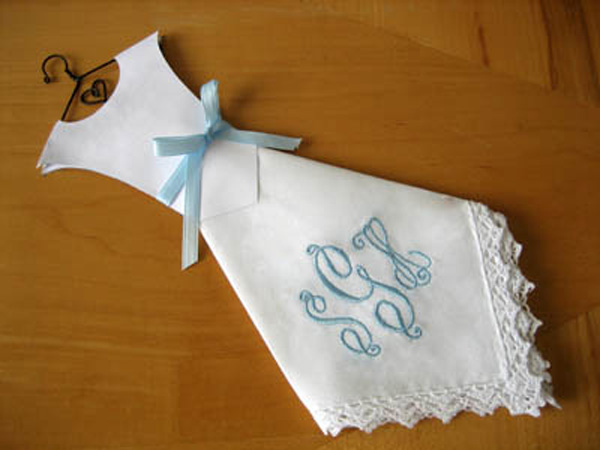
Ready for a project that is just as easy as it is adorable? This embroidered wedding dress hankie by Bumblebee Linens has been featured in magazines like Brides and Martha Stewart Weddings and aired on the NBC’s The Today Show. They have graciously permitted me to share the tutorial with you, free!
Photos via Bumblebee Linens
This keepsake is certain to become a family heirloom and makes wonderful gifts for members of your wedding party. It would also be a lovely memento for those renewing their vows or other special occasions such as First Communion.
Let’s make a wedding dress from a hankie!
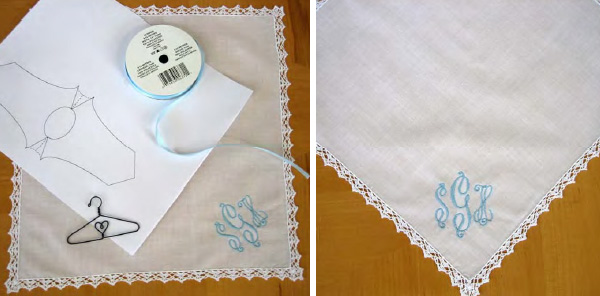
Step 1:
Start with a linen hankie. It can be vintage or just look that way. Embroider a monogram, sentiment, or other design in one corner. If you do not have an embroidery machine, Bumblebee Linens can customize the hankie for you! Choose a coordinating color of quarter-inch ribbon, a three-inch wire hanger, and a piece of white cardstock. Print the bodice template on the cardstock. Get linen hankies here.
Need a refresher on monogram rules? Read What’s in a Name? Proper Monogram Etiquette. For samples of monogram styles, check out Customize Your Embroidery With +20 Monogram Patterns!
Step 2:
Press the hankie flat. Using a spray like Best Press provides a crisp finish. 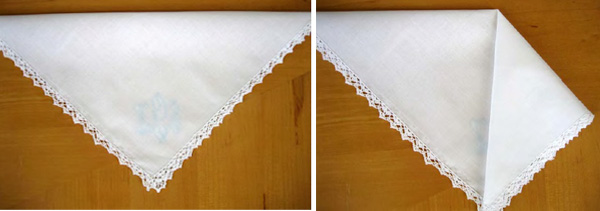
Step 3:
Place the monogram right side down pointing to six o-clock. Fold the top half of the hankie to the bottom, wrong sides together, matching top and bottom corners. Press the fold.
Step 4:
Match the right side point to the bottom point and press the fold.
 Step 5:
Complete the diamond by matching the left side point to the bottom point, meeting your second fold in the middle. Press the fold.
Step 6:
Fold left and right corners to the middle again and press the folds. 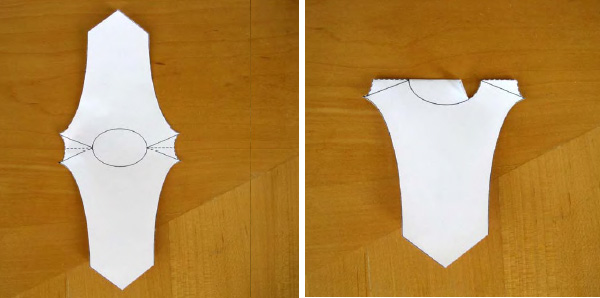
Step 7
Cut out the bodice template you printed earlier.
Step 8
Fold the template in half along the centered, dotted line. Cut out the neckline. 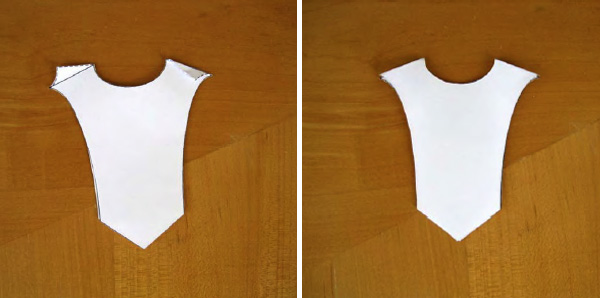
Step 9:
Flip the bodice template inside out, tucking the shoulders inside along the dotted lines. Printed lines should all be inside. 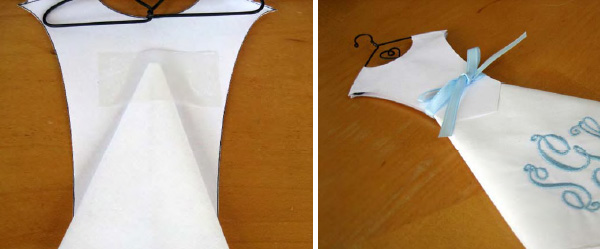
Step 10:
Open the bodice top and tape the folded tip of the hankie “skirt” to the inside back of the bodice, monogram side up.
Step 11:
Fold the front of the bodice back over the skirt tip. Wrap a piece of coordinating ribbon around the “waist,” tie in a bow, and you are done! Get wedding dress hankie kits here.
Discover new patterns + projects!
Looking for some project inspiration? Shop the Craftsy collection of online patterns, where you can instantly purchase patterns directly from fabulous indie pattern designers!
I still don't see the pattern or a "bonus section" like you described below in January.
Where is the bodice pattern?