
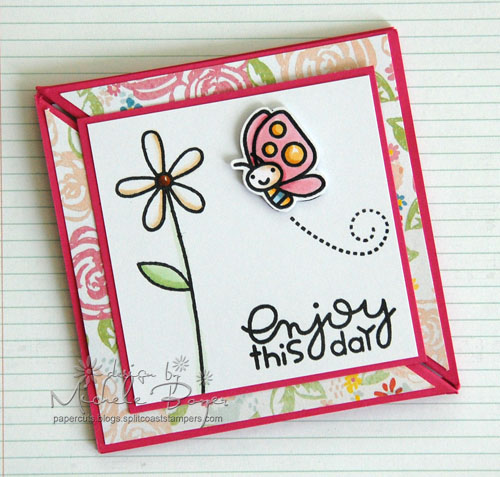
Your friends will flip for this triangle trifold card! It comes together with just four easy scores and folds, tied closed with a ribbon or snapped closed with hidden magnetic discs. The result is a square, 3 1/2″ if using a standard 8 1/2″ x 11″ piece of cardstock or 4″ if using 12″ x 12″. No matter your finished size, create a quick coordinating envelope with our simple tutorial on how to make an envelope in just minutes.
How to make a trifold card
Note: For this tutorial, I’ve used an 8 1/2″ x 11″ piece of cardstock, resulting in a 3 1/2″ square card. I used small magnetic discs hidden between the paper layers to hold the card closed, but have also included instructions for using ribbon to hold the card closed.
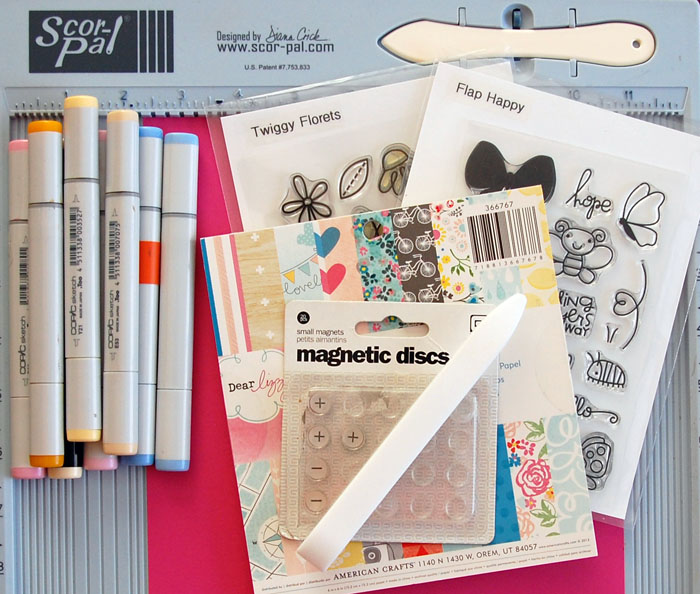
Supplies you’ll need:
- Scor-Pal or other scoring board
- Bone folder
- Cardstock
- Patterned paper (I used Dear Lizzy Day Dreamer 6×6 by American Crafts)
- Adhesive
- Paper trimmer
- Stamps (I used Twiggy Florets and Flap Happy by Paper Smooches)
- Black ink (I used Black Licorice hybrid by My Favorite Things)
- Copic markers (I used B21, B34, E50, E53, E57, G40, G43, R81, R83, Y21, YR23)
- BasicGrey small magnetic discs (two positives, two negatives)
Step 1:
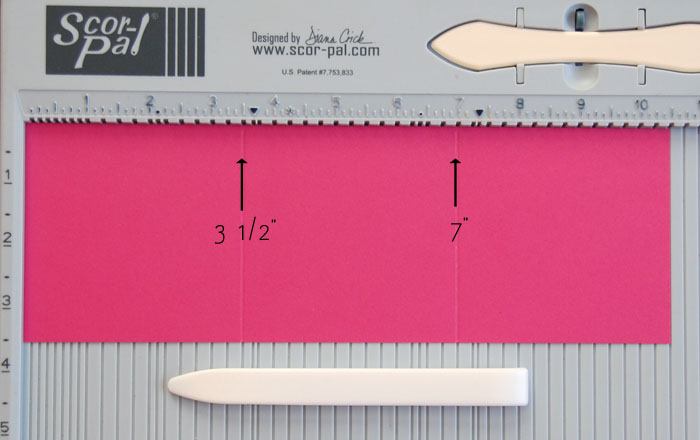
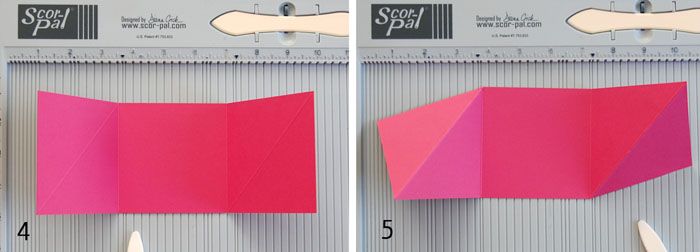
Cut cardstock base to 3 ½” x 10 ½”. Score at 3 ½” and 7”. The paper should now be scored/divided into three equal squares.
Step 2:
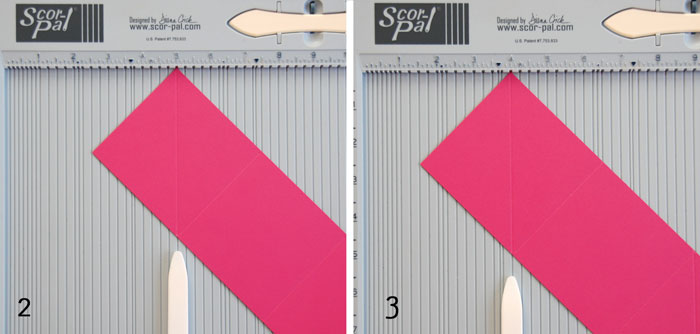
Diagonally score left square from upper left corner to lower right corner.
To do this, I chose a random spot across the top of my score board. I dragged my bone folder down, placed the upper corner of my cardstock at the chosen mark (5″ as shown on the left above), then shifted the cardstock until the bottom right corner aligned with the 5” groove. By dragging the bone folder down and holding in that position, I was assured to score along the correct groove.
Step 3:
Turn cardstock and repeat, diagonally scoring the opposite square. It is important that both diagonal scores (Steps 2 and 3) are in the same direction.
Step 4:
Fold cardstock ends up at 3 ½” and 7” score lines.
Step 5:
Fold cardstock ends down at diagonal score lines.

Step 6:
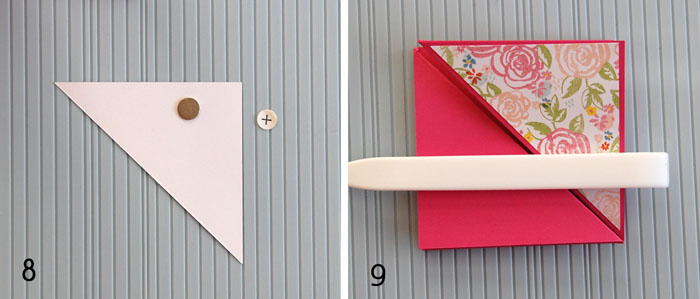
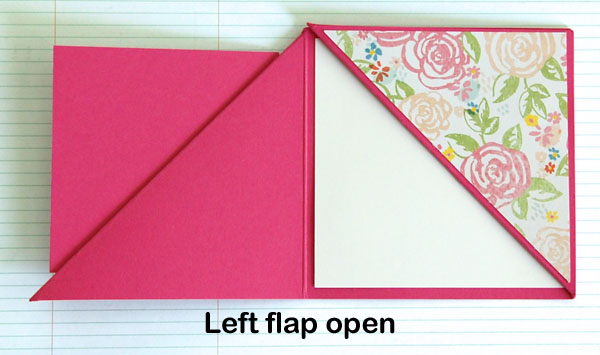
Cut patterned paper to 3 ¼” x 3 ¼”.
Step 7:
Diagonally cut patterned block into two pieces.
Step 8:
Remove adhesive backing from one positive disc and adhere to back side of one patterned triangle. I placed the disc close to the right angle corner, far enough away from the edge to leave room to apply adhesive around all edges.
Step 9:
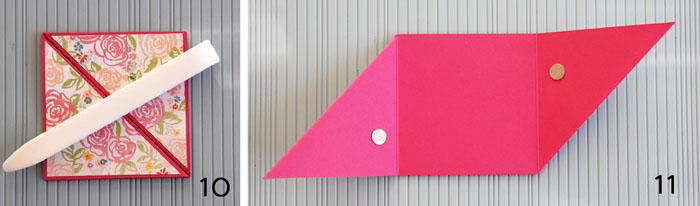
Adhere patterned triangle to one side of closed trifold card, over magnet. (Bone folder is in place to hold the card closed for photography purposes.)
Step 10:
Repeat Steps 8 and 9 with remaining positive magnetic and triangle of patterned paper.
Step 11:
Open card as shown. Without removing adhesive backing from negative discs, allow each magnet half to “stick” to each positive half (through the cardstock).
Step 12:
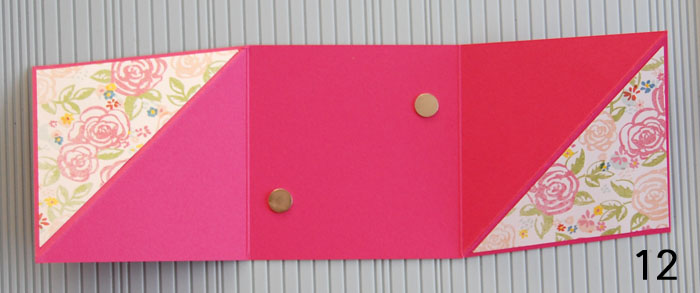
Remove adhesive backing from negative halves and close the card, pressing firmly over both magnets. When card is opened, the negative halves should now be adhered to the center panel, in perfect alignment with the magnetic halves hidden beneath the patterned triangles.
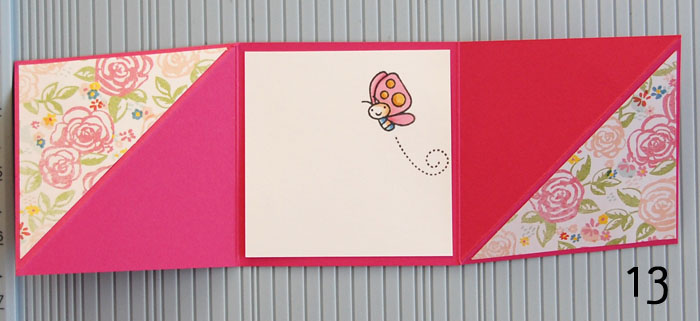
Step 13:
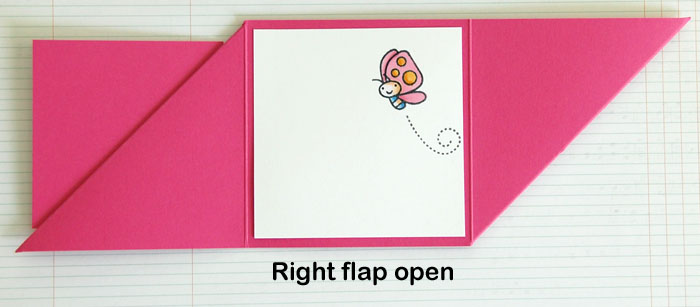
Cut a 3 1/4″ x 3 1/4″ block of white cardstock. Stamp and embellish as desired and adhere to inside panel.
Note: A handwritten message can be written before adhering the panel, or just be aware that the magnetic discs, while very thin, could slightly impede smooth penmanship.
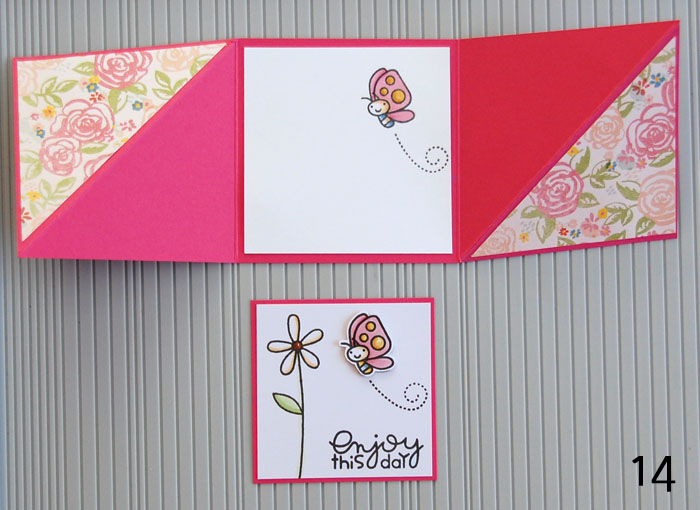
Step 14:
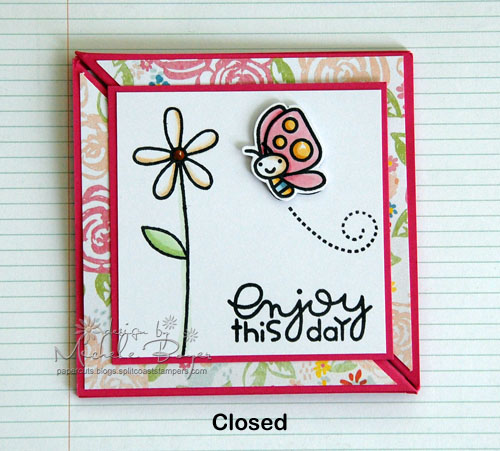
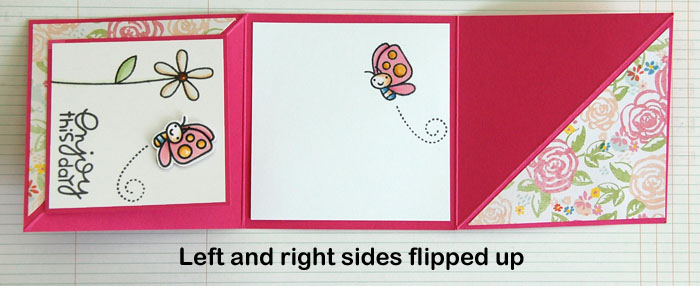
Decorate front panel as desired. My white cardstock is cut to 2 3/4″ x 2 3/4″ then matted with a thin pink border to allow the patterned paper to show beneath.
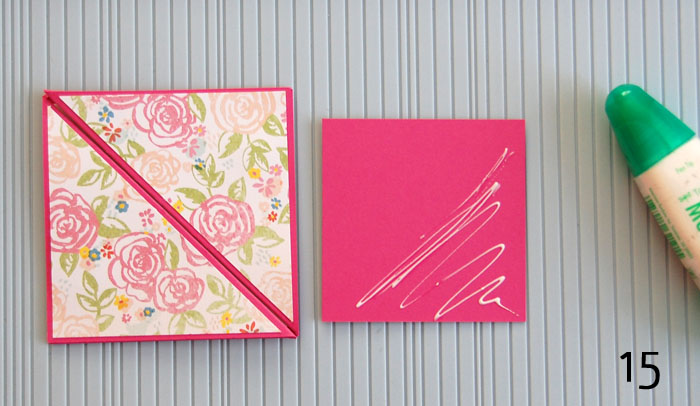
Step 15:
Apply adhesive to only one (diagonal) half of front panel and adhere to half of card front.
It does not matter whether front panel adheres to the top triangle or the bottom, but it is important to only apply adhesive to the chosen half.
As an alternative, if you do not have magnetic discs or choose not to use them, a ribbon can be used to hold the card closed. Instead of applying adhesive to one-half of the front panel, apply adhesive to the bottom edge only. Doing so will allow the ribbon to be slipped behind the front panel and tied to one side.
Share tips, start a discussion or ask one of our experts or other students a question.
No Responses to “Fancy Folds: How to Make a Cute Triangle Trifold Card”