
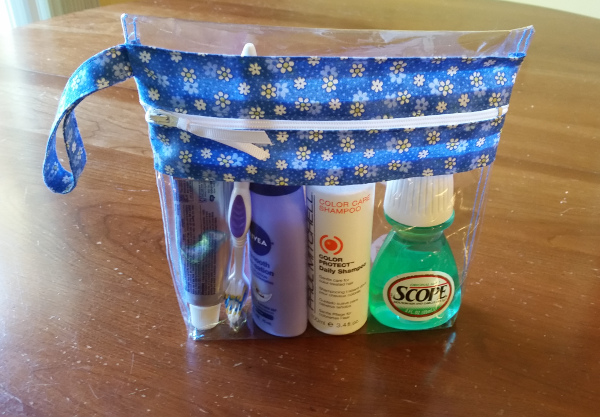
Planning a vacation soon? After all it’s the season for much-needed trip whether it’s just a weekend getaway or a trip abroad. In either case, everyone needs a bag to carry things while away from home.
A popular purchase before trips is a quart-sized bag packed with 3.4 oz. bottles to get past the TSA screening at the airport. Sure, a Ziploc bag does the trick just fine, but if you have an hour to spare you can easily make one that is far more impressive and durable.
The lessons here include instructions for making a cute travel bag, but, more importantly, you will learn how to sew using vinyl or plastic sheeting. Sewing with vinyl has its difficulties but once you get past learning how to deal with the sticking issues, they aren’t much different than sewing with regular fabric.
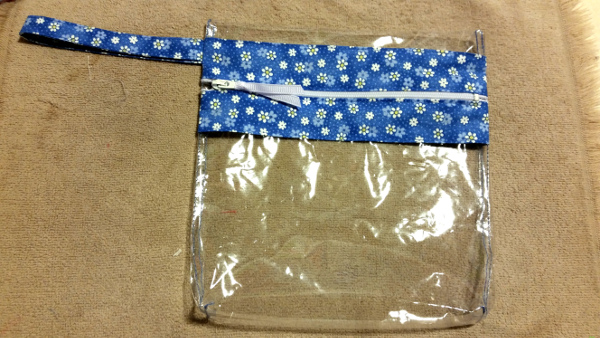
Making the bag itself is very simple and uses techniques that apply to making any small makeup or travel bags. Replace the vinyl with fabric and the steps remain exactly the same. Use a mix of contrasting or coordinating fabric and the bag takes on a whole new personality.
The bag measures approximately 8” by 9” when finished. It uses so little fabric that just a few scraps are needed. As for the plastic, this piece is from a bolt of tablecloth plastic I purchased at my local store. It’s fairly lightweight, which makes it easy to work with, but a slightly thicker plastic would be a bit better. To finish it, I added a wrist strap.
Materials:
- Enough fabric to cut two strips 2” by 9” long to frame the zipper, and one strip that is 2” by 11” long for the wrist strap.
- One 7” regular nylon zipper
- A piece of plastic sheeting measuring 9” by 15”.
How to make a toiletry bag:
1. Cut out the fabric strips and the plastic sheeting to the dimensions detailed above. A rotary cutter works great here and ensures even and very straight edges.
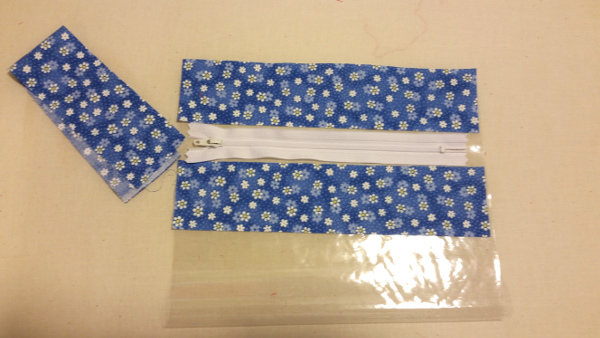
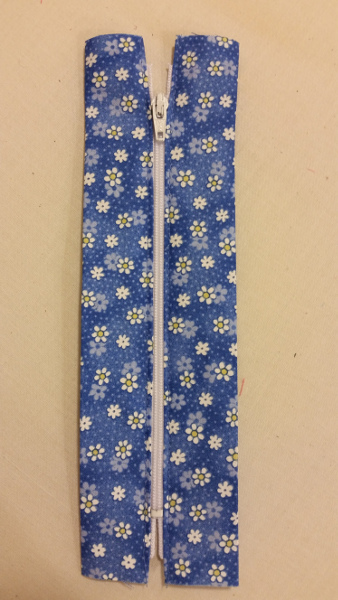
2. Frame the zipper with the fabric. Take each of the 2”x9” strips and for each, fold both long side edges in approximately 3/8” towards the wrong side of the fabric and press in place.
3. Take the zipper and place one of the fabric strips next to the zipper teeth making sure the zipper is centered within the length of the strip. Now sew the zipper in place using a zipper foot. Repeat the process with the other strip on the opposing side of the zipper. The zipper is now framed with the fabric.
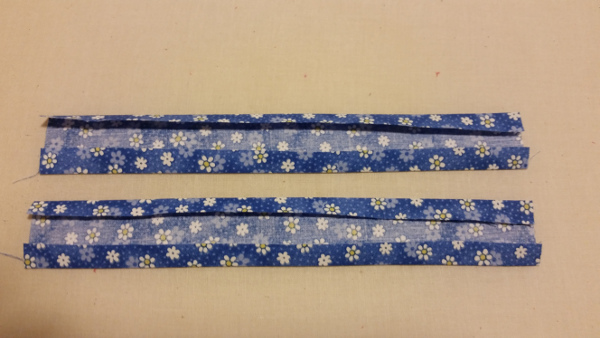
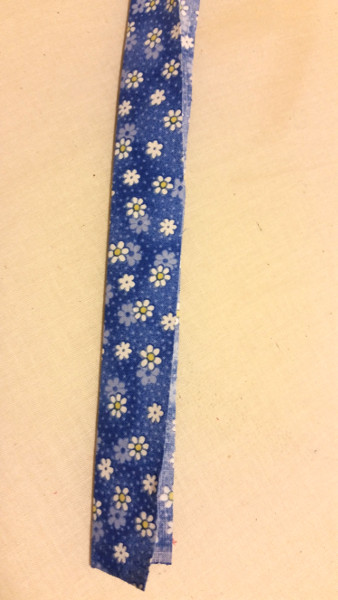
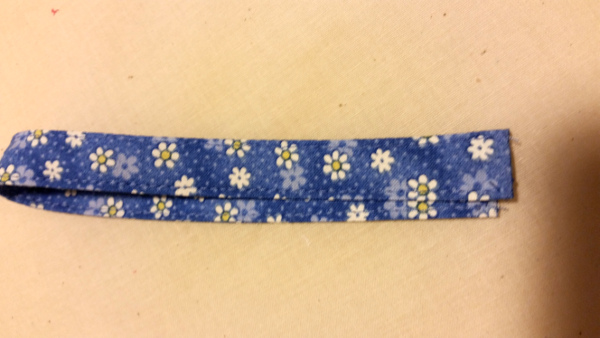
4. Make the wrist strap. Take the 2”x11” strip of fabric and fold it in half lengthwise. Press the fold. Now fold the two long raw edges in towards the center fold and press in place.
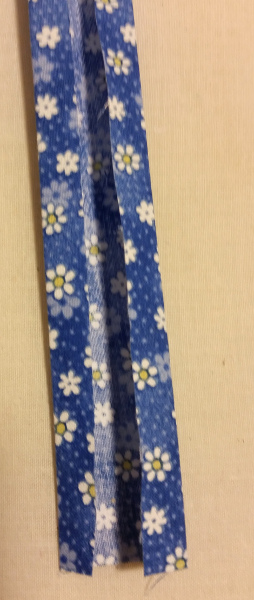
Fold the strip again in half and with an edgefoot stitch to secure the fold. Stitch along the center fold as well. Fold the completed strap in half and set aside.
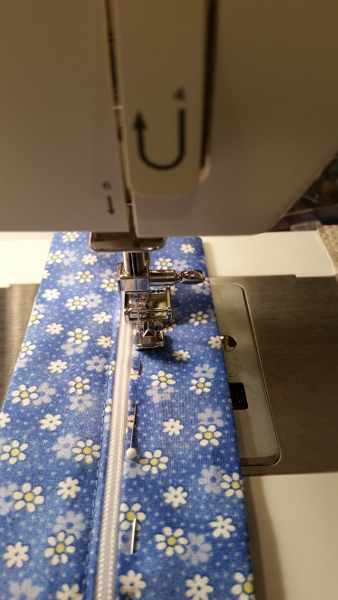
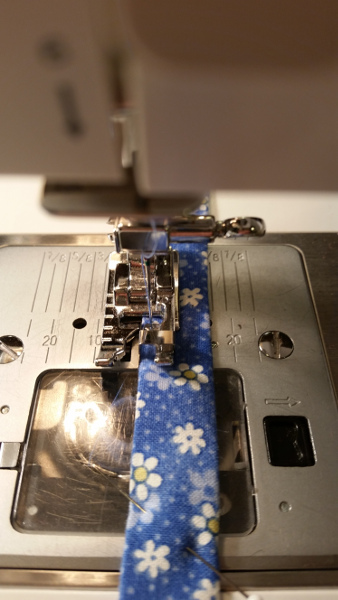
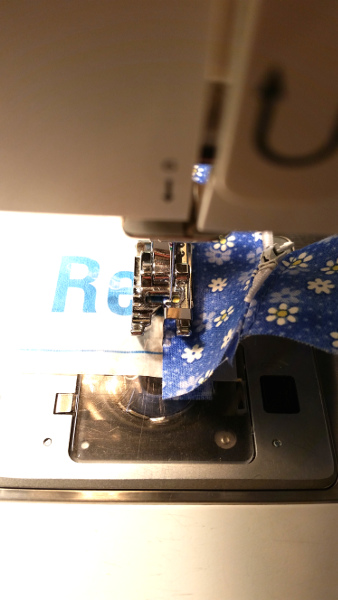
5. Attach the zipper to the plastic sheeting. One of the difficulties of sewing with vinyl or plastic is it has a tendency to stick to both the needle plate of the machine and the presser foot, keeping the plastic from moving through the machine.
To prevent this there are a number of solutions. One is to use either a roller or Teflon foot to prevent the plastic from sticking to the presser foot or simple apply some Scotch tape to the underside of a regular presser foot.
What I prefer to do is to sandwich the plastic between two strips of tissue paper. Use either regular tissue wrapping paper or use the tissue that backs the plastic when you purchase it. Sandwiching the plastic between the layers of tissue solves the issue of both the presser foot and needle plate sticking. The key is to place the tissue just slightly in from the cut edge of the plastic so when sewing, the plastic can line up with your machine guide lines. This may sound silly, but often times when sewing it’s these very tiny details that can prevent frustrations.
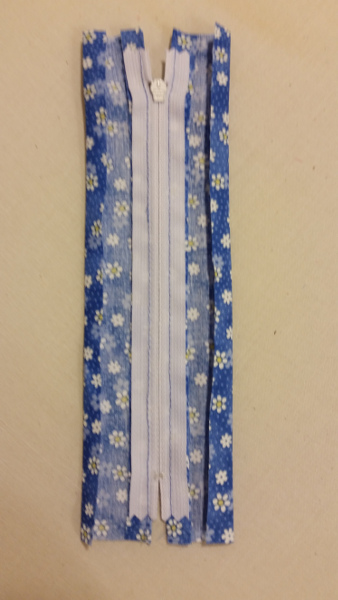
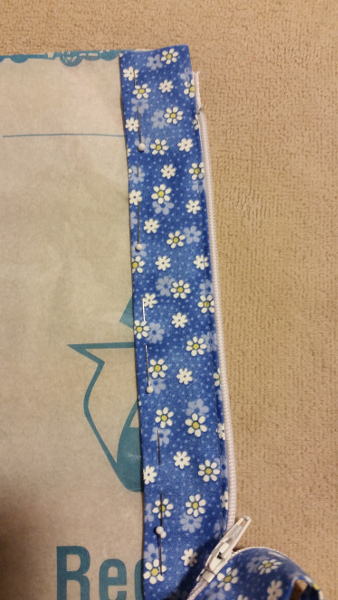
To attach the framed zipper to the plastic sheeting, lay the folded edge of the fabric on to one of the short sides of the sheeting. Pin in place within a ¼” seam allowance — no more than that as the holes will then show. Pin a strip of tissue under the joining points. Now using an edgefoot positioned so the blade is to the left of the folded fabric and the foot rides on the fabric, stitch the fabric/zipper to the plastic. Tear off the tissue and discard.
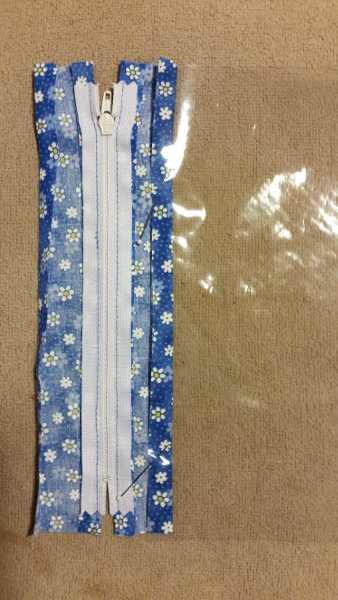
6. Repeat the process for attaching the other side of the zipper to the plastic. It helps to open the zipper when sewing this side. You should now have a piece that resembles a tube.
7. Turn the tube wrong side out. Join the sides together so the sides line up and at the top there remains a ¾” fold of plastic — the zippered section will rest slightly down from the top of the bag. Pin the side where the bottom of the zipper is within a ¼” seam allowance. Place tissue both under and over the sewing area and stitch the side using a 5/8” seam allowance.
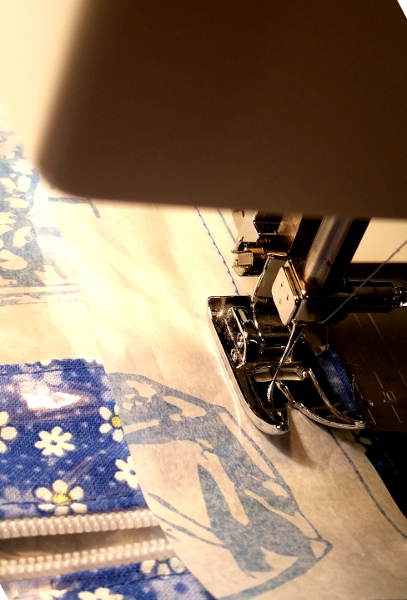
8. Repeat the process for the other side with the following considerations. First, open the zipper half way so when you complete the bag, it can be turned right side out. Next, position the wrist strap so it lines up with the top of the fabric edge and faces into the bag. Using tissue on the top and bottom sew this side of the bag.
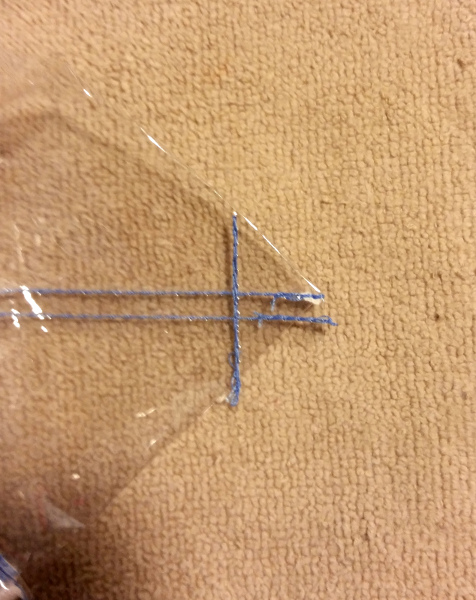
9. To give the bag some depth, pinch the bottom corners and sew in place approximately ¾” from the pointed end.
10. Turn the bag right side out, push out the corners and press flat with your hands. The bag is now complete.
Share tips, start a discussion or ask one of our experts or other students a question.
No Responses to “Travel in Style: Make a TSA Screening Toiletry Bag”