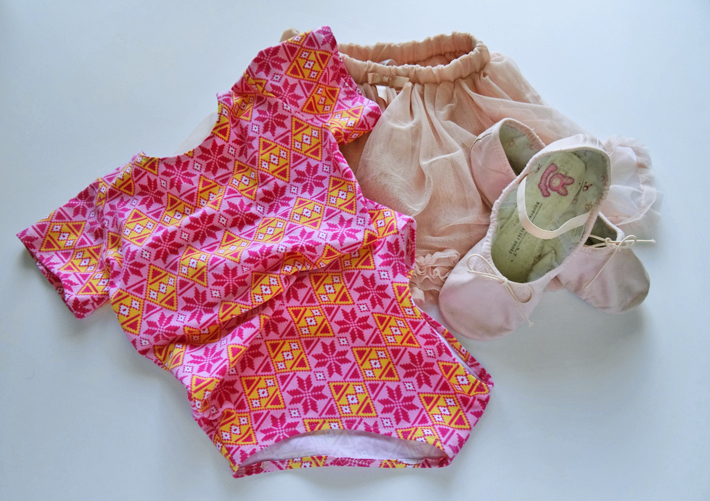
Dancing is all about expressing yourself, so you (or your little one) need a leotard to help show off your punchy personality. Whether you want a funky pattern or prefer to go with a more traditional color, making your own means you get to customize the design, the fabric, the fit, the whole vibe.
The leotard you'll make in this tutorial works perfectly for ballet, gymnastics and all kinds of other dance and fitness classes. You can use the same instructions to make a kids' leotard or an adult bodysuit. The best part? There's absolutely no pattern needed.
Leotard
Level: Intermediate
What You Need
Good to Know: If you want a longer sleeve than the one shown in this tutorial, you can trace a long-sleeve T-shirt during the drafting process. Or you can make a sleeveless leotard (or even a bathing suit) by finishing the sleeve openings the same way as the neckline.
Instructions
1. Draft the Leotard Front
Fold your bathing suit in half along the side seams, with the front side out. Align the suit's fold with the straight edge of your paper. Trace around the suit.
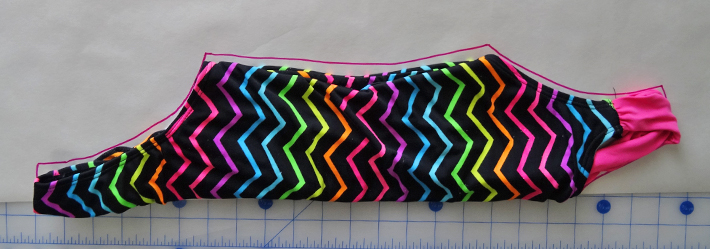
Turn the T-shirt inside out and fold it in half. Fold the sleeve back inside the bodice so the sleeve seam is exposed. Line the shoulder up with the bathing suit shoulder, and the side seam with the side of the bathing suit line you just traced. Trace the sleeve from where it meets the side seam to the bathing suit marking at the shoulder.
Pro Tip: For tracing these two garments, it might help to use different pen colors so you can easily tell what markings you're looking at.
Move the T-shirt so the fold is along the edge of the paper, with the shoulder still aligned with the bathing suit markings. Trace the neckline.
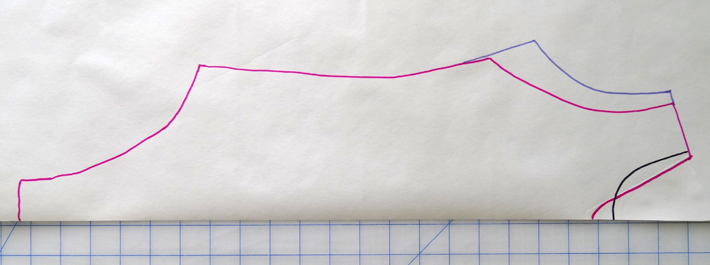
When you're done, the paper should look like the image above.
2. Add the Seam Allowance
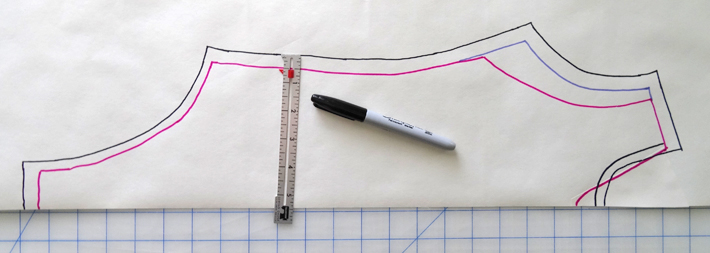
Using a seam gauge, add ½" seam allowance to the crotch seam, sides and shoulders. Add a ¼" seam allowance at the neckline and leg openings.
Mark the pattern piece with a fold notation and add any other important info (like a label that this piece is the front). Cut it out — you can use it to draft the back of your leotard.
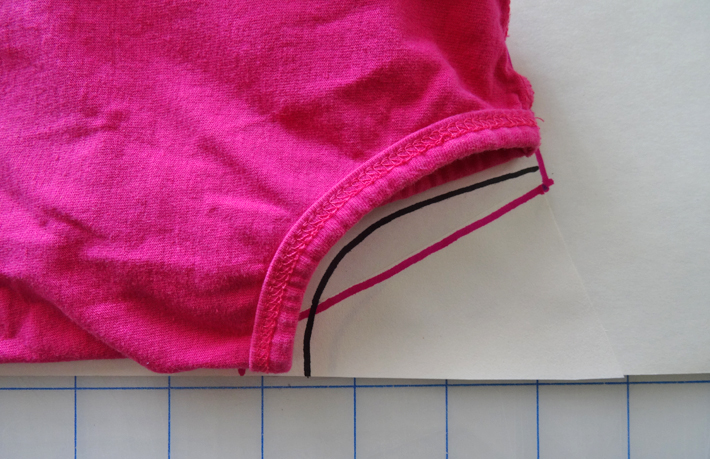
3. Draft the Leotard Back
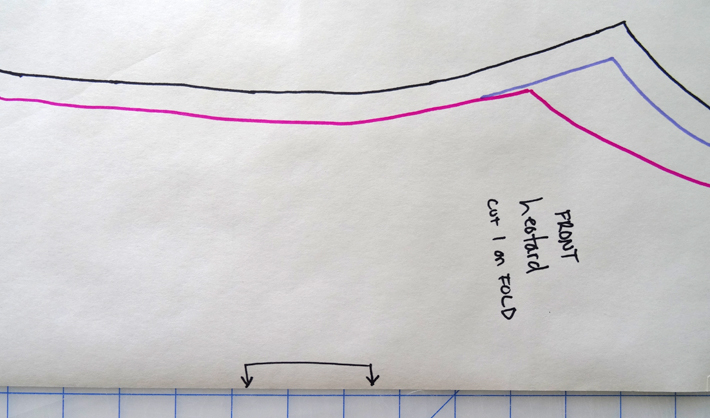
Trace the pattern for the leotard front on another edge of the paper to use as a reference.
Refold the bathing suit, this time with the back side out. Align it with the tracing of your front piece and trace any portion that's different (like the leg openings).
Make sure to add a ¼" seam allowance along the leg opening to account for the previously added seam allowance from the traced leotard front. Make sure the crotch and side lines still match up.
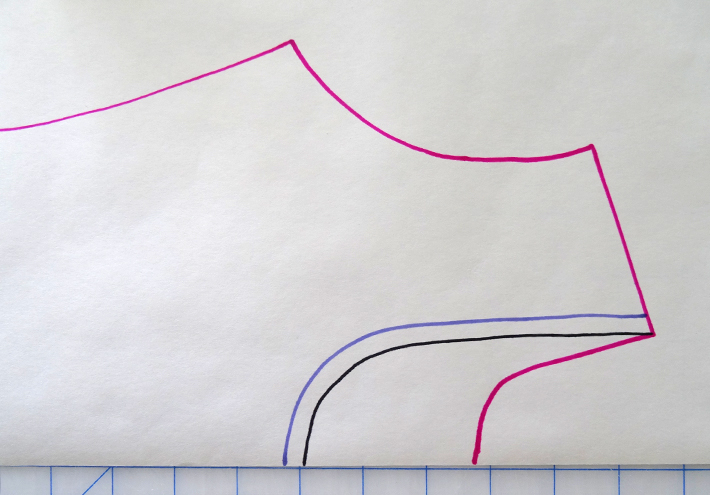
Draw in a lower back opening to allow for easy dressing without closures. The bottom of the new curve should be at least as low as the bottom of the sleeve opening. Add a ¼" seam allowance to the new back opening (the black line in the photo above).
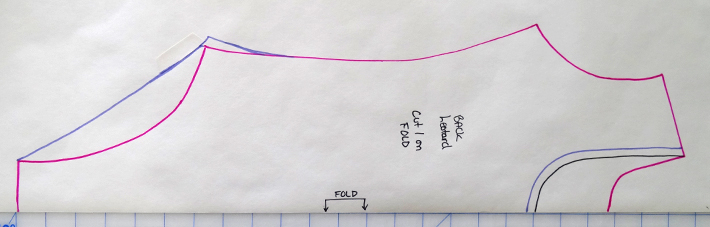
Mark the pattern piece with a fold notation and any other important details.
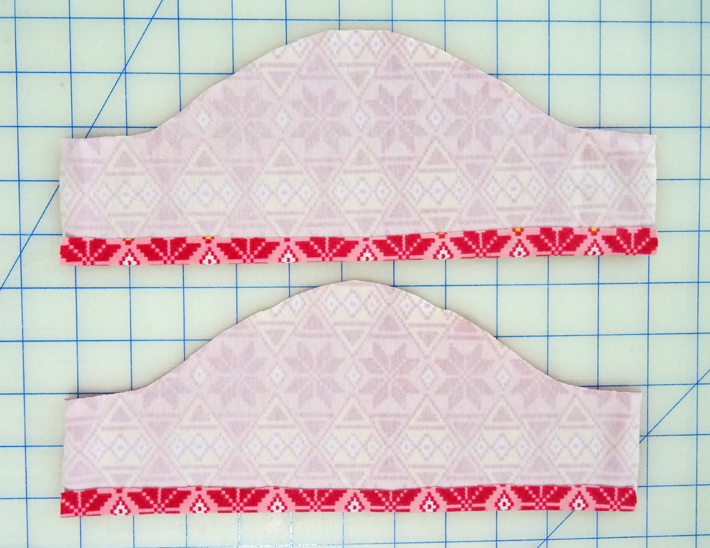
4. Draft the Sleeves
With the T-shirt still inside out, fold it into the sleeve and lay the folded edge along the straight edge of your paper. Trace the curve and bottom edge of your sleeve.
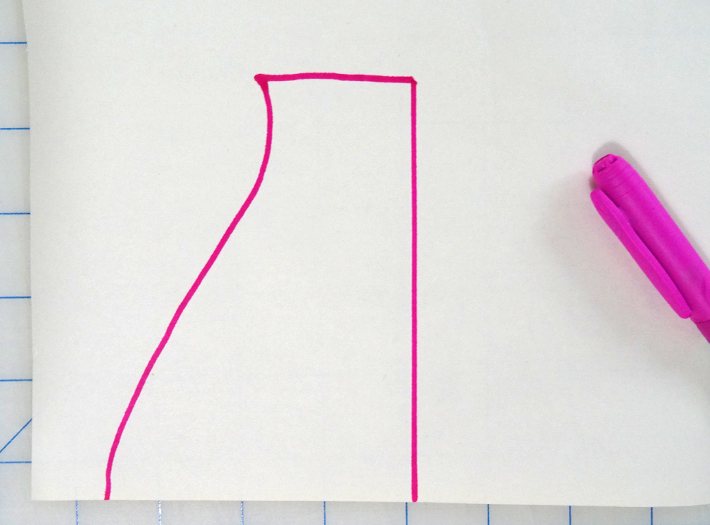
Draw a 90-degree line from the paper edge to the end of the sleeve.
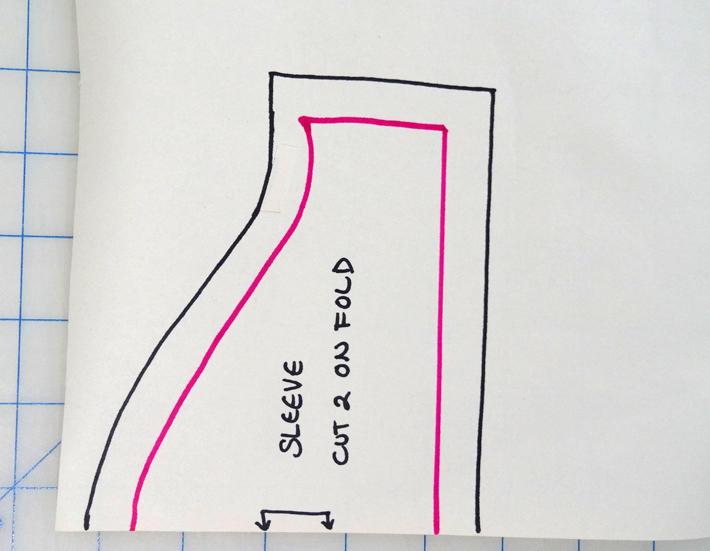
Add a ½" seam allowance around the entire sleeve. Mark the pattern piece with a fold notation and any other important info.
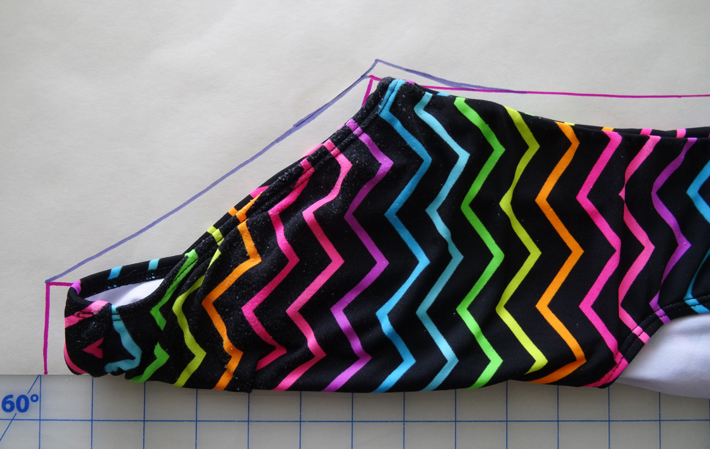
5. Cut the Fabric

Use the pattern pieces to cut your fabric. Cut one front, one back and two sleeves on the fold. Mark the top center of each sleeve once it's cut out.
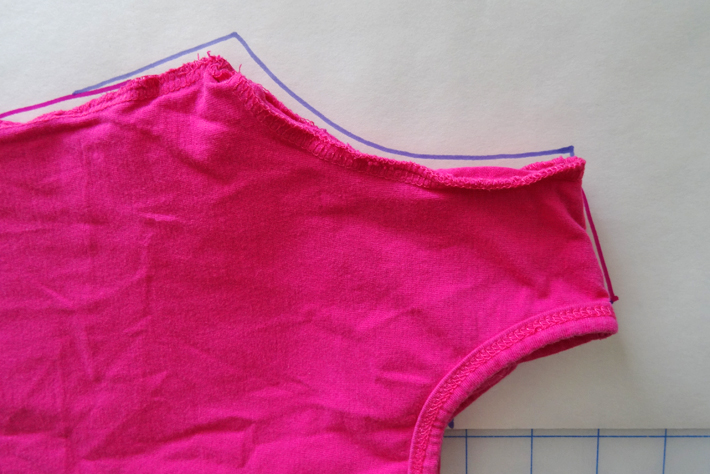
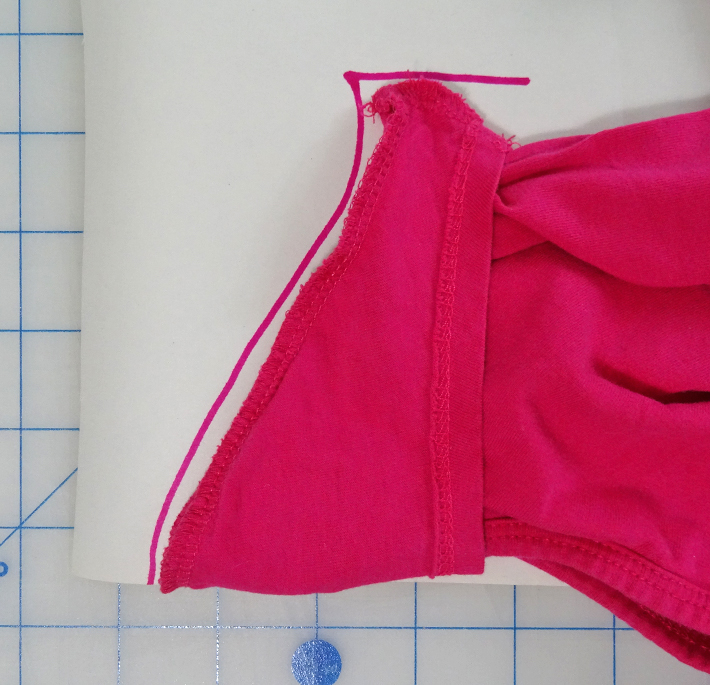
6. Sew the Neckline
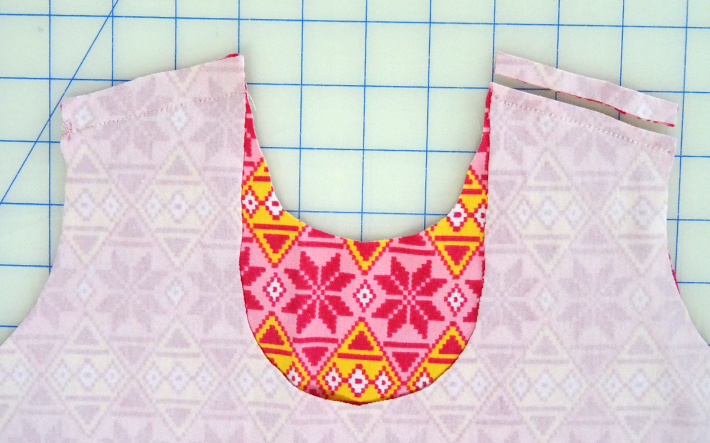
Align the front and back shoulders, right sides together. Pin and sew the shoulders with a ½" seam allowance. Trim the seam allowance to ¼" and press open or to the back.
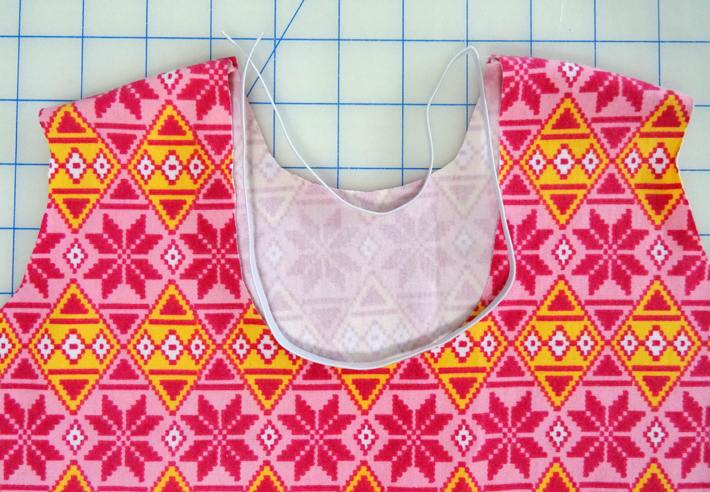
Measure out a piece of ¼" elastic so it's the length of the entire neck opening.
Baste the elastic to the neck opening with a wide, long zigzag stitch. Line up the edges of the neckline and elastic as you sew, making sure to not stretch the elastic or the fabric.
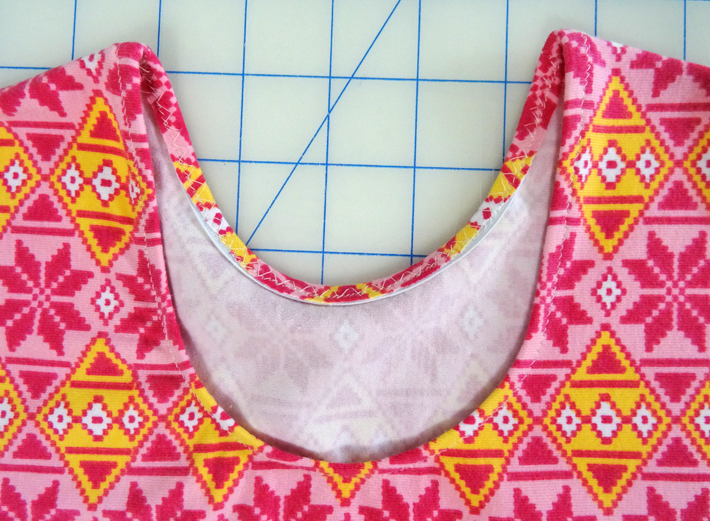
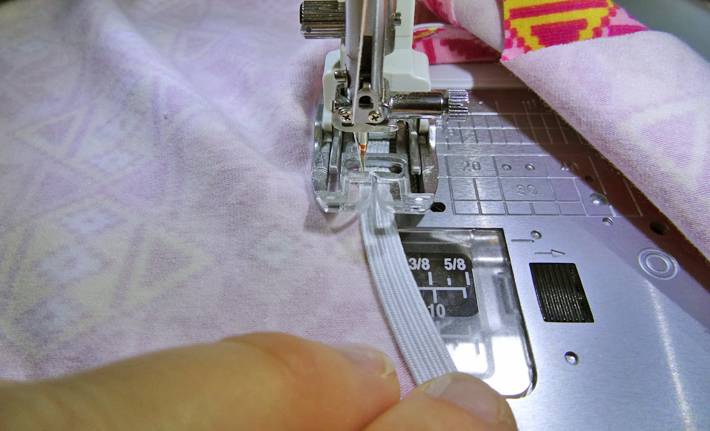
Turn the elastic under and all the way along the wrong side of the neckline. Topstitch about ¼" away from the edge with a stretch or zigzag stitch.
7. Add the Sleeves
Press the sleeve hem under ½".

Match the top center sleeve marking with the leotard's shoulder seam, right sides together. Pin the sleeves to the leotard sleeve opening.
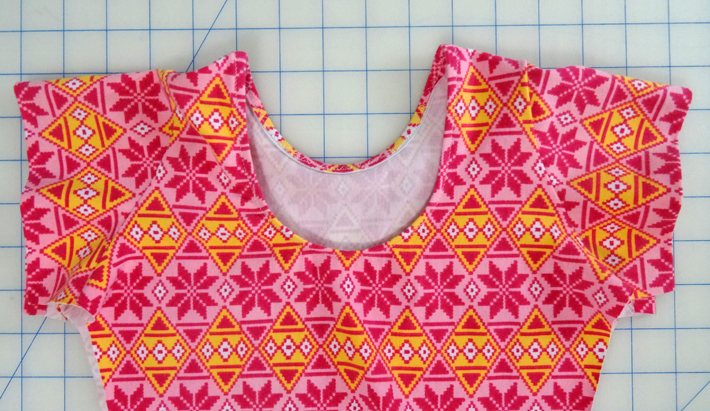
Stitch each sleeve in with a ½" seam allowance.
Pro Tip: Stitch with the sleeve fabric next to your machine’s feed dogs to help ease the sleeve in.
Trim the seam allowance to ¼" or press it toward the bodice.
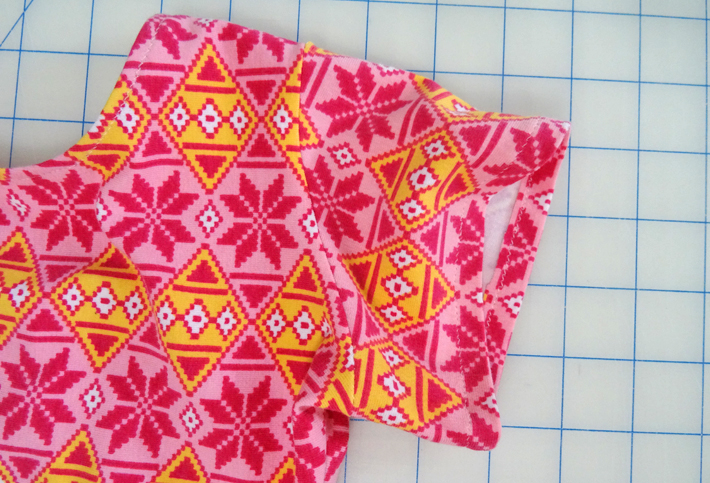
8. Stitch the Sides
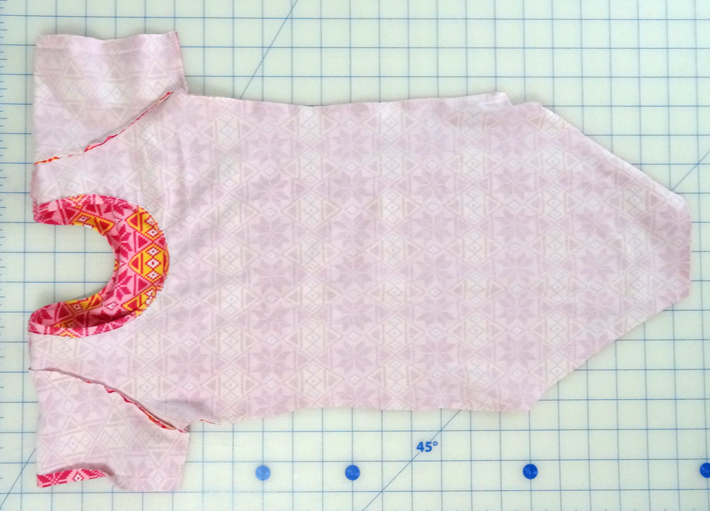
Place the leotard front, back and sleeves right sides together, aligning the side seams. Unfold the pressed sleeve hem and stitch the side seams from the leg opening to the end of the sleeves with a ½" seam allowance. Trim the seam allowance to ¼" or press it toward the back.
9. Hem
Refold each sleeve along the pressed line. Hem the sleeves about ⅜" from the fold, using a zigzag stitch, stretch stitch or twin needle.
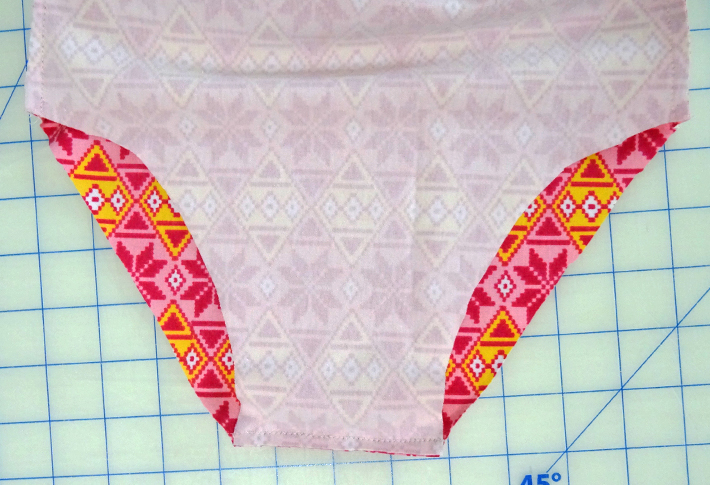
Stitch the crotch seam with a ½" seam allowance. Trim to ¼" and press it open or toward the back.
Baste and stitch more elastic into each leg opening, the same way you did with the neckline.
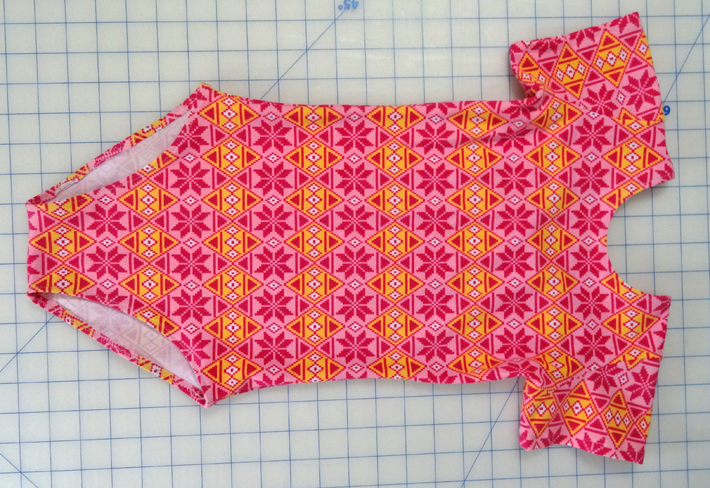
And there's your snazzy new custom leotard, ready to bust a move at the dance studio or gym!

I'd like an inner lining for my adult leotard that won't let me get too hot but hold me in place and keep my bosoms modest for ballet practice??? I plan on using cotton lycra for the outter layer.