
Take a walk with me, as we journey into the fashion frenzy phenomenon of sugar shoes for cake decorating and design. Many cake artists have mastered the art of sugar shoes so there are a variety of molds, forms and ways to make these beauties. Today we will delve into a simple and quick shoe tutorial. From there your imagination is the limit!
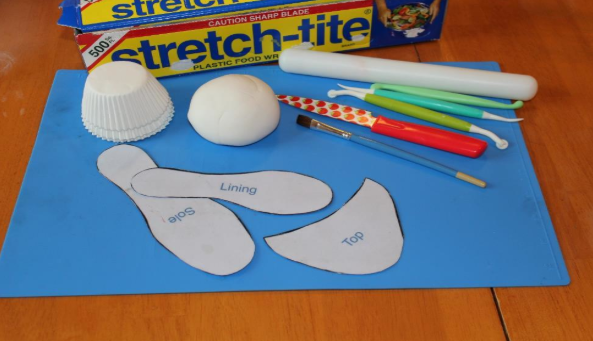
Materials
- Shoe template: There are many templates out there, just do a web search for “gum paste shoe template” or I found this one by Boonenati.
- Gum paste: try this Gum Paste Recipe, and you can also also check out Maggie Austin’s Bluprint class Sugar Berries, Leaves and Blossoms and she will walk you through how to make your own gum paste. There are also many different brands available at craft and specialty cake supply stores.
- Roller
- An overturned stack of unused cupcake cups
- A gum paste mat
- Sharp knife or X-acto knife for cutting fondant
- Stitching tool to make stitching marks
- Other decorations or accessories– the sky is the limit
Step 1: Make the heel
Take a small piece of gum paste, and roll it into a short snake. Be sure it is flat on the bottom and a bit tapered on the top. The heel should be as tall as you want your shoe to be.
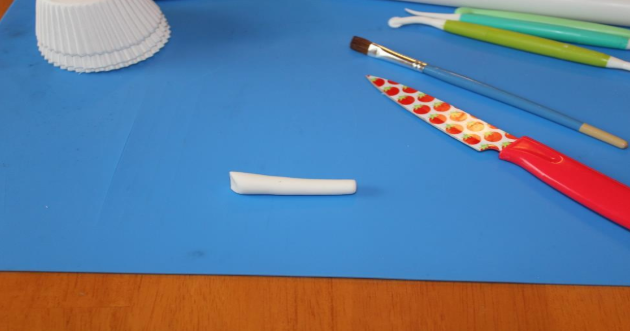
To make sure your heel is the right size, stack your baking cups as tall as you would like your shoe to be.
[box type=”shadow”]Note: There are many ways to dry your sugar shoes. You may turn them over a bowl that is the right height. I am using the baking cups in this tutorial because most of us have baking cups available. If you have a different way, go for it![/box]
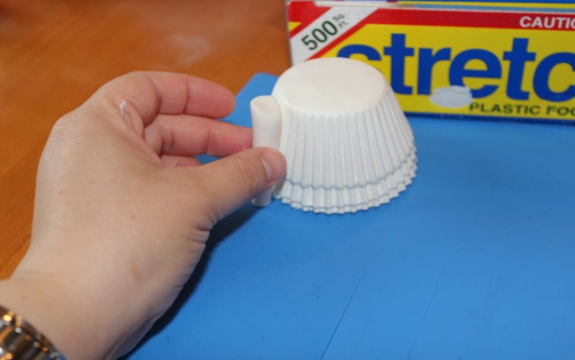
Make sure your heel is the height that your sugar shoe will be when it is dry. Let it dry overnight while your shoe is drying. If possible, it is best to let it dry for at least 24 hours.
Step 2: Make the shoe
We are first going to roll out the sole of the shoe. We want this sole to be thicker than we normally role out gum paste– at least ¼ inch thick.
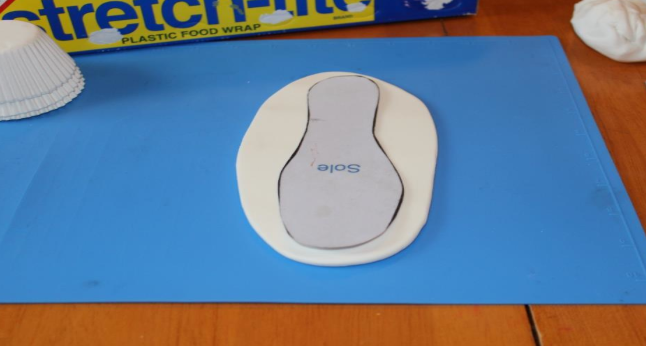
Place the template onto the gum paste, and cut around it using a sharp knife or X-acto knife.
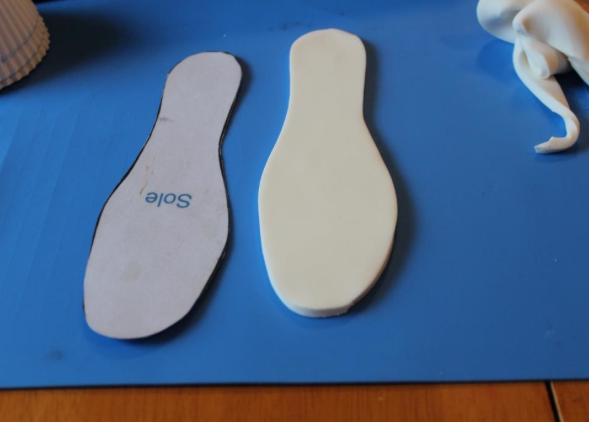
Once it is cut out, pick it up and soften the outside edge to even out any sharp cuts.
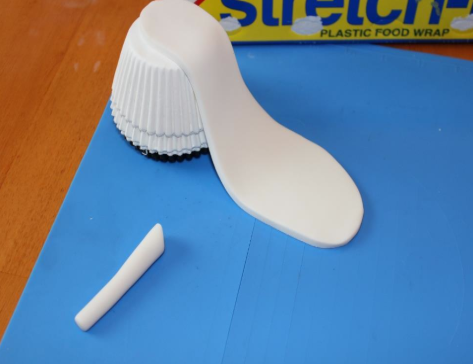
Next, lay the sole of the shoe with the heel on the top of the cupcake liners or on whatever form you chose.
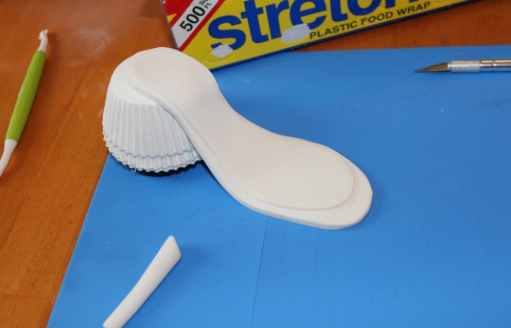
Step 3: Create the liner
Roll the gum paste much thinner for the liner. Then cut it out following the same steps as above. After that, use a stitching tool to make marks around the outside of the liner, so that it looks like it is stitched to the sole of the shoe!

Lay the liner on top of the sole leaving an equal space around the heel of the shoe.
Step 4: Make the top
Roll out your gum paste so it is about as thick as the liner. Again cut around the template and soften the edges.

Then using lemon extract or your favorite method of gluing gum paste together, brush the outside edge of the toe of the shoe, to get it ready to apply the top of the shoe.

Gently apply the top of the shoe by matching up the edge of the top of the shoe to the top of the sole.

The gum paste may be stiff enough to stand alone and not even need interior support. If not, you can use plastic wrap or cotton to help the shoe hold its shape while it is drying.
Let the shoe dry overnight or preferably for 24 hours before attaching the heel. To attach the heel, it is best to use royal icing or make a gum paste glue by adding a little bit of gum paste to a small amount of water and letting it dissolve. It will turn into a sticky mess which will be perfect for brushing onto the bottom of the sole and attaching the heel.
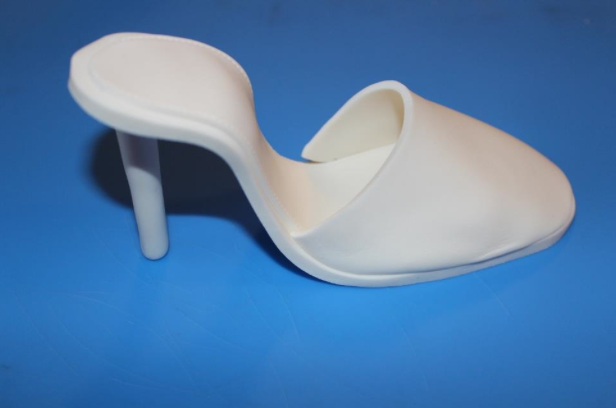
Step 5: Decorate it
Once your shoe is dry, it is time to add decorations! I added a simple bow below, but feel free to let your imagination soar!

For a look at other stylish sugar shoes, check out yesterday’s blog post, which featured lots of different shoe-themed cakes. You may even be inspired to learn how to make gum paste roses to adorn your shoe, or possibly even to create a handbag or dress to accompany your shoe. If so, check out the amazing Bluprint class taught by Elisa Strauss, Designer Handbag Cakes, and the new Bluprint class with Rachael Teufel, Cake Design Made Simple: The Wedding Dress!
Share tips, start a discussion or ask one of our experts or other students a question.
No Responses to “How to Make a Gum Paste Shoe: A Step in the Right Direction”