Have you ever seen one of those cool optical illusions and wondered how they were created? It's easier than you think to trick the eye on a flat piece of paper, and that is exactly what we will be doing on this tutorial. Moreover, learning how to draw optical illusions can be a fun way to get away from realism for a while and experiment with shapes and colors without the pressures we sometimes put on ourselves when we are creating art.
Follow along to create your own optical illusion!
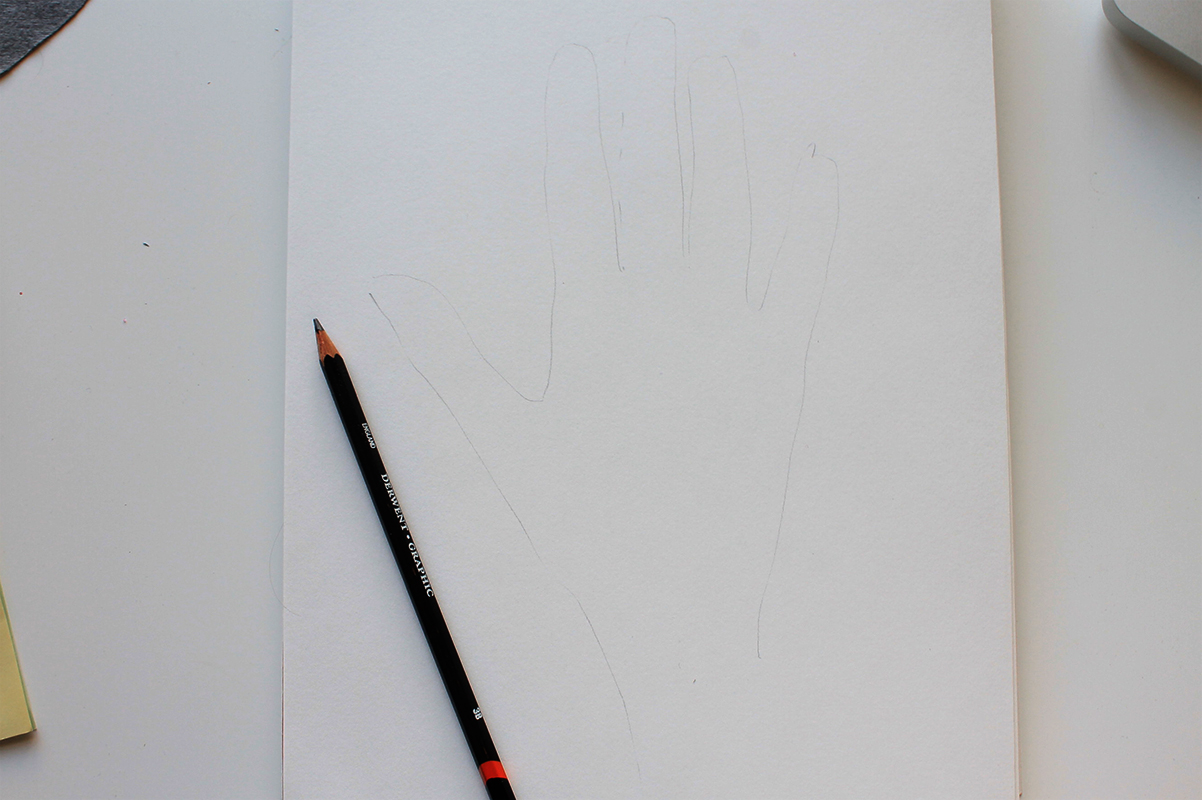
Step 1.
The first thing we need to do is decide what shape or subject we want to represent. In this example we are going with a subject that is not only easy to represent but also easy to have quick access to —our own hand. whichever shape or subject you choose will work with this tutorial as long as the have curves and are not 100 percent angular.
Trace your hand or draw your chosen subject or shape in the center of the page with a light pencil stroke.

Step 2.
Now on to one of the fun part — selecting your color palette. The color combinations for this are endless. You could opt for a cool palette like I have done here. You could also create your optical illusion with warm colors, a mixture of random colors or even a monochromatic palette. Decide on the specific order you want the colors to be in throughout the paper and remember it as you draw each line.
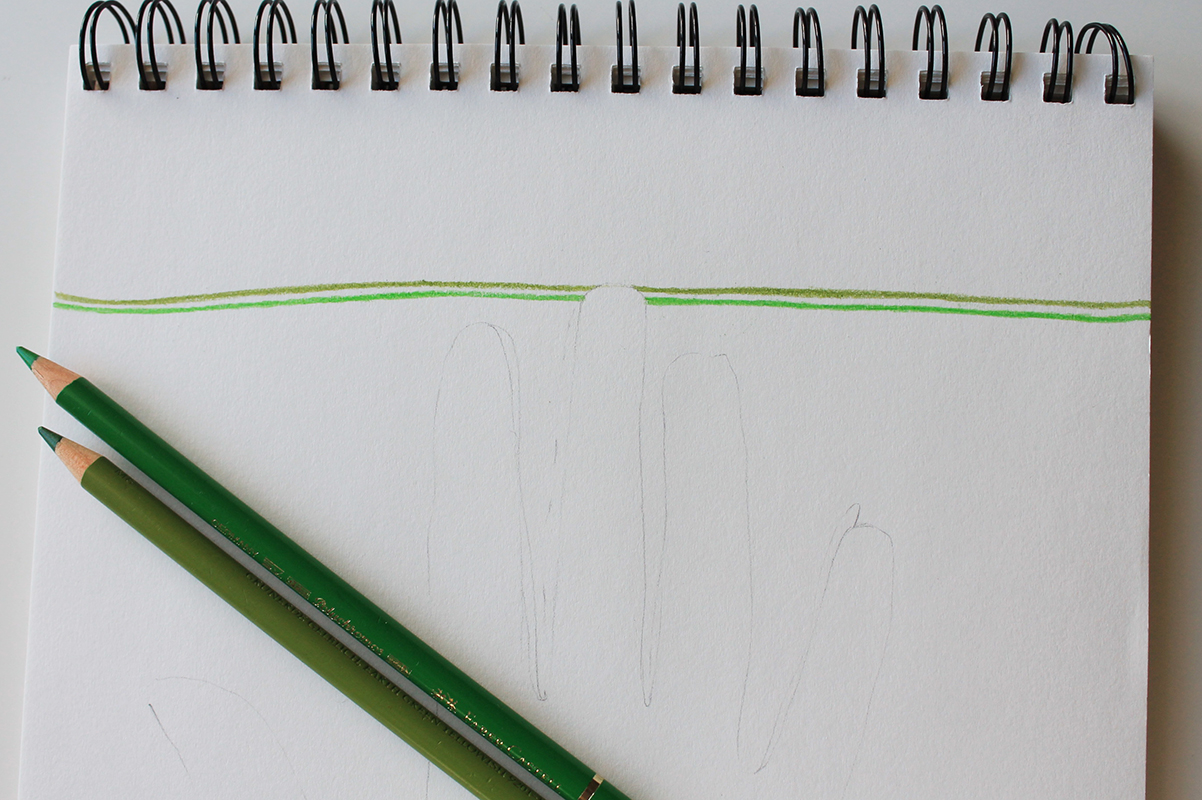
Step 3.
After selecting the order of the colors, begin to draw thin straight lines across the background of your subject, keeping the forefront blank. Keep the lines aligned, straight and separated by just a few millimeters.
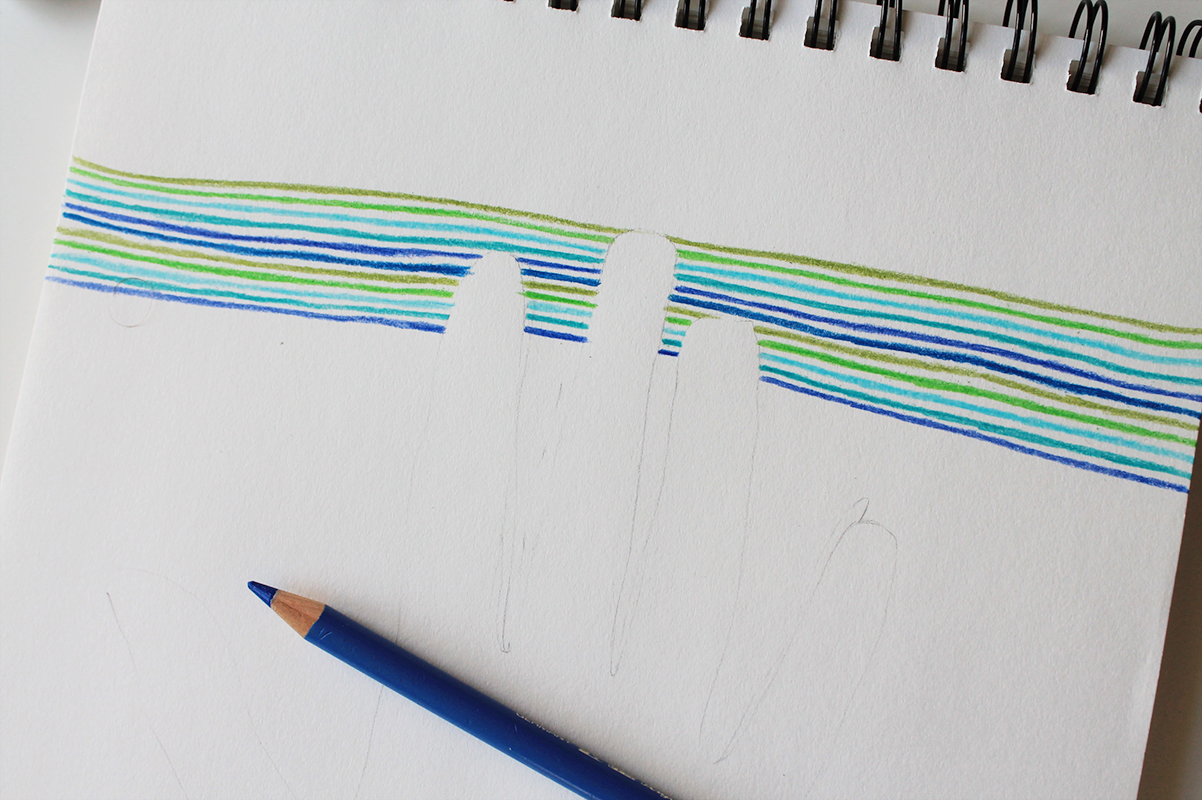
Step 4.
Continue working your way down the paper with each new line, and repeat the same sequence of colors once you reach the end of your palette.
Tip: Try to maintain the same distance between each line and always make sure that you keep them straight and aligned, especially in intricate places like between the fingers. This will make the next step a lot easier.

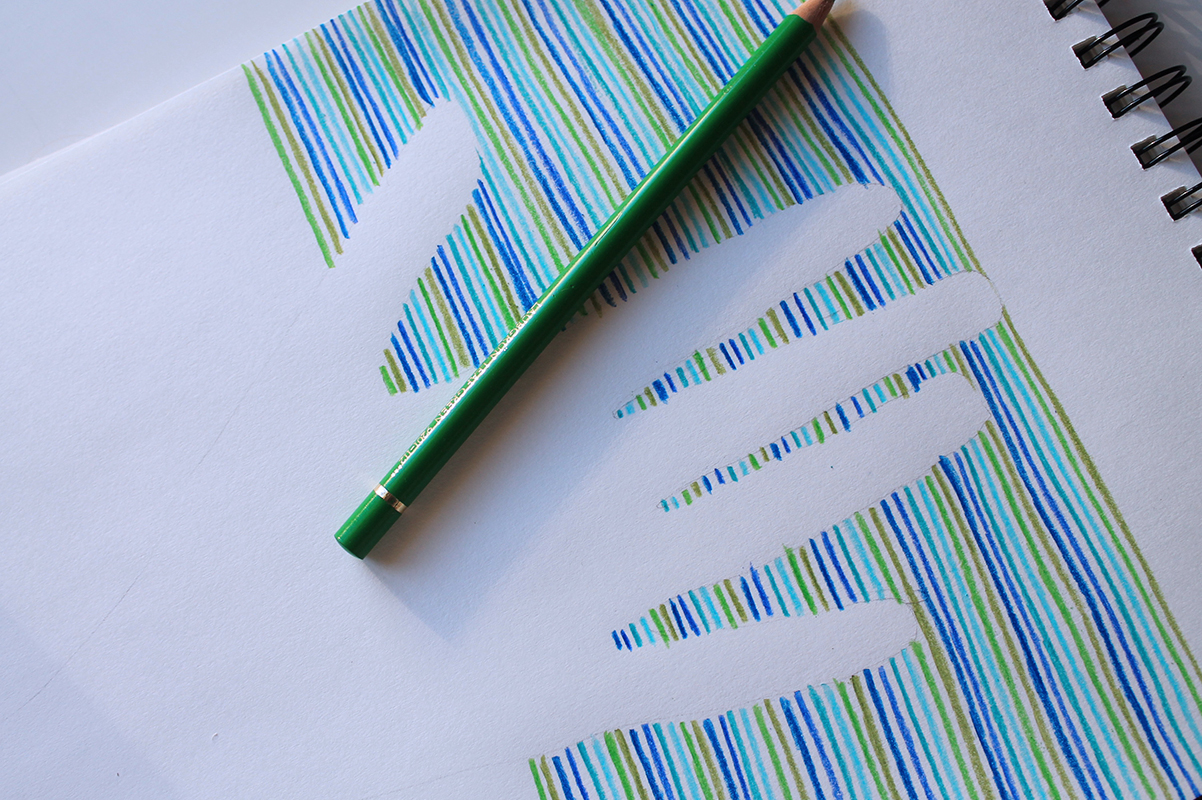
Step 5.
Once the background is completely covered, you will want to cover the surface of the shape you selected. using the same colors as before, connect each line from one side of the shape to the other, but this time make sure you curve your lines in tune with the curvature of your shape — the hand in this case. Keeping your lines curved will make your shape pop right of the page and look like it has real volume.
Have you ever drawn any other optical illusions?
FREE drawing prompts for more creative art

Enjoy 140 ideas that will jumpstart your imagination and help you create inspired drawings.

nice and easy
my brain hurts after seeing that :l
That good
I want to draw that
This optical illusion is awesome :)
AMAZING!!!!!!!!!!!!!!!!!!!!!!!!!!!
PROLLY THE BEST I'VE SEEN!!í ½í¸¨í ½í¸±í ½í¸±
Wow! This is so good!
2K TGV MJWDNQWJQJHJHHHHHHHHHHHHHUWHQHWENWWwaijwqwuejwdnsewjkiwqjmwkwkakwmwjrnquwjqa
tHANK YOU!