
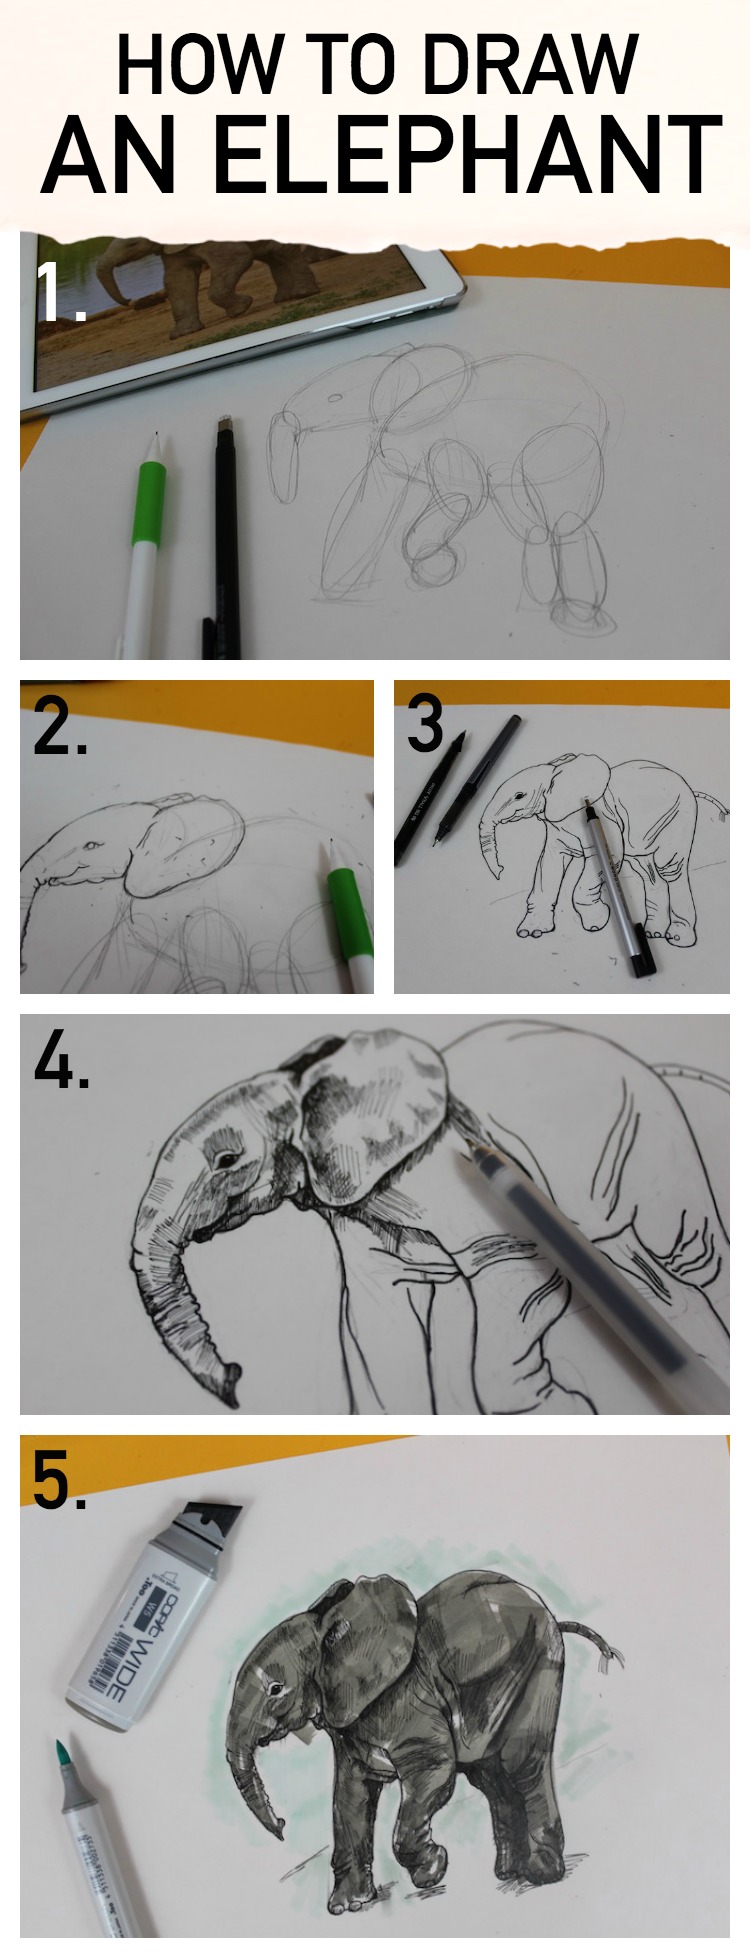
Drawing animals is a great way to practice your skills and to combine several techniques into one picture. Elephants, with their giant floppy ears and long trunk, make great subjects to realistically illustrate on paper. Best of all, you can learn how to draw an elephant in just five easy steps!
Supplies you’ll need:
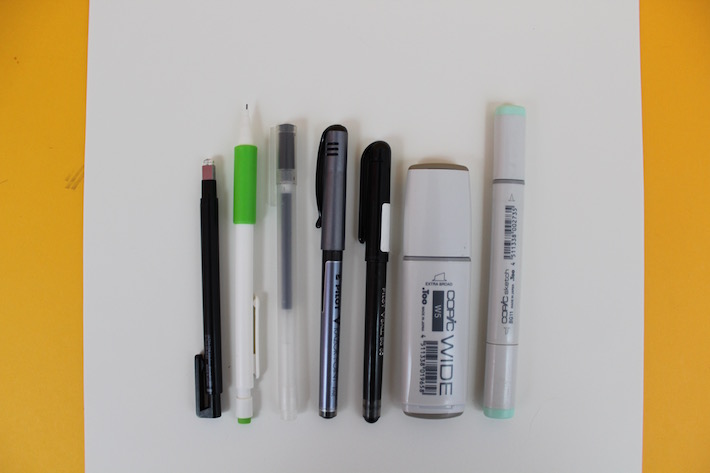
- Your favorite drawing paper.
- Graphite pencils. I recommend HB — not too hard or too soft.
- An eraser. I prefer white erasers because they don’t leave any stray marks on your page.
- Pens. Gather a variety of pen tip sizes such as fine tip, wide tip or even brush style.
- Marker. I love Copic makers. They make a number of warm grays that are the perfect color for elephant skin!
Follow these instructions and learn how to draw an elephant
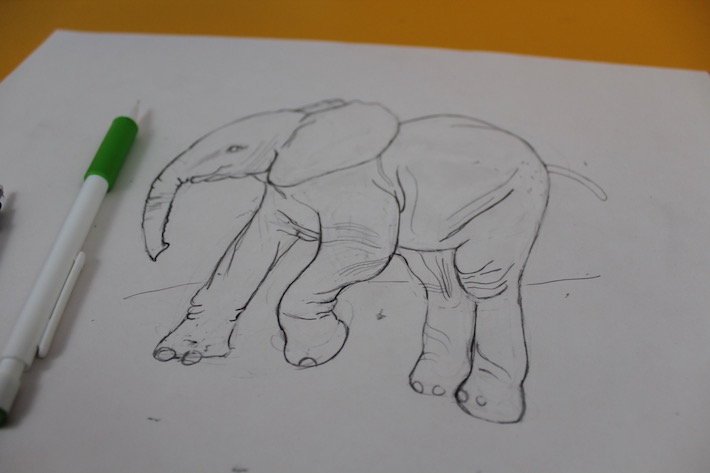
Step 1: Break down the elephant’s anatomy into simple shapes.
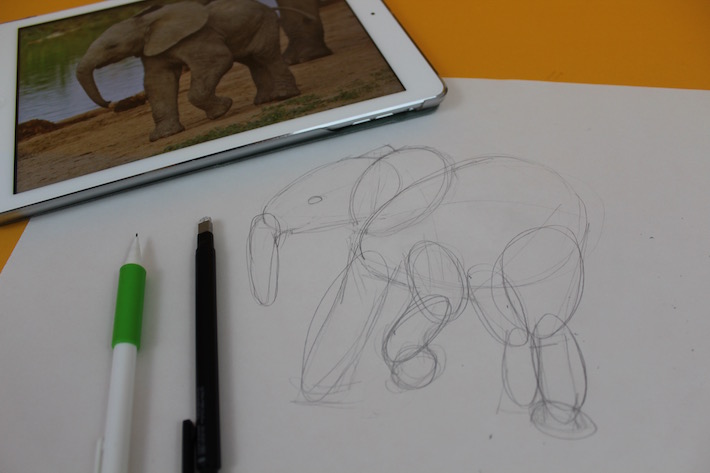
For this exercise, find a reference photo of an elephant. If you try and making up one in your head, you’re liable to forget some if its fine details — plus, it’s more challenging to have to draw every wrinkle of its stiff skin. Start with a simple Google image search.
Once you’ve got a photo, study it for a moment to determine the big, simple shapes that define the body. Its head, for instance will be an oval, while the trunk is like a long cylinder. Overlap the shapes where the joints of the animal meet. When you’re done, it should resemble a very rough outline of an elephant.
Step 2: Refine the shapes
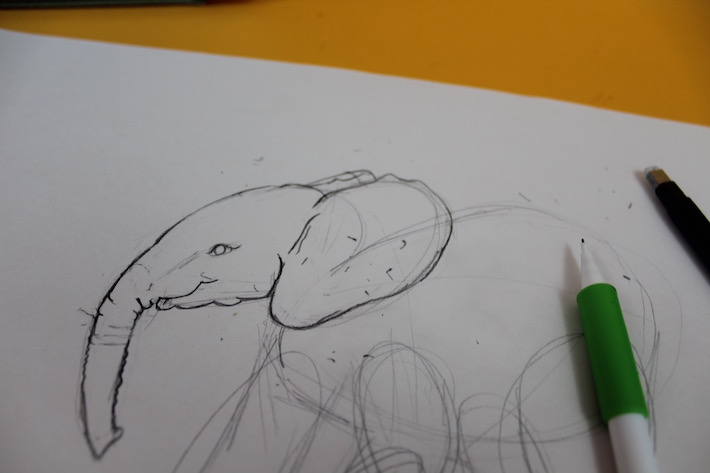
Start to refine these shapes with a pencil. Make them more intricate and precise so that the contour matches your reference photo. For instance, an elephant’s trunk will have more flair than just the cylindrical shape. Draw the lines to reflect the wrinkles in the skin — you’ll find that the tiny lines overlap one another, creating appearance that piles of skin lay on top of one another.
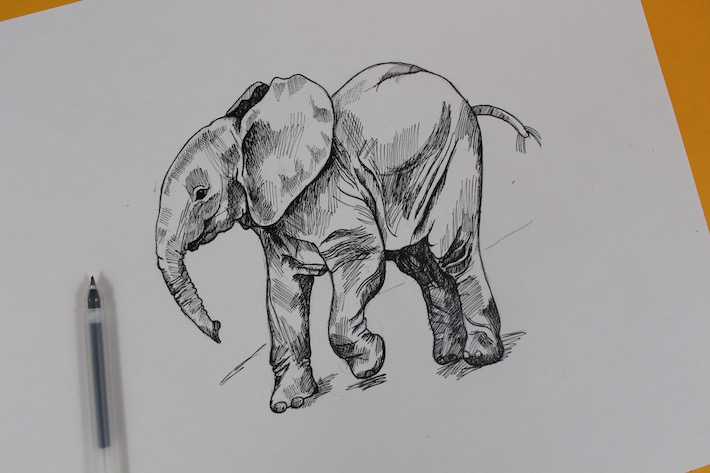
Step 3: Go over the lines with pen.

Once you’re sure of your drawing, take a medium-tipped pen and go over the contour lines. For the wrinkles, try a pen with a thin point. The different widths — wider ones — will make these marks visually pop, so accentuate the areas you want noticed first with thick lines.
Step 4: Use a pen to shade the elephant.
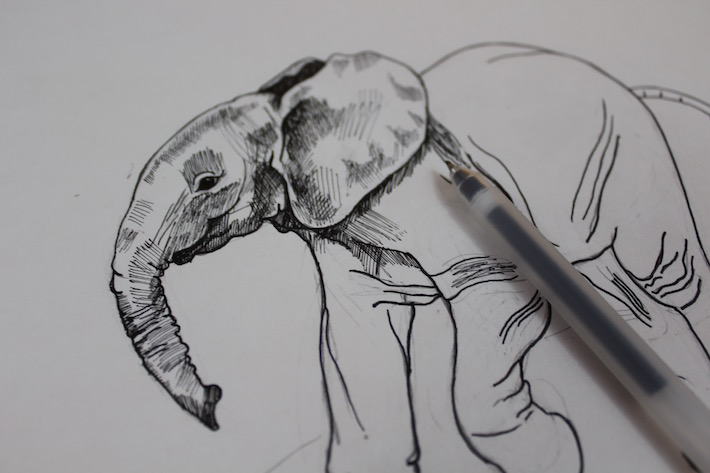
Here’s where you bring your elephant to life. Study your reference and notice where the shaded parts are — it will probably be in places like where the legs meet the torso and on the head around the ears.
Wherever you see the shadows, use a thin-tipped pen and make tiny marks. The shading technique is up to you — you could do cross contour, contour lines, cross-hatching, stippling or scribbles. Personally, I like the cross contour for elephants because it mimics the wrinkles of their skin while creating a 3-D effect.
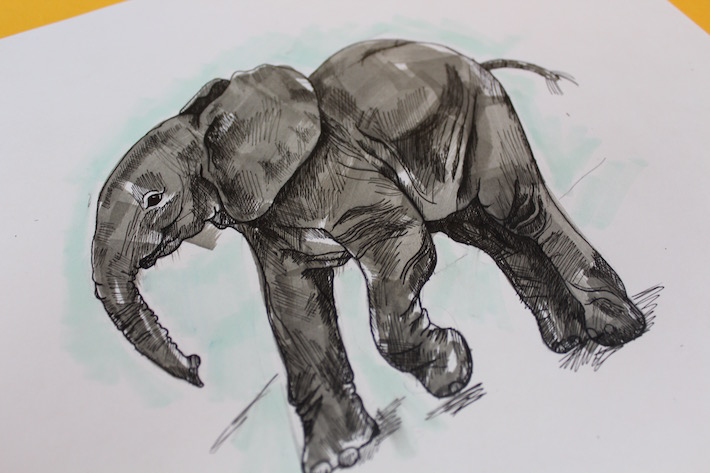
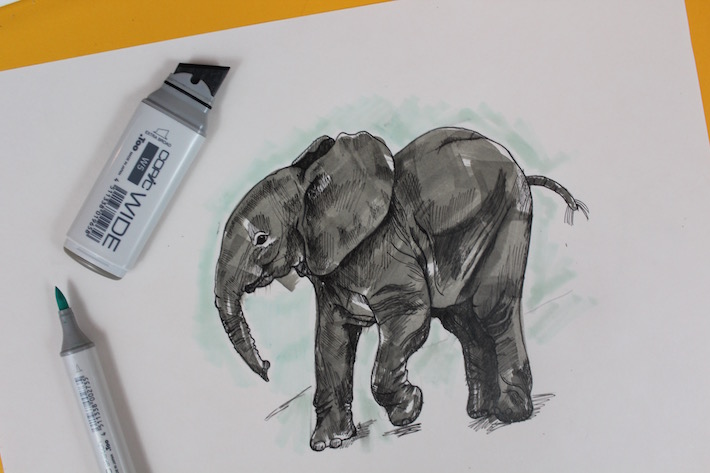
Step 5: Add a pop of color
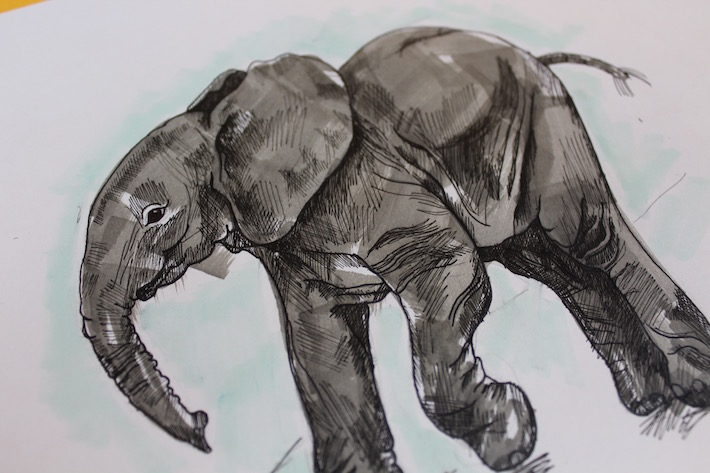
Once you’re done with the pen, grab your favorite gray markers and color in the body of the elephant. There’s no shading necessary here — the black pen has done all the work for you. This step adds a fun pop of color that will make your drawing look finished (even if it’s just a sketch!).
Want to save this tutorial for later? Pin it!
Share tips, start a discussion or ask one of our experts or other students a question.
No Responses to “Learn How to Draw an Elephant in Just 5 Easy Steps”