
Did you know that the original shelf life of Twinkies was about three days? Today, there are jokes about their infinite life-span and real speculation about their status as actual food. But you can see for yourself what it might have been like to taste the original variety with this recipe for homemade Twinkies.
Photos via CakeSpy
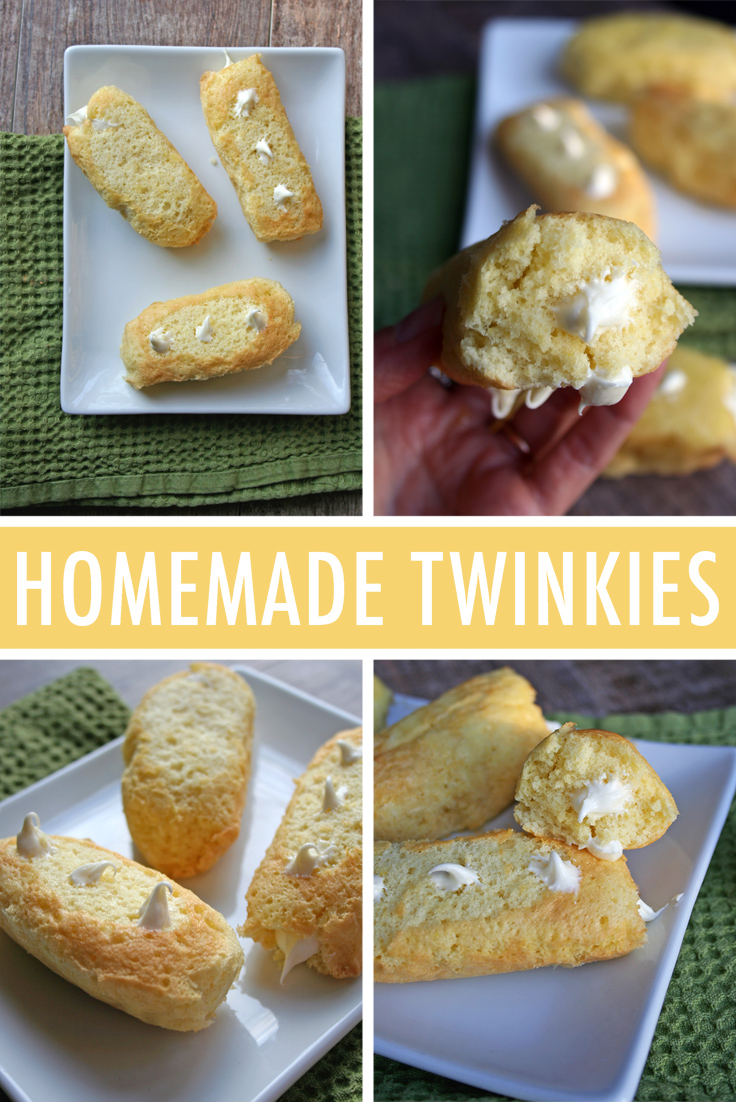
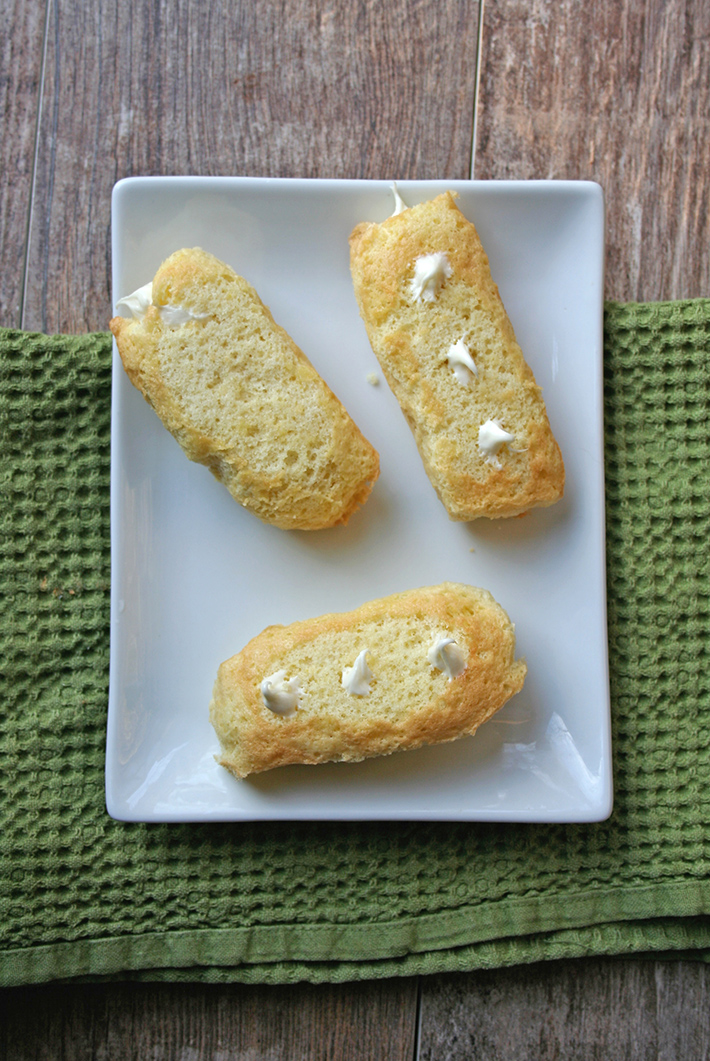
These cream-filled snack cakes may resemble the store-bought variety.
Made using common pantry ingredients, these light, spongey cakes are filled with a delicious marshmallowy cream filling that tastes enough like the original to evoke nostalgia, but the finished product is a truly respectable dessert that will suit your more refined adult palate.
Homemade Twinkies Recipe
Makes 12
Adapted from The New York Times
You’ll need:
- Non-stick cooking spray
- Heavy duty aluminum foil
- Baking sheets or baking pans
For the snack cakes:
- 3/4 cup all purpose flour
- 1 teaspoon baking powder
- 1/4 teaspoon salt
- 6 tablespoons unsalted butter, melted and slightly cooled
- 1 teaspoon vanilla extract
- 5 large eggs, separated
- 1/2 cup granulated sugar
For the filling:
- 1 1/2 cups mini marshmallows
- 1/4 cup cream
- 1/2 stick (4 ounces) unsalted butter, softened
- 2 cups confectioners’ sugar
- Pinch salt
Step 1:
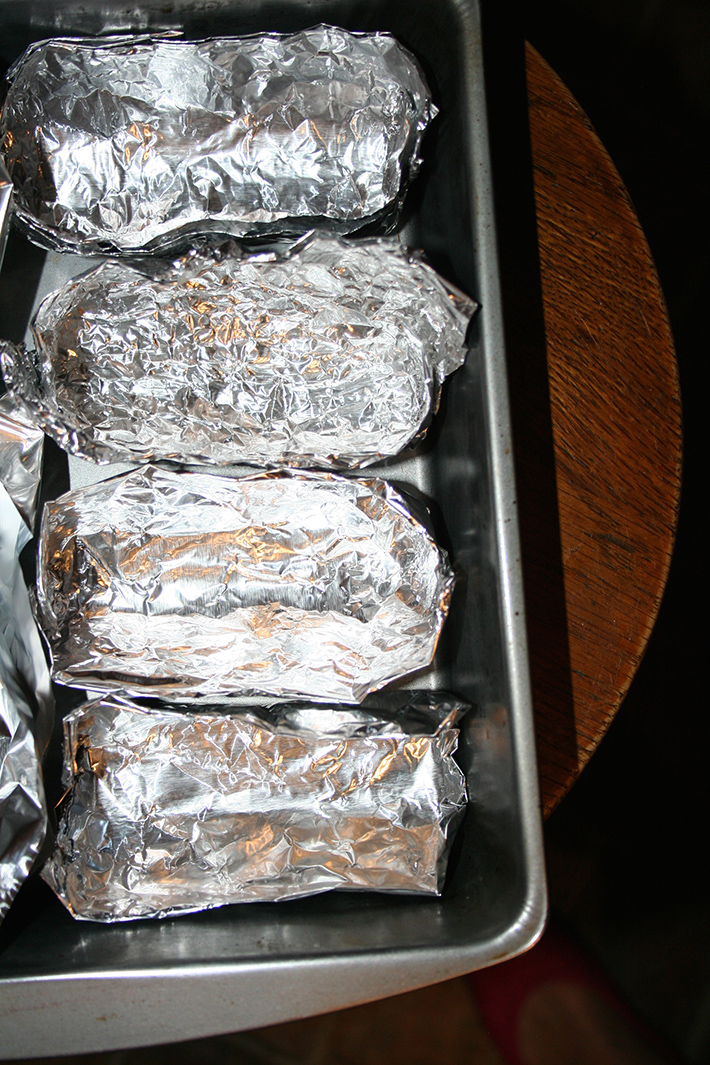
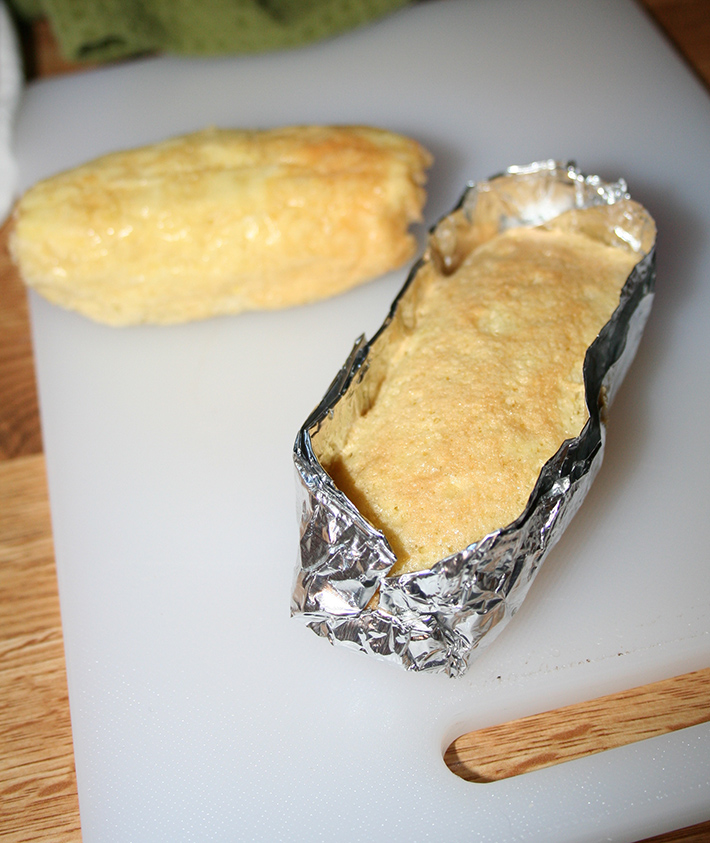
Before you bake, form molds for the Twinkies with this nifty method. Cut 12 pieces of aluminum foil approximately 12 inches wide by 14 inches long. Fold each piece in half lengthwise; then, fold it again, so that it is a rectangle roughly 6 inches by 7 inches. Repeat with the remaining pieces of foil.
Now, form the foil into Twinkie-shaped molds. Place a small cylindrical object (a spice jar, or a film container, etc) in the center of the piece of foil, which is aligned with the 7-inch sides vertically. Use the object to mold the sides into a rounded shape; form the ends into a seal, forming a sort of trough. Basically, you’re trying to create a Twinkie shape here. Repeat with the remaining pieces of foil, then place them on a baking sheet or in a baking pan (I divided my molds between two 9×9-inch pans). Yes, this is the most challenging part of the recipe. Stay with it!
Step 2:
Whew! Thank goodness the molds are done. Preheat the oven to 350 F.
Step 3:
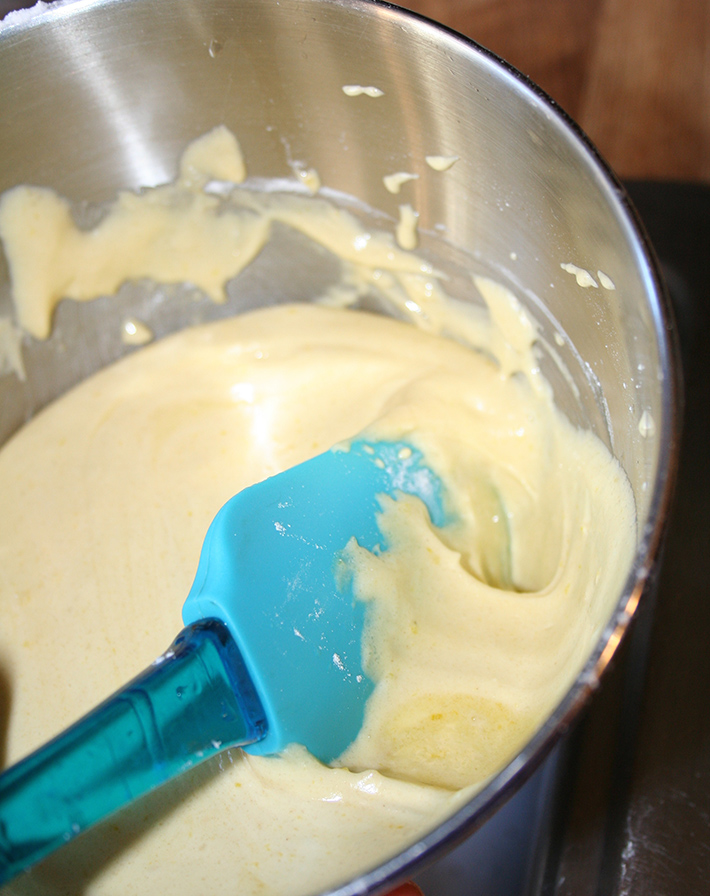
Time to make the batter. In a medium bowl, sift together the flour, baking powder and salt. Set to the side.
Step 4:
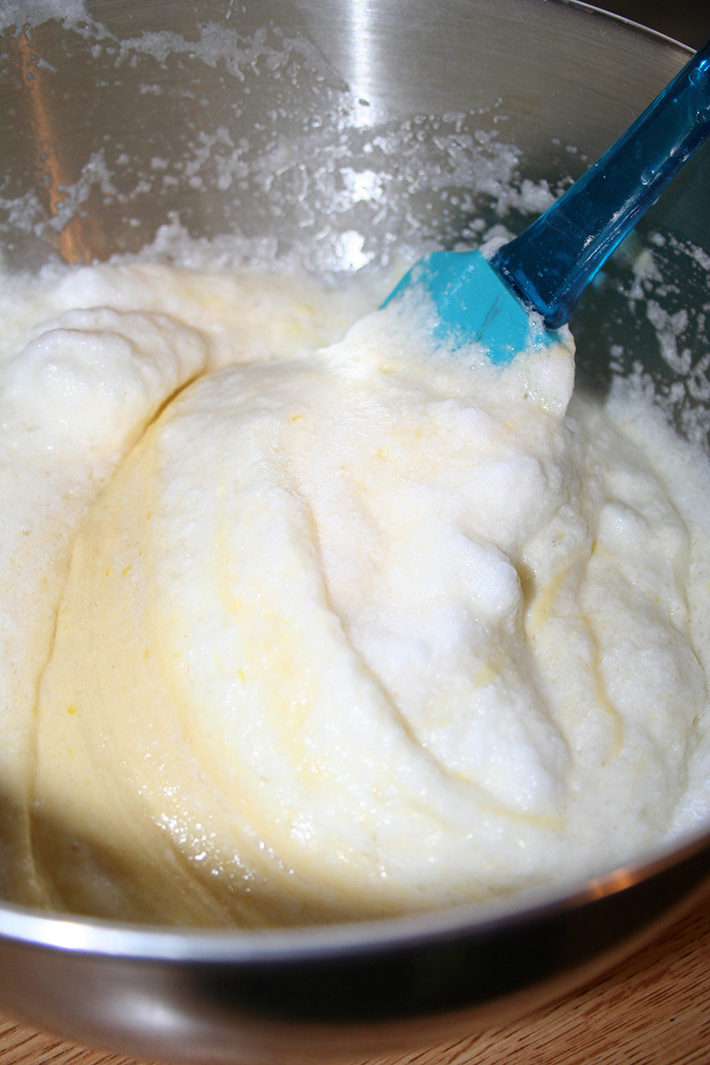
In the bowl of a stand mixer fitted with the whisk attachment, whisk the egg whites until soft peaks form. Pause mixing, and add 2 tablespoons of the sugar; resume mixing until firm peaks form.
Step 5:
By hand or with your stand mixer, whisk the egg yolks with the remaining 1/2 cup sugar until the mixture turns light lemon in color; about 3 minutes with a stand mixer set on medium, or about 5-7 minutes by hand. Stir in the vanilla and the melted and cooled butter, stirring only long enough to combine.
Step 6:
Gently stir the flour mixture into the egg white mixture, until combined.
Step 7:
Fold the egg white mixture in last, gently incorporating it into the batter until no streaks of white remain.
Step 8:
Spoon the fairly thick batter into your molds, filling them roughly halfway full. Bake in the preheated oven for 14-18 minutes, or until the tops of the cakes are lightly browned and if you lightly touch the cake, it does not leave an imprint and feels springy. Remove from the oven, and after a few minutes, while the cakes are still quite warm but not burning, remove the foil (it will become more difficult to remove as the cakes cool). Let the cakes cool completely.
Step 9:
While the cakes cool, make your filling. In a medium saucepan over low heat, melt the marshmallows with the cream. Once there are no pieces of marshmallow left, remove from heat and let cool to room temperature.
Step 10:
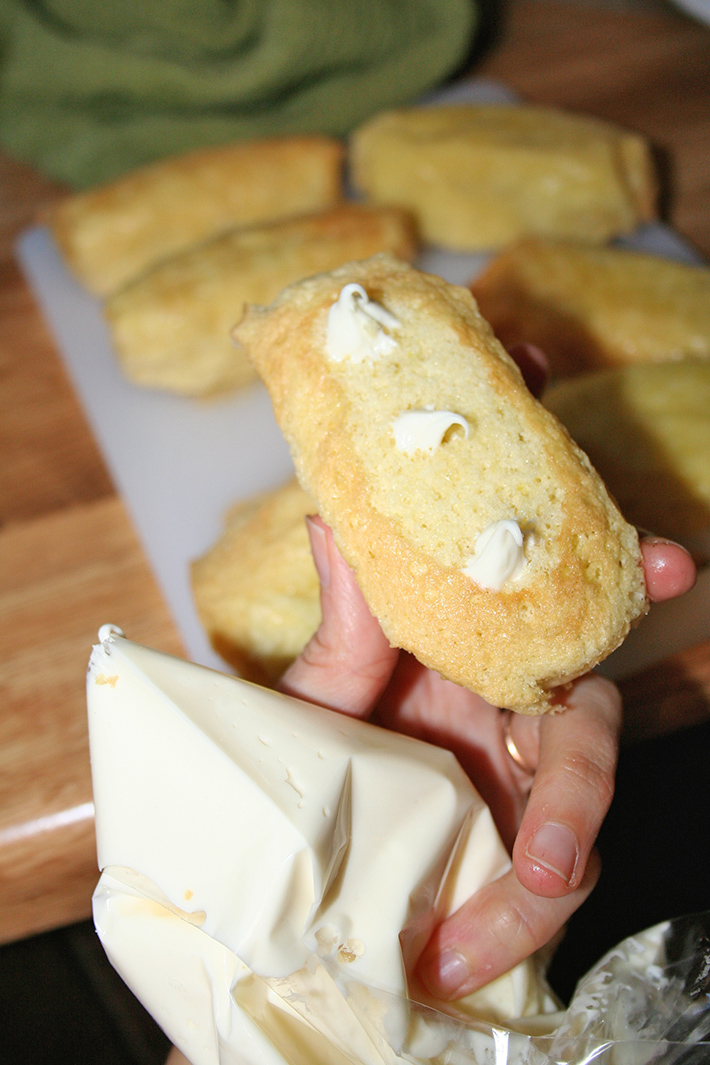
In the bowl of a stand mixer fitted with the whisk attachment, cream the butter until smooth, about 3 minutes on medium speed. Add the marshmallow mixture, and beat to combine. Begin adding the confectioners’ sugar, 1/2 cup at a time, until the filling is light and fluffy. Load the mixture into a piping bag fitted with a medium-sized, round tip (you can also just use the snipped corner of a freezer-type bag for your piping).
Step 11:
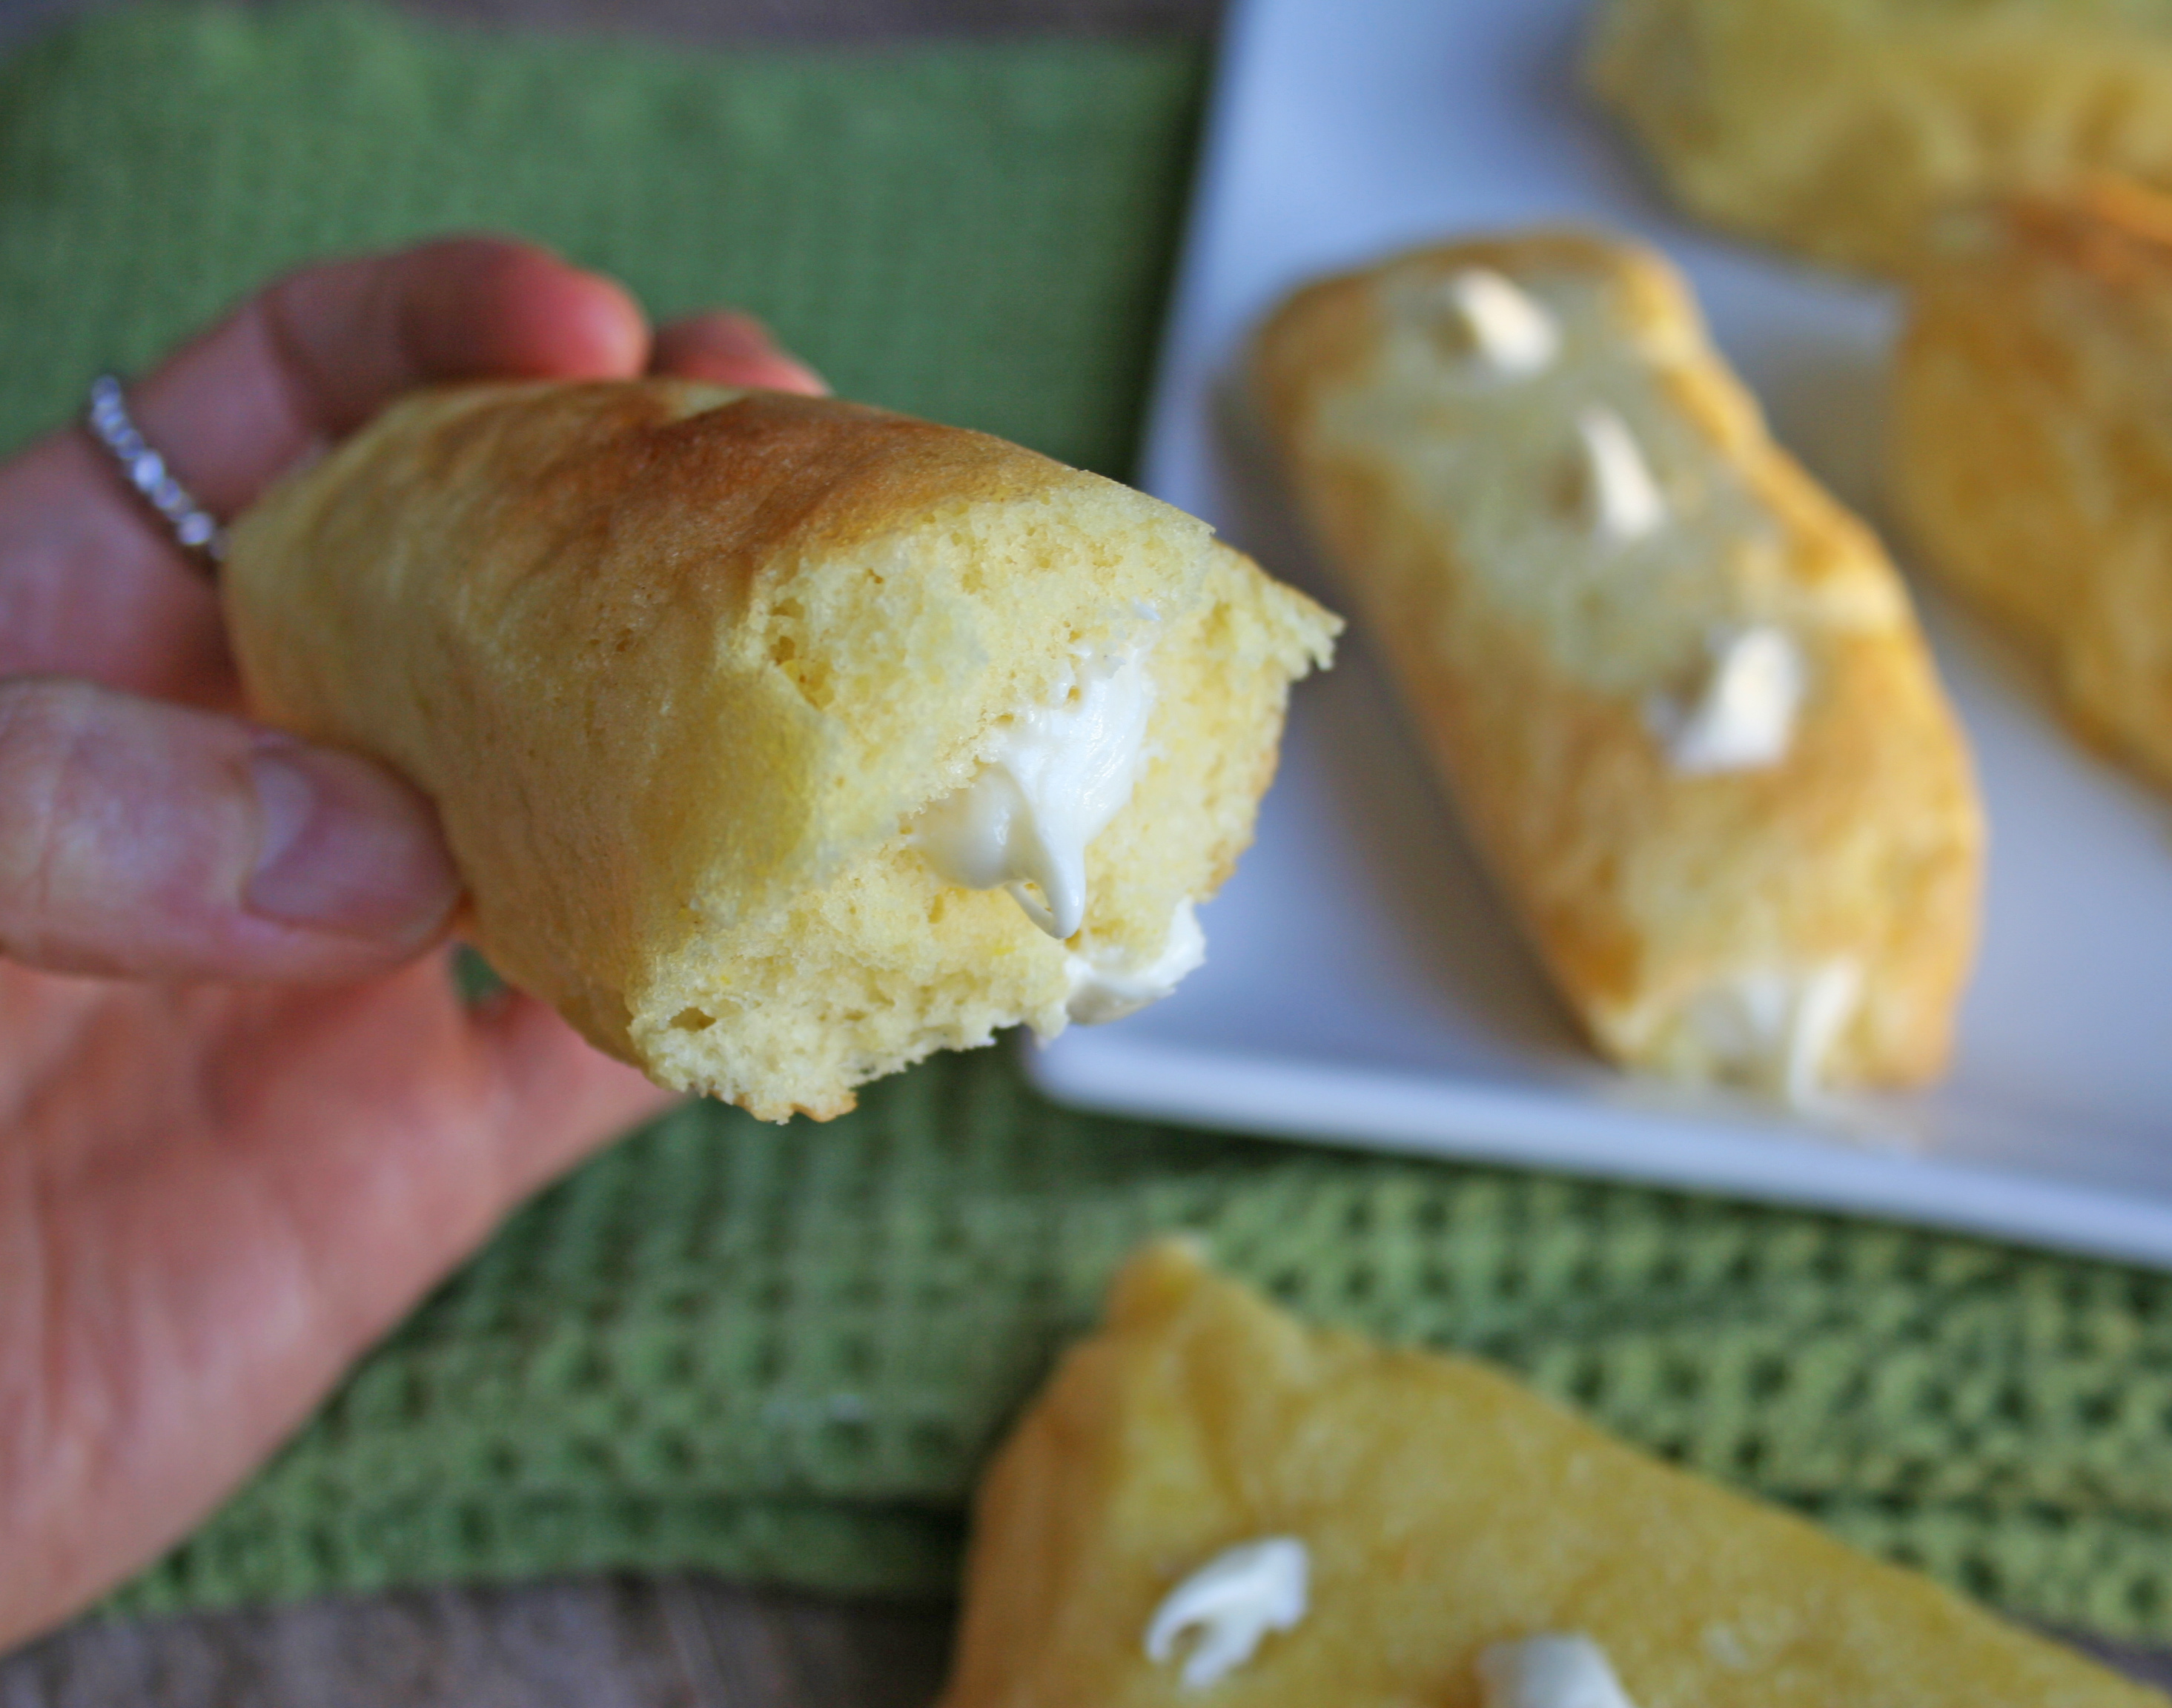
Not to ruin your childhood dreams, but you’ll actually get a better filling ratio if you make a hole at one end of each Twinkie. Make a hole with a chopstick or a knife, and widen it so that there is a tunnel inside of the Twinkie. Pipe the filling in. For looks, you can also make three perforations in the bottom of the cakes and pipe just a dot of filling on top of them, for the full Twinkie effect.
Enjoy your homemade Twinkies! These cakes will keep for 2-3 days, well wrapped, at room temperature.
Share tips, start a discussion or ask one of our experts or other students a question.
No Responses to “Twinkie, Twinkie, Little Star: Homemade Twinkies Recipe”