
Candy corn: it’s one of those Halloween foods that people seem to love or hate. But this homemade candy corn recipe creates a candy experience unlike any commercial variety. It’ll delight candy corn lovers even more than usual…and it might even convert some of the haters.
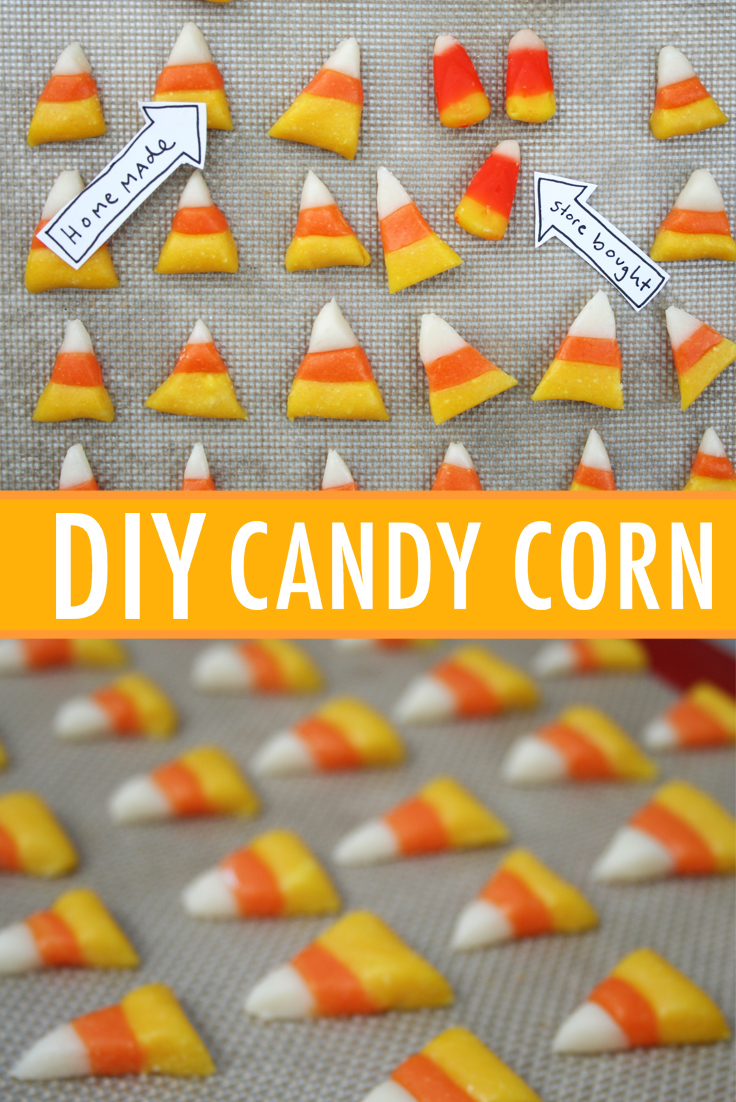
Do you think candy corn is something that can only be bought? Think again. This homemade candy corn recipe is easy and delicious.
Candy corn lovers will rejoice at the familiar flavor in fresh, homemade form; haters may rethink their candy corn kibosh and find that they truly enjoy the DIY kind, which is buttery, delicately vanilla-scented, slightly chewy and just a touch salty.
Homemade candy corn recipe
Makes 200+ kernels of candy corn
Ingredients:
- 2½ cups powdered sugar, sifted
- 1/3 cup powdered milk
- 1 cup granulated sugar
- 2/3 cup light corn syrup
- 1/3 cup salted butter
- 1 teaspoon vanilla extract
- Red and yellow food coloring
Step 1:
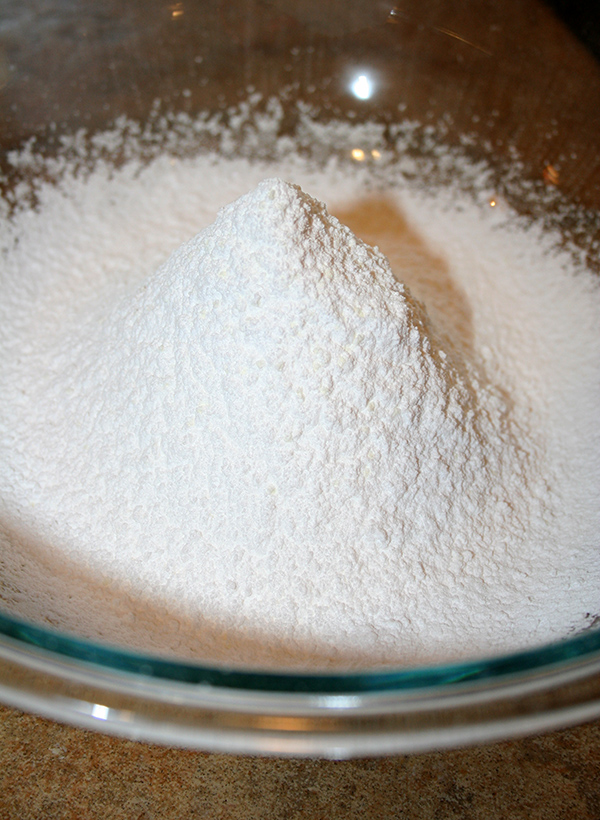
In a medium-sized bowl, whisk the sifted powdered sugar and powdered milk together. Set aside.
Step 2:
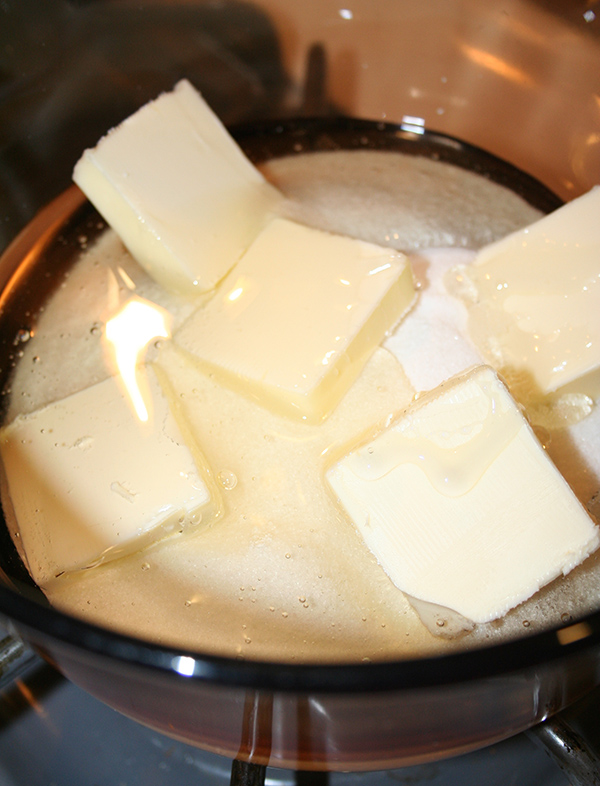
In a medium saucepan, combine the granulated sugar, corn syrup and butter over high heat, stirring frequently until it comes to a boil. Reduce heat to medium, stir in the vanilla and continue stirring frequently for 5 minutes. The mixture will begin to reduce and thicken.
Step 3:
Remove from heat, and pour into a large, heatproof bowl. Add in the powdered sugar bit by bit, stirring after each addition, until it has all been incorporated into the wet mixture.
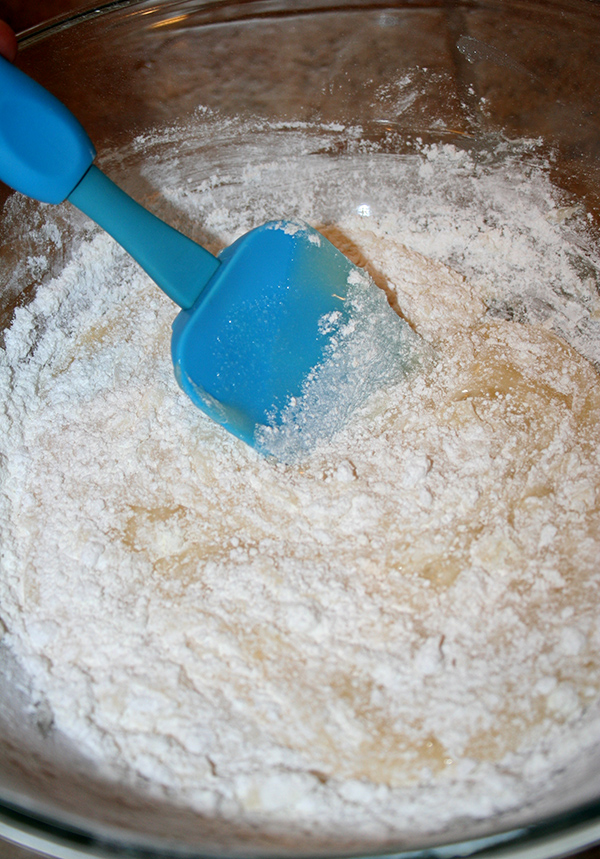
Use a sturdy spoon or spatula, as the mixture will become quite thick. (I tell you this because moments after snapping this shot, that spoon spatula snapped in half, causing me to switch to a wooden spoon.)
If the mixture is too hot to handle, let it chill out in the bowl for another few minutes. But you should start working with the dough as soon as you can stand the temperature. If the dough sits too long, will become harder and more difficult to work with.
Step 4:
Divide the dough into three equal parts, and put them in separate bowls. Leave one portion white; tint the remaining portions yellow and orange, respectively.
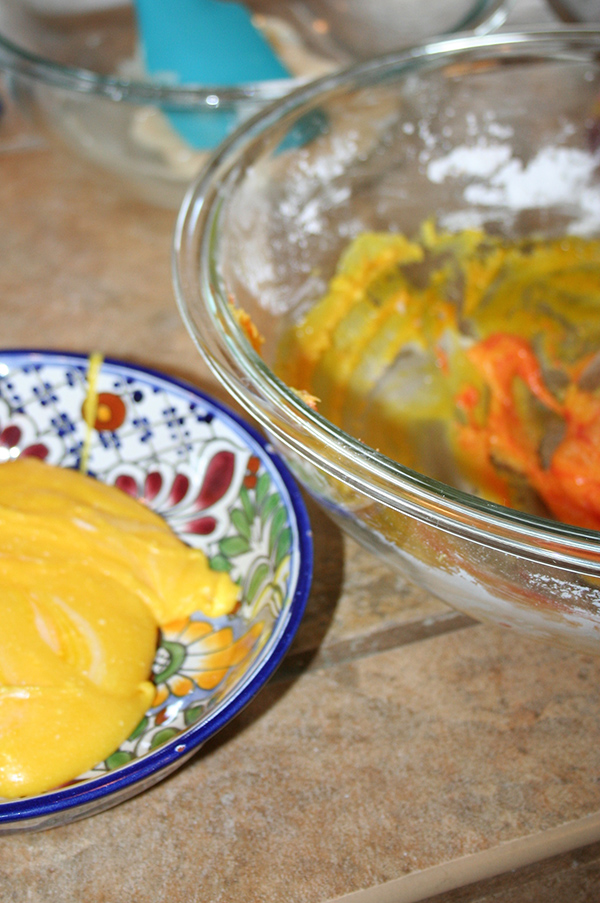
Work the dye into the dough by hand or with a spoon until it is streak-free, adding in more coloring if desired. You may find that you can start with a spoon, but at a certain point, working with your hands is more efficient. Use gloves to protect your hands, or prepare a story to tell your friends why your hands have red and yellow streaks on them.
Since the dough is pretty thick, with a consistency like marzipan, it may need some working to get the dye incorporated.Step 5:
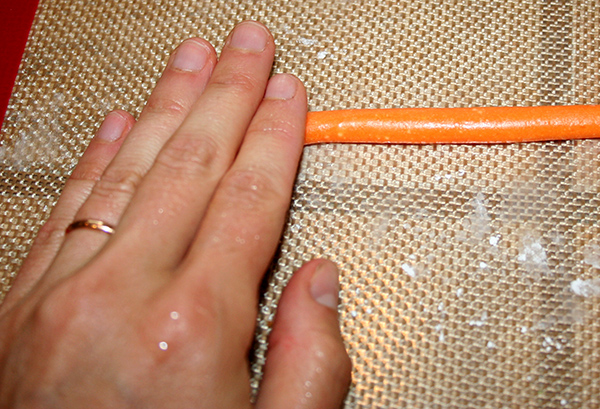
On top of a sheet of waxed or parchment paper, or on a silicone mat, roll out each color of dough into long, thin ropes. The thinner the rope, the smaller that segment of color will be in your finished candy. An easy-to-handle size is a 12″-long rope.
Step 6:
Press the ropes of dough together in whatever color combination you’d like. The classic combo is white, orange and yellow (in that order).
To ensure that each segment sticks together, you can press the ropes of candy color together by hand, or press a second sheet of waxed or parchment paper on top and press very gently with a rolling pin. Don’t worry if the dough looks slightly uneven — during the next step it will even out a bit.
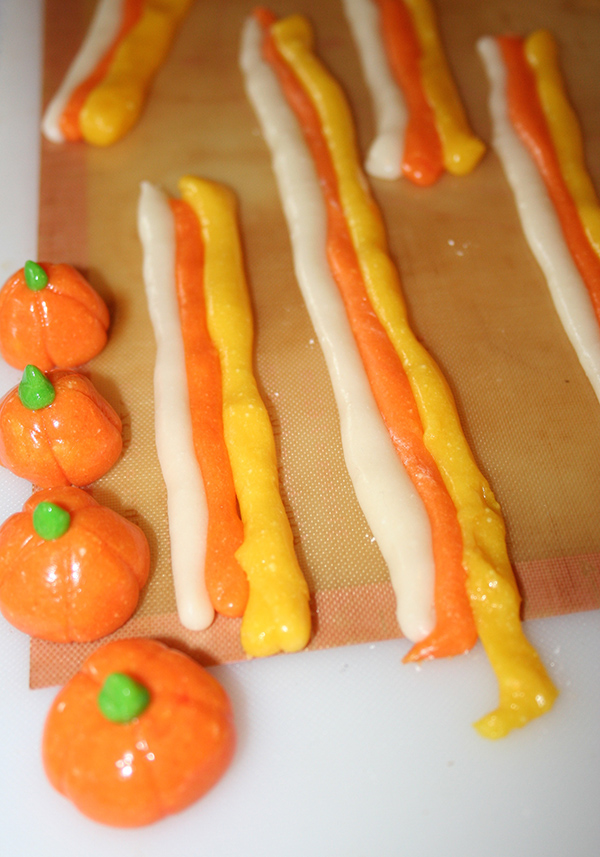
Note: If you find yourself with more of one candy corn color, mold the leftovers different candy shapes. For instance, I had extra orange dough, so I used it to make some homemade mellowcreme pumpkins, tinting some of the leftover yellow dough green to form stalks.
Step 7:
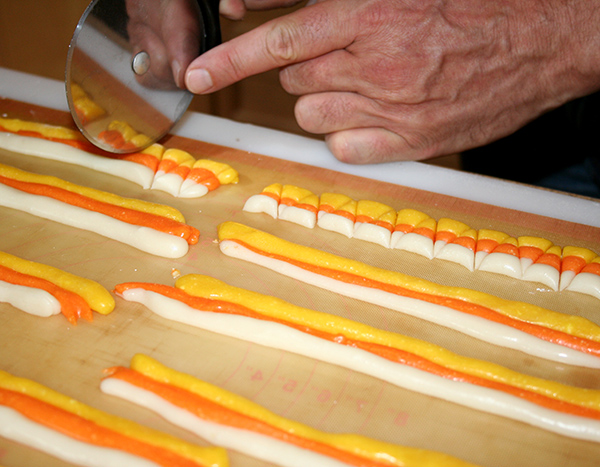
Using a sharp knife or a pizza cutter, cut dough into triangle segments. Yes, this means that half of your candy corn will have an upside-down color combo, but isn’t that just proof that they’re homemade?
Dip the knife in powdered sugar to keep it from sticking. Keep a damp, clean cloth nearby to wipe off the knife in the event that it gets sticky.
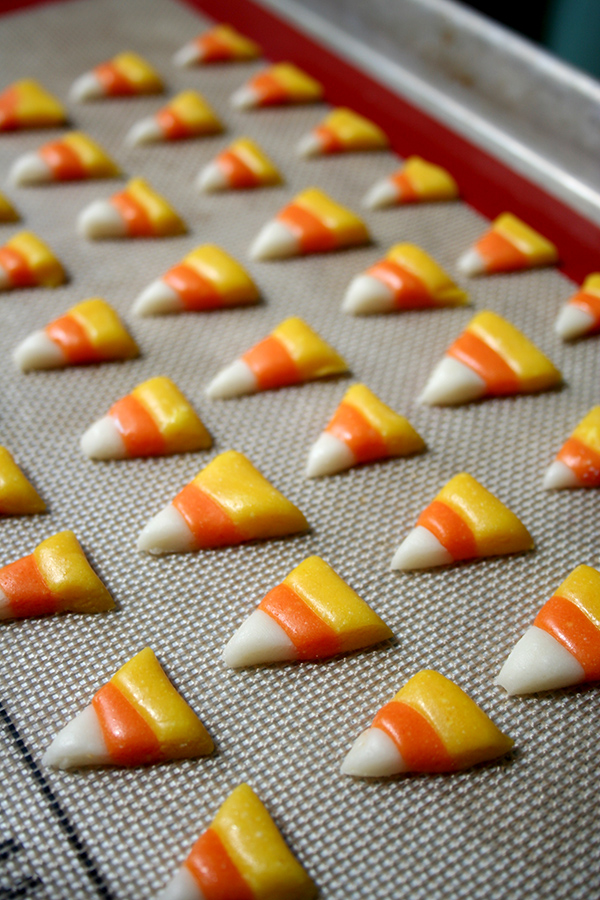
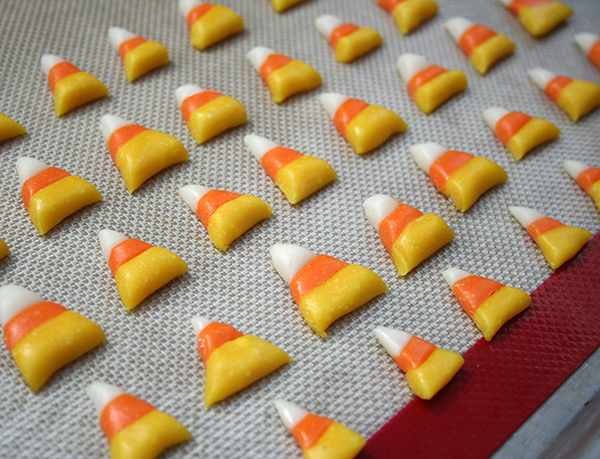
Step 8:
Repeat with the remaining dough until you’ve used it all. Let the candy set in a single layer on parchment, waxed paper or a silicone-lined baking sheets for about 2 hours. They will keep for at least a few weeks if kept in an airtight container at room temperature.
Do you prefer mellowcreme pumpkins to candy corn? Check out our tutorial for how to make homemade mellowcreme pumpkins!
FREE PDF Guide: DIY Pantry Staples

Trying to eat fewer processed foods? Stock your pantry with homemade essentials like butter, confectioners’ sugar and more, with this FREE downloadable guide.
Share tips, start a discussion or ask one of our experts or other students a question.
No Responses to “This Homemade Candy Corn Recipe Tastes Far Better Than Store Bought”