
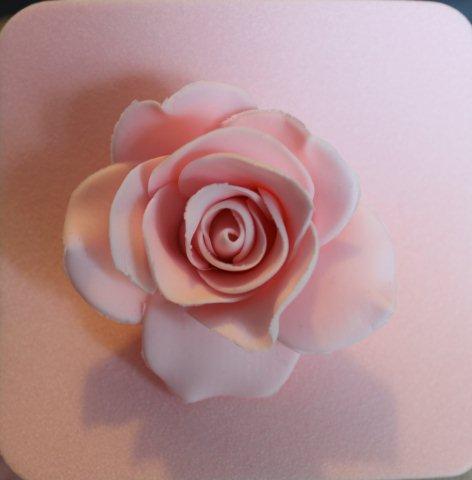
Roses are the symbol of love, beauty, joy and romance, and what better way to enjoy them then in sugar? Sugar roses can be so lifelike that they mystify even the most experienced florist. Made with gum paste and petal dust, roses can come to life and become the perfect addition to any beautifully decorated cake, from a wedding, birthday or anniversary cake.
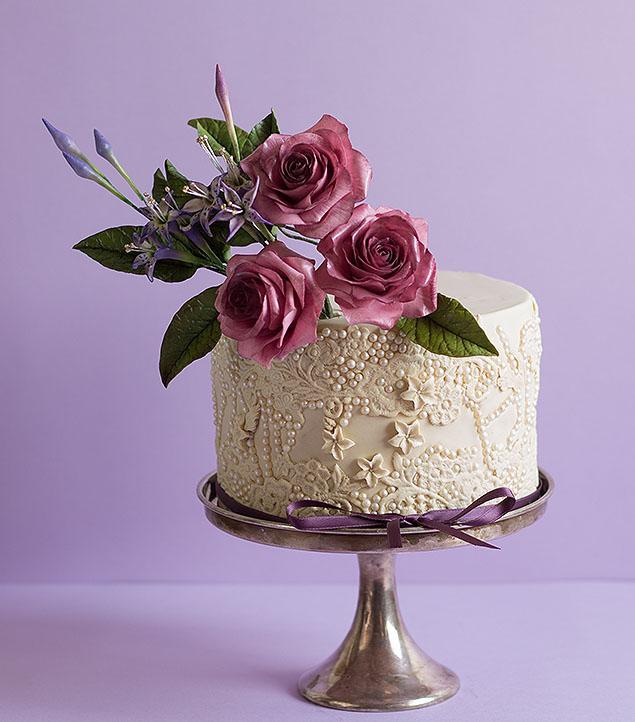
Photo via Bluprint member ModernLovers
Nicholas Lodge is the best of the best when it comes to sugar flowers. With 35 years in the industry and having taught in over 30 countries, his expertise is world renown. He owns the International Sugar Art Collection, which has schools in Georgia and Tokyo. His love and enthusiasm for his craft is inspiring.
In his Bluprint class The Ultimate Sugar Rose, Nicholas takes you step-by-step through not only how to make a gum paste rose, but he also explains the ins and outs of gum paste, including how to make your own and why and when to use homemade vs. commercial gum paste. He also teaches how to arrange floral sprays, which gauge of wire to use, and how to add special touches to make your flowers look extremely lifelike.
I was inspired as I watched his class, so I have put together a little snip-it of his class to share with you. We are going to make a simple gum paste rose. I do not have room to write all that he takes the time to teach, but hopefully this simple gum paste flower tutorial will inspire you to learn more from Nicholas Lodge. I highly recommend it!
Here’s how to make a simple gum paste rose:
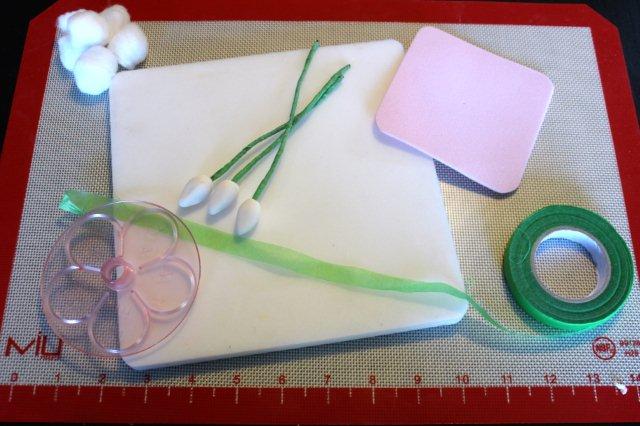
What you’ll need:
- 20 gauge wire pre-wrapped with paper
- Foam gum paste mat
- Gum paste (See Nicholas Lodge’s recipe here)
- Floral tape
- Silicone mat
- Fondant roller
- Ball tool
- Rose petal cutter
- Rose bud center
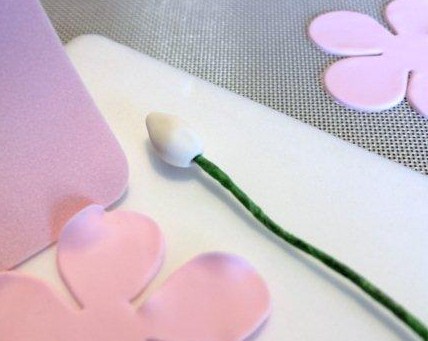
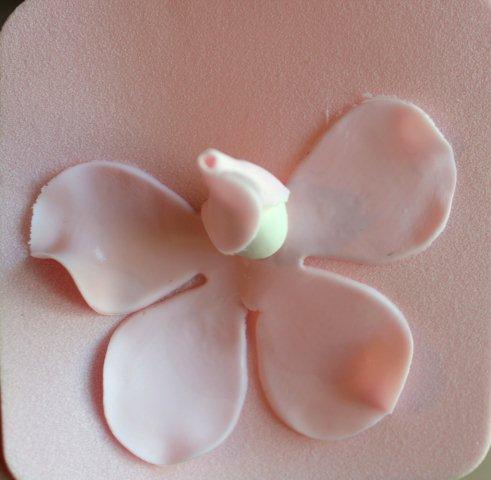
Step 1: Make your gum paste bud center.
Cut your wire to about 7″ long. Using Nicholas Lodge’s method, make a rosebud by wrapping floral tape around one end of the wire 10 times, then bend that piece over and wrap the top again 10 times with floral wire. Form a small ball or gum paste over the floral ball to form a cone about 1″ long.
Step 2: Condition your gum paste.
Add a small amount of shortening to your piece of gum paste to get it workable. Knead it gently a few times until it’s soft and pliable.
Step 3: Roll out your gum paste.
If you have a pasta machine, now is a great time to use it. If you do not, make sure to roll out your gum paste until it is almost see- through. If you are using a pasta machine, you want to feed the gum paste through until you have it at a thickness of about 6 or 7.

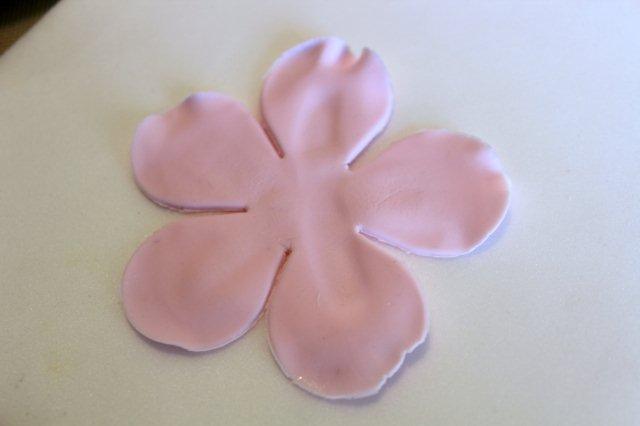
Step 4: Cut your petals.
There are many types of rose flower petal cutters out there — I am using a JEM rose cutter. Press your cutter firmly and slide it around the mat to remove any “fray” from the edges.
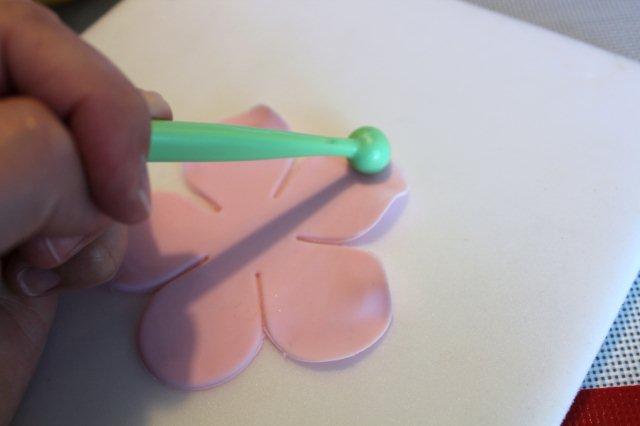
Step 5: Thin your petals.
Place your flower on your white foam board. Using your ball tool, gently glide with the ball tool half on the mat and half on the petal. You only need to thin the top inch of the petal for your first layer of petals. Using your ball tool again, place it in the center of each petal and press down slightly while gliding it inward to the center. This will give each petal a slightly cupped look.
Step 6: Form a tightly close bud.
Place your flower on the thin pink mat. Before starting make, a small hole in the center of the mat. Press the end of the wire through the center of the gum paste flower and through the mat. Choose any one of the petals to be petal #1. The petals are numbered clockwise around the flower.
Brush a small amount of egg white, gum glue or vodka on the inside of each petal about 2/3 of the way up. Wrap petal #1 around the bud — you want it to be closed enough to not see the bud. Now place petal #3, which is the petal across from petal #1 onto the opposite side of the bud. This petal should be slightly looser around the bud. Next place petal #5 around the bud, then add petals #2 and #4.
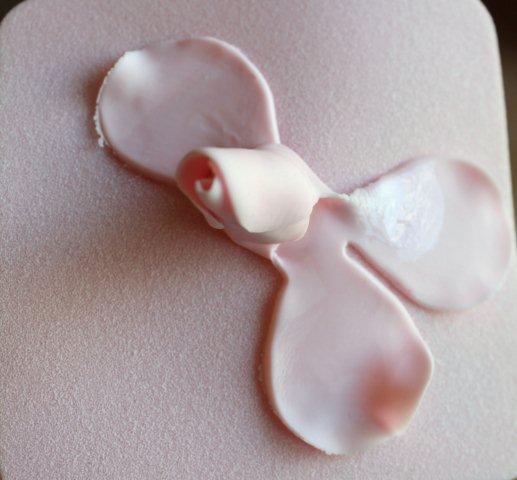
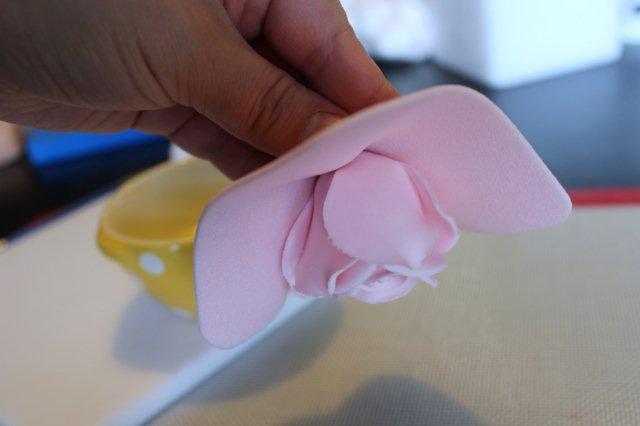
Step 7: Add a second layer.
Continue with the next layer of petals. The only difference is when you are cupping the flowers after thinning the edges. You want to cup petals 1 and 3 just as before, but then turn over your flower and cup petals 2,4 and 5 the opposite direction.
Place your petal on the small pink mat and repeat the process of adding your petals in the same order as before: 1, 3, 5, 2, 4.
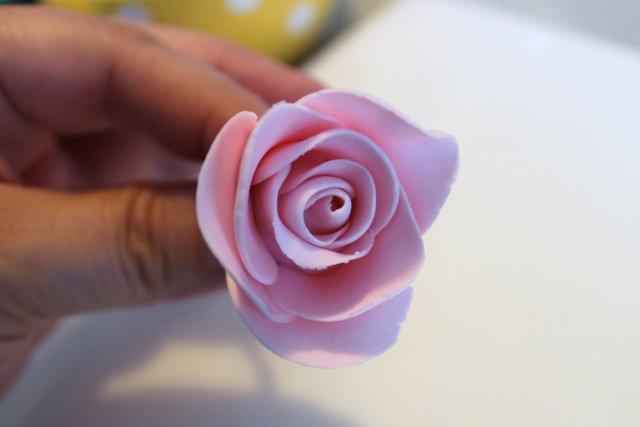
Step 8: Add third layer.
For the third layer, repeat the same process as before. Thin and cup your petals, then place them on the pink mat. This time, instead of using the same petal order, simply flip over your rose and let your petals drop into place. Check to make sure the right side of each petal is covered, and the left side covers the petal to the right.
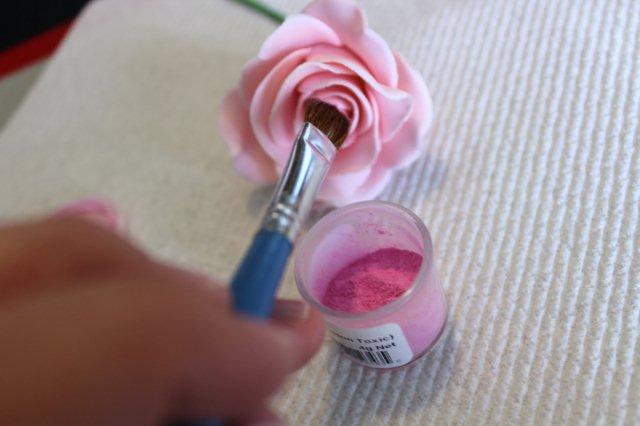
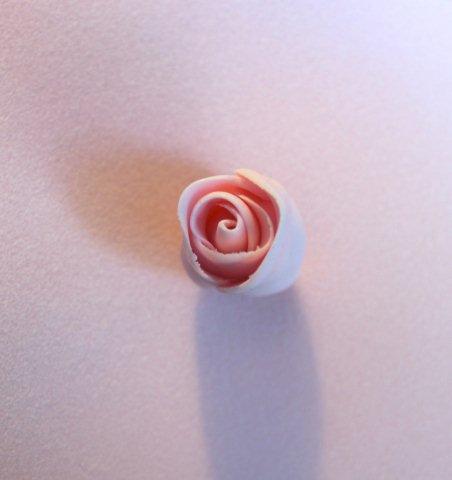
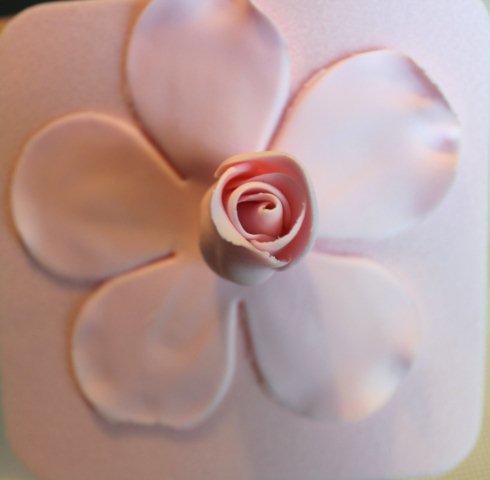
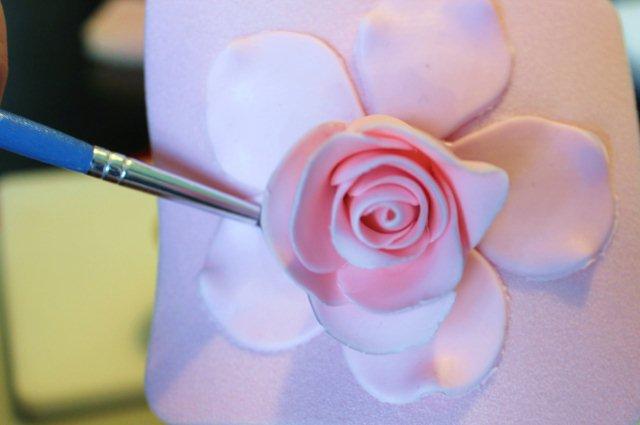
Step 9: Add petal dust.
For my pink gum paste, I used a very small amount of Americolor Soft Pink coloring gel. For the petal dust, I used Cosmos by CK Products. I did not lighten or change my colors.
In the very center of the flower, dab color to make the center a bit darker than the rest of the flower. Then, start at the edge of the petals and brush down or away from the edge.
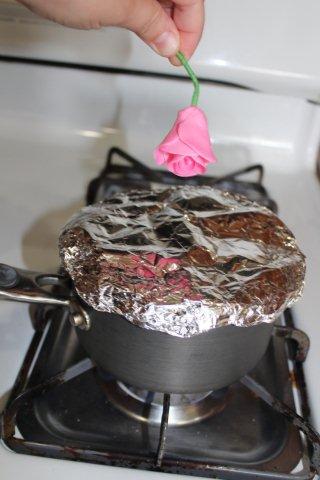
Step 10: Steam to seal in the color.
Fill a small pot with about 1″ of water and boil. Cover the pot with a piece of tinfoil with a few small holes in the top. This will allow steam to escape, but not drench your flower. Once steam can be seen, simply hold your flower over the pot to allow the steam to seal in the color. You don’t want it to get wet or sticky and it only takes a few seconds, so be careful not to overdo it.
[box type=”shadow”]
 This is truly just the beginning. Master gum paste roses, including making color thorns, hips, calyxes and leaves in The Ultimate Sugar Rose. Sign up today to learn everything you need to know to make beautiful, lifelike sugar flowers, including how to arrange and display them on your cake.
What makes online Bluprint classes great?

Learn for life! With lifetime access to your classes, you can watch lessons at your preferred pace and easily revisit your favorite concepts with just a click.

Kick up your feet! Enjoy classes anytime from the convenience of your home or even on-the-go with our mobile apps.

Get personalized guidance! Ask your instructor questions to receive all the answers and feedback you need to succeed.

Love it! There’s no risk in trying with our 100% money back guarantee.
Share tips, start a discussion or ask one of our experts or other students a question.
No Responses to “Make Romantic Roses: A Simple Gum Paste Flower Tutorial”