
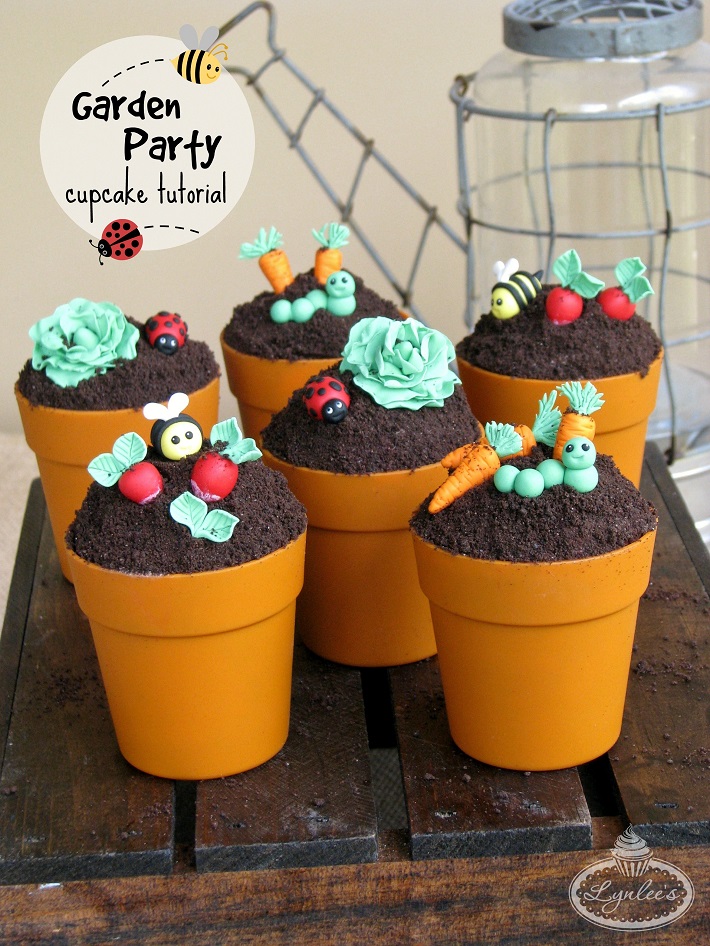
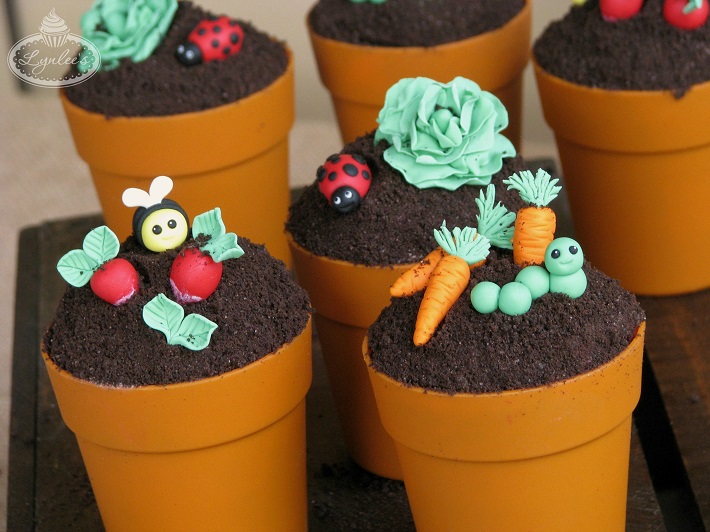
Get outside and enjoy the fresh air — and these sweet cupcakes! Take the party outdoors with these adorable garden cupcakes topped with fondant veggies and cute critters.
Buzz through this easy-to-follow tutorial to make your own sweet garden cupcakes bloom!
Get Lynlee’s Best Decorating Tips!
Join blogger and instructor Lynlee North Beckett in her Craftsy class to learn even more genius tips and tricks for decorating cupcakes with fondant.
Materials needed:
- Yellow, black, white, red, orange and green fondant
- Fondant rolling pin with 1/8″ and 1/16″ guide rings
- 1/4″ wooden dowels
- Round decorating tips (Nos. 2, 3, 7, 10 and 12)
- Small modeling stick
- Knife tool
- Ball tool
- Precision knife
- Rolling pastry cutter
- Two sizes of flower cutters
- Thin foam mat
- Powdered sugar
- Water/glue and brush
- Black and white soft gel paste
- Toothpick
- Cupcakes and icing
- Crushed cookie crumbs
We’ll start with the sweet bumble bee topper.
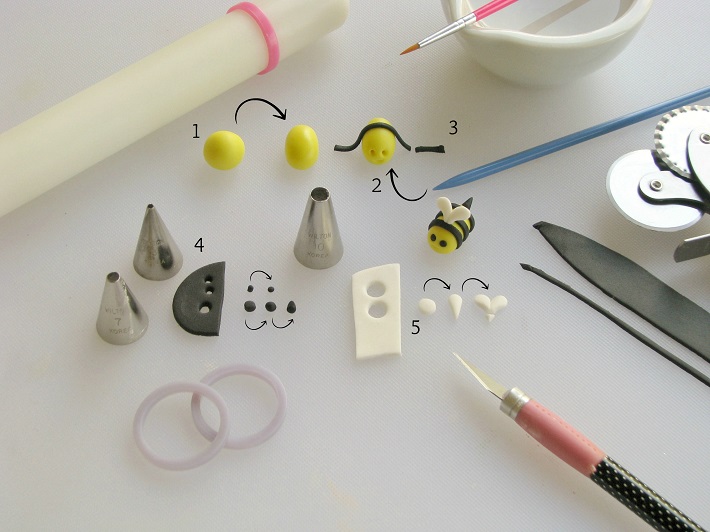
Step 1:
Roll yellow fondant into a ball. Then, with your fingers, form it into an oval shape to create the bee’s body.
Step 2:
With the small modeling stick, make two indentations for the bee’s eyes. Holding the round decorating tip #7 at a 45-degree angle, press down to make an indentation to create the bee’s mouth by holding.
Step 3:
Roll out black fondant 1/16″ thick. Use the rolling pastry cutter to cut three thin strips for the bee’s stripes. Fit them over the bee and trim the excess. Glue the stripes in place, tucking in the ends underneath the bee.
Step 4:
Roll out additional black fondant, 1/8″ thick. With round decorating tip #3, cut out two circles for the eyes. Roll them into balls and glue them into the eye cavities in the bee. Cut out an additional circle with round decorating tip #7, roll it into a ball, then shape it into a cone to create the bee’s stinger. Glue it in place behind the bee.
Step 5:
Roll out white fondant 1/8″ thick with the rolling pin and cut out two circles with round decorating tip #10. Use your fingers to shape the two circles into a teardrop shape. Then, glue the two ends together and flare the larger ends out in opposite directions to create the wings. With a precision knife, trim the bottom of the wings and glue them into place on the bee.
Next up, another cute creature: a ladybug!
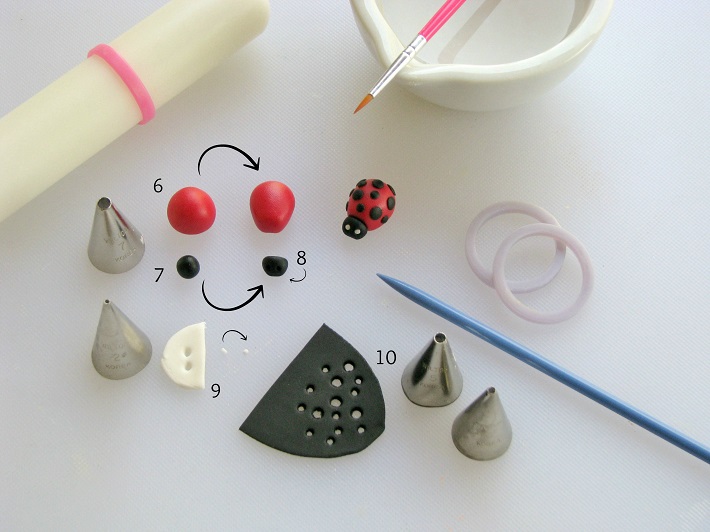
Step 6:
Roll red fondant into a ball, then shape it into a teardrop for the ladybug’s body. Flatten the narrower end with your fingers.
Step 7:
Roll a small ball of black fondant to create the ladybug’s head. Flatten out one side to fit against the red body and glue it in place.
Step 8:
Use the small modeling stick and decorating tip #7 to indent the eyes an mouth, respectively.
Step 9:
Roll out white fondant 1/8″ thick and cut out two circles with round decorating tip #2. Roll them into balls for the eyes and glue them in place.
Step 10:
Roll out black fondant thin 1/16″ thick and cut out several circles with round decorating tips #3 and #5. Flatten each circle out with your fingers and glue them sporadically on the ladybug’s body.
And our last garden critter will be a sweet caterpillar.
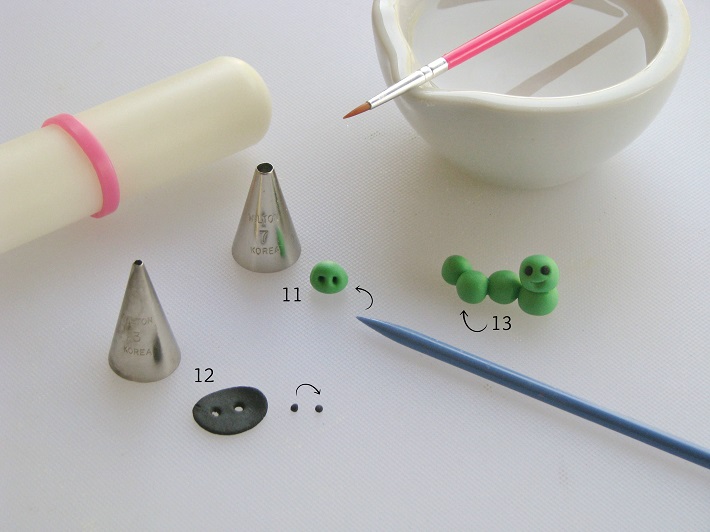
Step 11:
Roll green fondant into a small ball to create the caterpillar’s head. Indent the eye cavities and mouth with the small modeling stick and round decorating tip #7, respectively.
Step 12:
Roll out black fondant 1/8″ and cut out two circles with round decorating tip #3. Roll them into balls for the eyes and glue them into place.
Step 13:
Roll out four additional balls with the green fondant, decreasing a bit in size for the rest of the caterpillar’s body. Glue one directly underneath the head, then glue the rest flat on your work surface.
How about some flowers for our garden party cupcakes?
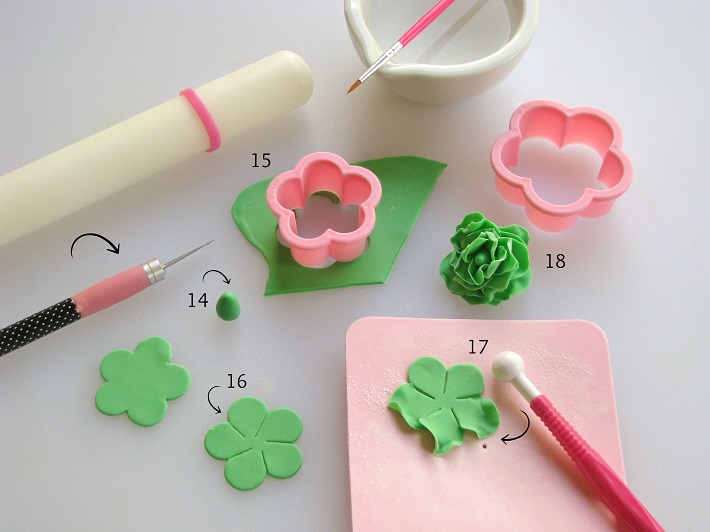
Step 14:
Roll green fondant into a ball, then shape it into an upside-down teardrop shape and set it aside.
Step 15:
Roll out green fondant on your work surface with the rolling pin and 1/16″ guide rings. Cut out two small flowers and two larger flowers.
Step 16:
Use your precision knife (or a small spatula) to make slices where each petal connects to make them longer.
Step 17:
Spread a bit of powdered sugar on the thin foam mat and place a small flower on it. Pick up one petal with your fingers on one hand and with your other hand, thin out the edges by slowly turning the ball tool around the petal. Repeat with all the petals, making them look a bit ruffly. Then do the same with the remaining cut-out flowers.
Step 18:
Once all the flowers are ruffled, spread glue over the center of one of the smaller flowers. Place the teardrop-shaped fondant in the center. Fold up the petals, one at a time, and repeat with the remaining small flower, then the larger flowers. Use your modeling stick to spread out any of the ruffled edges as needed.
Don’t forget the veggies! Let’s make a fondant carrot next.
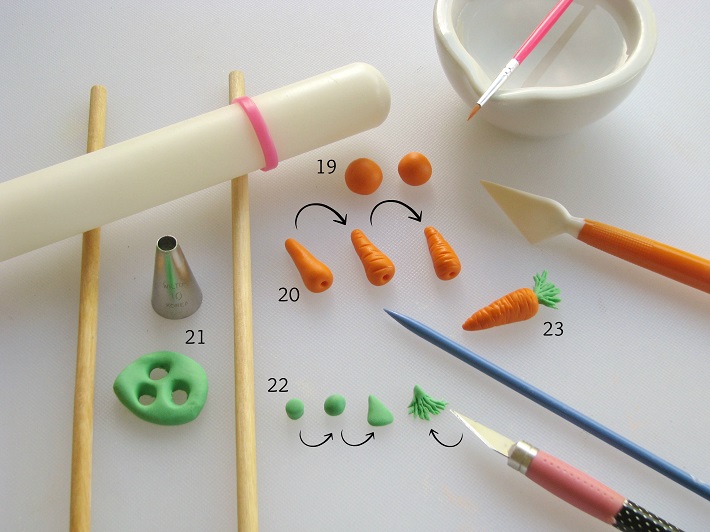
Step 19:
Roll orange fondant into a ball.
Step 20:
Use your fingers to form the orange fondant into a carrot shape, narrowing one end. At the larger end of the carrot, use the modeling stick to make an indentation. Then, use the precision knife to make horizontal indentations across the carrot and on its sides.
Step 21:
Roll out green fondant, using wooden dowels as guides. Cut out a circle with round decorating tip #10.
Step 22:
Roll the green circle into a ball, then shape it into a teardrop shape with your fingers, flattening the top of the wider end. Use the precision knife to gently cut the wide end vertically.
Step 23:
Insert the narrow end of the green fondant into the hole at the top of the carrot and glue it in place.
Our next garden cupcake veggie topper is a red radish.
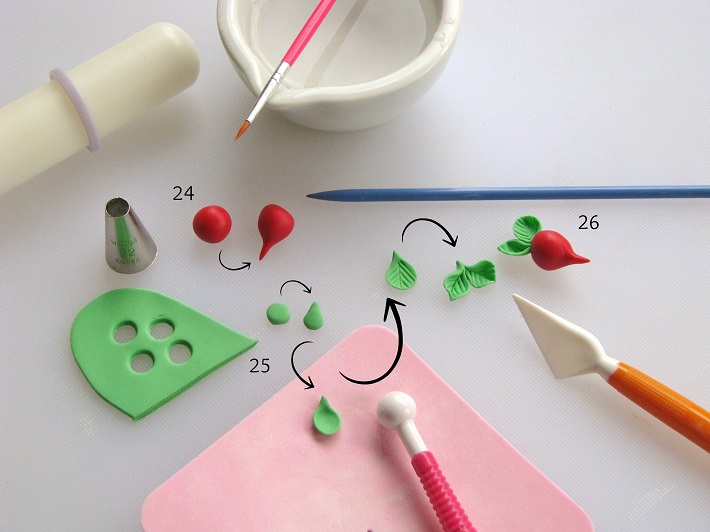
Step 24:
Roll red fondant into a ball, then begin pulling a little piece out to begin creating the radish. Insert the modeling stick to make an indentation at the larger end of the radish.
Step 25:
Roll out green fondant 1/8″ thick. Cut out two circles with round decorating tip #12. Shape them into teardrop shapes. Place them onto a thin foam mat with a bit of powdered sugar and flatten out the wider end of the green fondant with the ball tool.
Then, use the knife tool to make leaf indentations (one vertical down the center and diagonal lines on either side). Glue the two ends of the leaves and pinch them together. Finish them off by pinching the tops of each leaf with your fingers for a bit of shaping.
Step 26:
Insert the leaves in the top of the radish and glue them in place.
After you’ve made all your adorable fondant toppers, it’s time to add them to the garden cupcakes.
Once the fondant has dried approximately 24 hours, you can add a little glimmer to the eyes by dipping a toothpick in white or black soft gel paste and dabbing it on the insects’ eyes. You can also use a mixture of water or vodka and white soft gel paste to lightly paint the bottom of the radishes.
To decorate the garden cupcakes, start off by crushing cookies for the dirt. Remove any filling from the cookies an place them in a zip-top bag. Use a rolling pin to crush them finely. Place the crumbs in a bowl.
Then, cover the cupcakes with icing using a small spatula, turn them upside down and dip them in the cookie crumb bowl, coating the entire surface.
Finish off the cupcakes by adding the fondant decorations and lightly sprinkling cookie crumbs over the vegetables.
Get Lynlee’s Best Decorating Tips!
Join blogger and instructor Lynlee North Beckett in her Craftsy class to learn even more genius tips and tricks for decorating cupcakes with fondant.
Share tips, start a discussion or ask one of our experts or other students a question.
No Responses to “How to Make the Cutest Garden Party Cupcakes Ever”