
If you’re looking to create one (or a bunch of) super-simple die cut handmade cards that pack a serious visual punch, then this layered paper project is for you.
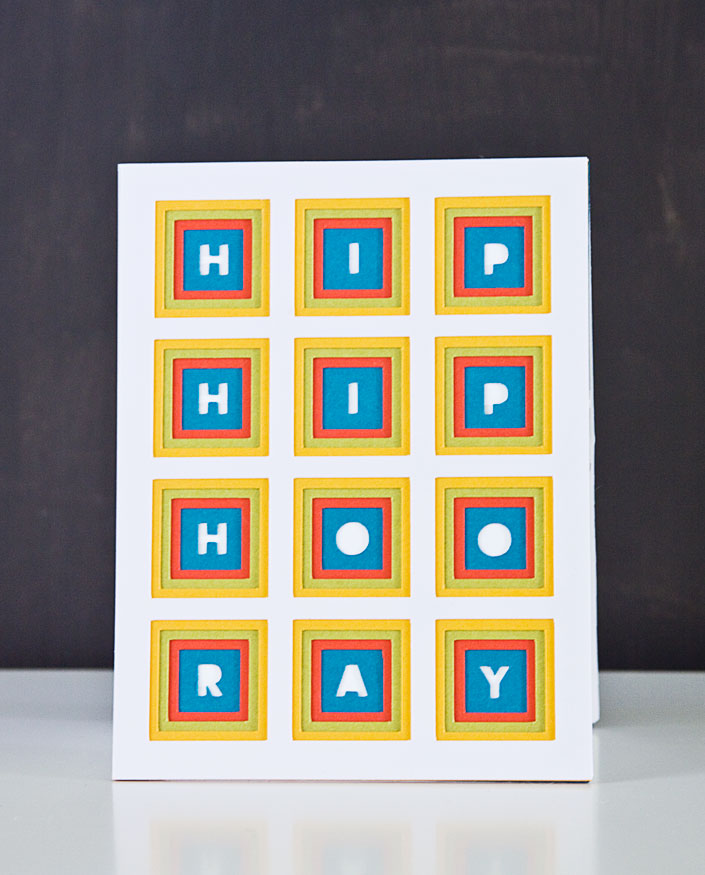
Make a big visual statement with a simple paper layering technique.
Want to know how they’re so simple? We have FREE downloadable templates that you can use! Break out your die cutting machine, grab some card stock or watercolor paper and let’s get this paper party started!
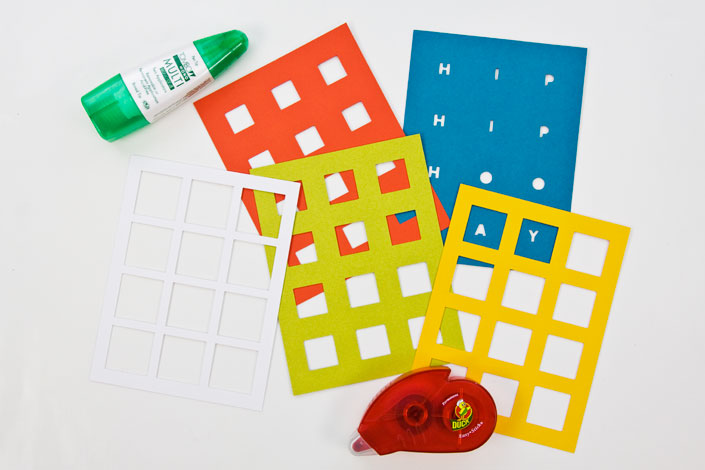
Here’s what you’ll need:
- Card stock (I used Gmund card stock from LCI Paper in Snow White, Sun Glow, Chartreuse, Cayenne and Aqua)
- An A2 card base
- The free PDF or SVG templates for this project
- A digital die cutting machine*
- Craft glue and/or double-sided adhesive
*Note: If you don’t have a digital die cutting machine, don’t worry! You can print the PDF file and cut out by hand. I don’t recommend cutting the “hip hip hooray” layer by hand — those letters are pretty small. You can certainly give it a shot if you’re feeling ambitious, but you can easily use small alphabet rubber stamps or letter stickers instead.
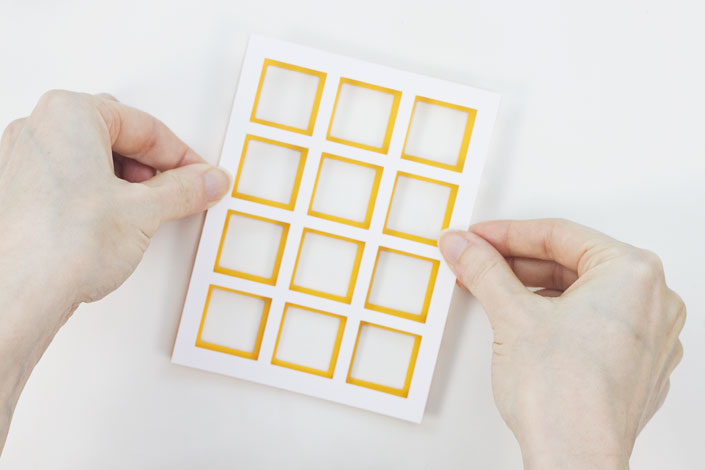
Step 1:
Cut out all of the template layers. I used a different color of card stock for each layer, but the great thing about this project is that you can use whatever paper you’d like. Use all white cardstock for a chic, white-on-white look or cut the layers from watercolor paper and paint each layer in a different color. You could even color white cardstock with pigment or dye inks like I did in this handmade card project.
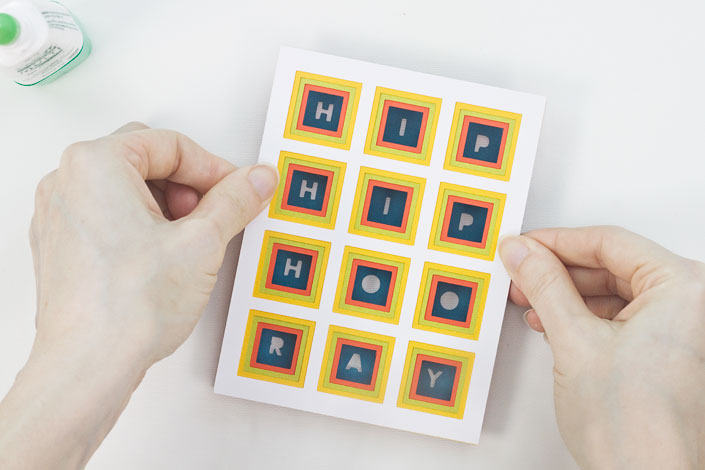
Step 2:
Run glue all along the back of the top layer. Be sure to add glue to the inner grid as well as around the outside of the layer. Align the top layer over the second layer and press together to adhere.
Repeat this for all of the remaining layers. After the first couple of layers, the areas where you can place glue or adhesive become wide enough that you can use a double-sided adhesive runner if you like.
Step 3:
Glue the nested square layers on top of the bottom sentiment layer to finish the card front. Cover the underside of the sentiment layer with glue or double-sided adhesive and attach to an A2 card front to finish.
There are so many possibilities with this paper layering technique, and Silhouette Studio‘s Internal Offset option (Options > Offset and choose Internal Offset from the menu that appears on the right) makes quick work of creating all sorts of nested shapes. Make a series of nested shapes as I did here, or create one large nested shape, like a heart, a circle or a word, for handmade cards or even wall art. The creative options are endless!
No link I can see either!
Where is the pdf please?
Can we be notified when the pdf/svg is available?
Yep 31 December 2020 and still no pdf link 👎🏻
It's a shame the PDF isn't available. Looks like a super cute card!
Ruth Allen.
I can't find the pdf.