

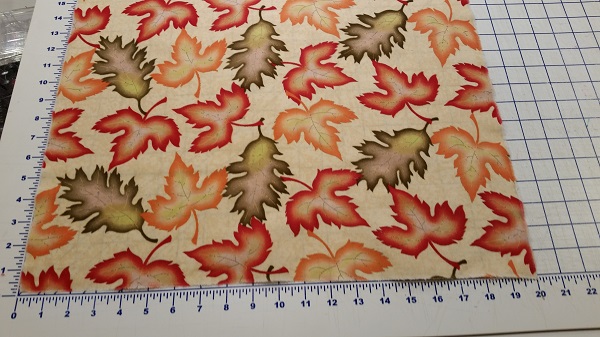
Fall-inspired napkins
Be inspired this season with fall napkins made to celebrate the season. Making a set of cloth napkins is a fun and easy sewing project. Done in no time at all, they add a touch of refinement and new life to a dreary table.
Materials
- 1¼ yards cotton or cotton blend fabric
- Rotary cutter and cutting mat
- Fabric marking pen
- Matching thread
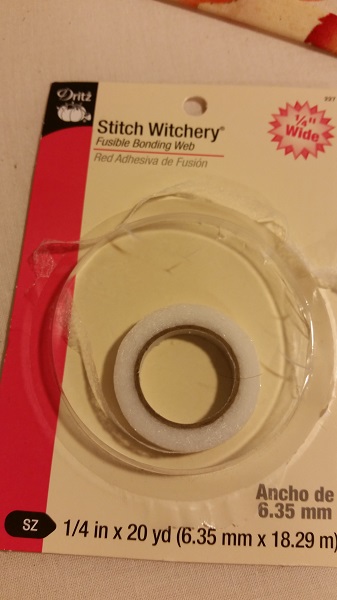
- One yard Stitch Witchery® to seal corners – ¼” or ½” wide
Be sure to use easy-care fabrics that can withstand machine washing and drying. Fabric retailers are flush with great fall inspired designs (with many on sale right now!). Choose one that fits your decor, room style, personal style or and holiday celebration.
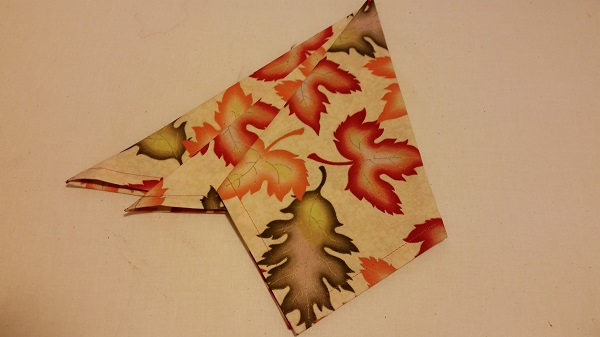
Napkins can be made in any size you want, but I have chosen to sew mine into 18″ squares. I prefer square rather than rectangular shaped napkins, as squares can be folded a variety of interesting ways and are large enough to sufficiently cover one’s lap.
How to make 18” square napkins:
Step 1:
Pre-washing your fabric to ensure the finished napkins maintain their size and shape. It also removes some of the sizing, making the napkins softer at the lips and more absorbent.
It is also best the fabric be on grain, so prepare the fabric crossgrain accordingly to assure it is perfectly square.
Step 2:
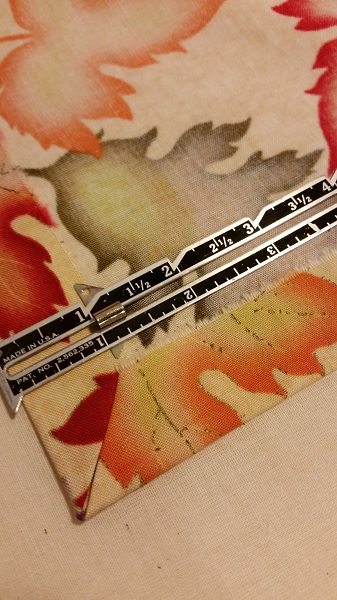
2. Cut perfect 20″ squares. This allows for ½” double-rolled hems around the perimeter. I prefer to rip my fabric into the squares, which keeps cross and long grains in check, but as an alternative, use a ruler and rotary cutter to cut them for the straightest and most precise dimensions. This becomes especially helpful when it comes to squaring and finishing the mitered corners.
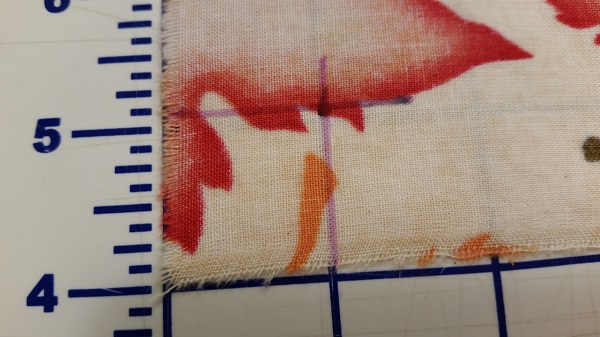
Step 3:
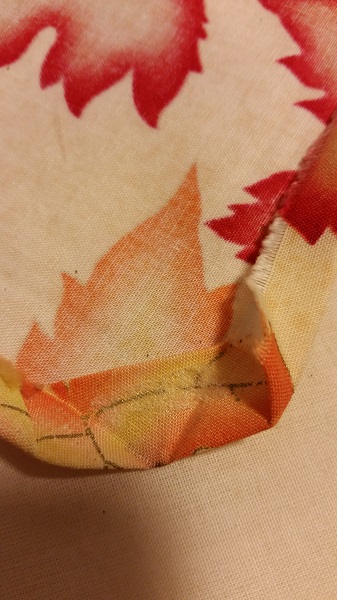
Using a fabric marking pen, draw a line at least 1 inch from each of the corner edges into the body of the square on the wrong side of the fabric. Mark a dot where the two lines intersect.
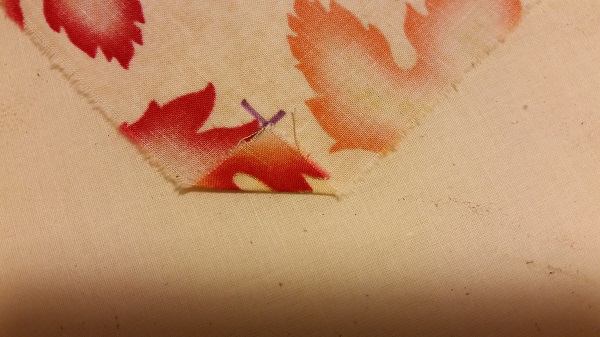
Step 4:
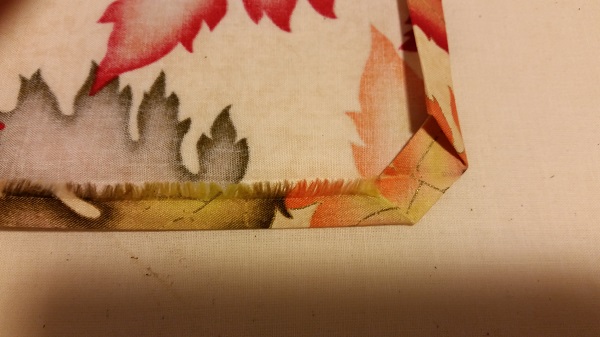
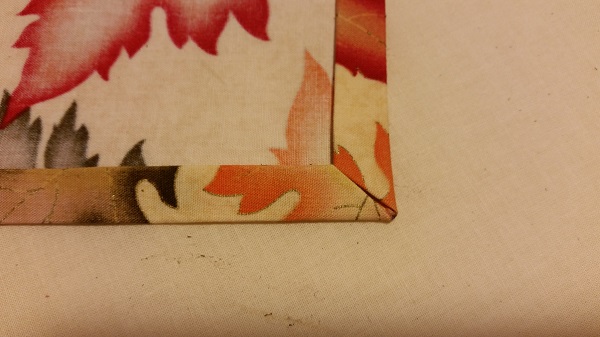
Fold the corner point in towards the body of the napkin to the dot mark on the wrong side of the napkin. Fold the corner up again by ½” and press it in place. Repeat this for each of the four corners.
Step 5:
Fold up the edges in 1″ towards the wrong side of the fabric on all four sides. Press them in place. At this point, the sides should miter nicely at each corner.

Step 6:
Unfold the edges and then fold the raw edge to the crease, which should be ½”. Press this fold in place and then press the double-folded edge up. Finesse the corners so they line up evenly and the corners are properly mitered.
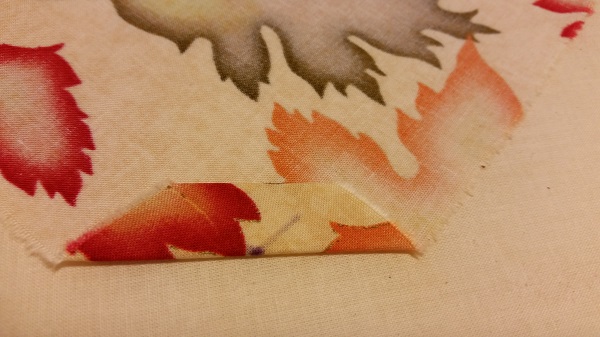
Step 7:
To seal the corners take some Stitch Witchery and lay it into the corner. Turn the folds over it and press the corner in place. This will seal and hold the mitering in place.
Step 8:
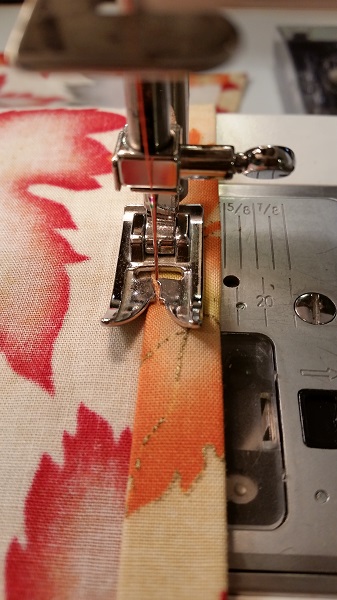
Pin the folded edges in place around the entire napkin. Now stitch the double-folded edges in place very close to the fold around the inside perimeter of the square, pivoting at each corner to hem. Give the napkin a final press to seal the stitching and then fold the napkin as desired.

Share tips, start a discussion or ask one of our experts or other students a question.
No Responses to “Make Your Table a Seasonal Beauty! Sew These Easy Fall Napkins in No Time”