
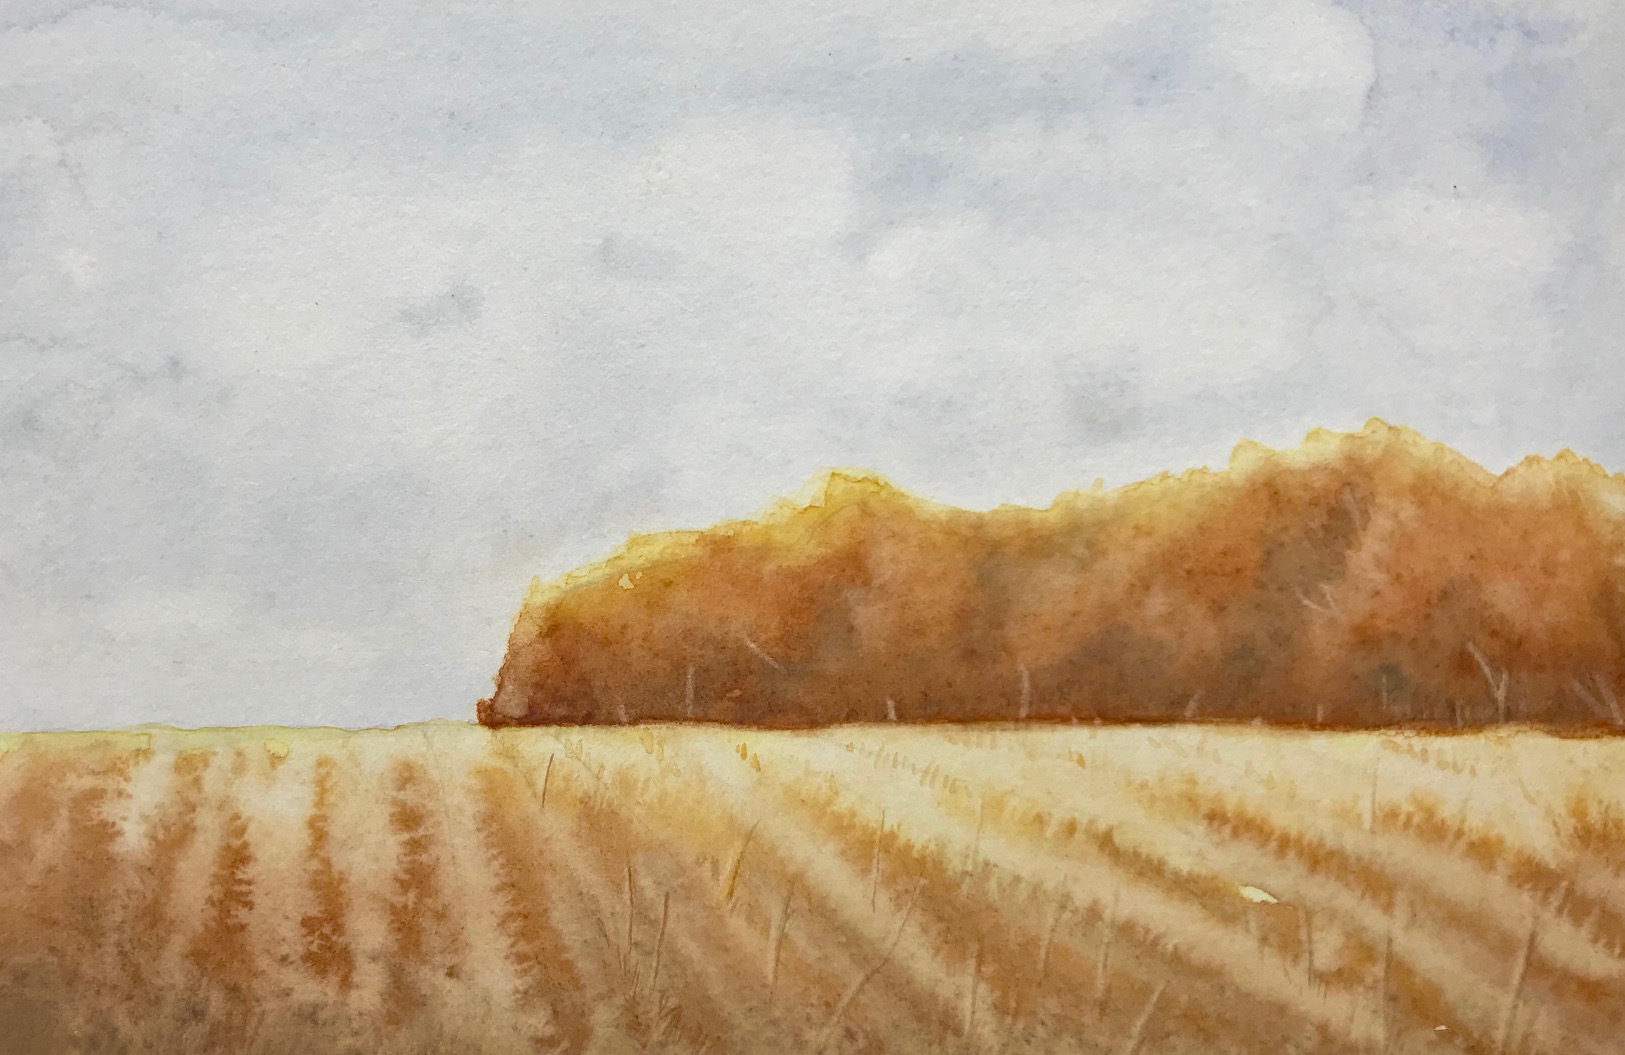
My most successful fall foliage paintings keep simplicity in mind.
I try to achieve the illusion of a grouping of trees without focusing on individual leaves. The colors and the techniques I choose are the key. For this project we will be working on the grouping of trees depicted in this autumn landscape I painted of the view from my brother’s house in Northern Michigan.Here’s what you’ll need:
- 9″ x 12″ sheet of hot- or cold-press watercolor paper. I used Arches hot press in a 9 12 block.
- A pointed round watercolor brush in size 8.
- Artist grade watercolor paints in these colors: Hansa yellow light, new gamboge, yellow ochre, burnt sienna, burnt umber and French ultramarine blue
- A container of clean water
- A kitchen towel or soft rag to wipe your brushes
- A stiff, inexpensive pointed round brush in a small size such as 1 or 0 to lift out the paint for the tree trunks
- A small flat scrubber brush
Step 1: Sketch
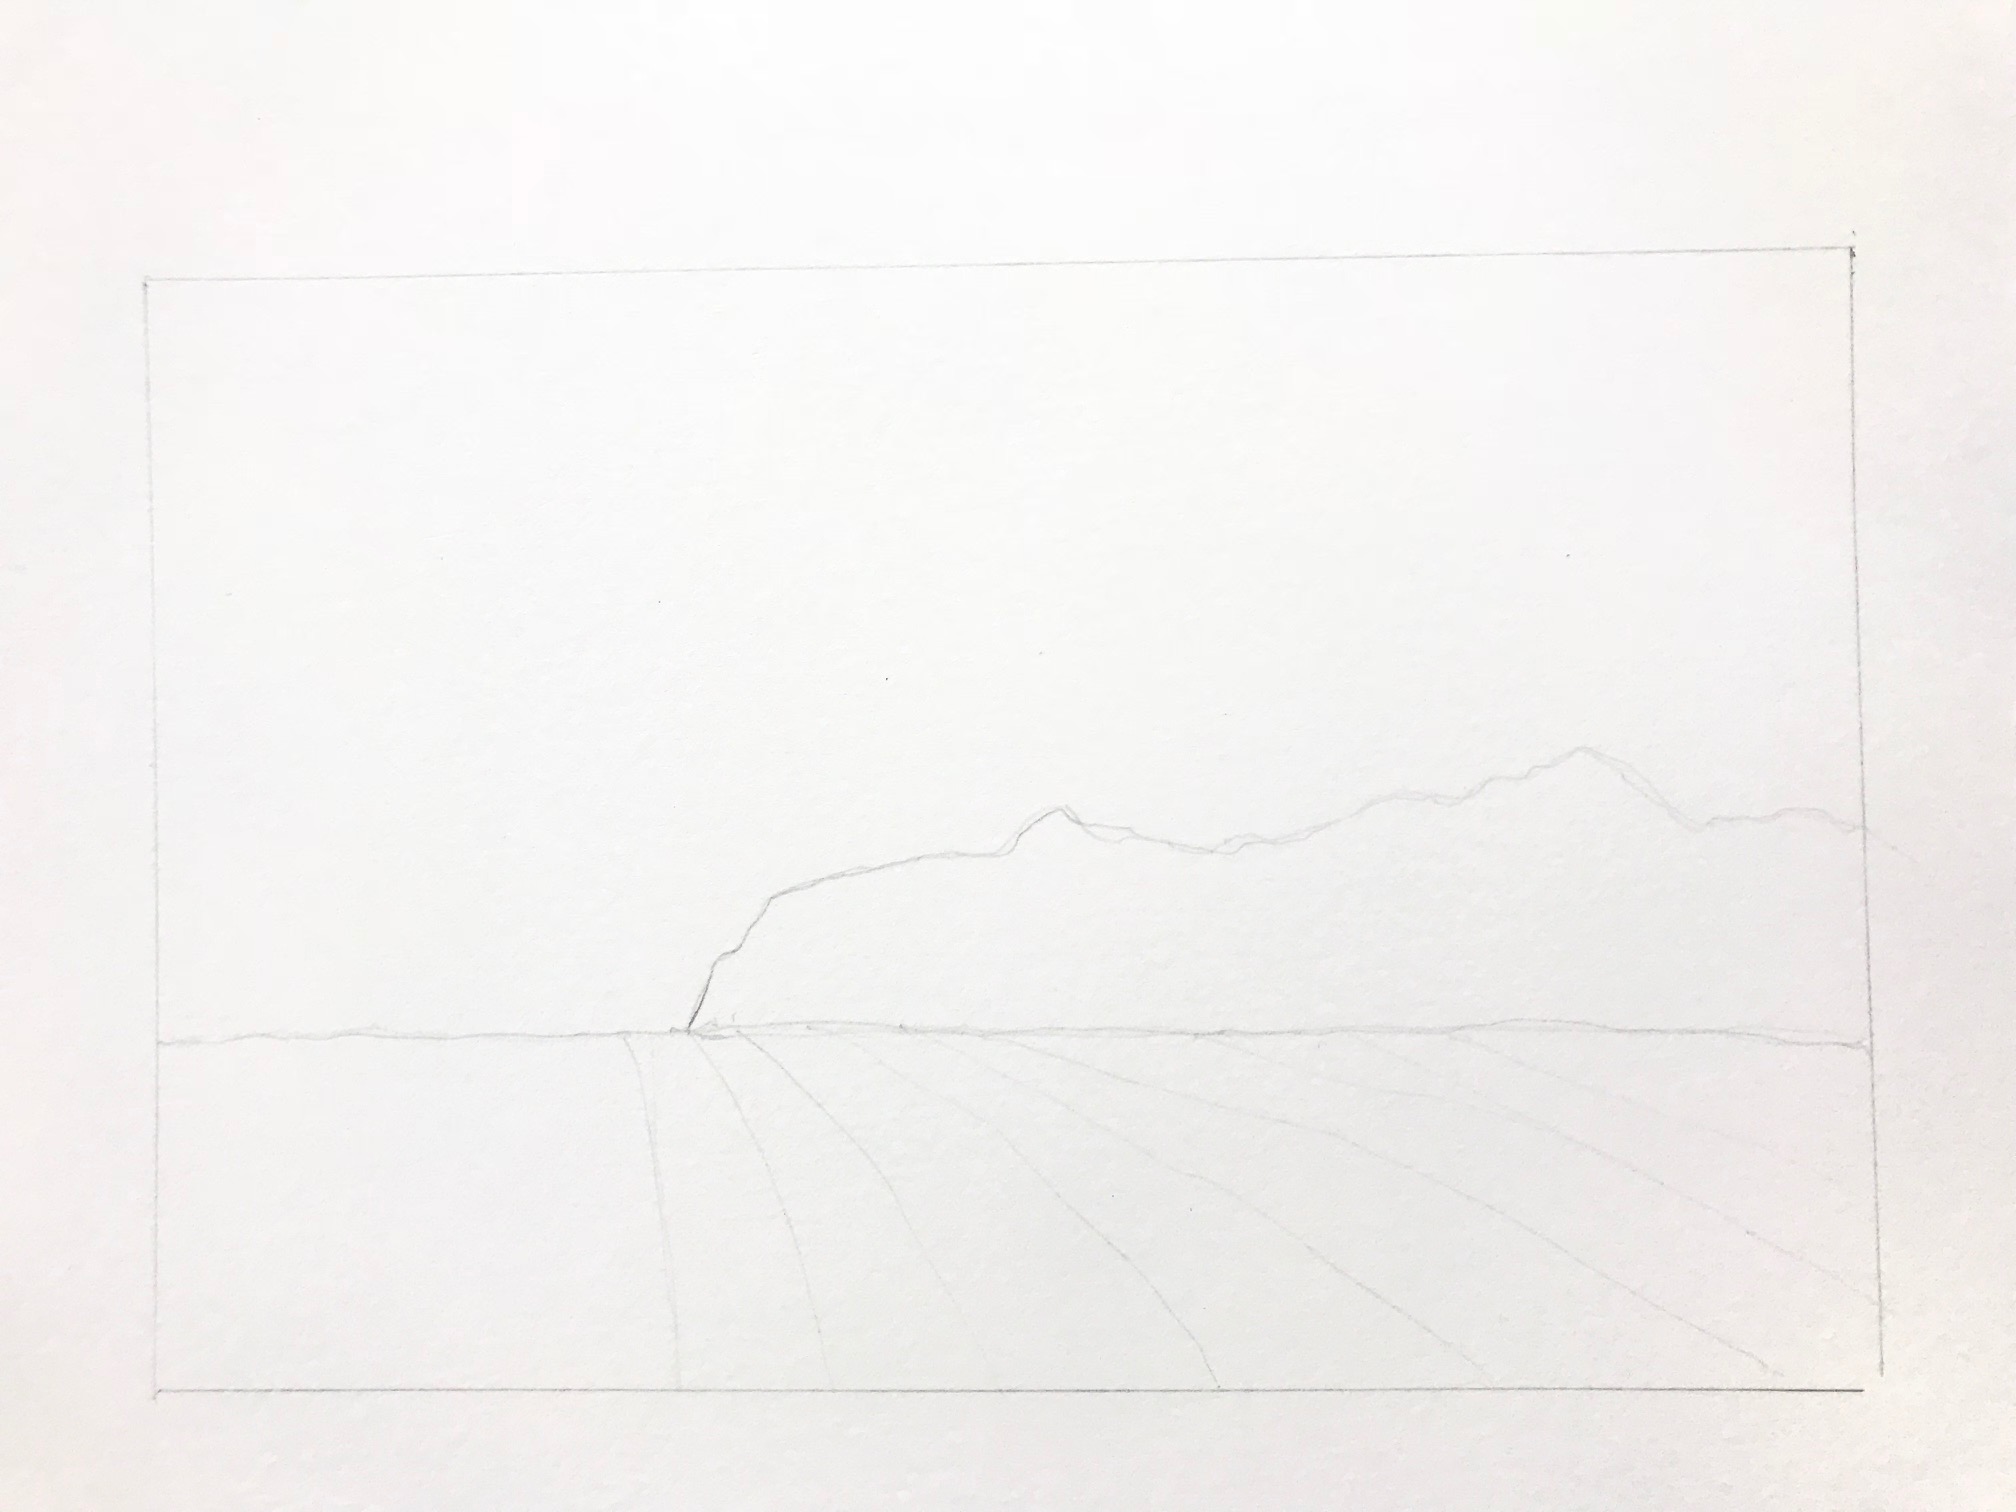 I start with a simple, light pencil drawing on my watercolor paper to depict where I want my trees in my composition. I also indicate the diagonal lines of the field.
Step 2: Paint the sky
Next I want to add in the sky. In this painting the colorful trees are the star of the show, so I want to keep my sky simple and atmospheric.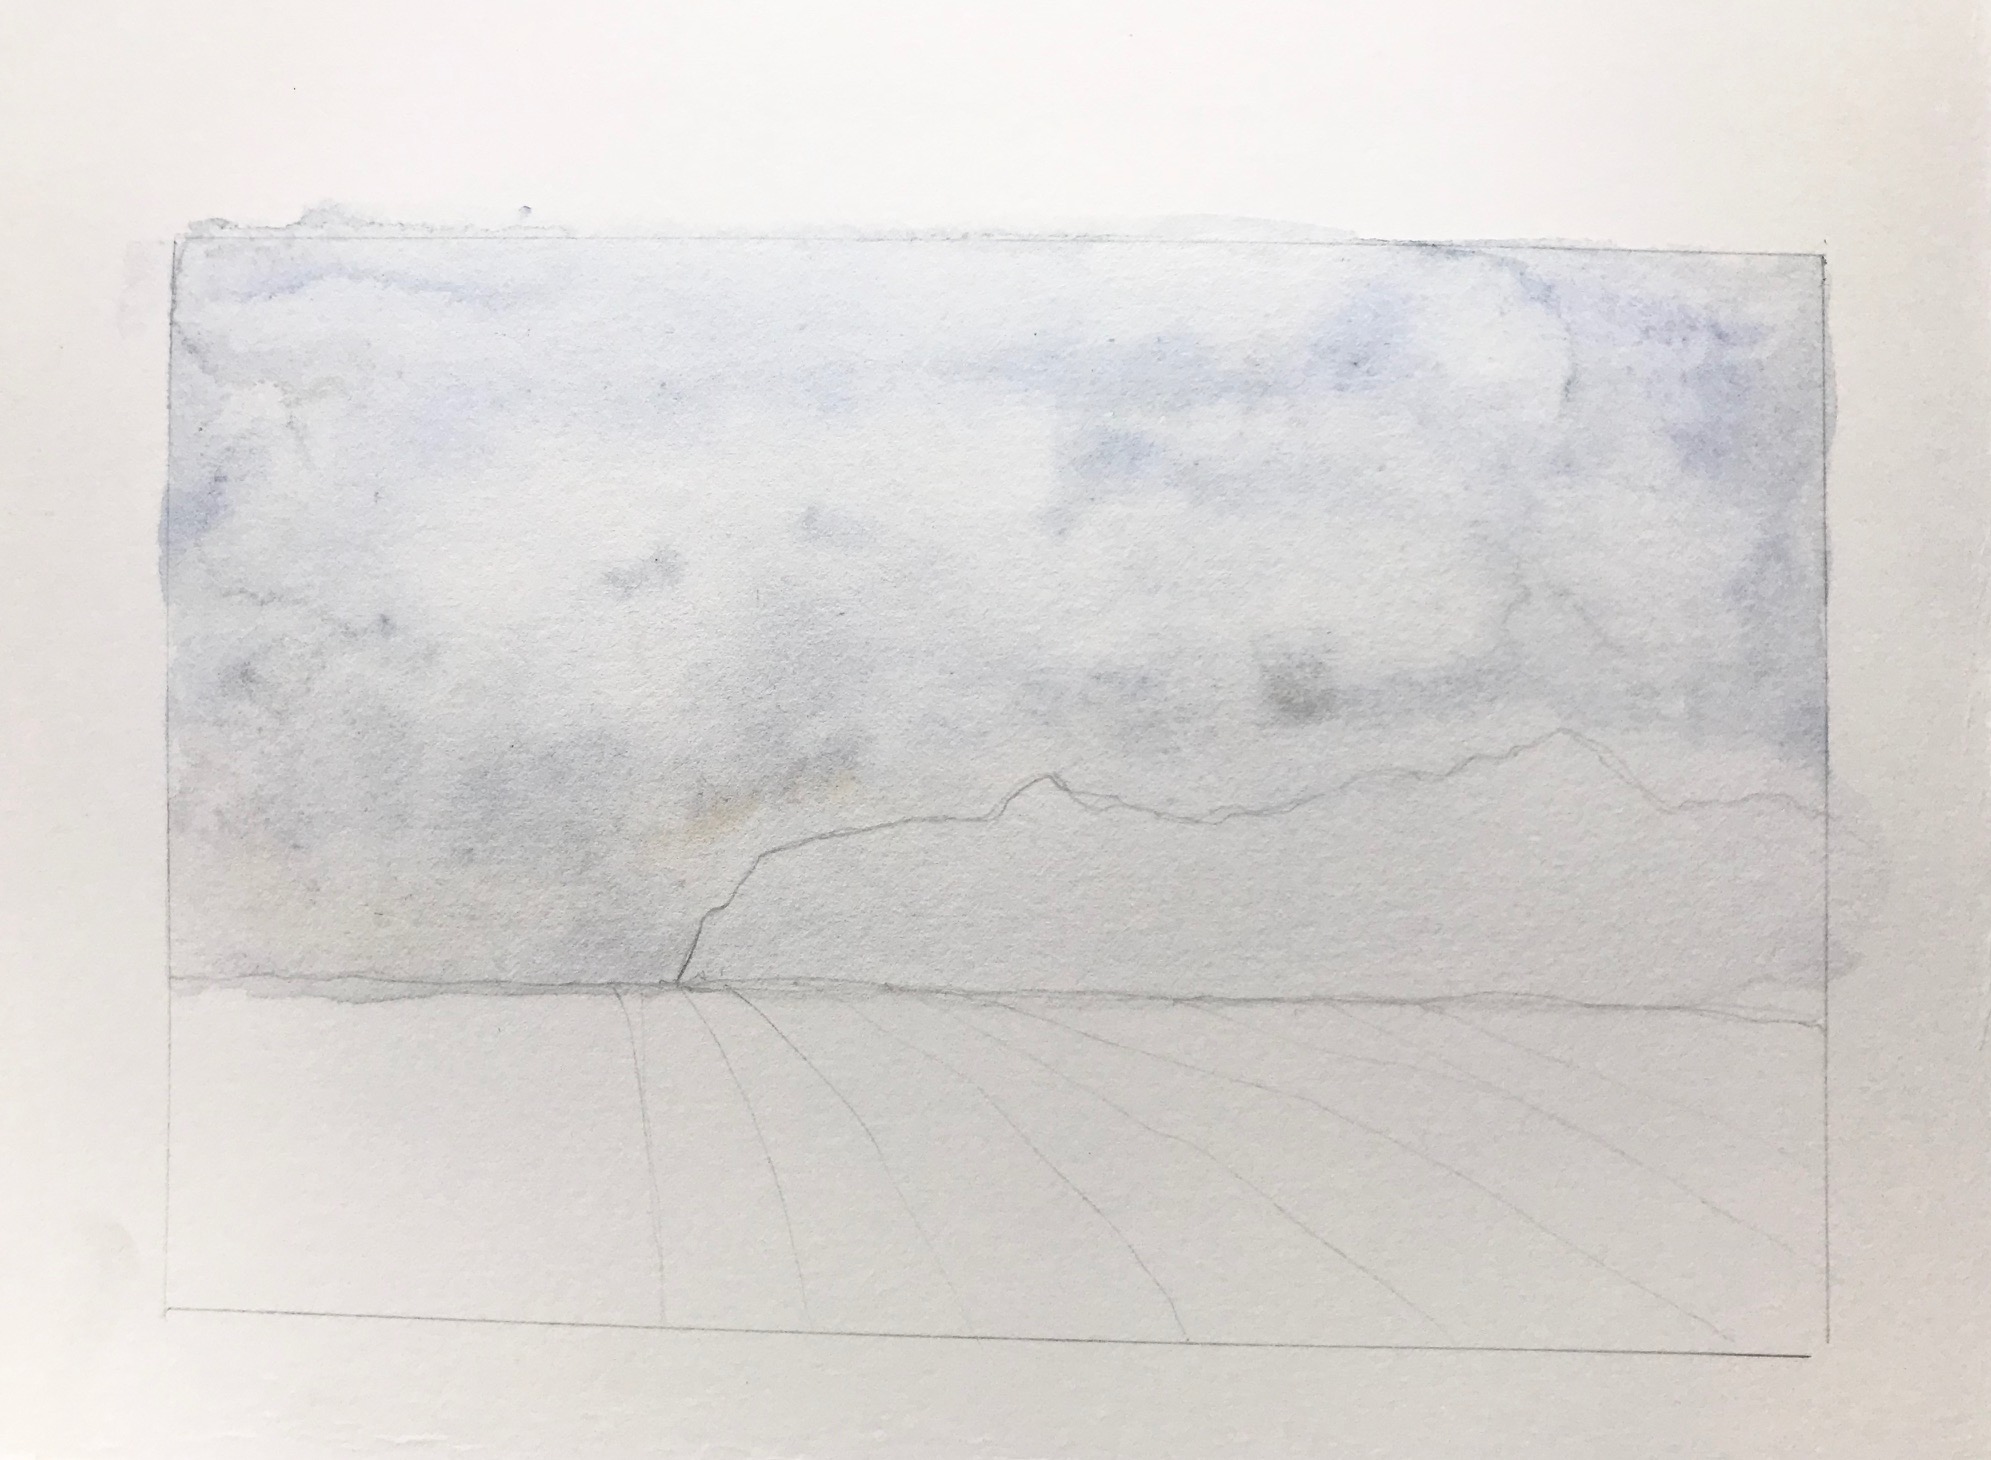 I made a light wash of French ultramarine grayed out just a bit with a touch of burnt sienna. With my pointed round brush I washed on the sky, taking it all the way down to the horizon line, right over the trees.
I added some water to my brush starting at the top of the trees, to create an even lighter mix of grayish blue. Then I dropped in some clean water into the sky to push the blue paint around and suggest clouds. Finally, I dropped in a bit more of the grayish blue mix to suggest some darker shadow areas within the simple sky.
I made a light wash of French ultramarine grayed out just a bit with a touch of burnt sienna. With my pointed round brush I washed on the sky, taking it all the way down to the horizon line, right over the trees.
I added some water to my brush starting at the top of the trees, to create an even lighter mix of grayish blue. Then I dropped in some clean water into the sky to push the blue paint around and suggest clouds. Finally, I dropped in a bit more of the grayish blue mix to suggest some darker shadow areas within the simple sky.
Step 3: Mix colors and prepare to paint the trees
Once the sky is dry, it’s time to begin our trees. I made some puddles of paint on my favorite palette for mixing — a white dinner plate!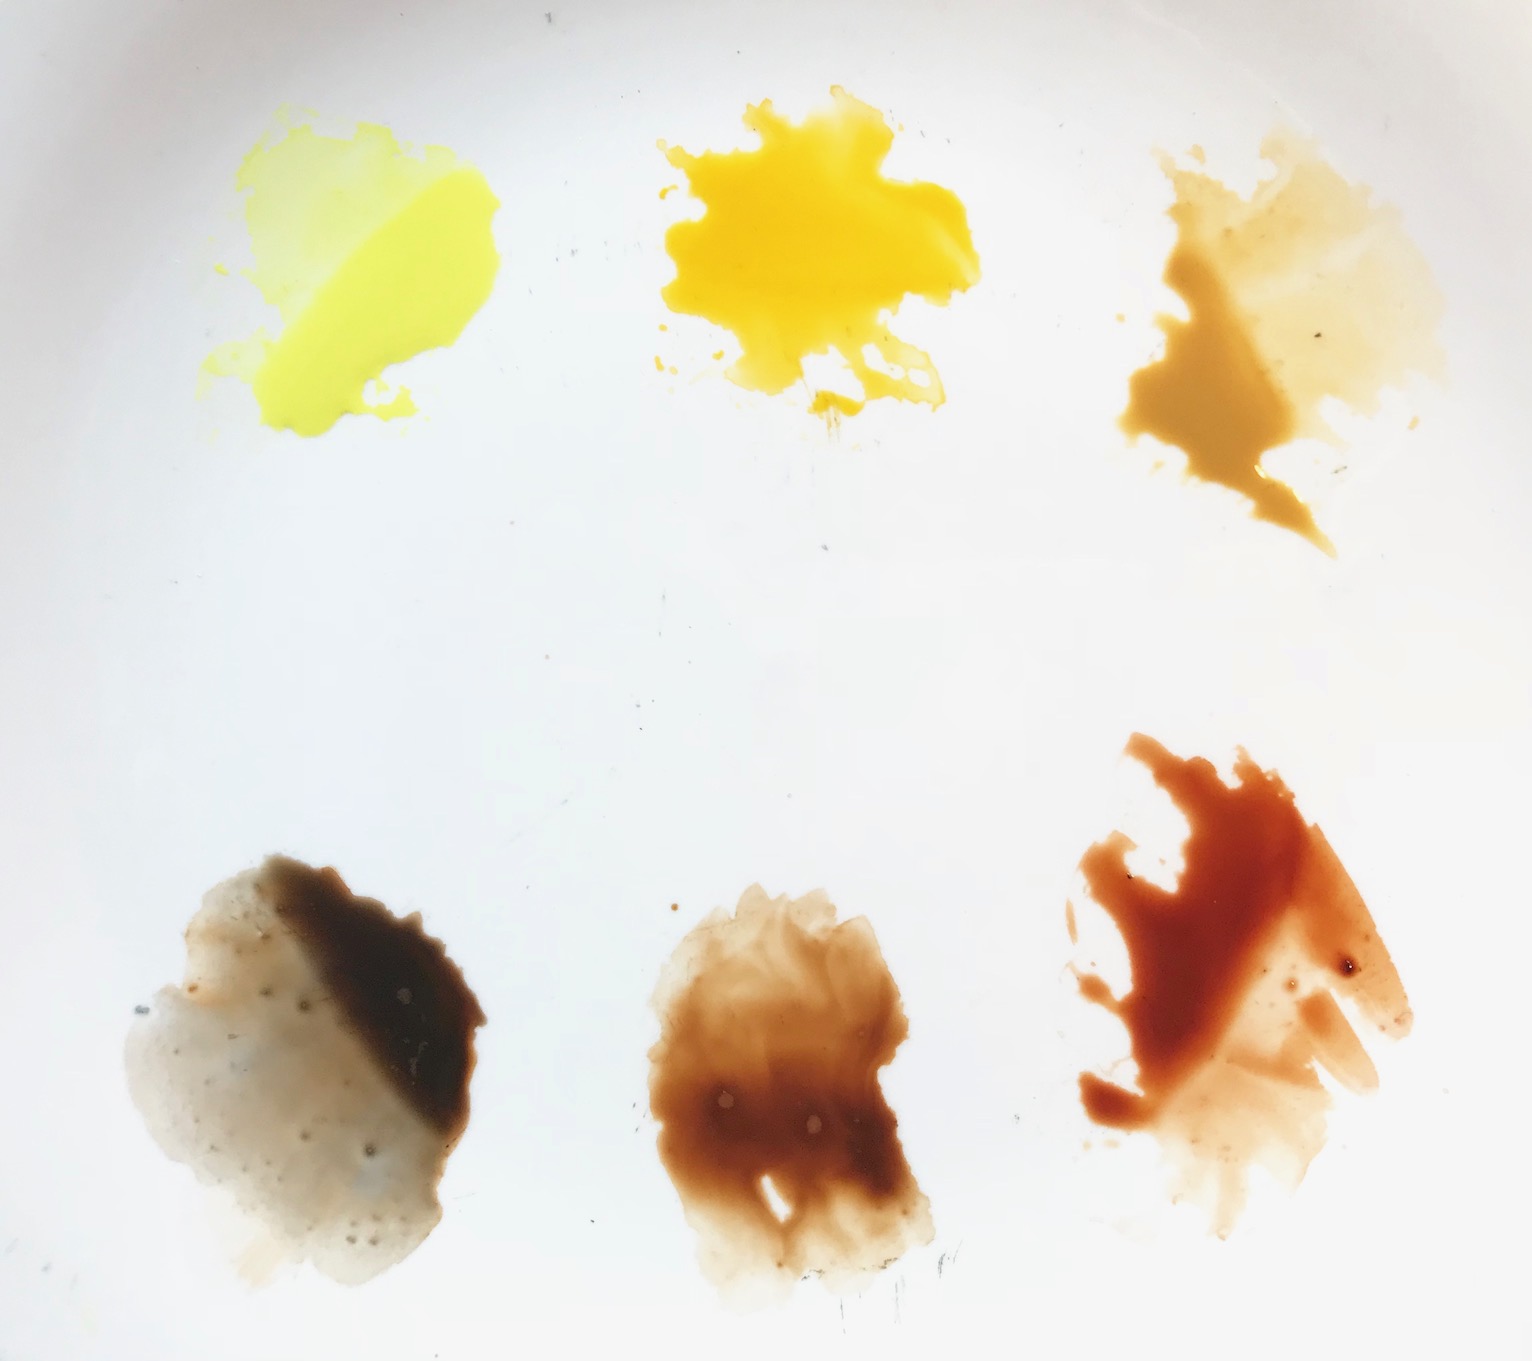 Here you can see hansa yellow light, new gamboge, yellow ochre, burnt sienna and burnt umber. I also created a darker brown by mixing some burnt umber with a bit of French ultramarine blue. (For this project I used Winsor & Newton Professional watercolors, but all brands have a version of these pigments.)
I want to make sure I have one container of clean water. I begin by dipping a clean watercolor brush into this water and dampening the area directly above the tree line that I penciled in. Just a bit — not too wet. This helps the tops of the trees blend softly into the sky.
Here you can see hansa yellow light, new gamboge, yellow ochre, burnt sienna and burnt umber. I also created a darker brown by mixing some burnt umber with a bit of French ultramarine blue. (For this project I used Winsor & Newton Professional watercolors, but all brands have a version of these pigments.)
I want to make sure I have one container of clean water. I begin by dipping a clean watercolor brush into this water and dampening the area directly above the tree line that I penciled in. Just a bit — not too wet. This helps the tops of the trees blend softly into the sky.
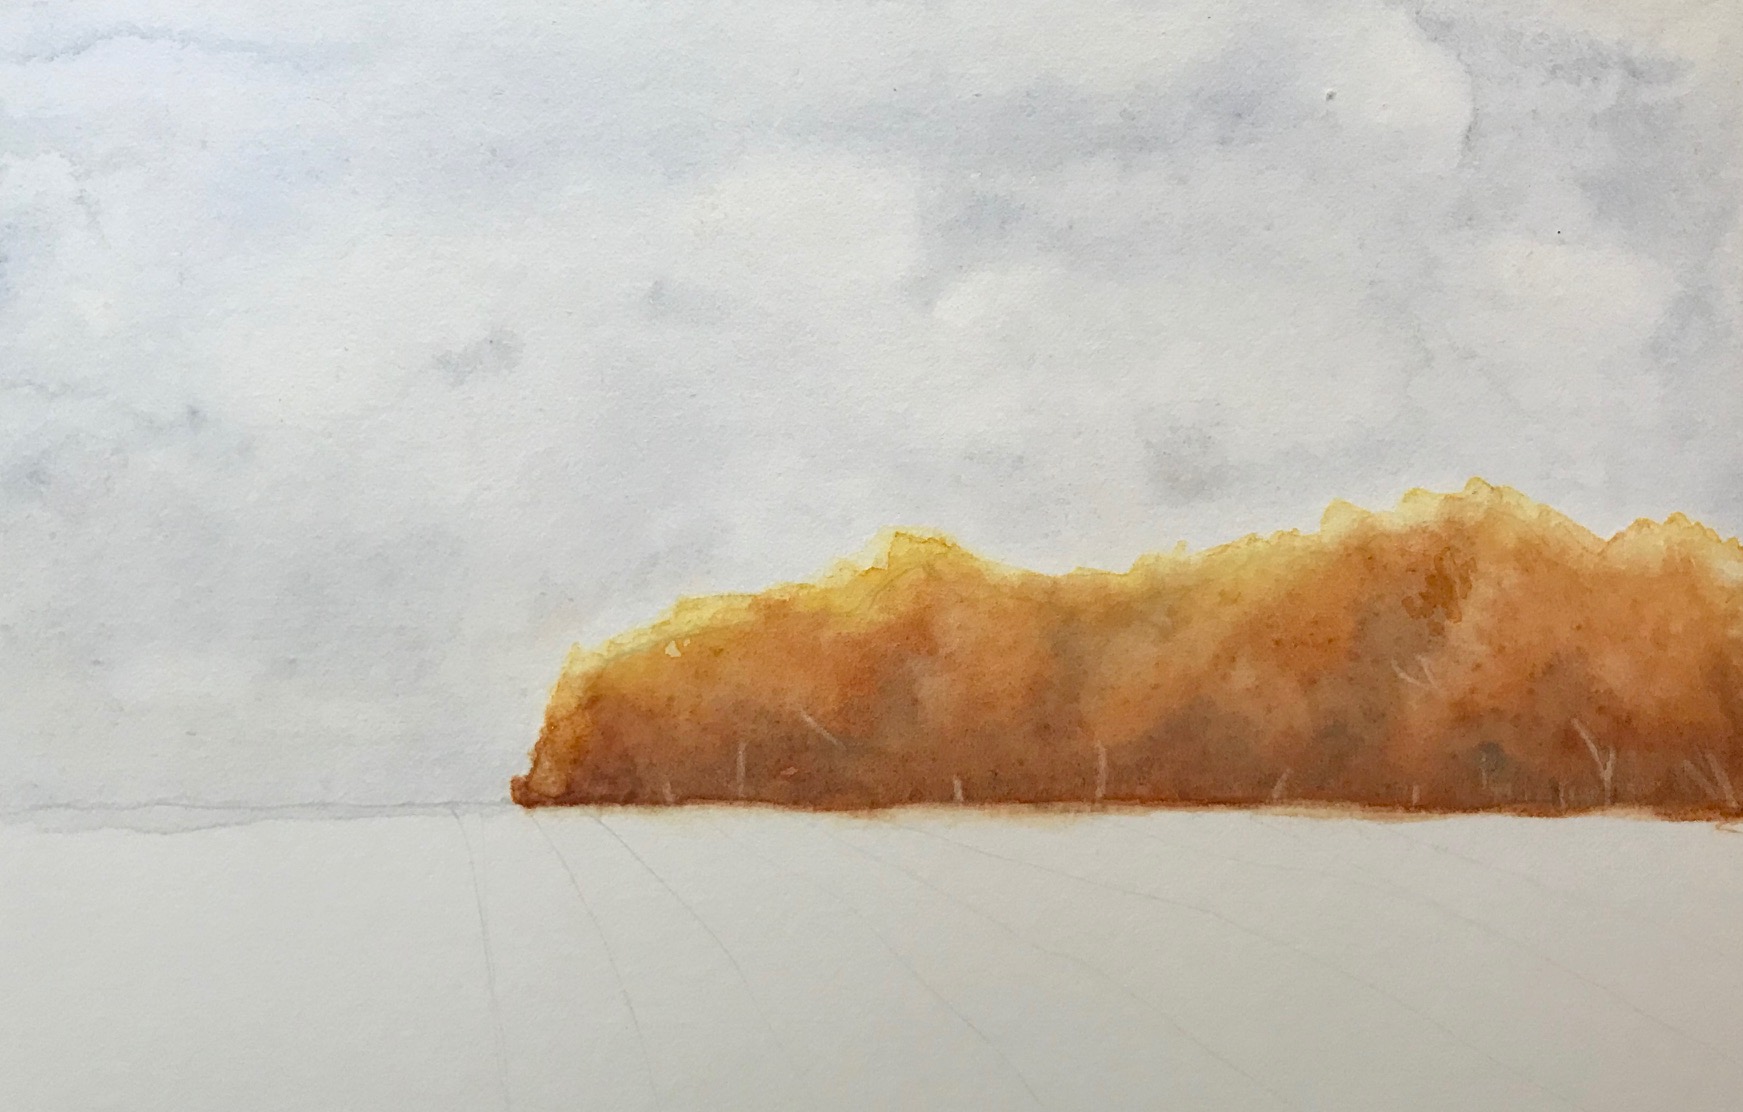
Step 4: Begin painting the trees
Once that area is dampened I begin to work through the colors on my palette, dropping them off the tip of my brush onto the tree area. I begin with hansa yellow light just at the very tips, then add in new gamboge and yellow ochre to pull the golden hues down toward the middle. Be random, and have a light touch.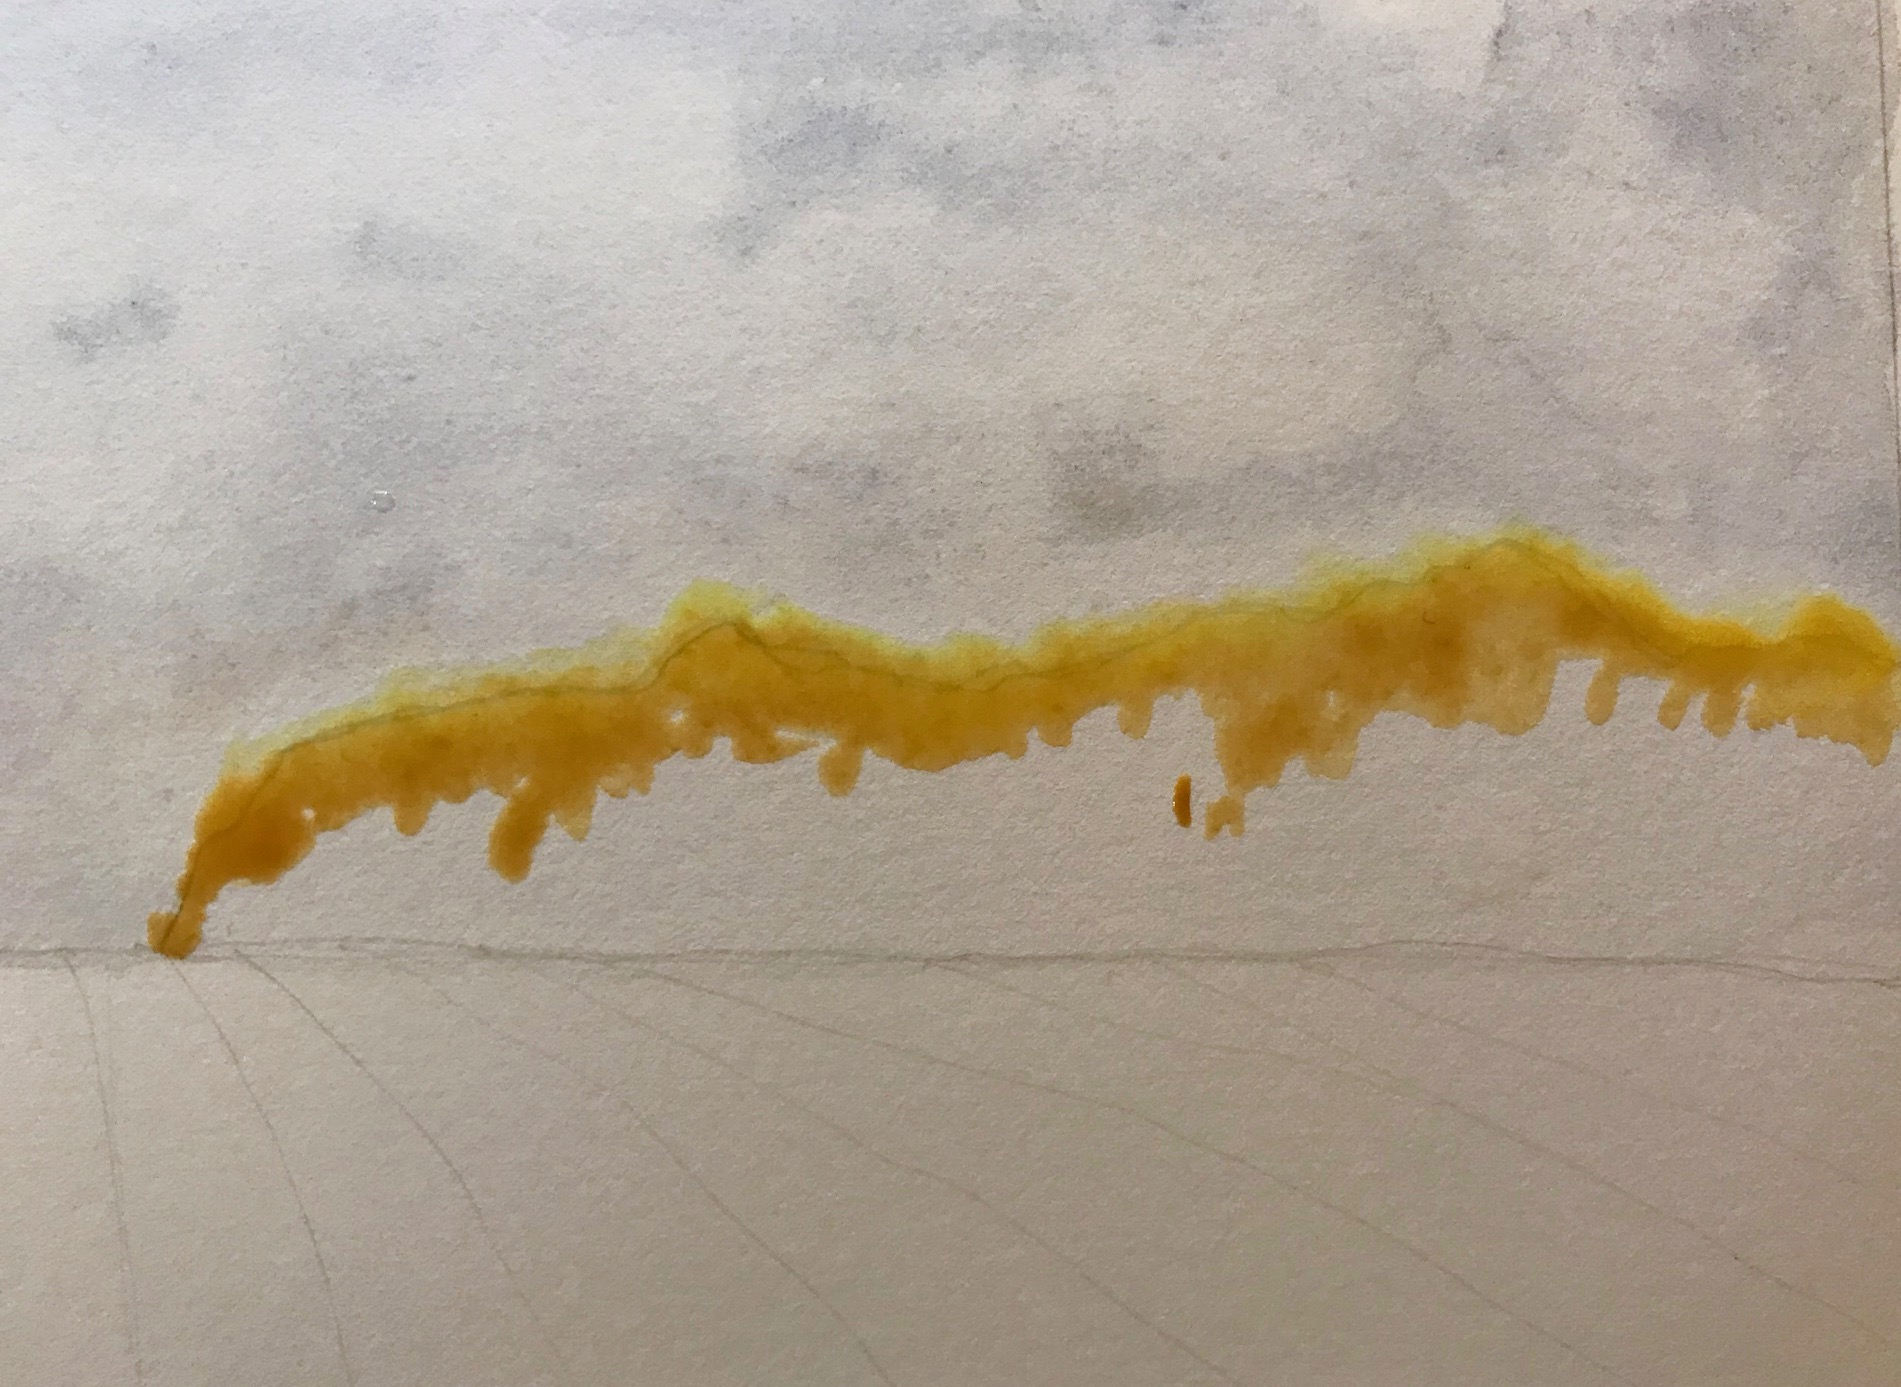 I continue down to the horizon line adding burnt sienna and burnt umber. I finish with a clean damp brush, drawing the paint to the bottom of the trees.
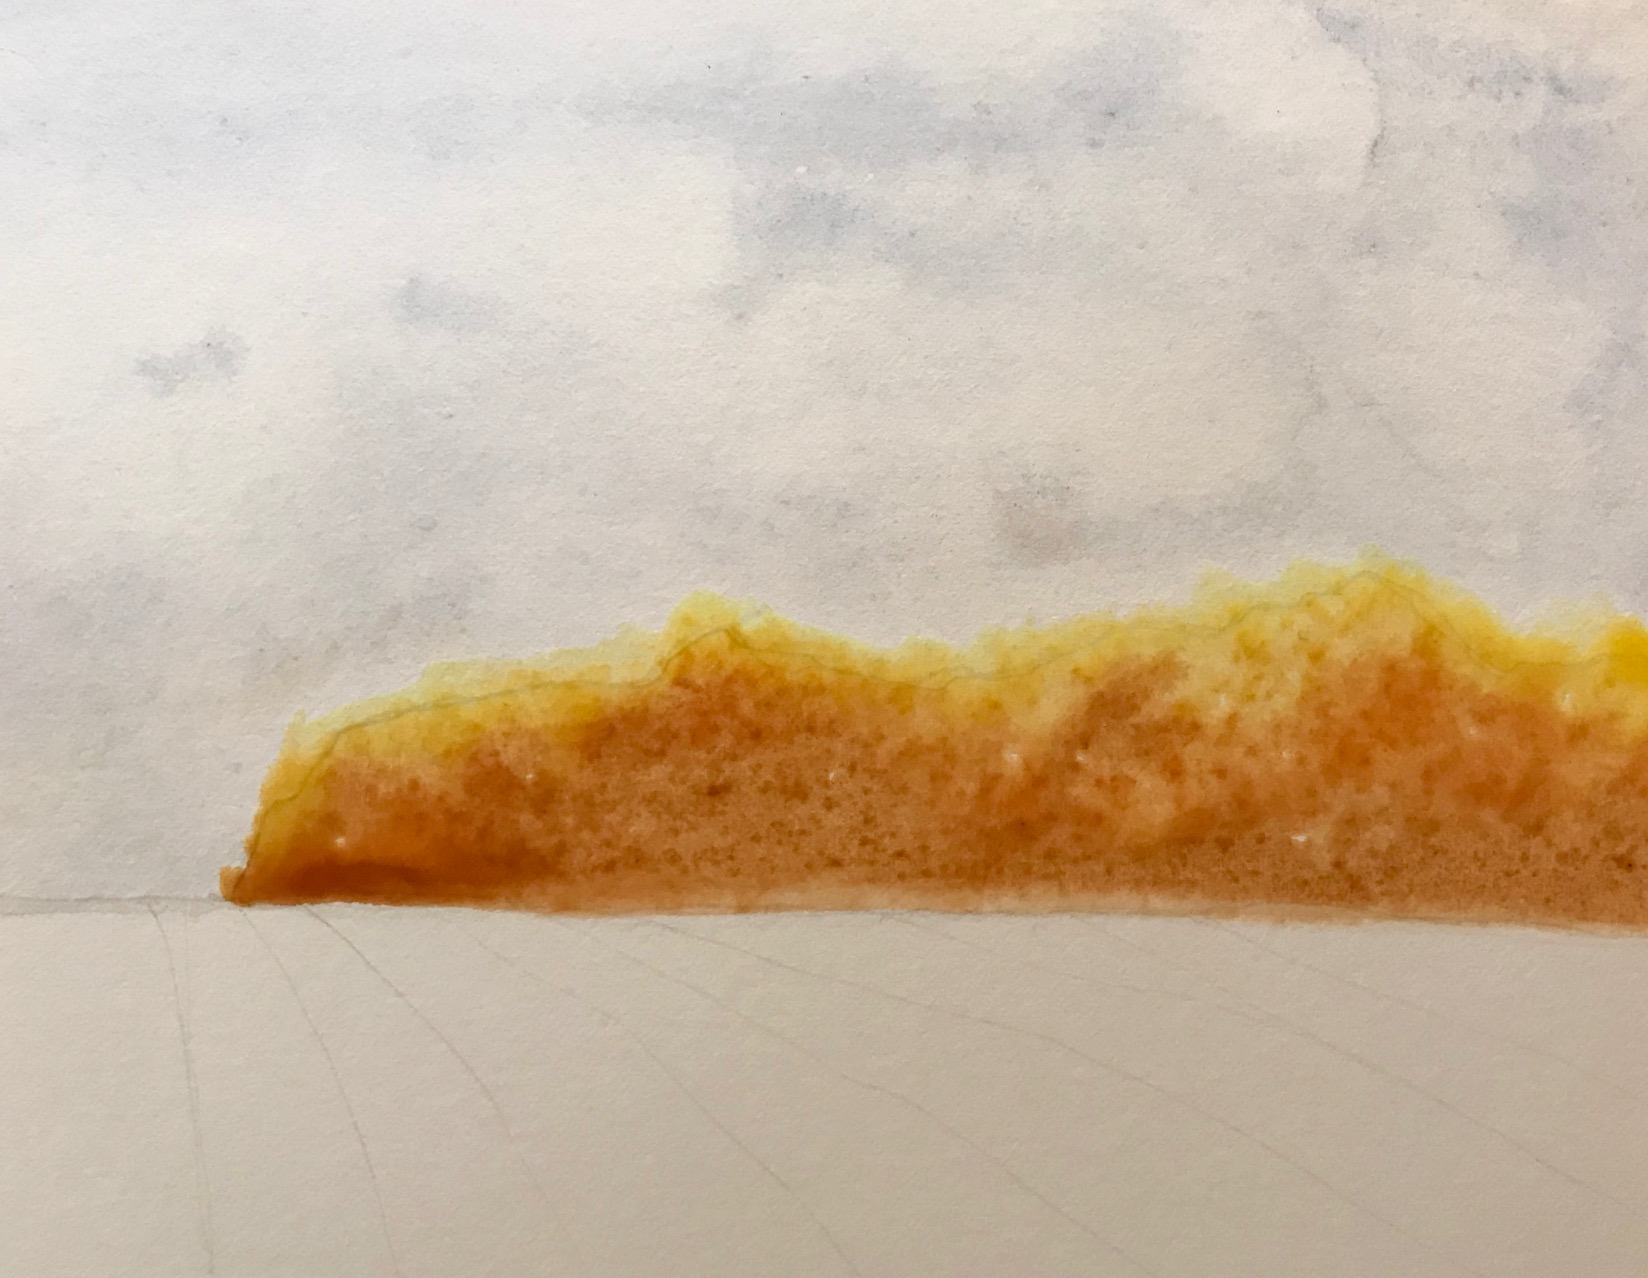 While the paint is still settling, I use a brush wet with clean water and I drop in some water, randomly, to create blooms. Then I leave the painting to dry.
 Once the painting is dry, I begin again by lightly dampening the tree area only, with clean water. Do this gently, just damp, not too much water. Then I repeat the previous steps, dropping in my paints starting with hansa yellow and working my way through to burnt umber at the very bottom.
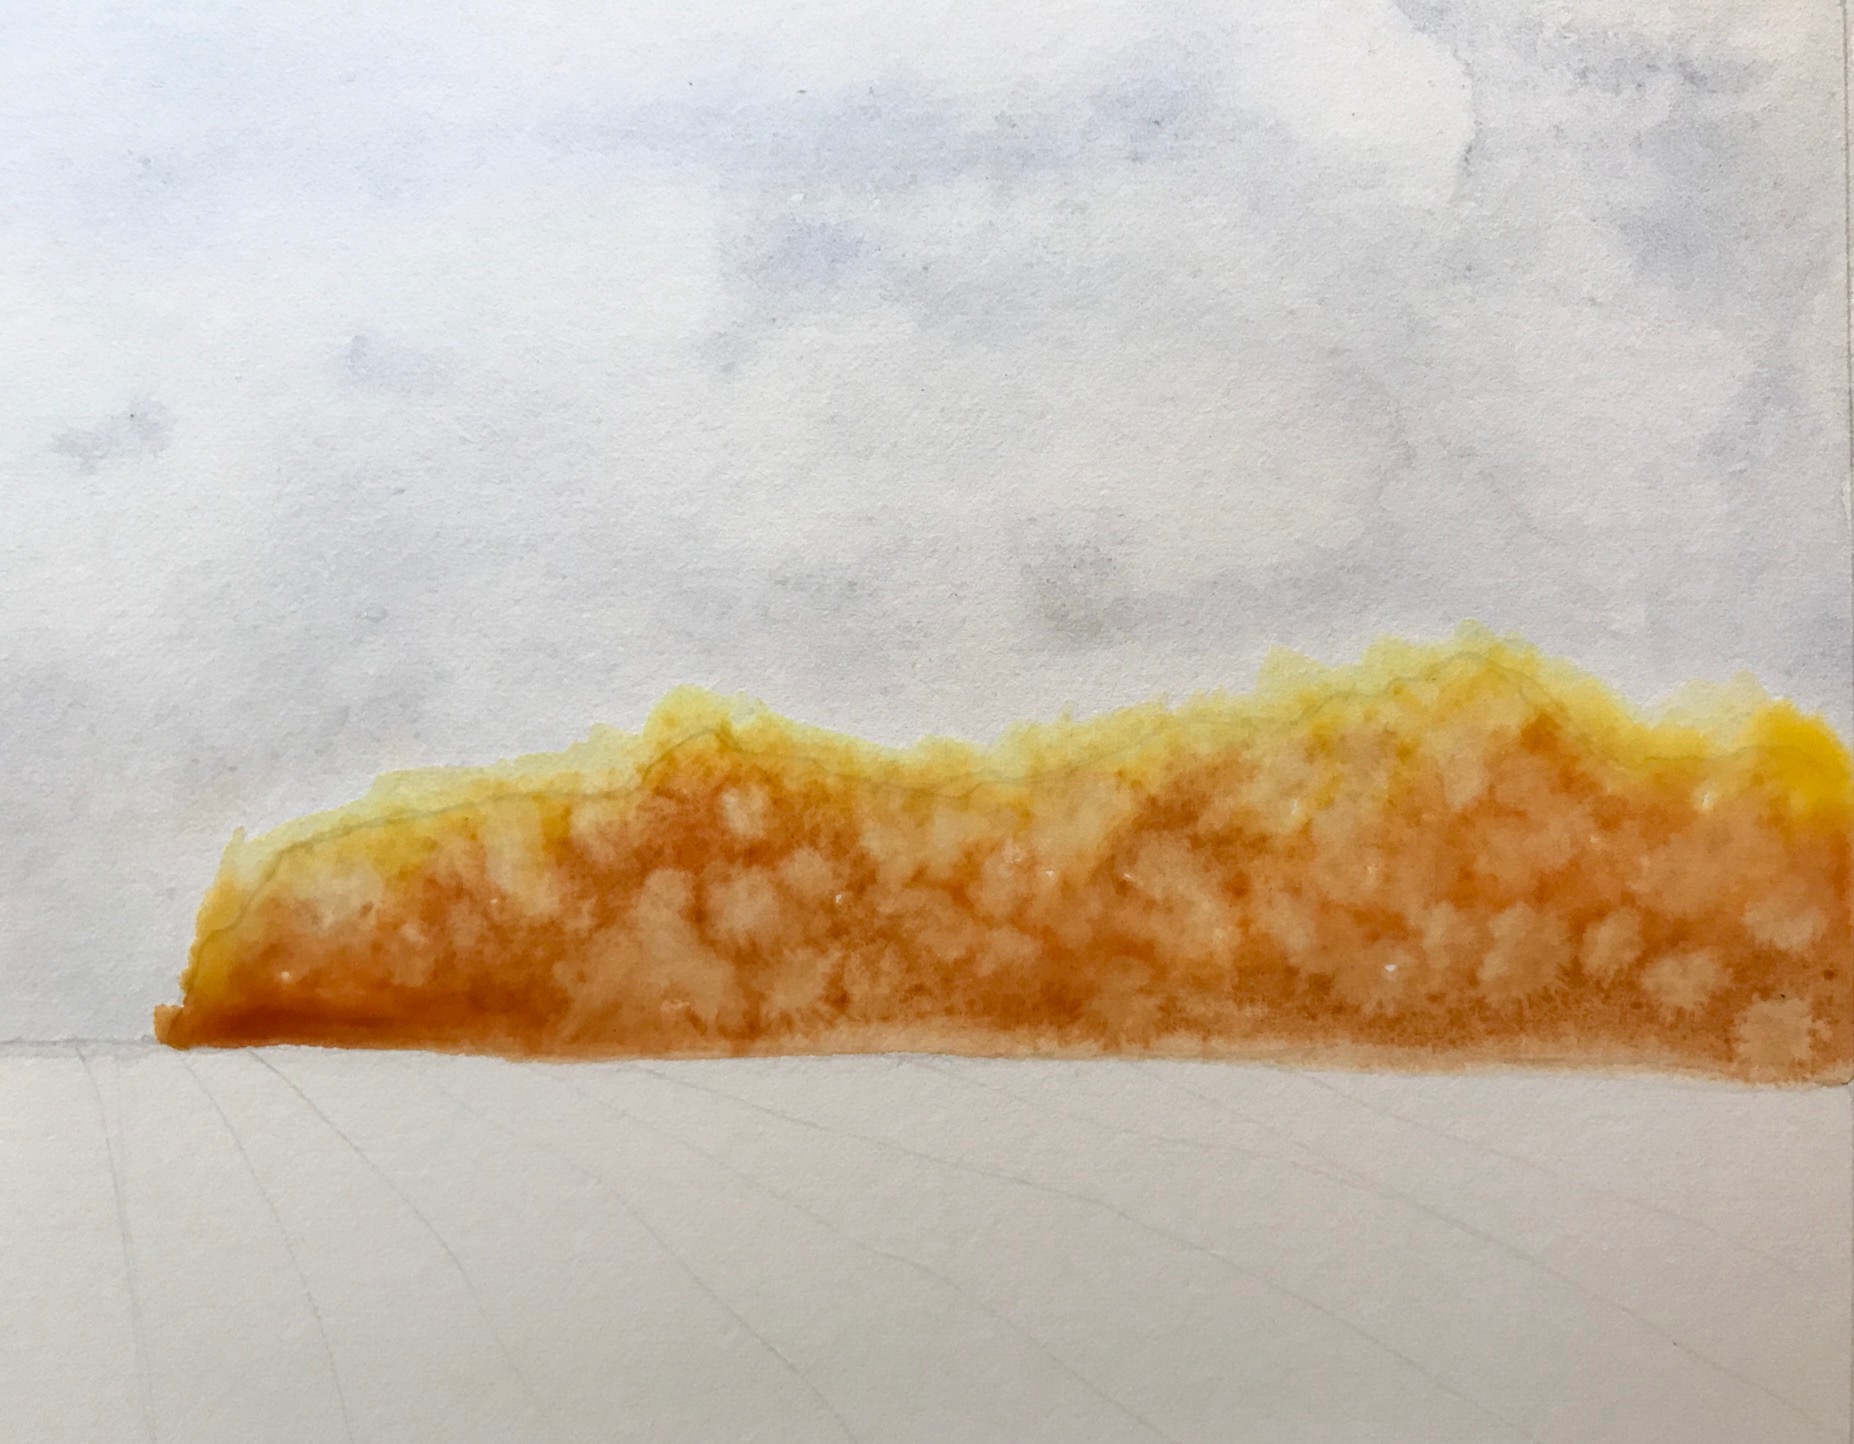
 Now it’s time to wake up that darker burnt umber and French ultramarine mix. I use my pointed round brush to drop it in where there might be shadows in the trees, especially along the lower portion, to create depth. Once this step is done, I let the painting completely dry.

Step 5: Add details to the trees
Once my painting is dry, I want to lift out some tree trunks and branches to give it even more depth. For this I use a stiff, synthetic brush that I purchased exclusively for this purpose. I’m using a Blick Scrubber in size 2 and a DaVinci Nova pointed round in size 0.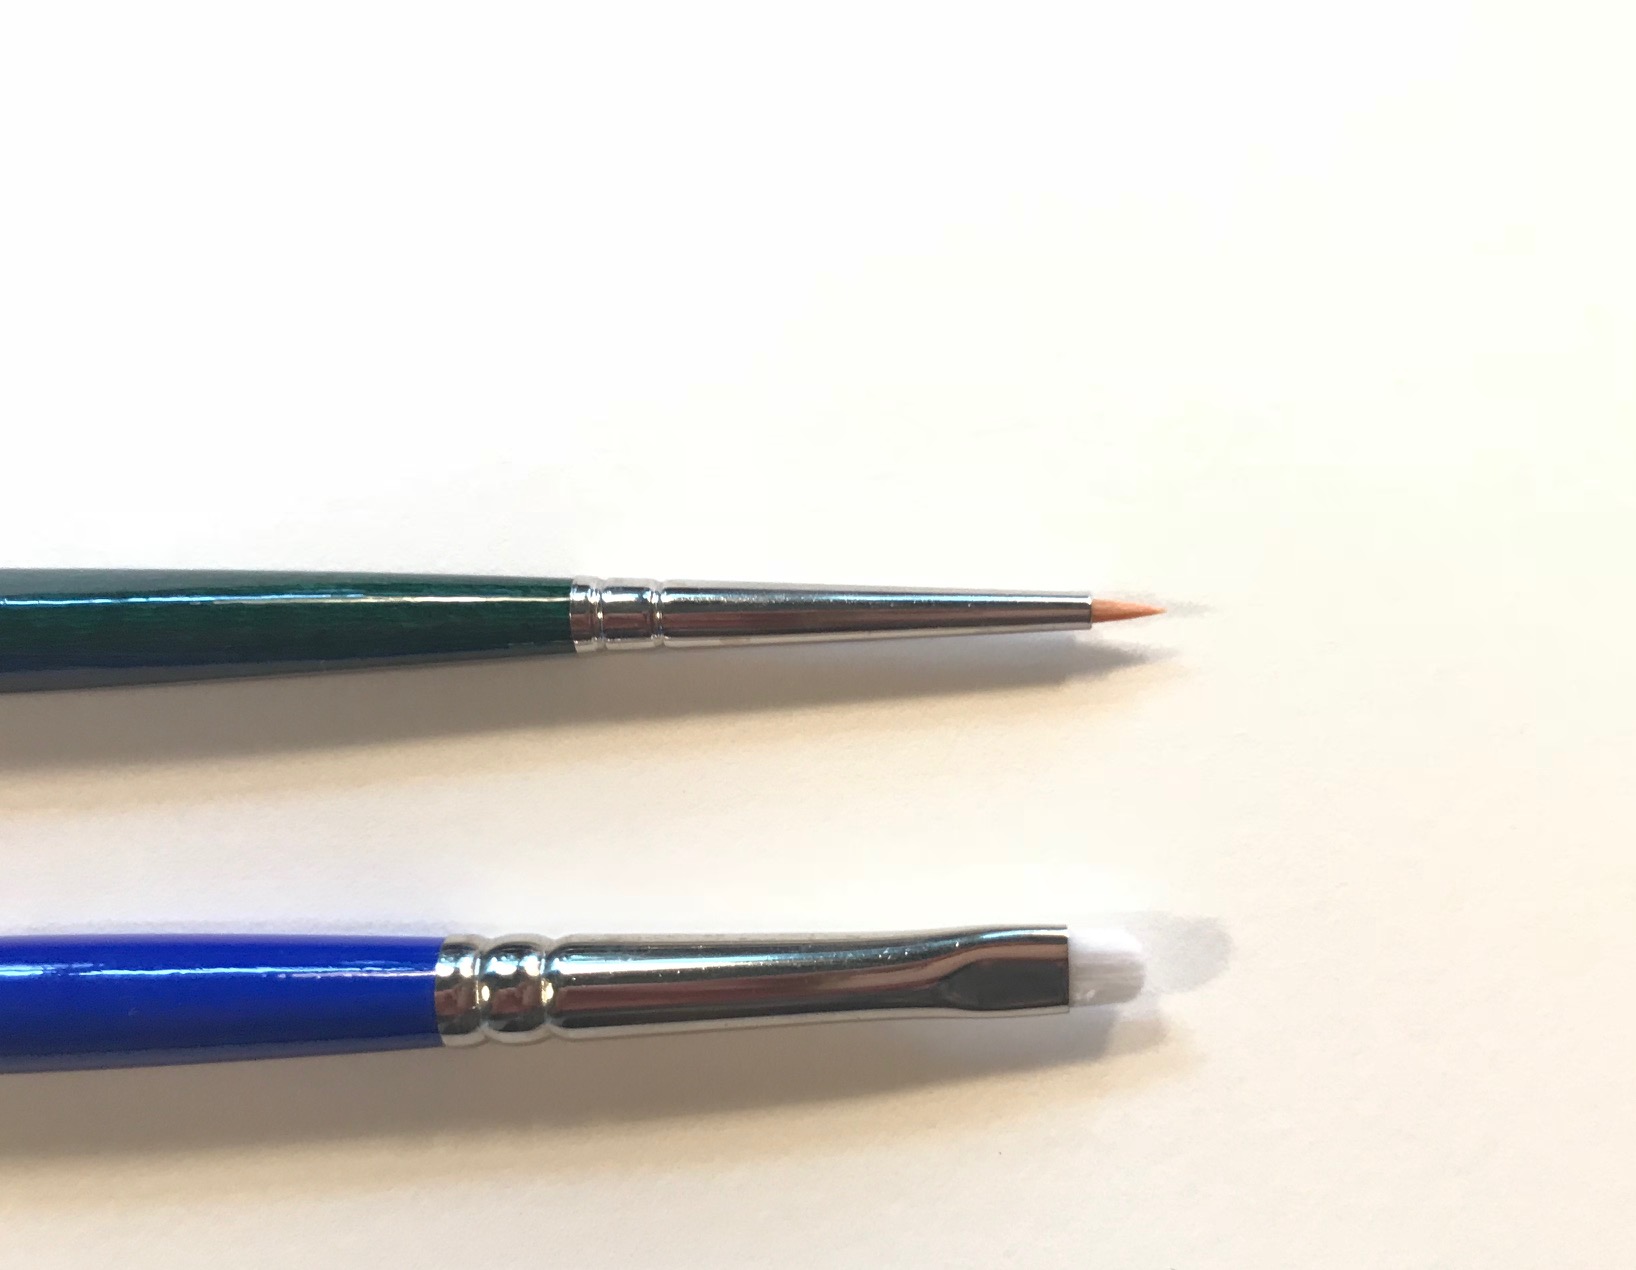 I want to make sure I have a container of clean water, and a small piece of clean, dry kitchen towel (paper towel) or Kleenex.
Lifting is a wonderful tool to create softer edges, and also to make a spot of light in an otherwise darker area. To lift, use a stiff brush and dampen it with clean water. Then lightly move the tip of the brush back forth over the area where you want to create light or that softer edge.
I want to make sure I have a container of clean water, and a small piece of clean, dry kitchen towel (paper towel) or Kleenex.
Lifting is a wonderful tool to create softer edges, and also to make a spot of light in an otherwise darker area. To lift, use a stiff brush and dampen it with clean water. Then lightly move the tip of the brush back forth over the area where you want to create light or that softer edge.
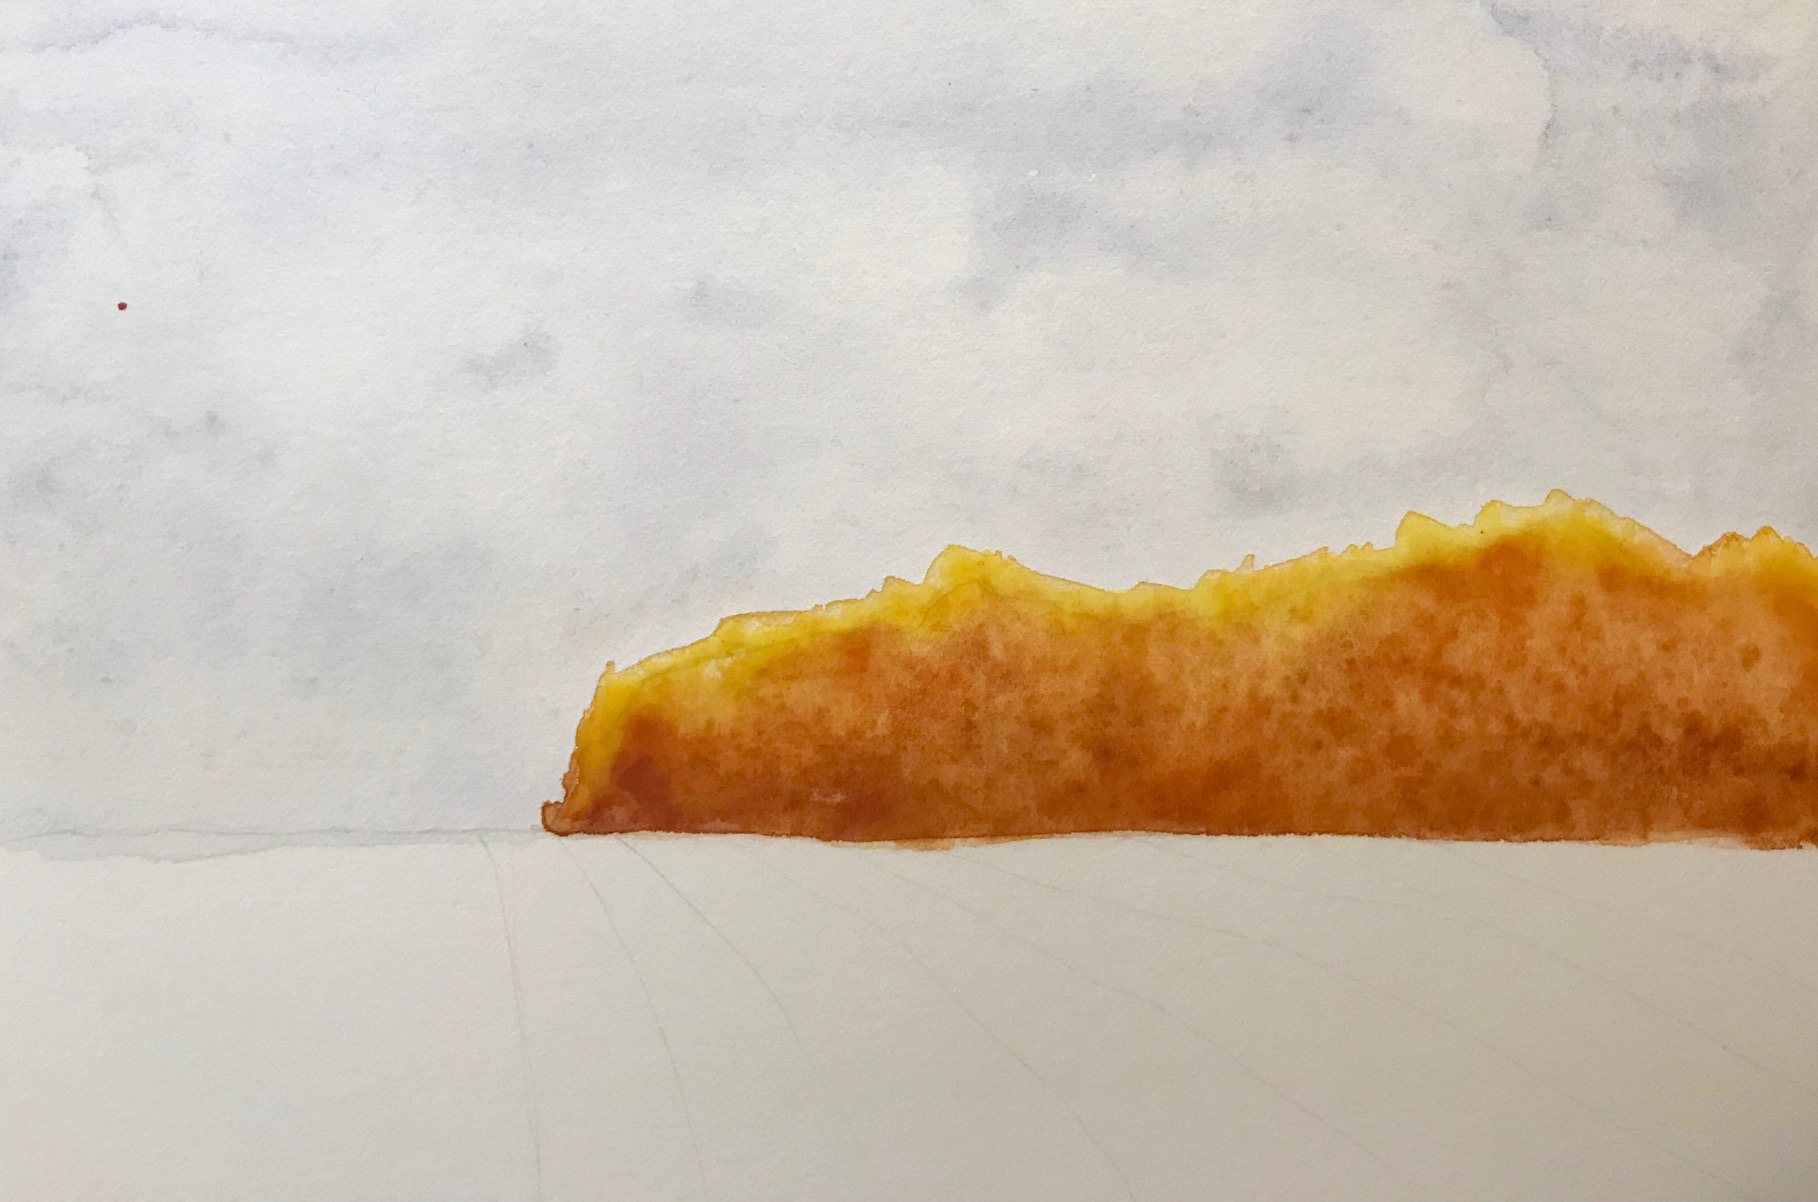
 In this painting, I began by using the small, flat scrubber brush dampened with clean water to soften the top of the tree line, and also the area where the trees meet the field. After I did the lifting motion, I dabbed up the loosened paint with a clean piece of kitchen towel.
Then I moved on to the trees, using the size 0 pointed round to lightly suggest tree trunks and branches, always using clean water and immediately lifting up the loosened paint with the clean paper towel. You can see my results in the photo above.
In this painting, I began by using the small, flat scrubber brush dampened with clean water to soften the top of the tree line, and also the area where the trees meet the field. After I did the lifting motion, I dabbed up the loosened paint with a clean piece of kitchen towel.
Then I moved on to the trees, using the size 0 pointed round to lightly suggest tree trunks and branches, always using clean water and immediately lifting up the loosened paint with the clean paper towel. You can see my results in the photo above.
Step 6: Paint the field
Now that the trees and sky are finished, it’s time to paint the field. I used a few of the same pigments from the rest of the painting, to keep color harmony in my work. I started with a fresh dinner plate and added a puddle of hansa yellow light, yellow ochre and burnt umber, and a larger puddle of the burnt umber and French ultramarine mix.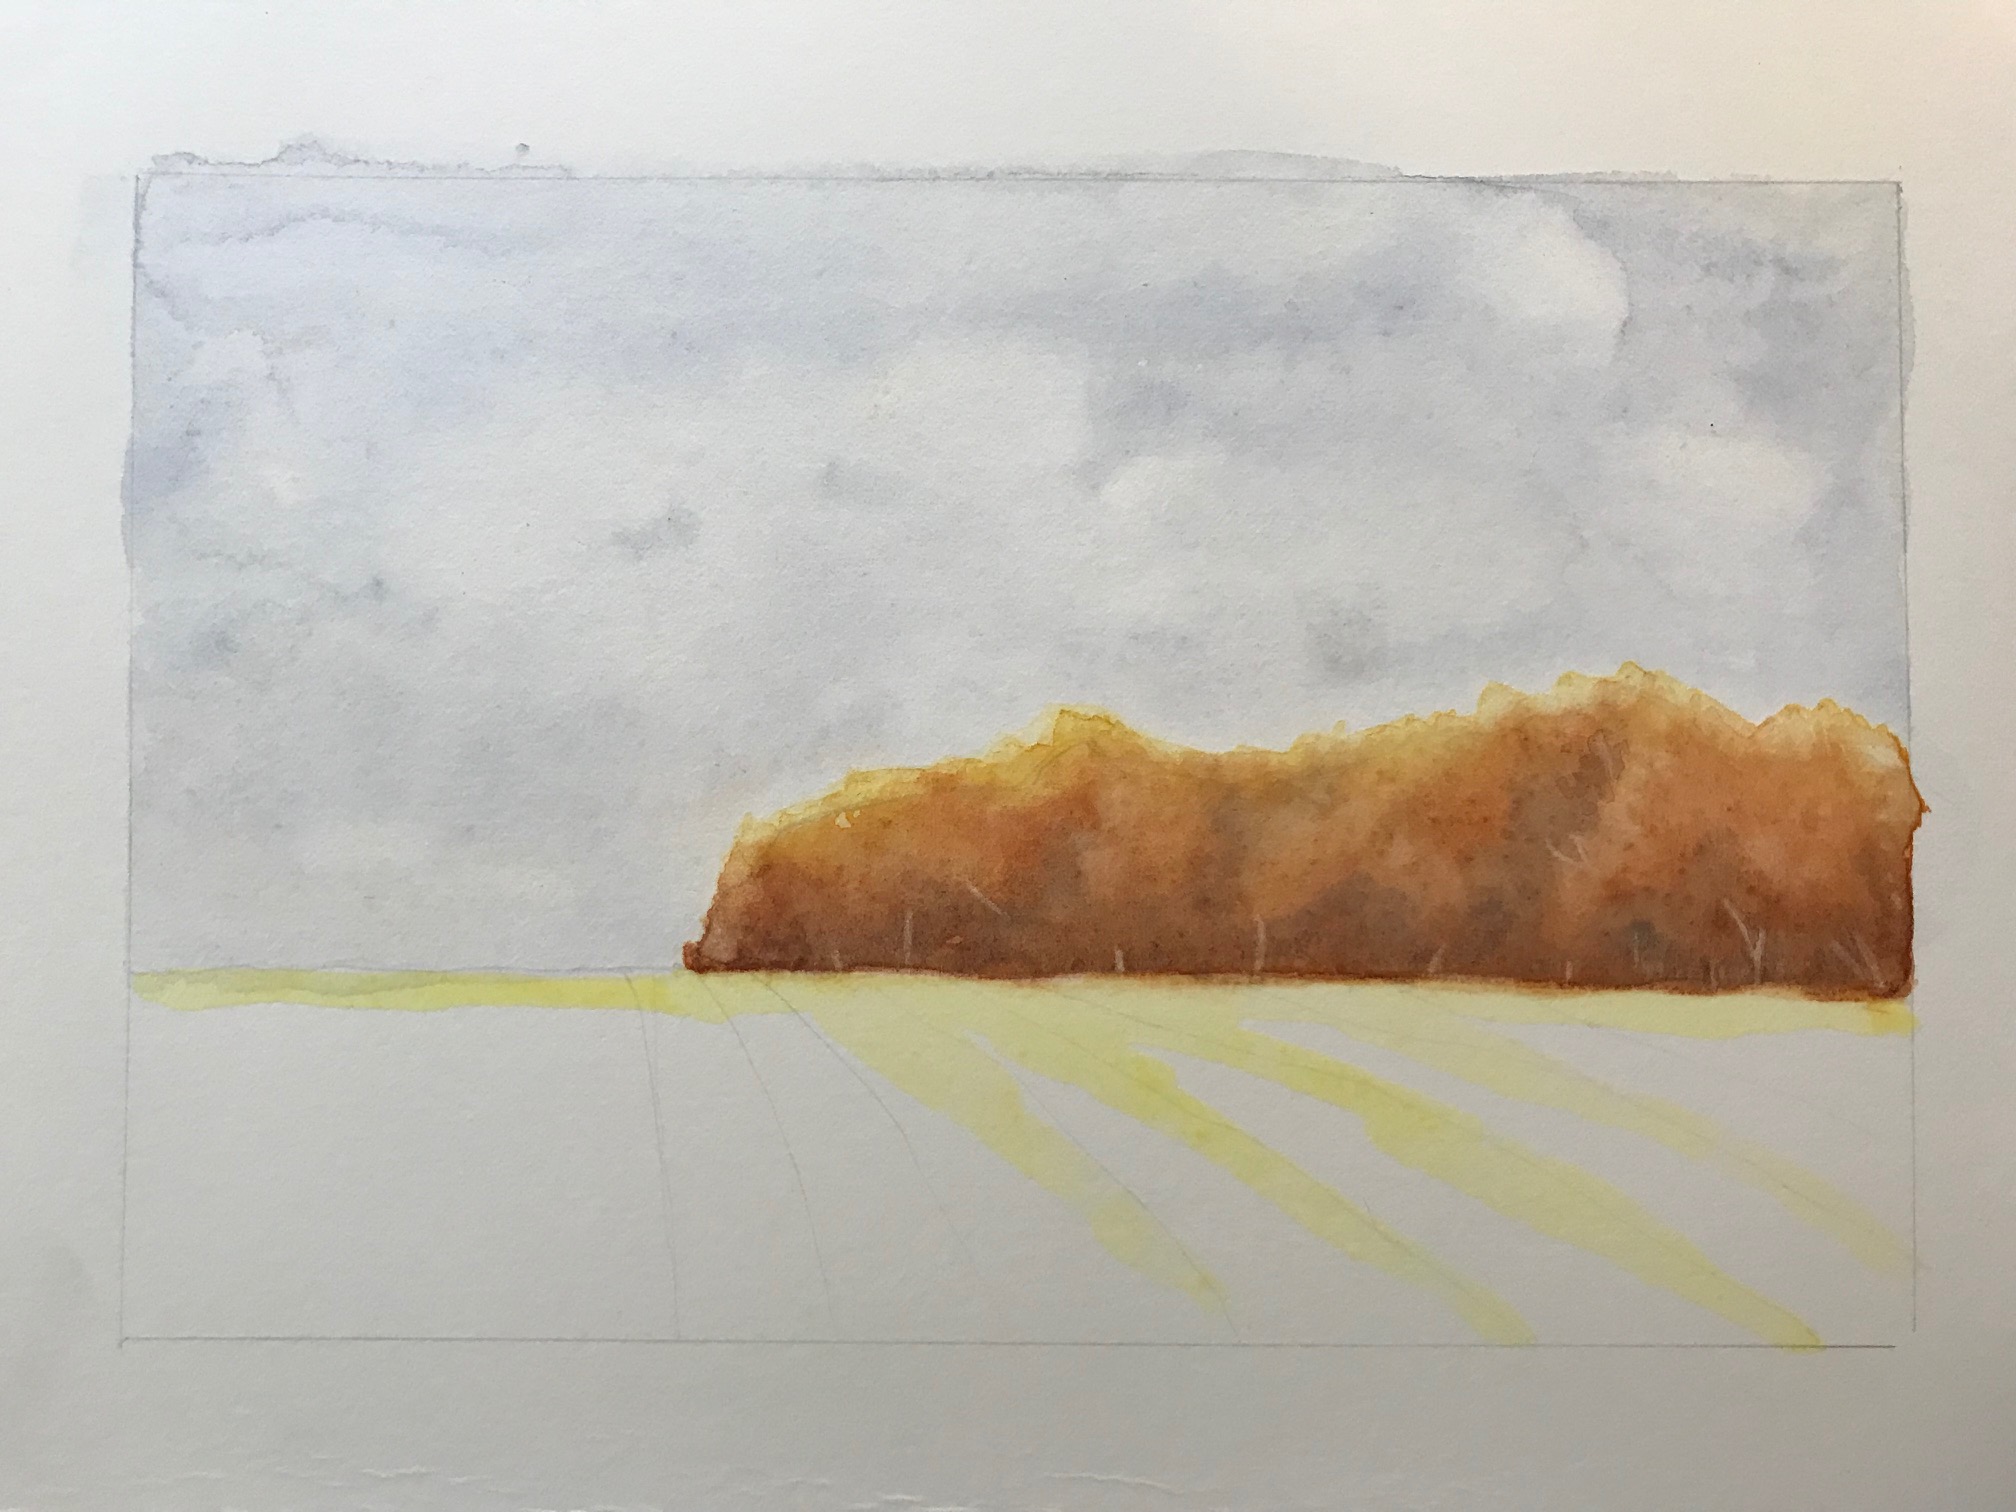 I begin with the hansa yellow light, laying down color where I want the sun to shine brightest on the field, especially at the very top, always following the direction of the land as I had indicated with the lines on the field in my drawing.
I then begin to add in the yellow ochre paint, following those directional pencil lines, working down the field about halfway.
I begin with the hansa yellow light, laying down color where I want the sun to shine brightest on the field, especially at the very top, always following the direction of the land as I had indicated with the lines on the field in my drawing.
I then begin to add in the yellow ochre paint, following those directional pencil lines, working down the field about halfway.
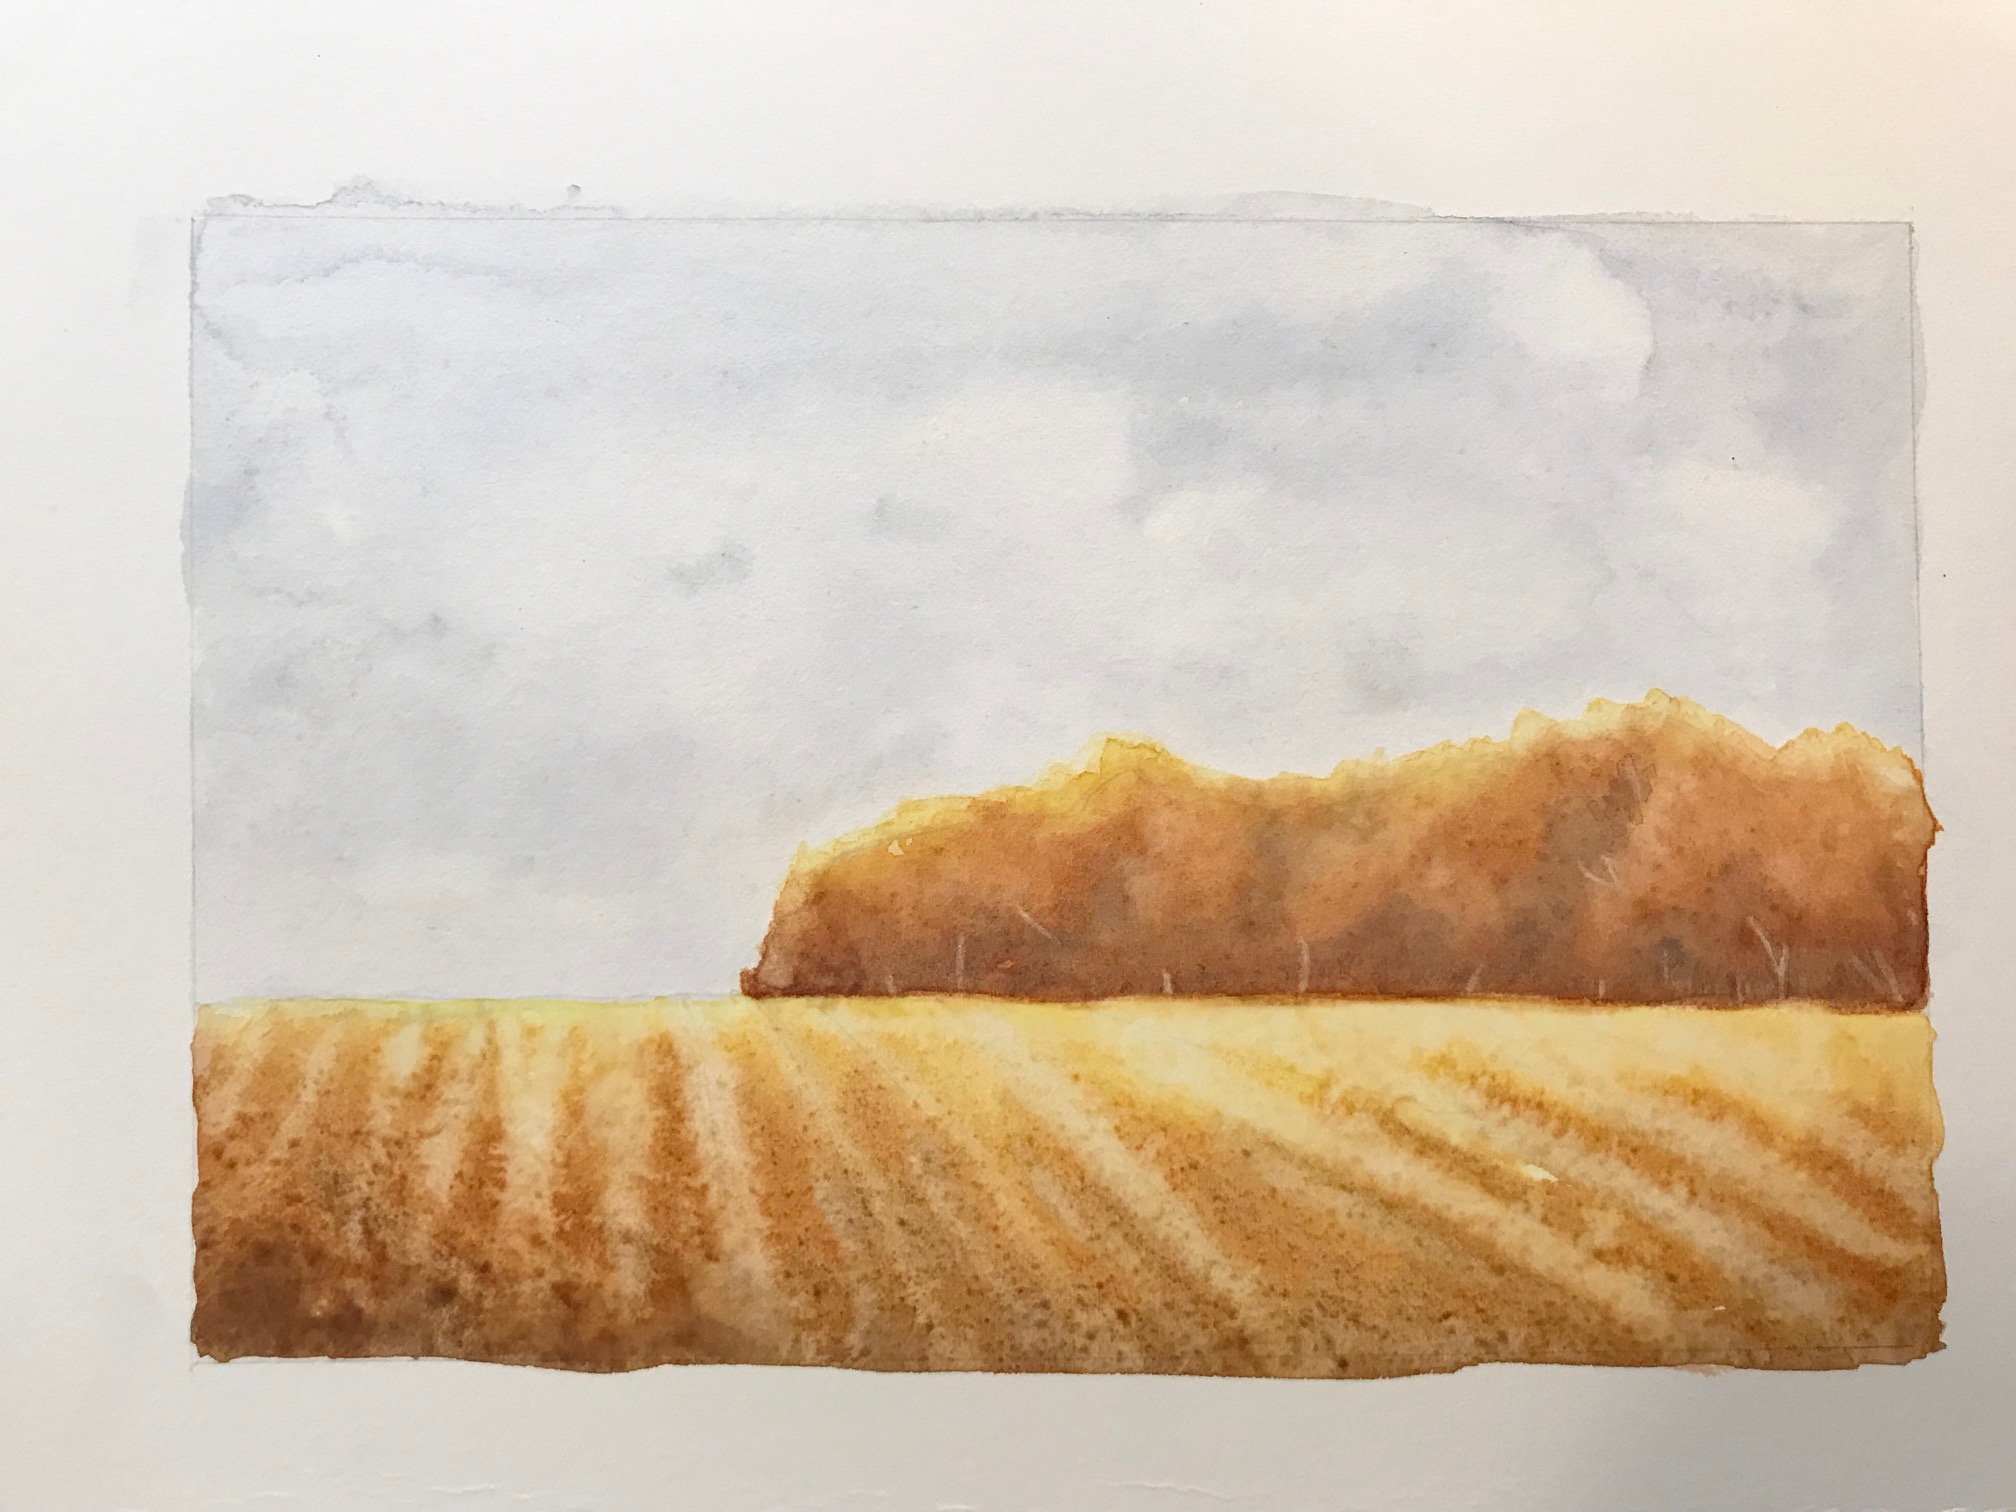
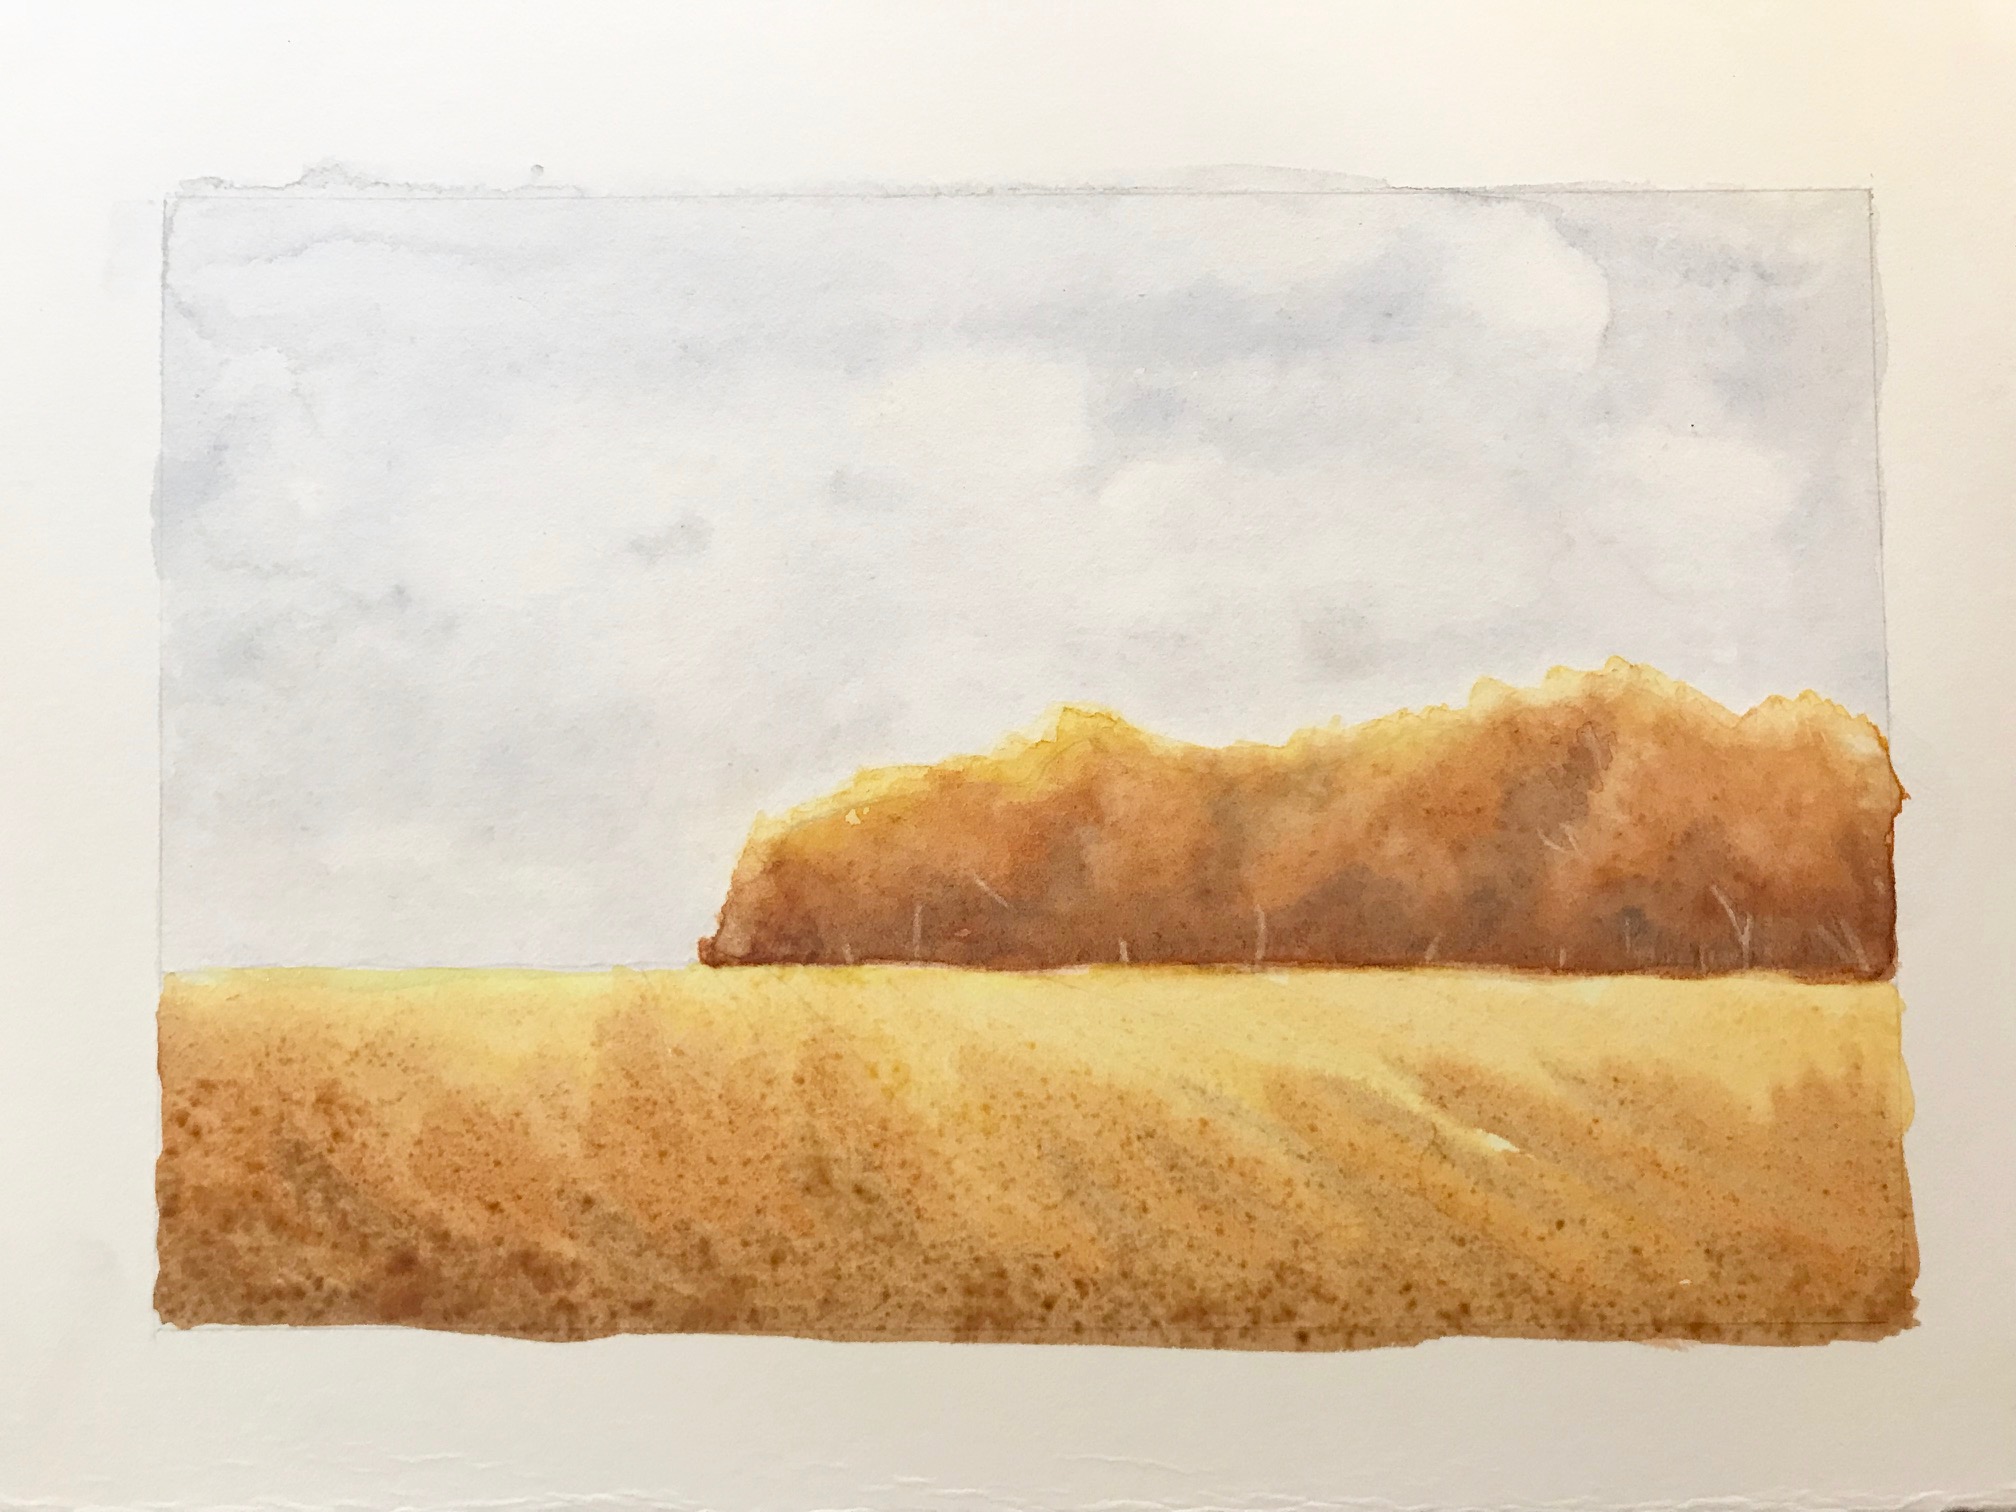 Now it’s time too add some clean water by dropping it in to the area directly to the right of the darkest diagonal lines I have made with the burnt umber mix. This creates both depth and texture, giving the illusion of tall grasses and corn stubble. Once this layer is dry, I will add the finishing touches.
Step 7: Finishing touches
 For the final touches, I want to highlight some of the texture in the field by lifting out some lines to suggest corn stalks. Using the size 0 pointed round lifting brush and the same technique used to create the tree trunks, I randomly lift out thin lines here and there.
I also use the same brush to paint in a few wispy reeds of grass with some watered down burnt umber. I can accentuate the right sides of the corn stalks, too. If I ever put too much paint down I can always blot it up with some clean kitchen towel.
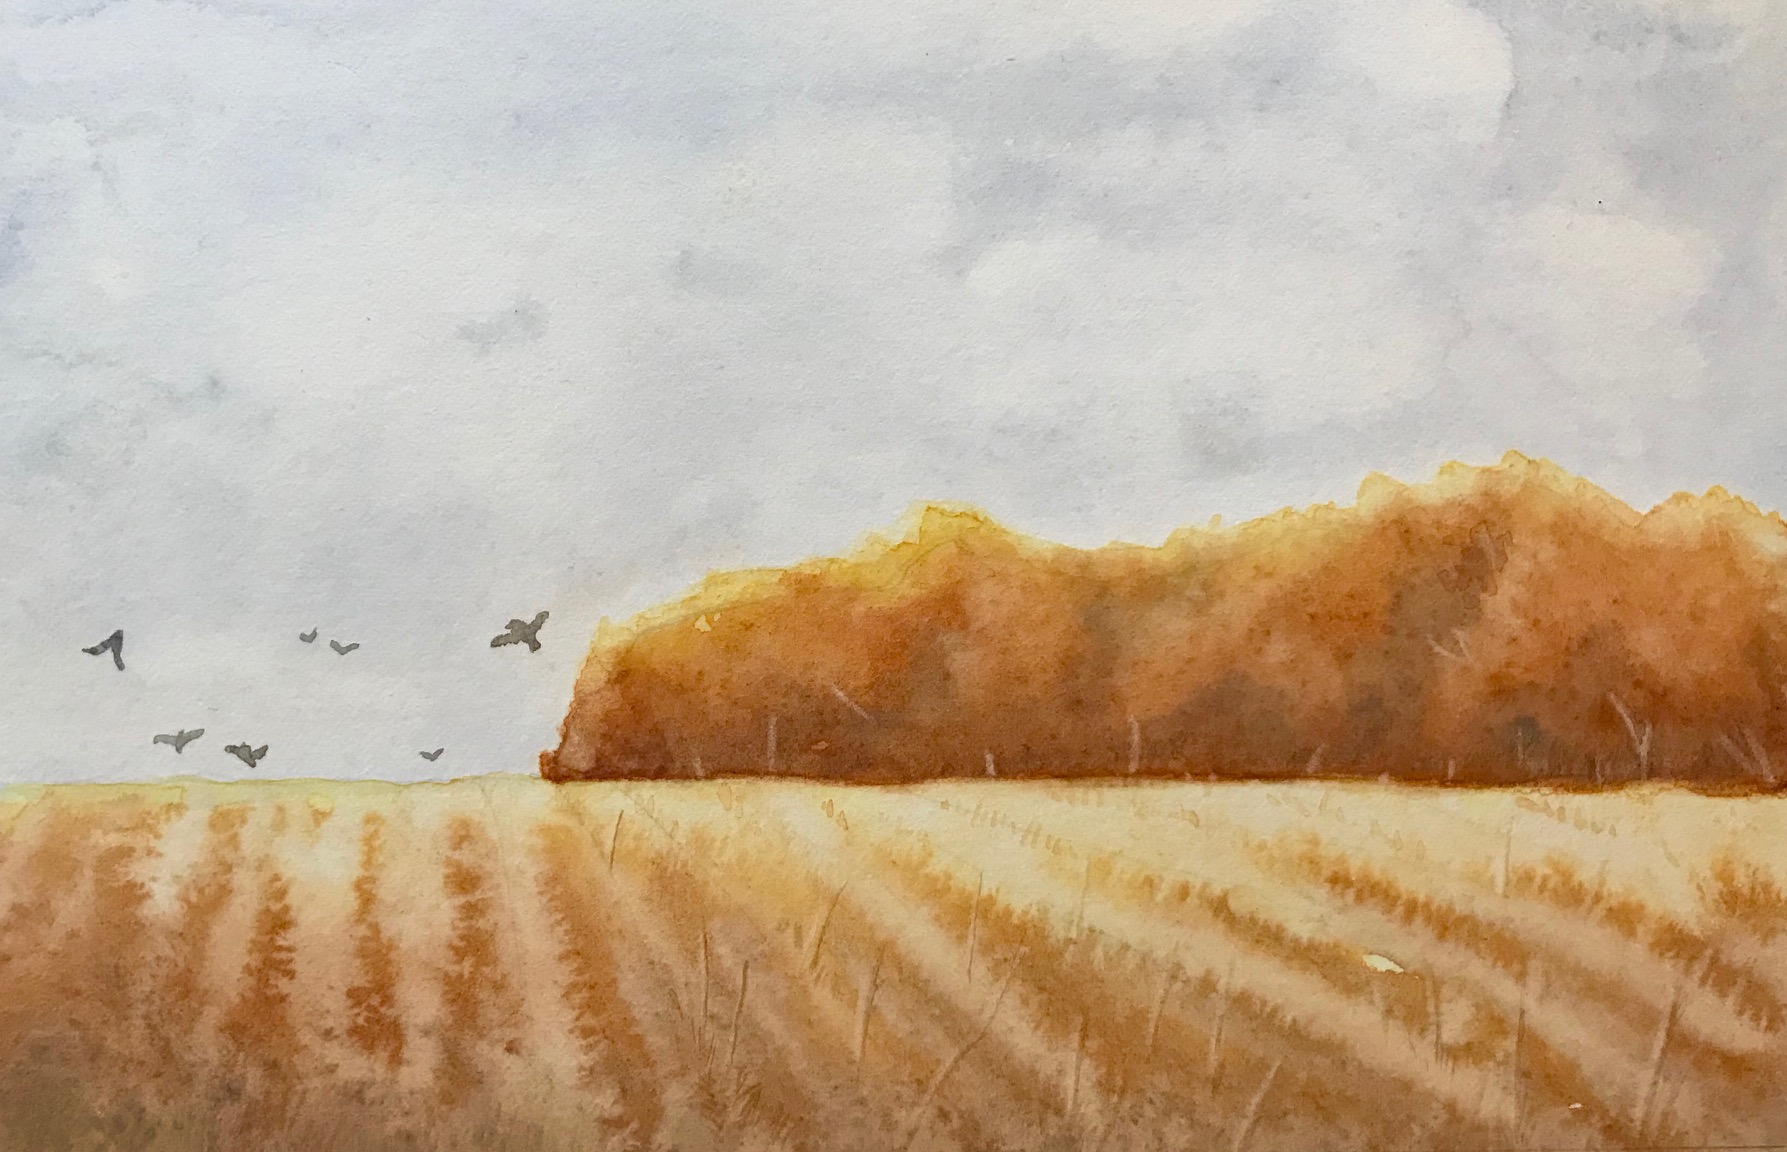
Finally, I use a bit of the yellow ochre to suggest where the lines in the field go up to the horizon line. Take a look at my completed painting to how subtle these details are, and to know where you might want to add a bit to your own painting.
And one last little touch:Why not add a few crows to your autumn landscape? I used the size 0 pointed round lifting brush with a bit of the burnt umber darkened with French ultramarine to draw in the suggestion of a few crows about the gather in the field.
For the final touches, I want to highlight some of the texture in the field by lifting out some lines to suggest corn stalks. Using the size 0 pointed round lifting brush and the same technique used to create the tree trunks, I randomly lift out thin lines here and there.
I also use the same brush to paint in a few wispy reeds of grass with some watered down burnt umber. I can accentuate the right sides of the corn stalks, too. If I ever put too much paint down I can always blot it up with some clean kitchen towel.
Finally, I use a bit of the yellow ochre to suggest where the lines in the field go up to the horizon line. Take a look at my completed painting to how subtle these details are, and to know where you might want to add a bit to your own painting.
And one last little touch:Why not add a few crows to your autumn landscape? I used the size 0 pointed round lifting brush with a bit of the burnt umber darkened with French ultramarine to draw in the suggestion of a few crows about the gather in the field.
 I hope you have lots of fun creating your own fall landscapes. It’s such a glorious time of the year!
If you enjoyed this project and wish to take it further, here’s a painting done with the same techniques and pigments on the same paper:
I hope you have lots of fun creating your own fall landscapes. It’s such a glorious time of the year!
If you enjoyed this project and wish to take it further, here’s a painting done with the same techniques and pigments on the same paper:
 For this painting, I added a bit of permanent alizarin crimson to my sky, created a rich black using French ultramarine and burnt umber, and took a good long time to create those fine details. Just more more time and attention using the very same skills!
Share tips, start a discussion or ask one of our experts or other students a question.
No Responses to “Paint Luminous Watercolor Fall Foliage in 7 Steps”