
The written word is a wonderful way to express your deepest thoughts and feelings, but sometimes emotions are bigger than words. Sometimes you just have to say it with…emojis!
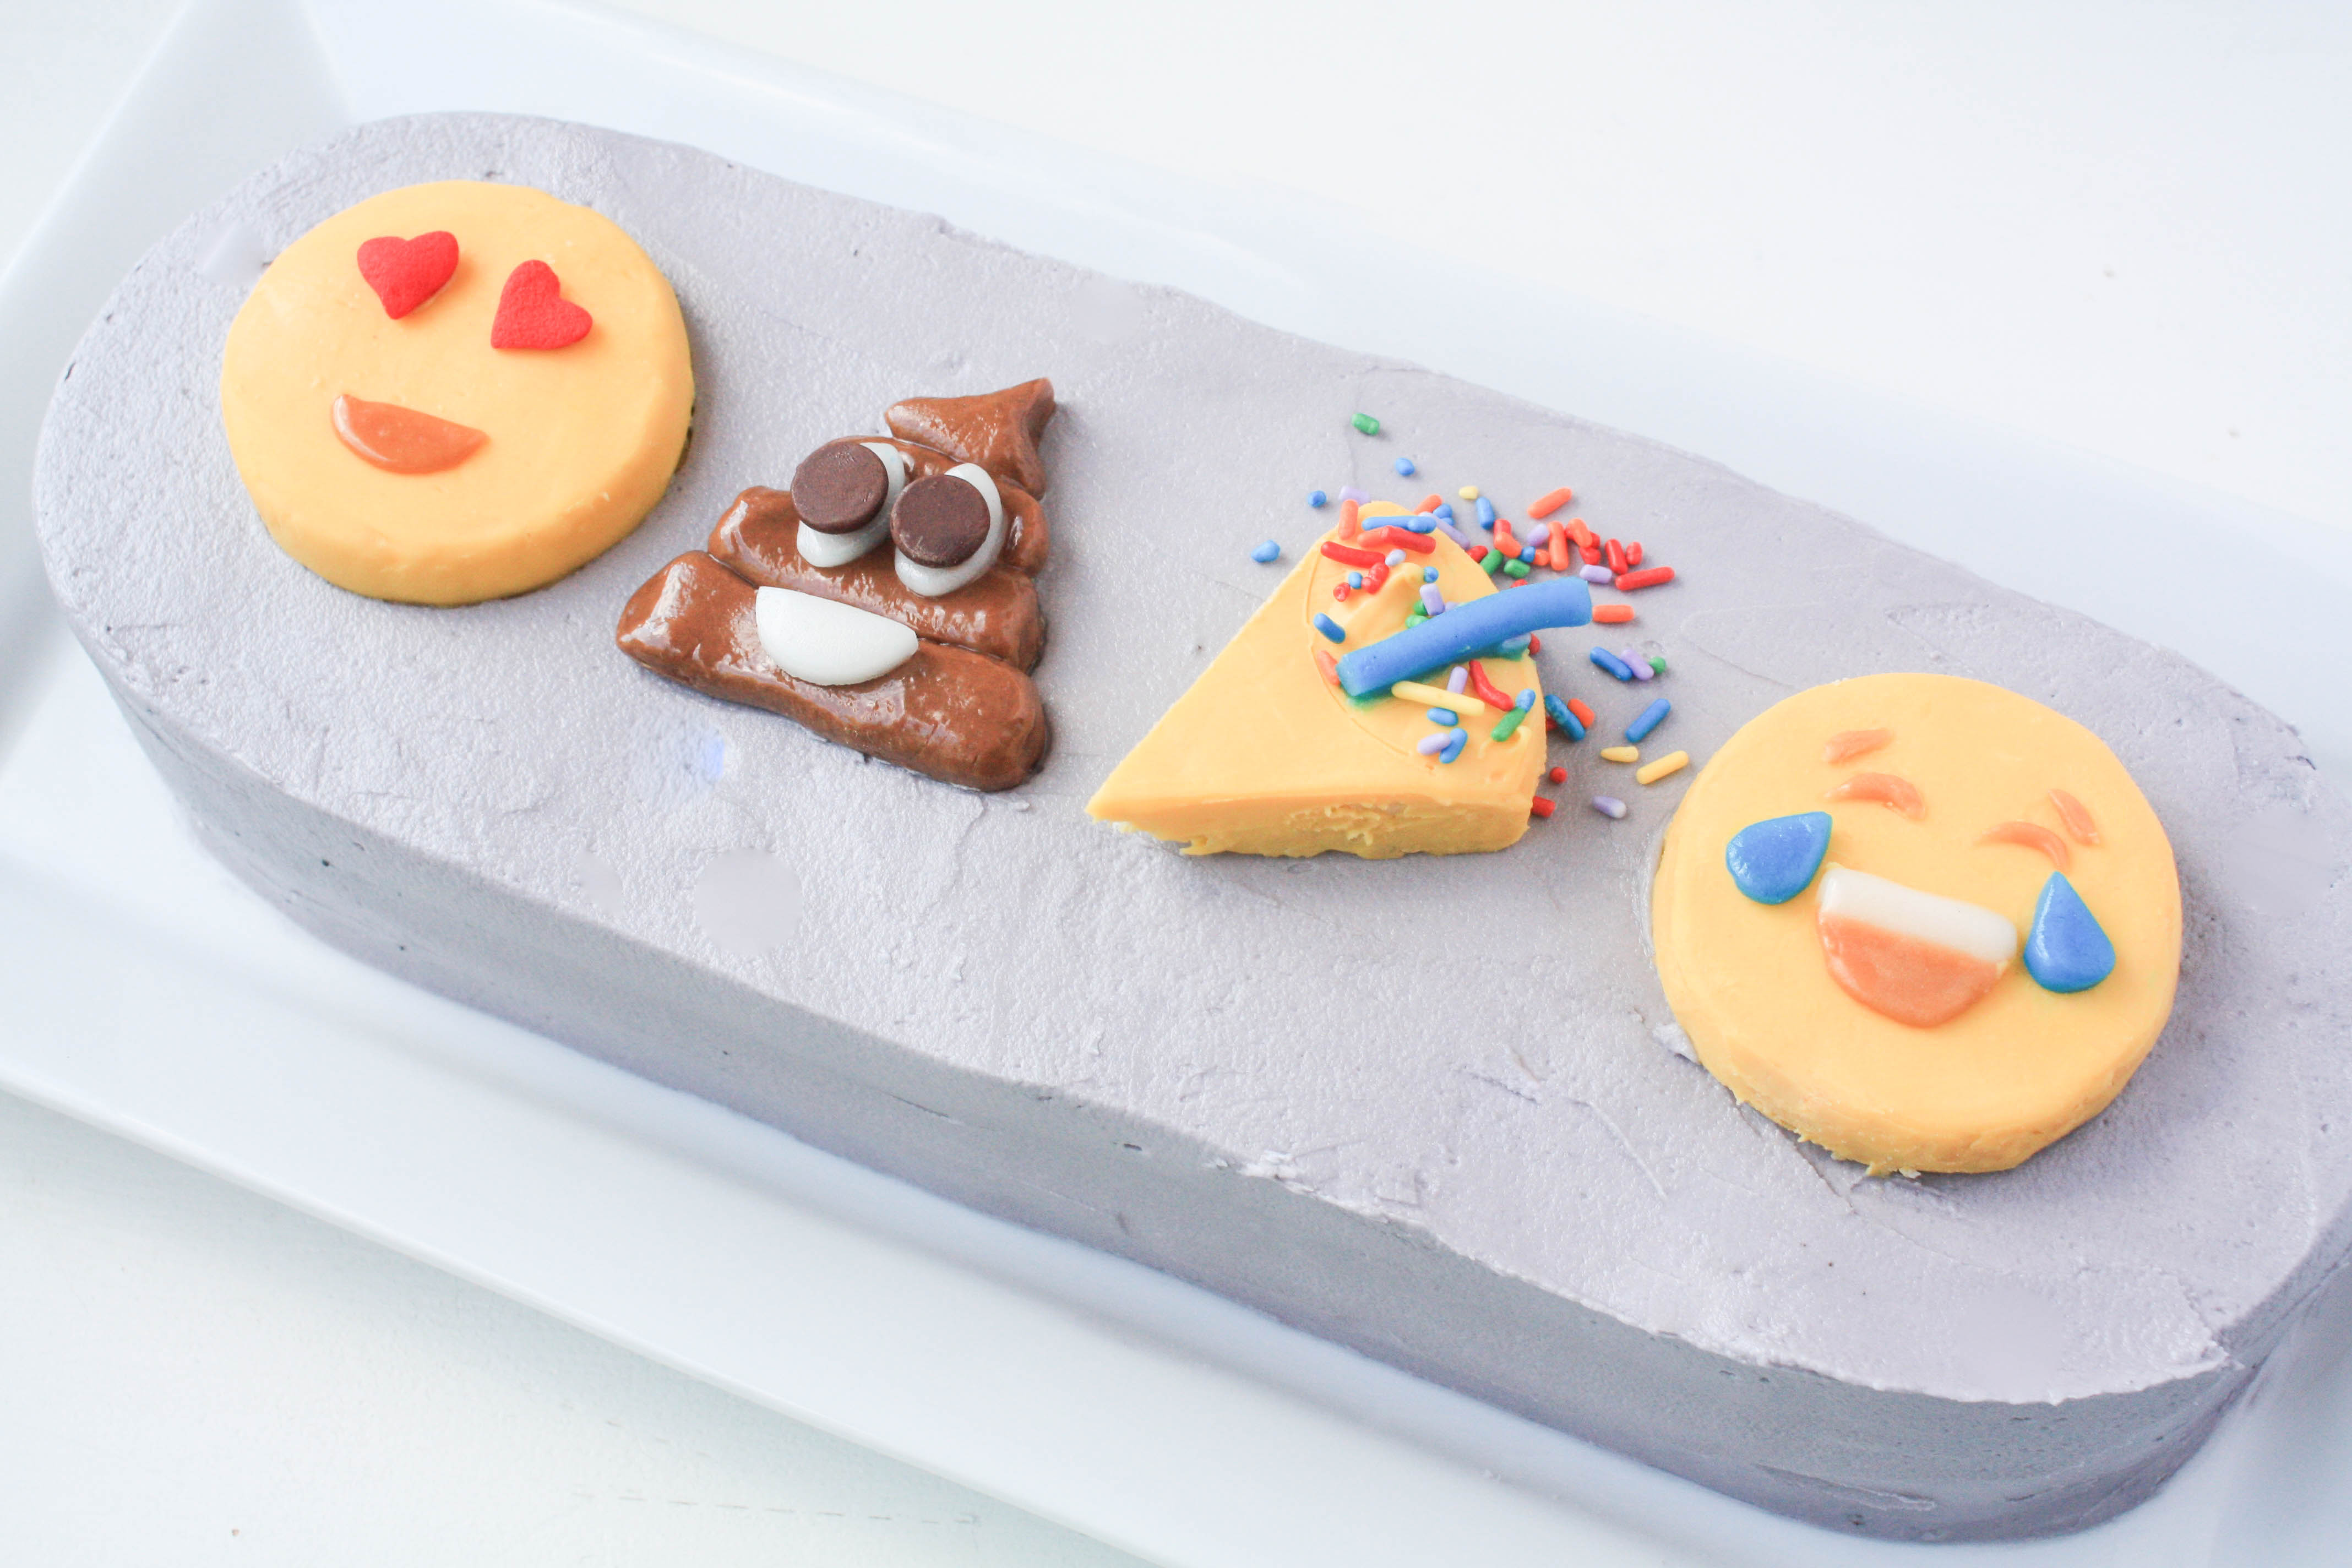
This fun emoji cake is easily customizable and comes together in a flash! I created my cake imagining I had received a text from a good friend (Incoming, obviously, because it’s gray. Tint the frosting blue if it’s outgoing.) saying, “Hey, I love you. Let’s have a chocolate ice cream party and laugh until we cry.” You can create yours to say whatever it is your heart desires!
All images via Erin Bakes
Cake emoji tutorial
Supplies:
- 8-inch square cake
- Two 3-inch round cakes
- 4 cups of buttercream frosting
- Black food coloring
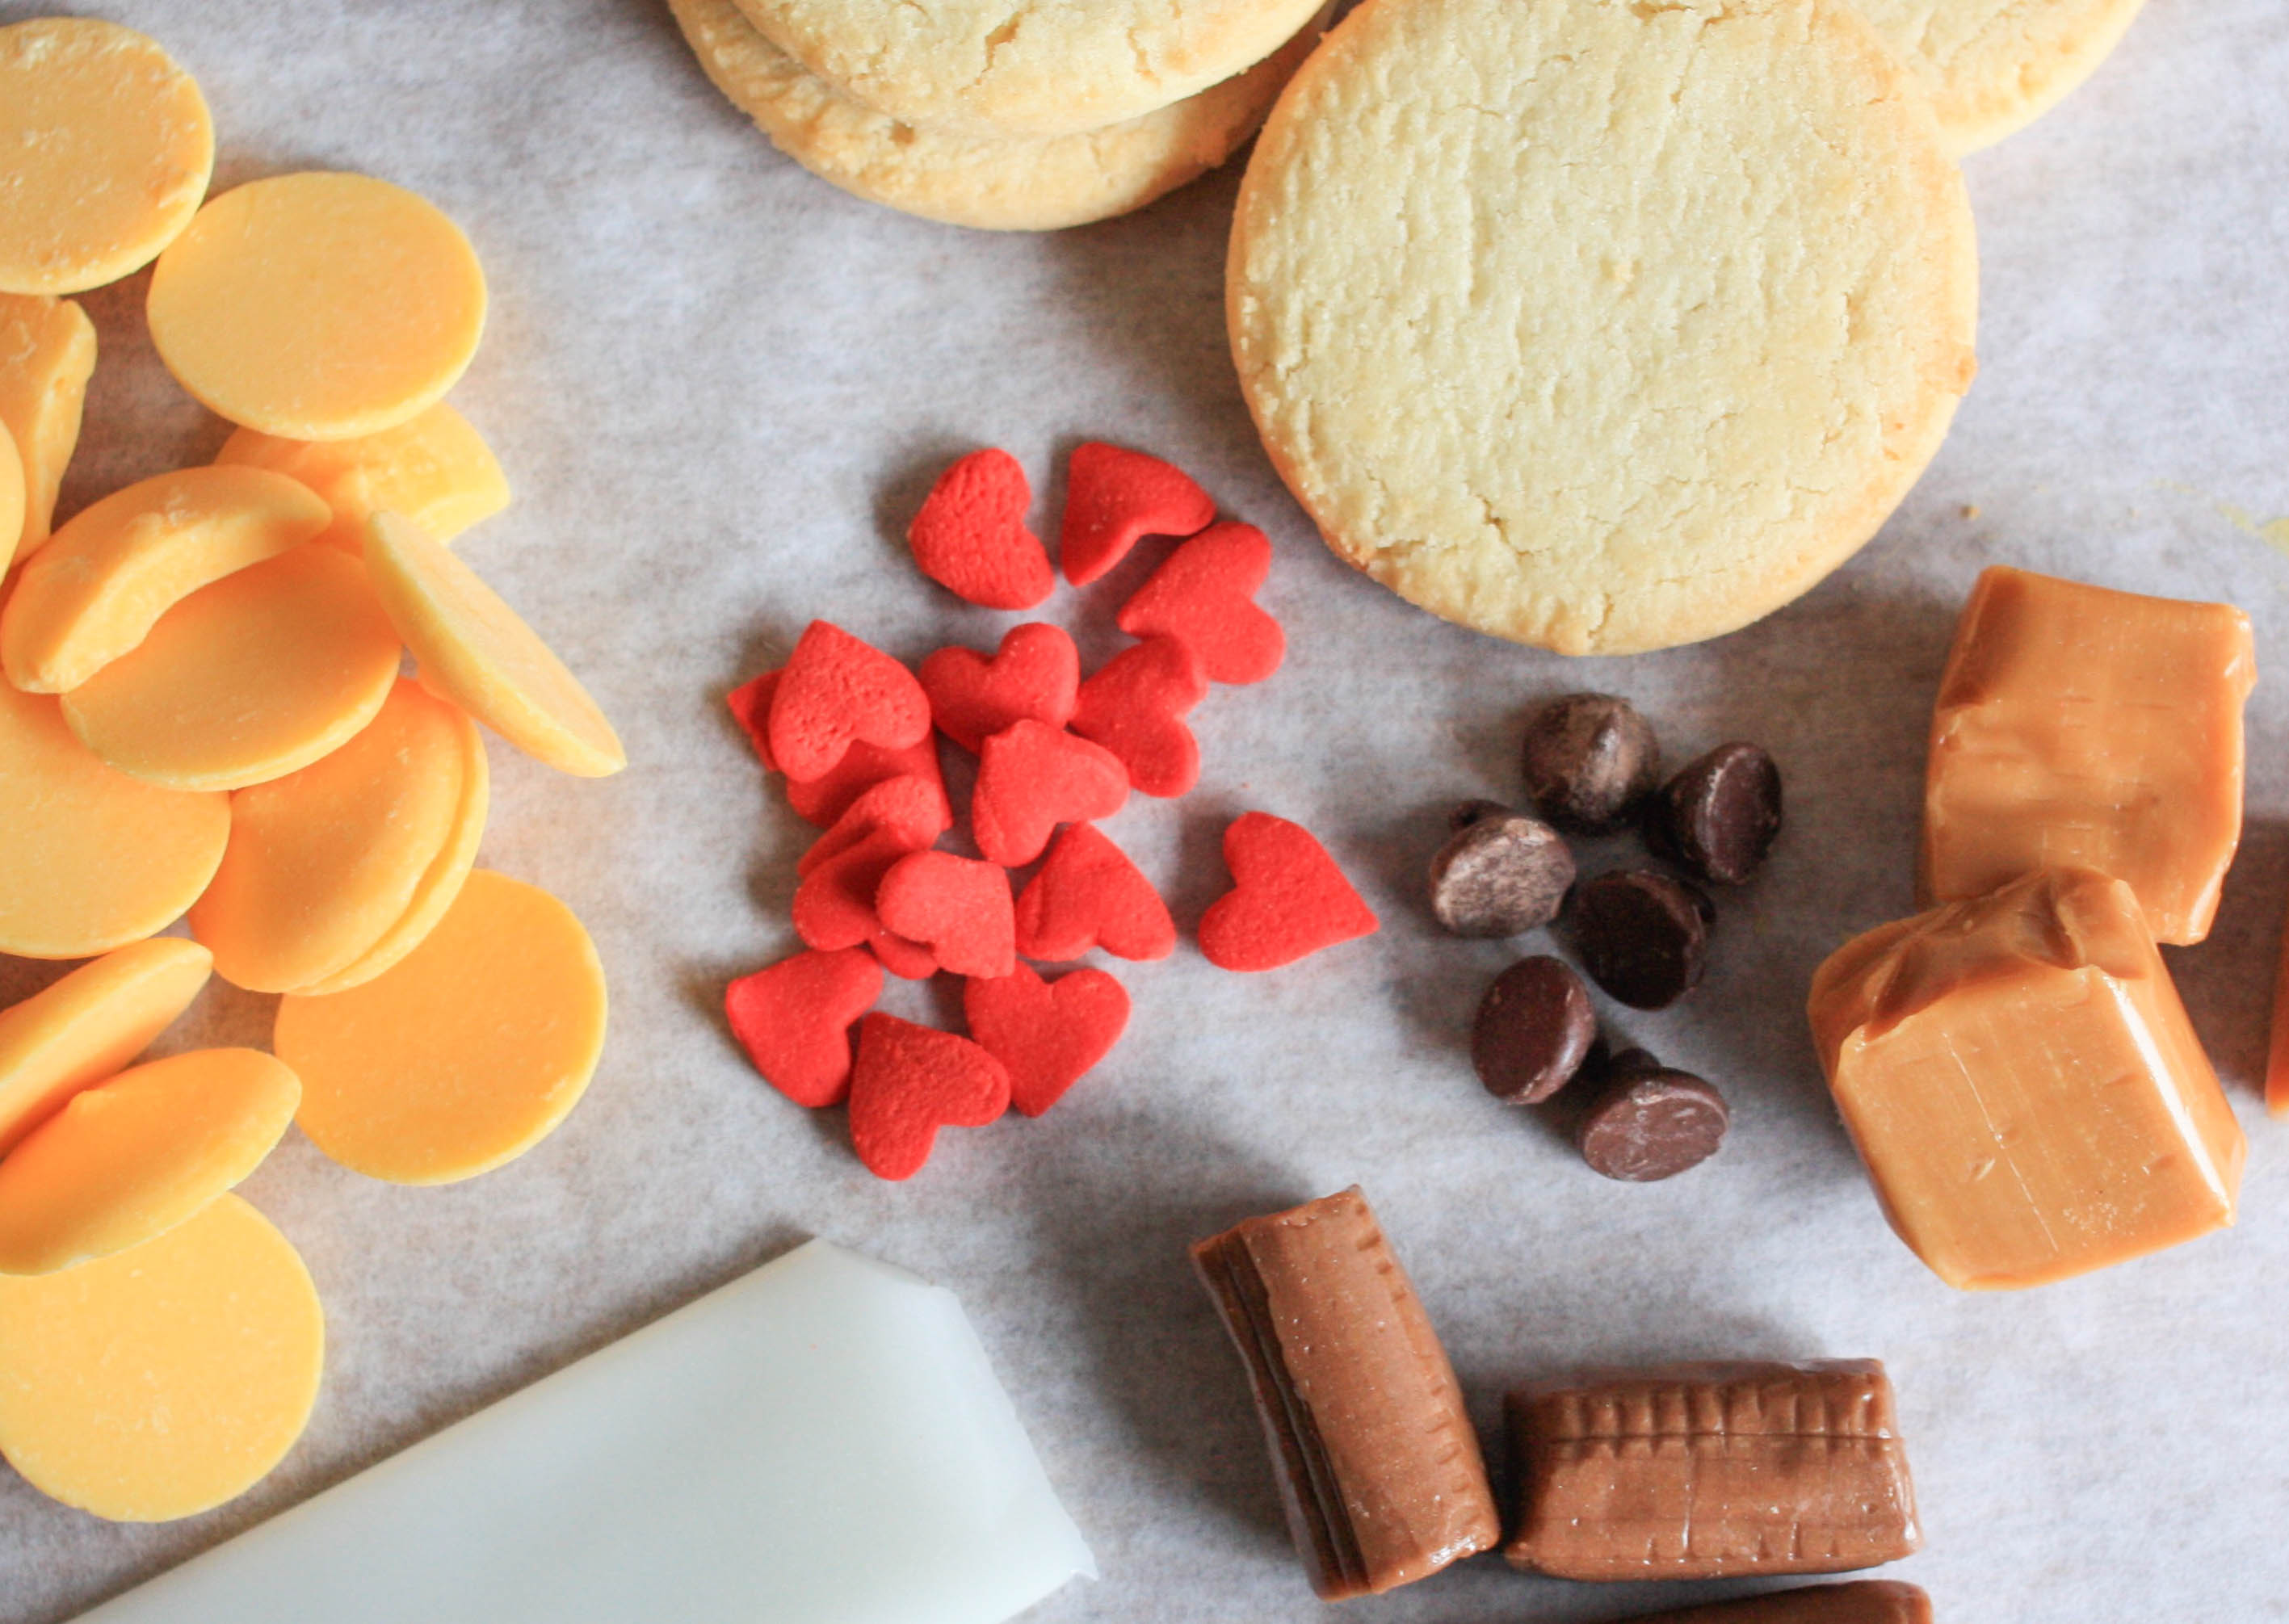
- Yellow candy melts
- Sugar cookies (store-bought works!)
- Chewy chocolate candies (like Tootsie Rolls)
- Chewy white and blue strip candies (like Airheads)
- Wrapped caramels
- Heart sprinkles
- Chocolate chips
- Rainbow sprinkles
- Small circle cutters or round piping tips
- Rolling pin
- Small knife
- Icing spatula
Part 1: Making the cake
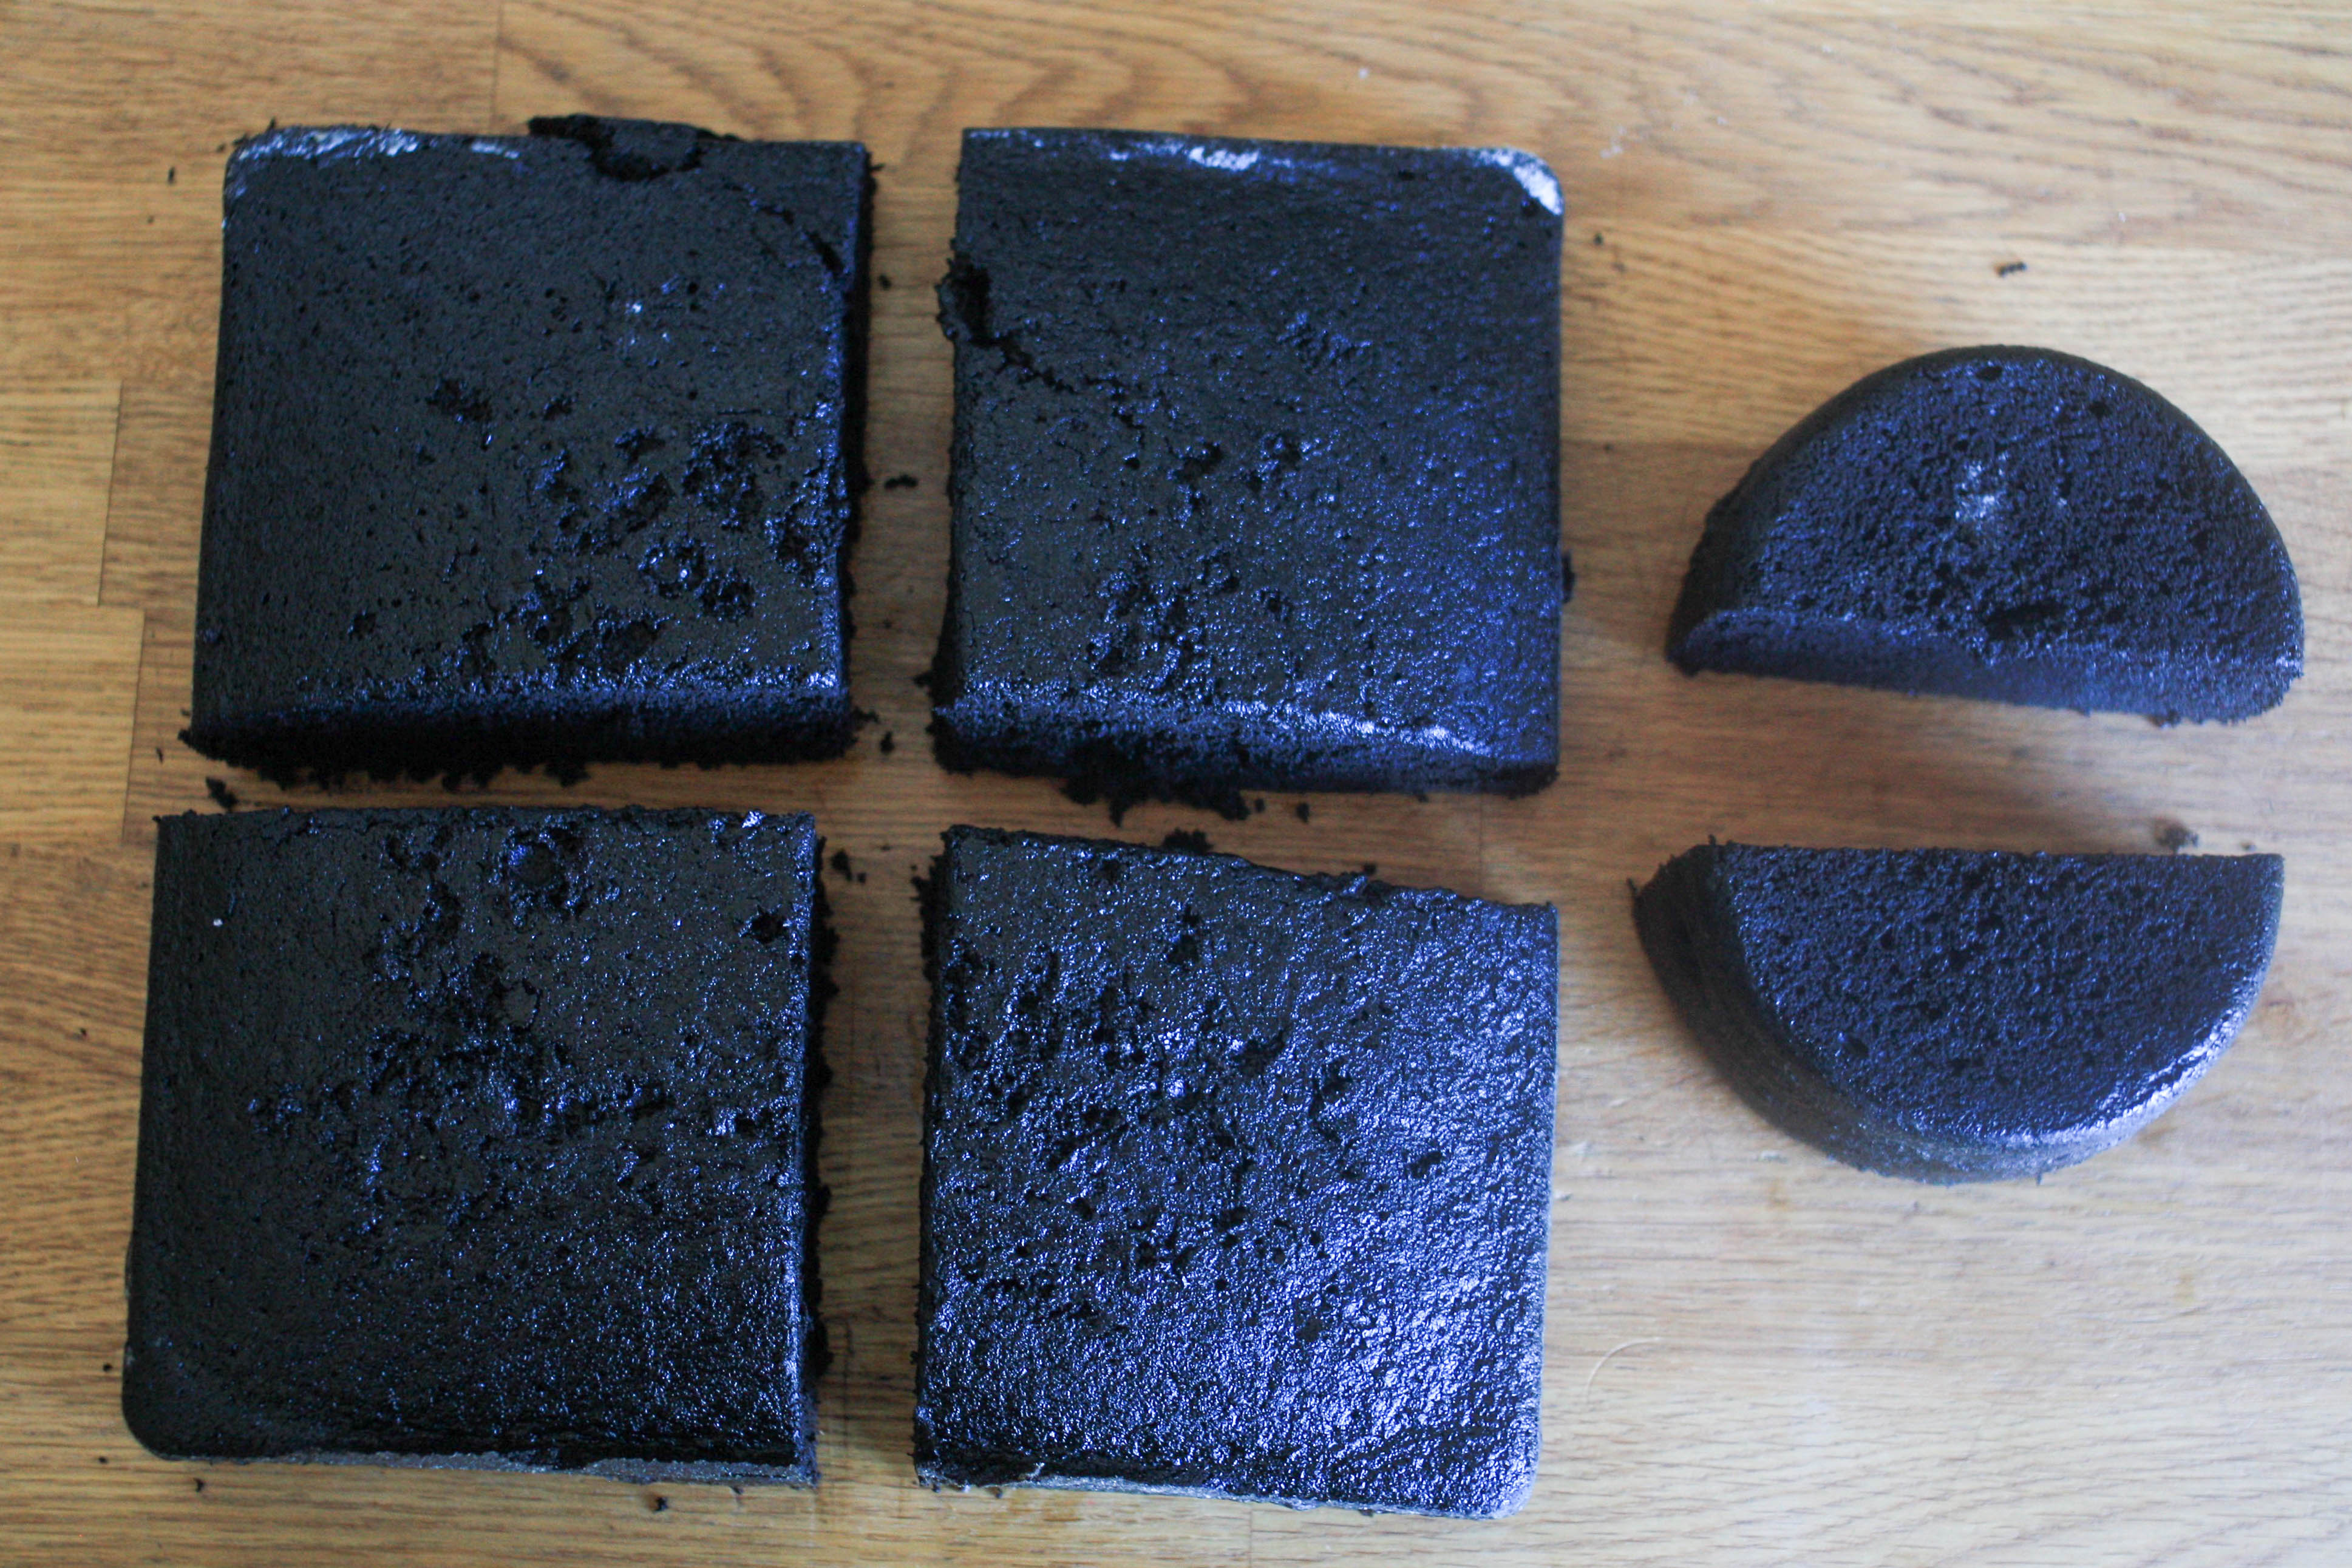
Step 1:
Cut the square cake into four pieces and cut the circles in half.
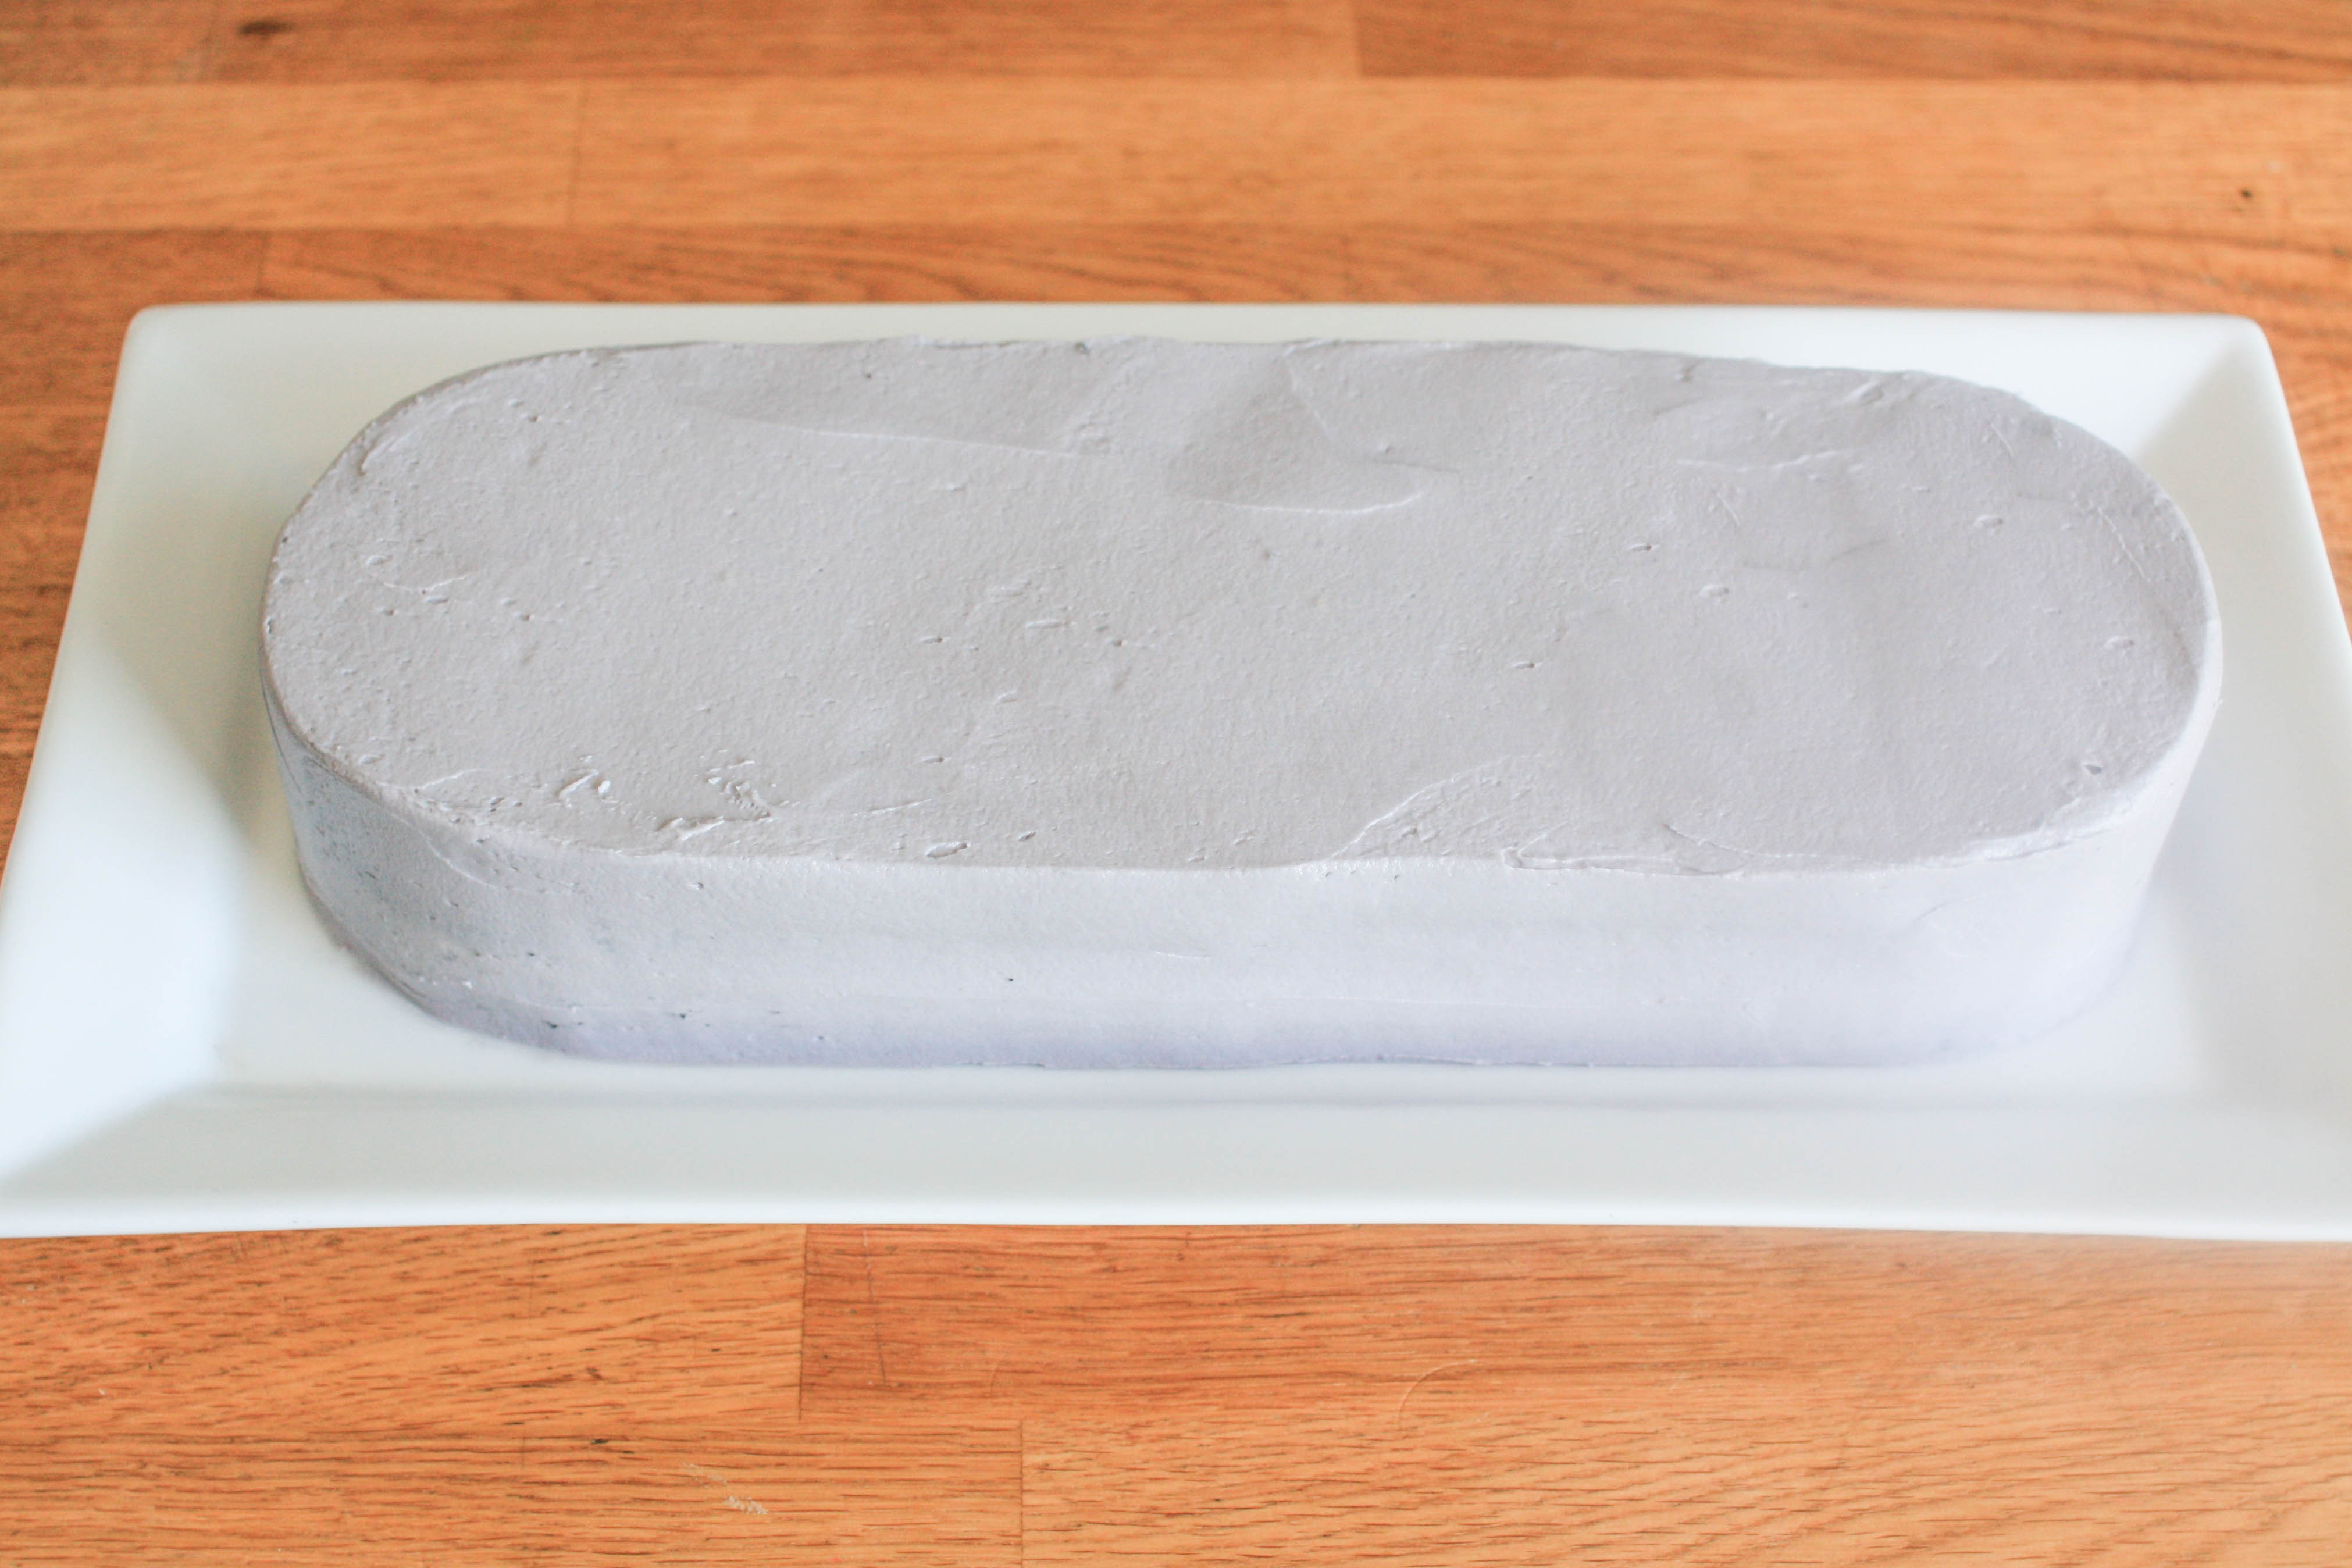
Step 2:
Line up the cakes to create the shape of your text bubble, half circles on the ends and squares in between. Top with frosting and finish with your other layer of cakes.

Step 3:
Use the black gel food coloring to tint the rest of your frosting gray. (Or whatever color you’d like your text bubble to be.) Ice the cake using a small icing spatula.
Part 2: Making the emojis
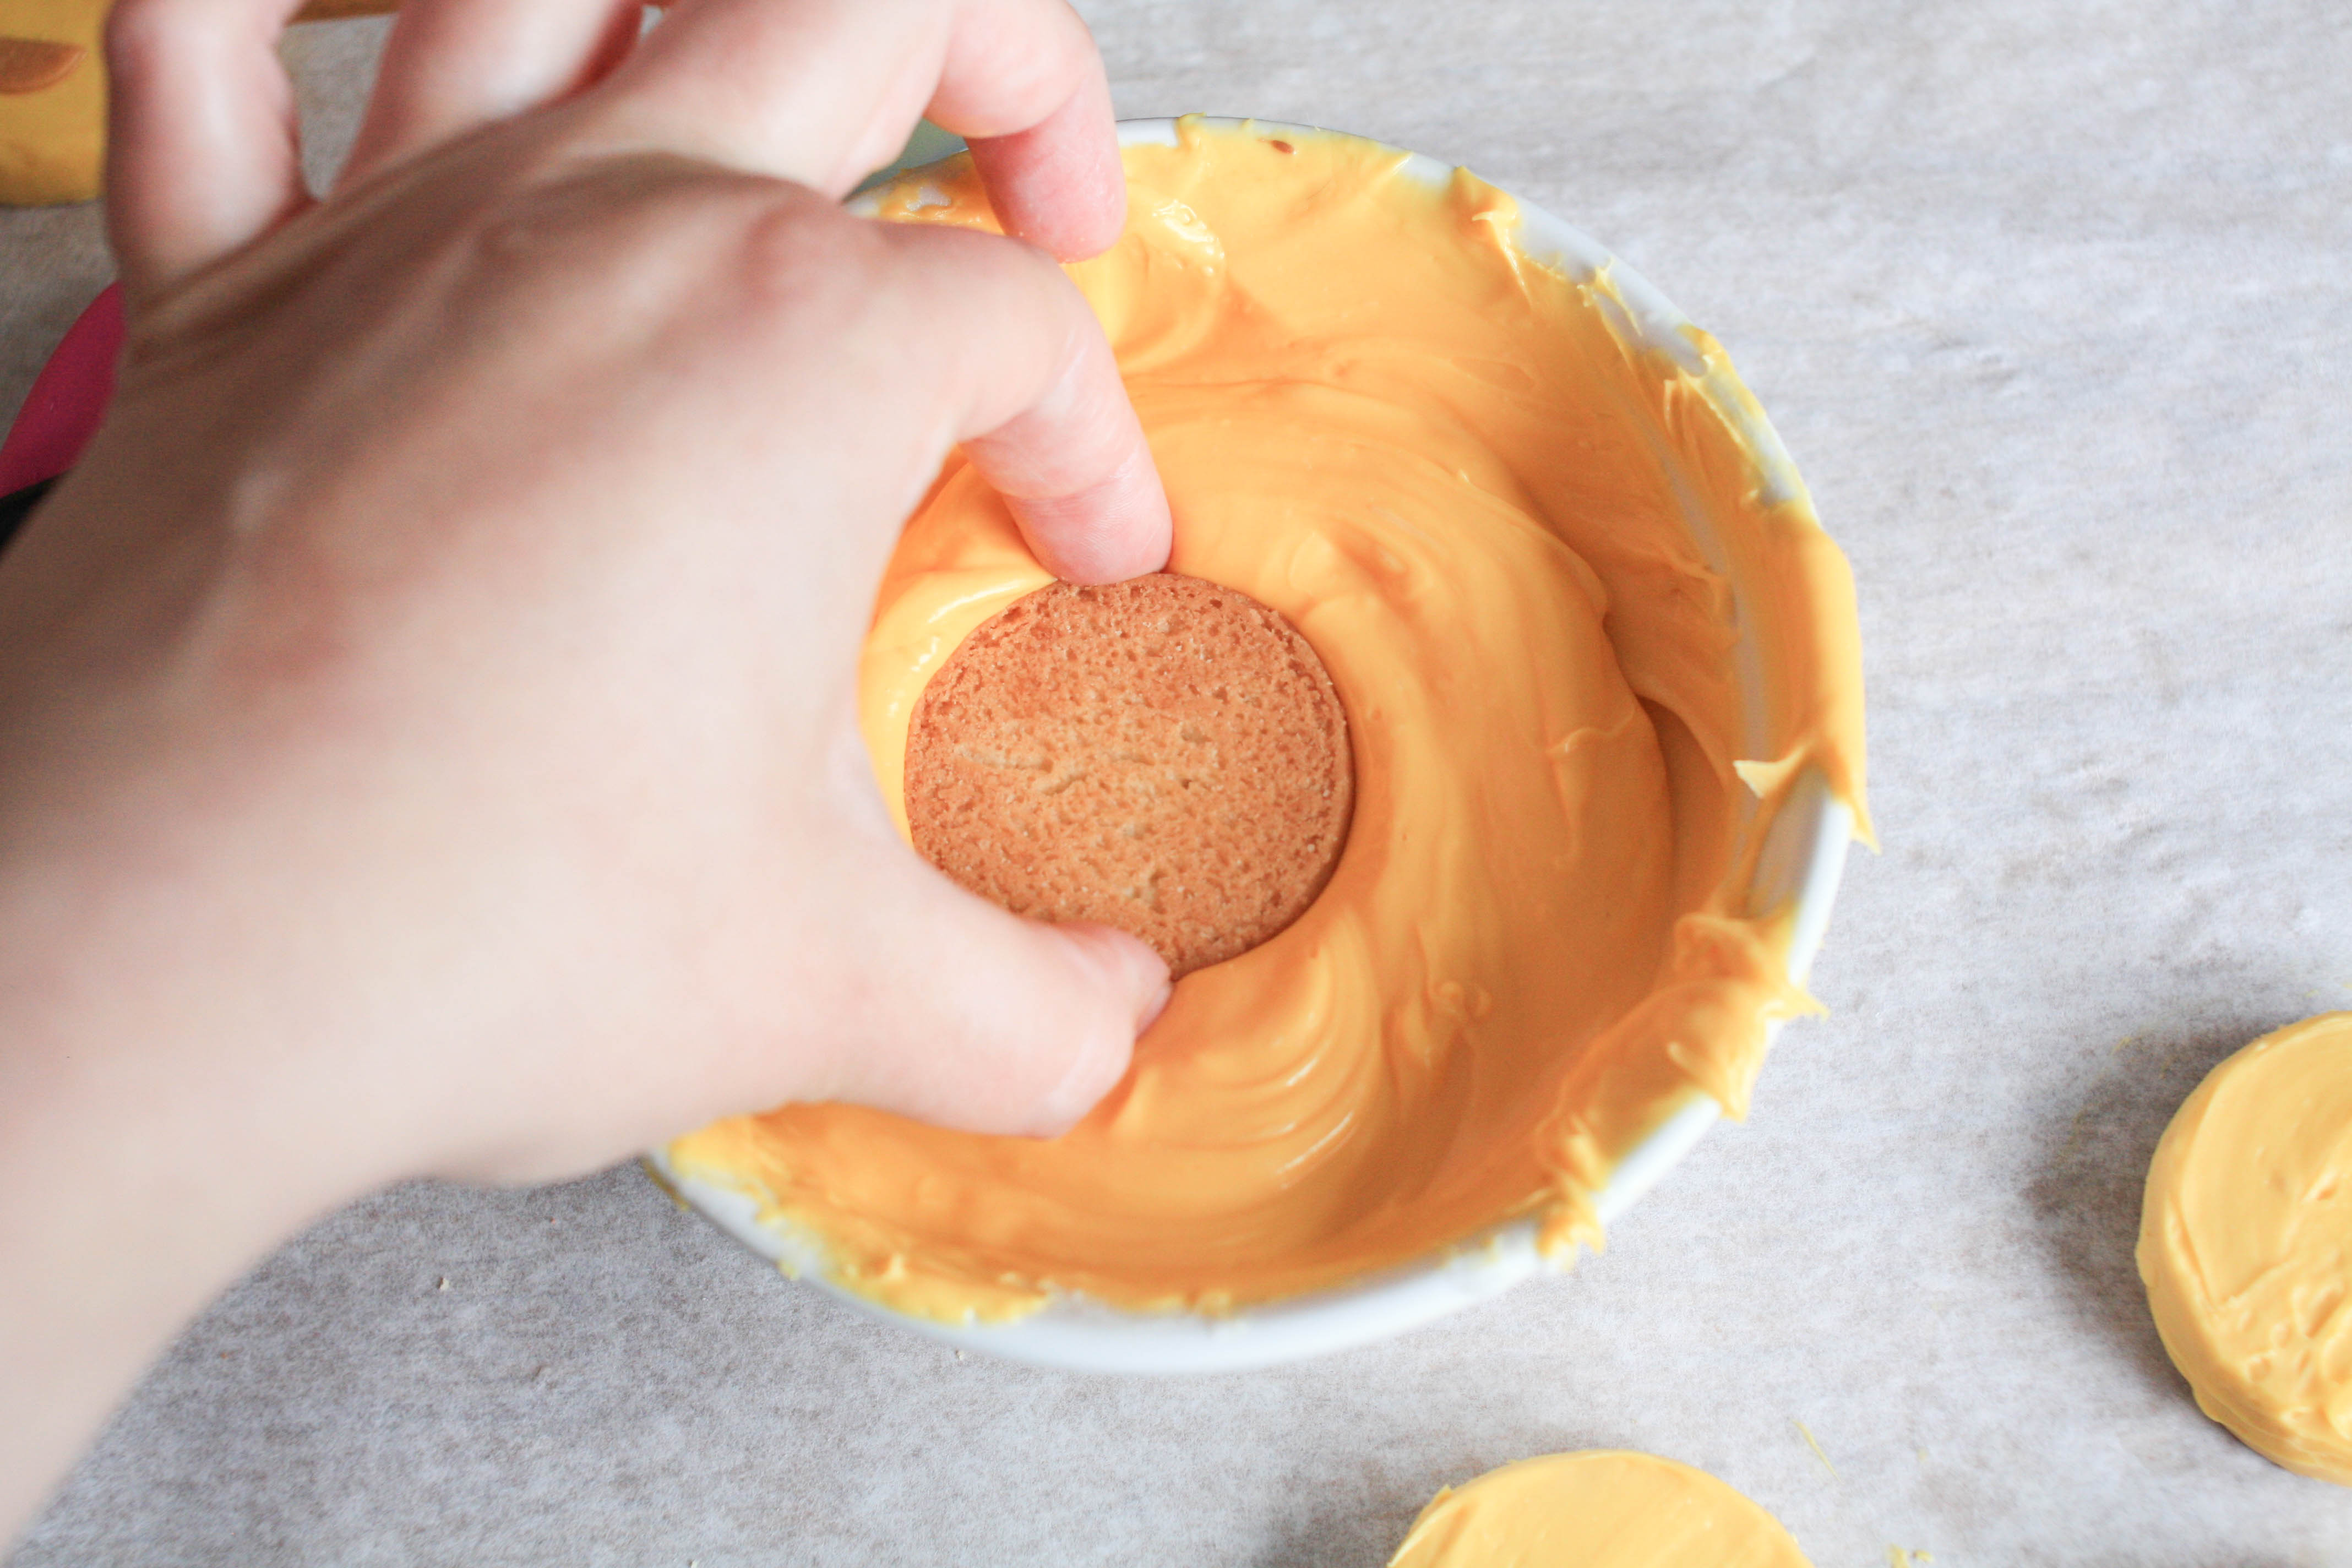
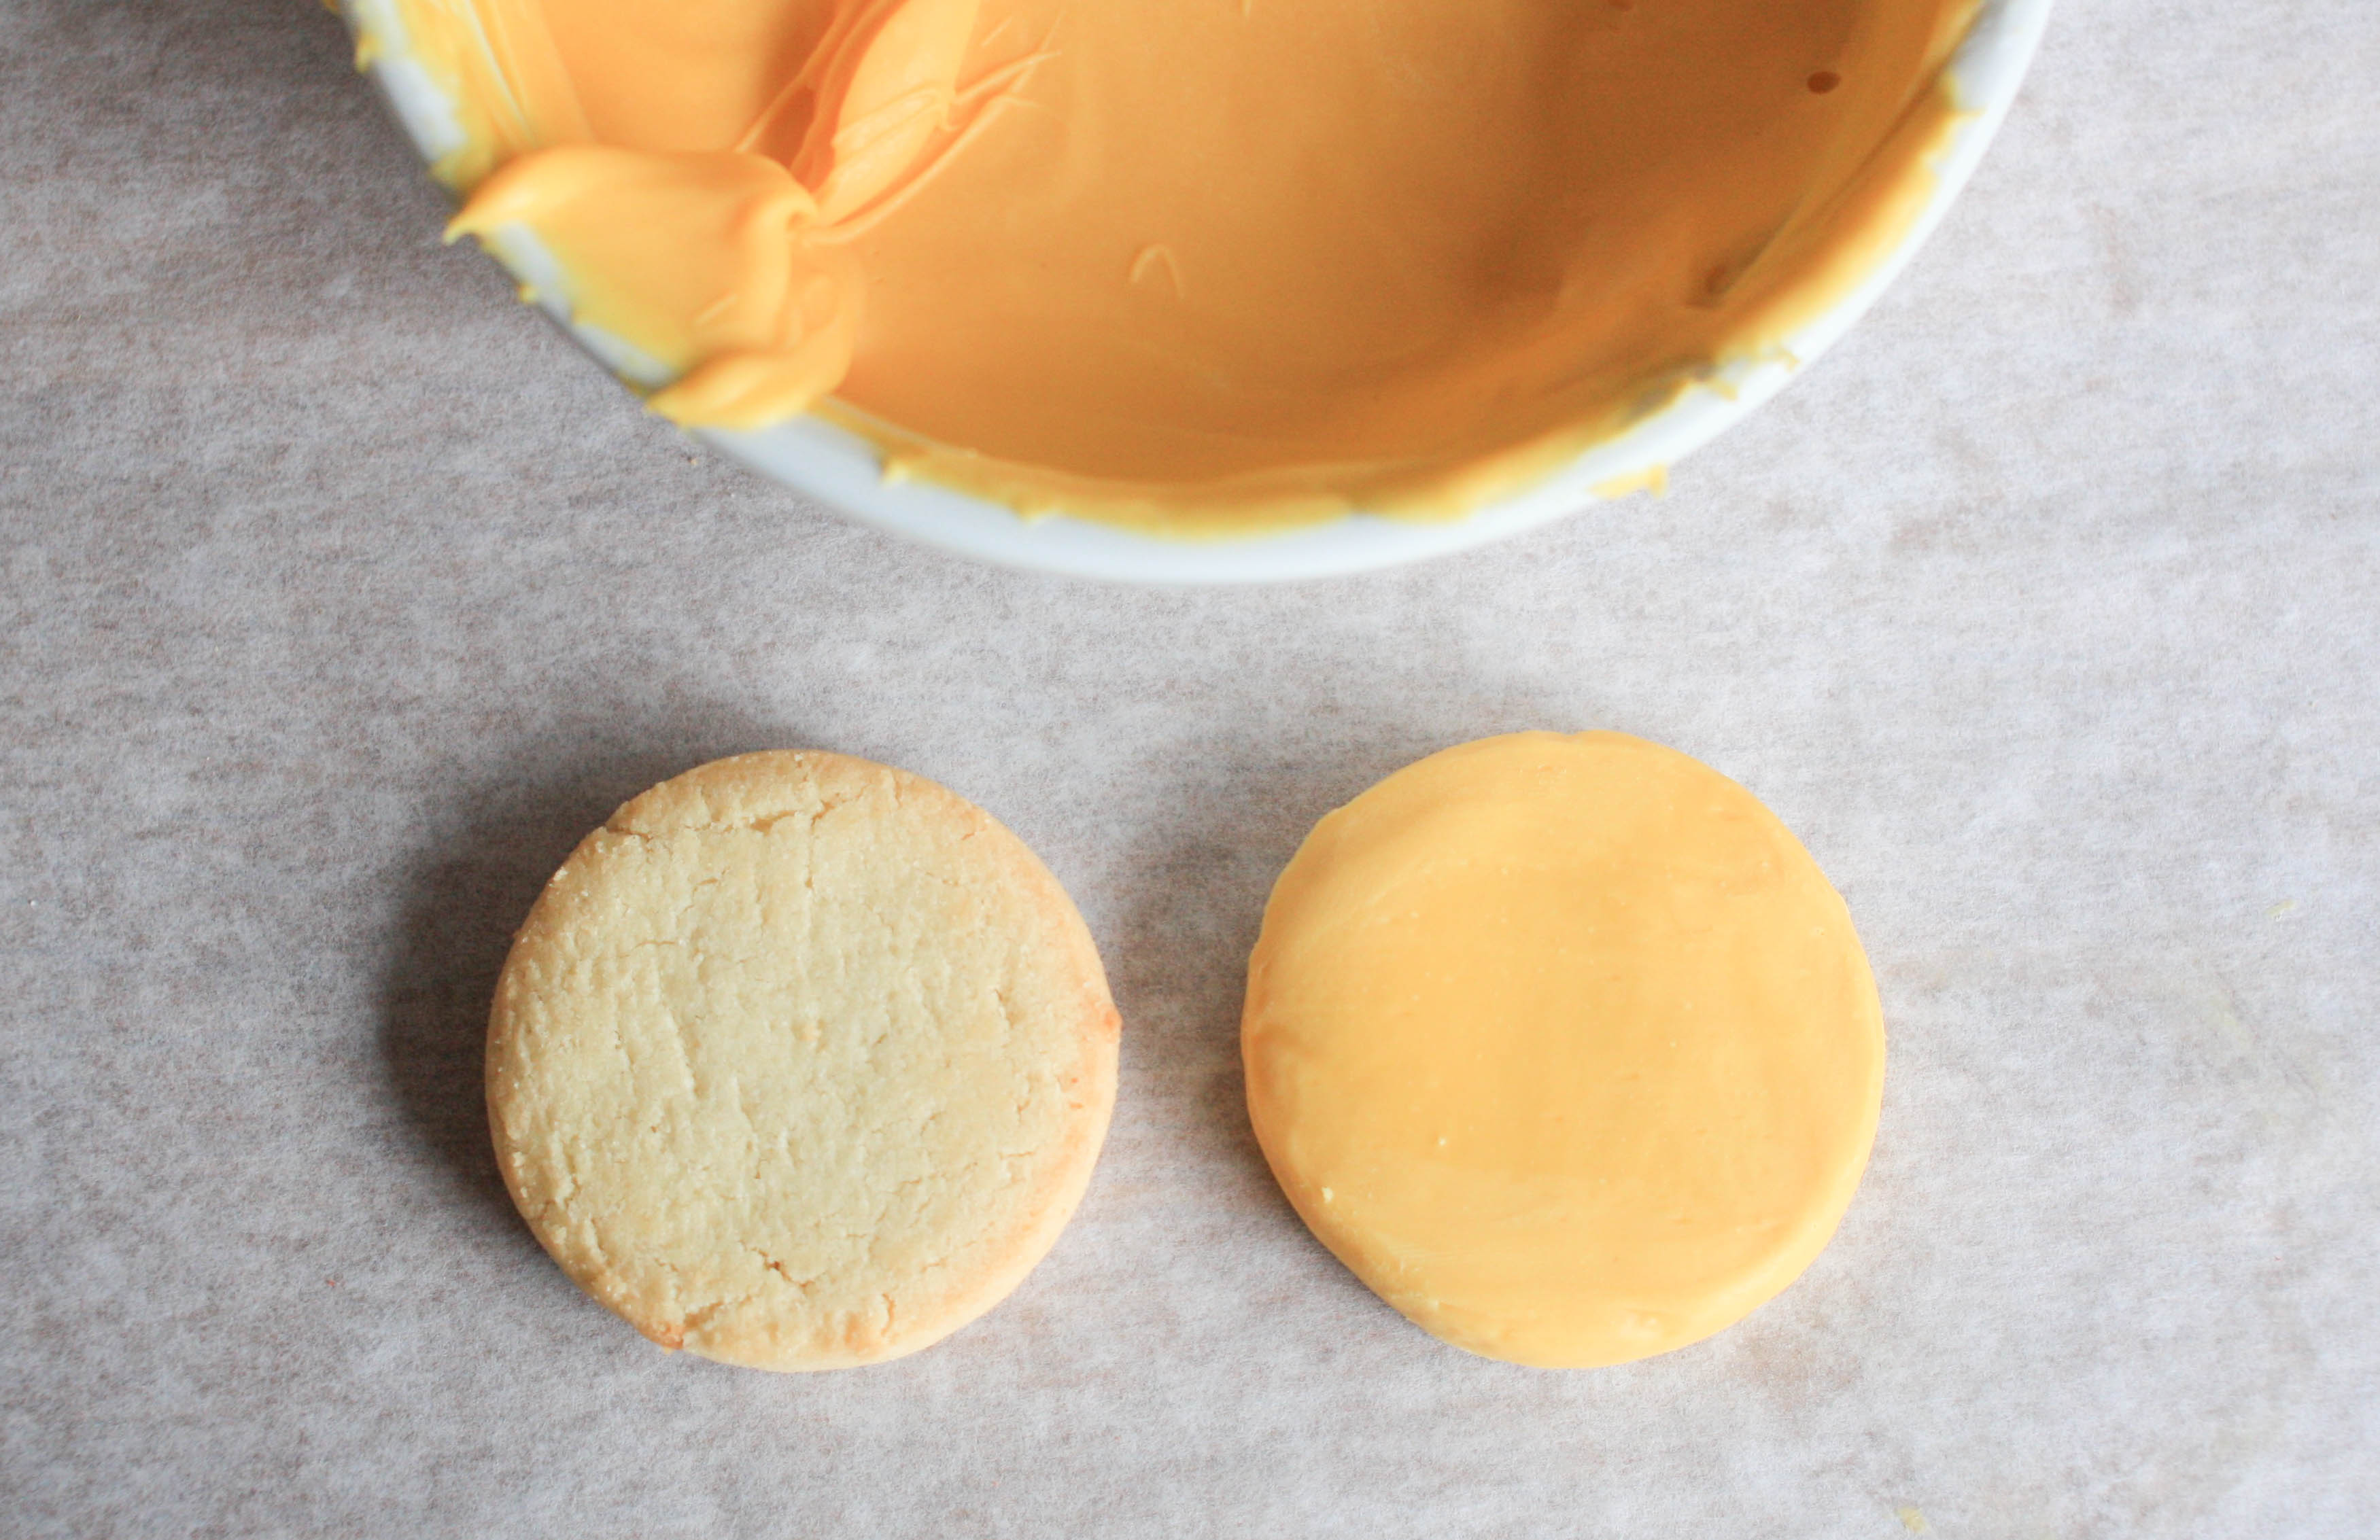
Step 1:
Dip the front of a sugar cookie into melted yellow candy melts. Shake off any excess candy and smooth any bumps with the icing spatula.
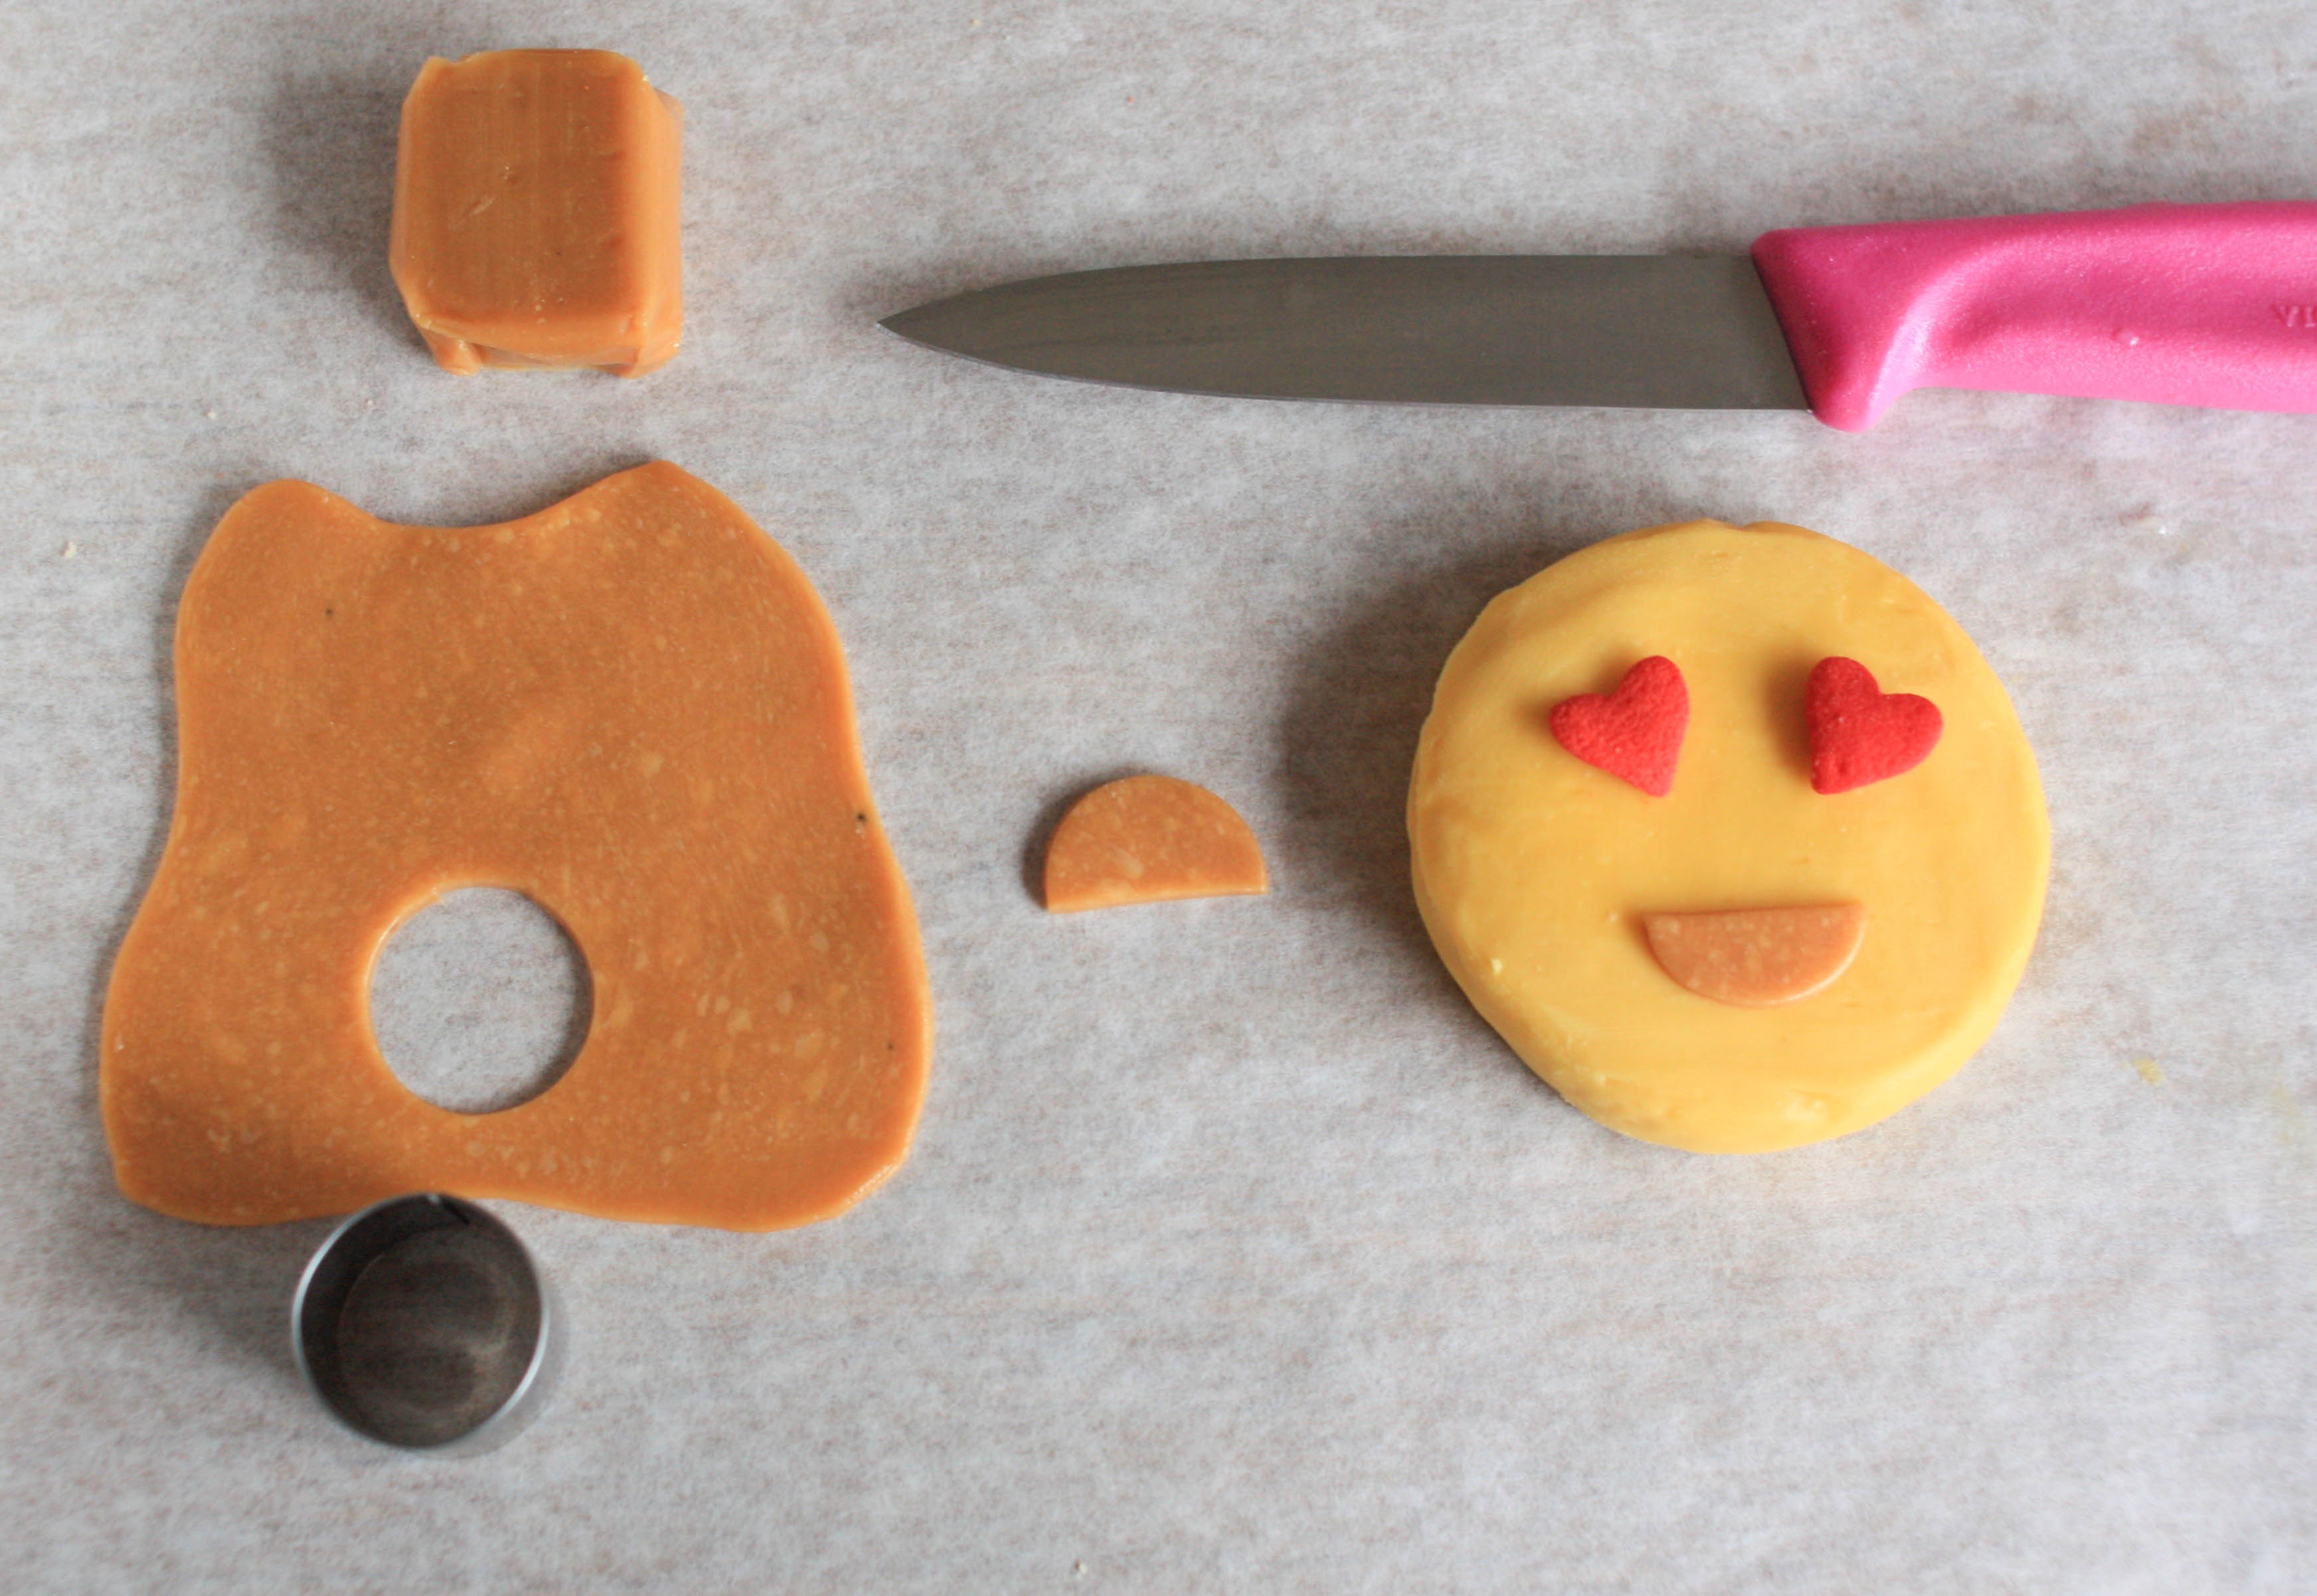
Step 2:
Heart eyes emoji: Roll out a piece of caramel and cut out a small circle. Cut the circle in half to make a smile. Add red heart sprinkles as eyes.
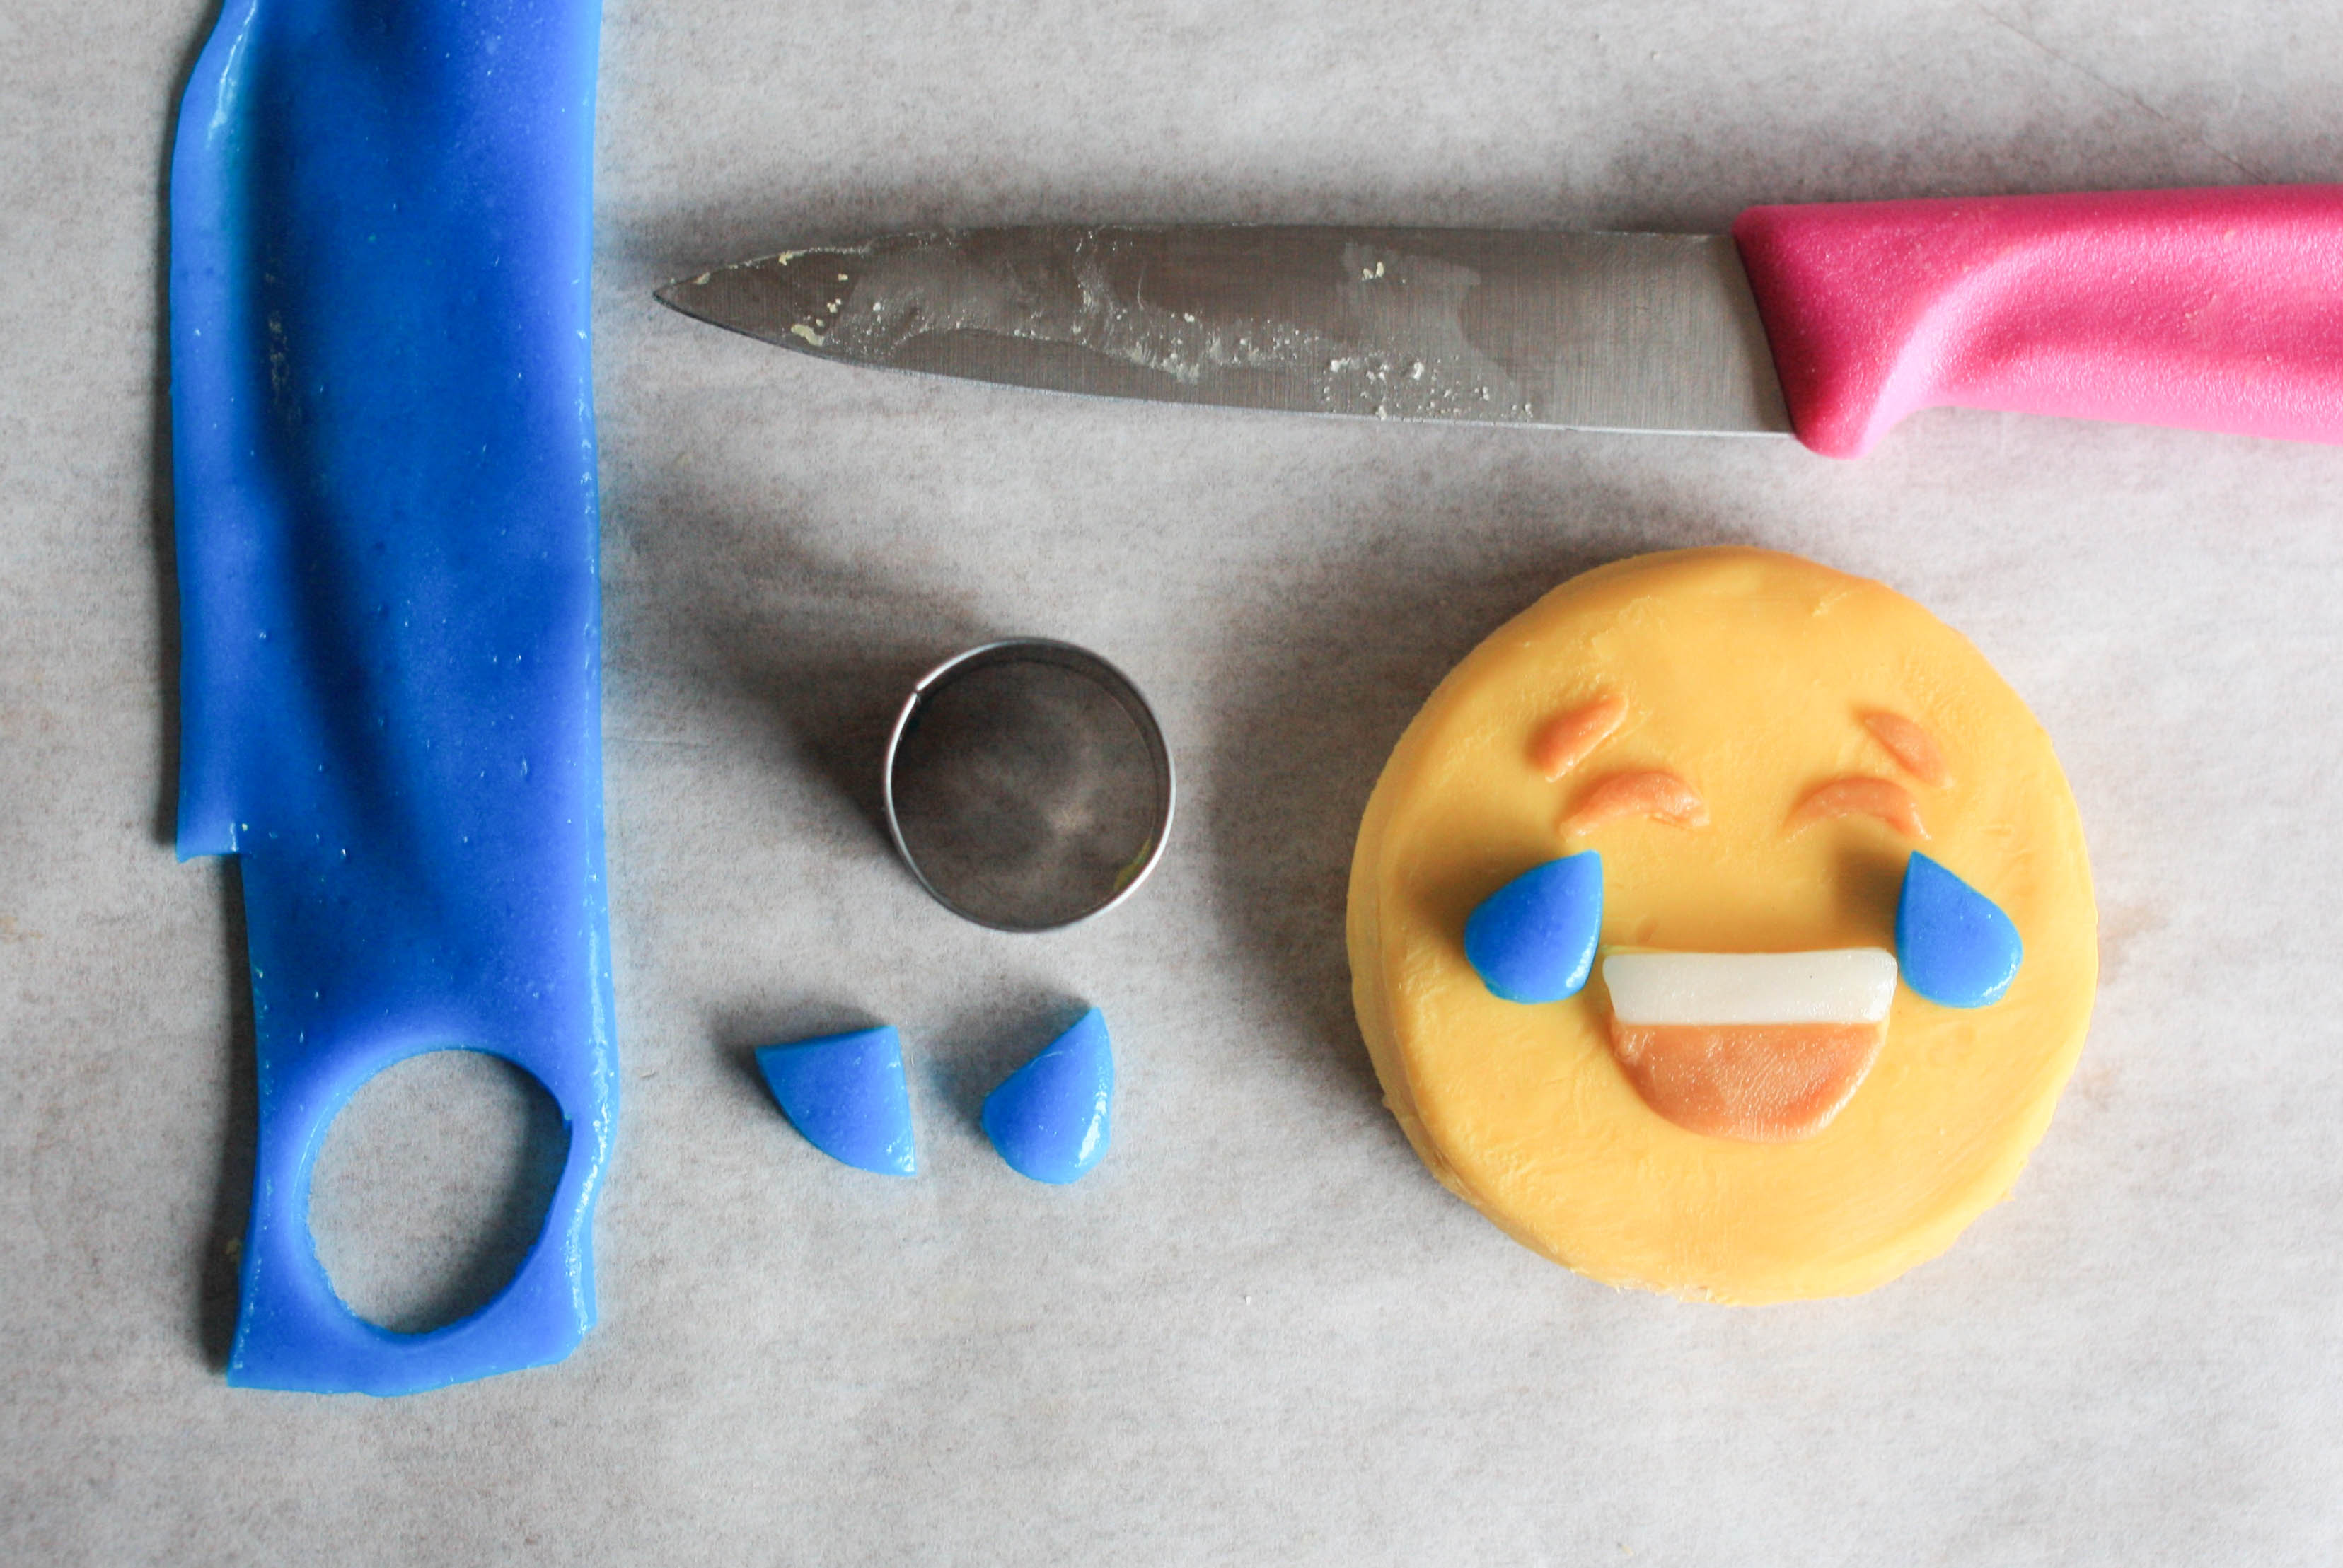
Laughing emoji: Cut a circle from the chewy white candy. Cut the circle in half and then trim a strip from the top of one of the halves to create the teeth.
Roll out a piece of caramel and cut out a circle. Cut the circle in half to form the bottom part of the smile. Cut out two small circles using a small, round piping tip. Use the tip to then cut tiny half-moons from the circles to form the eyes. Cut two more half-moons for the eyebrows.
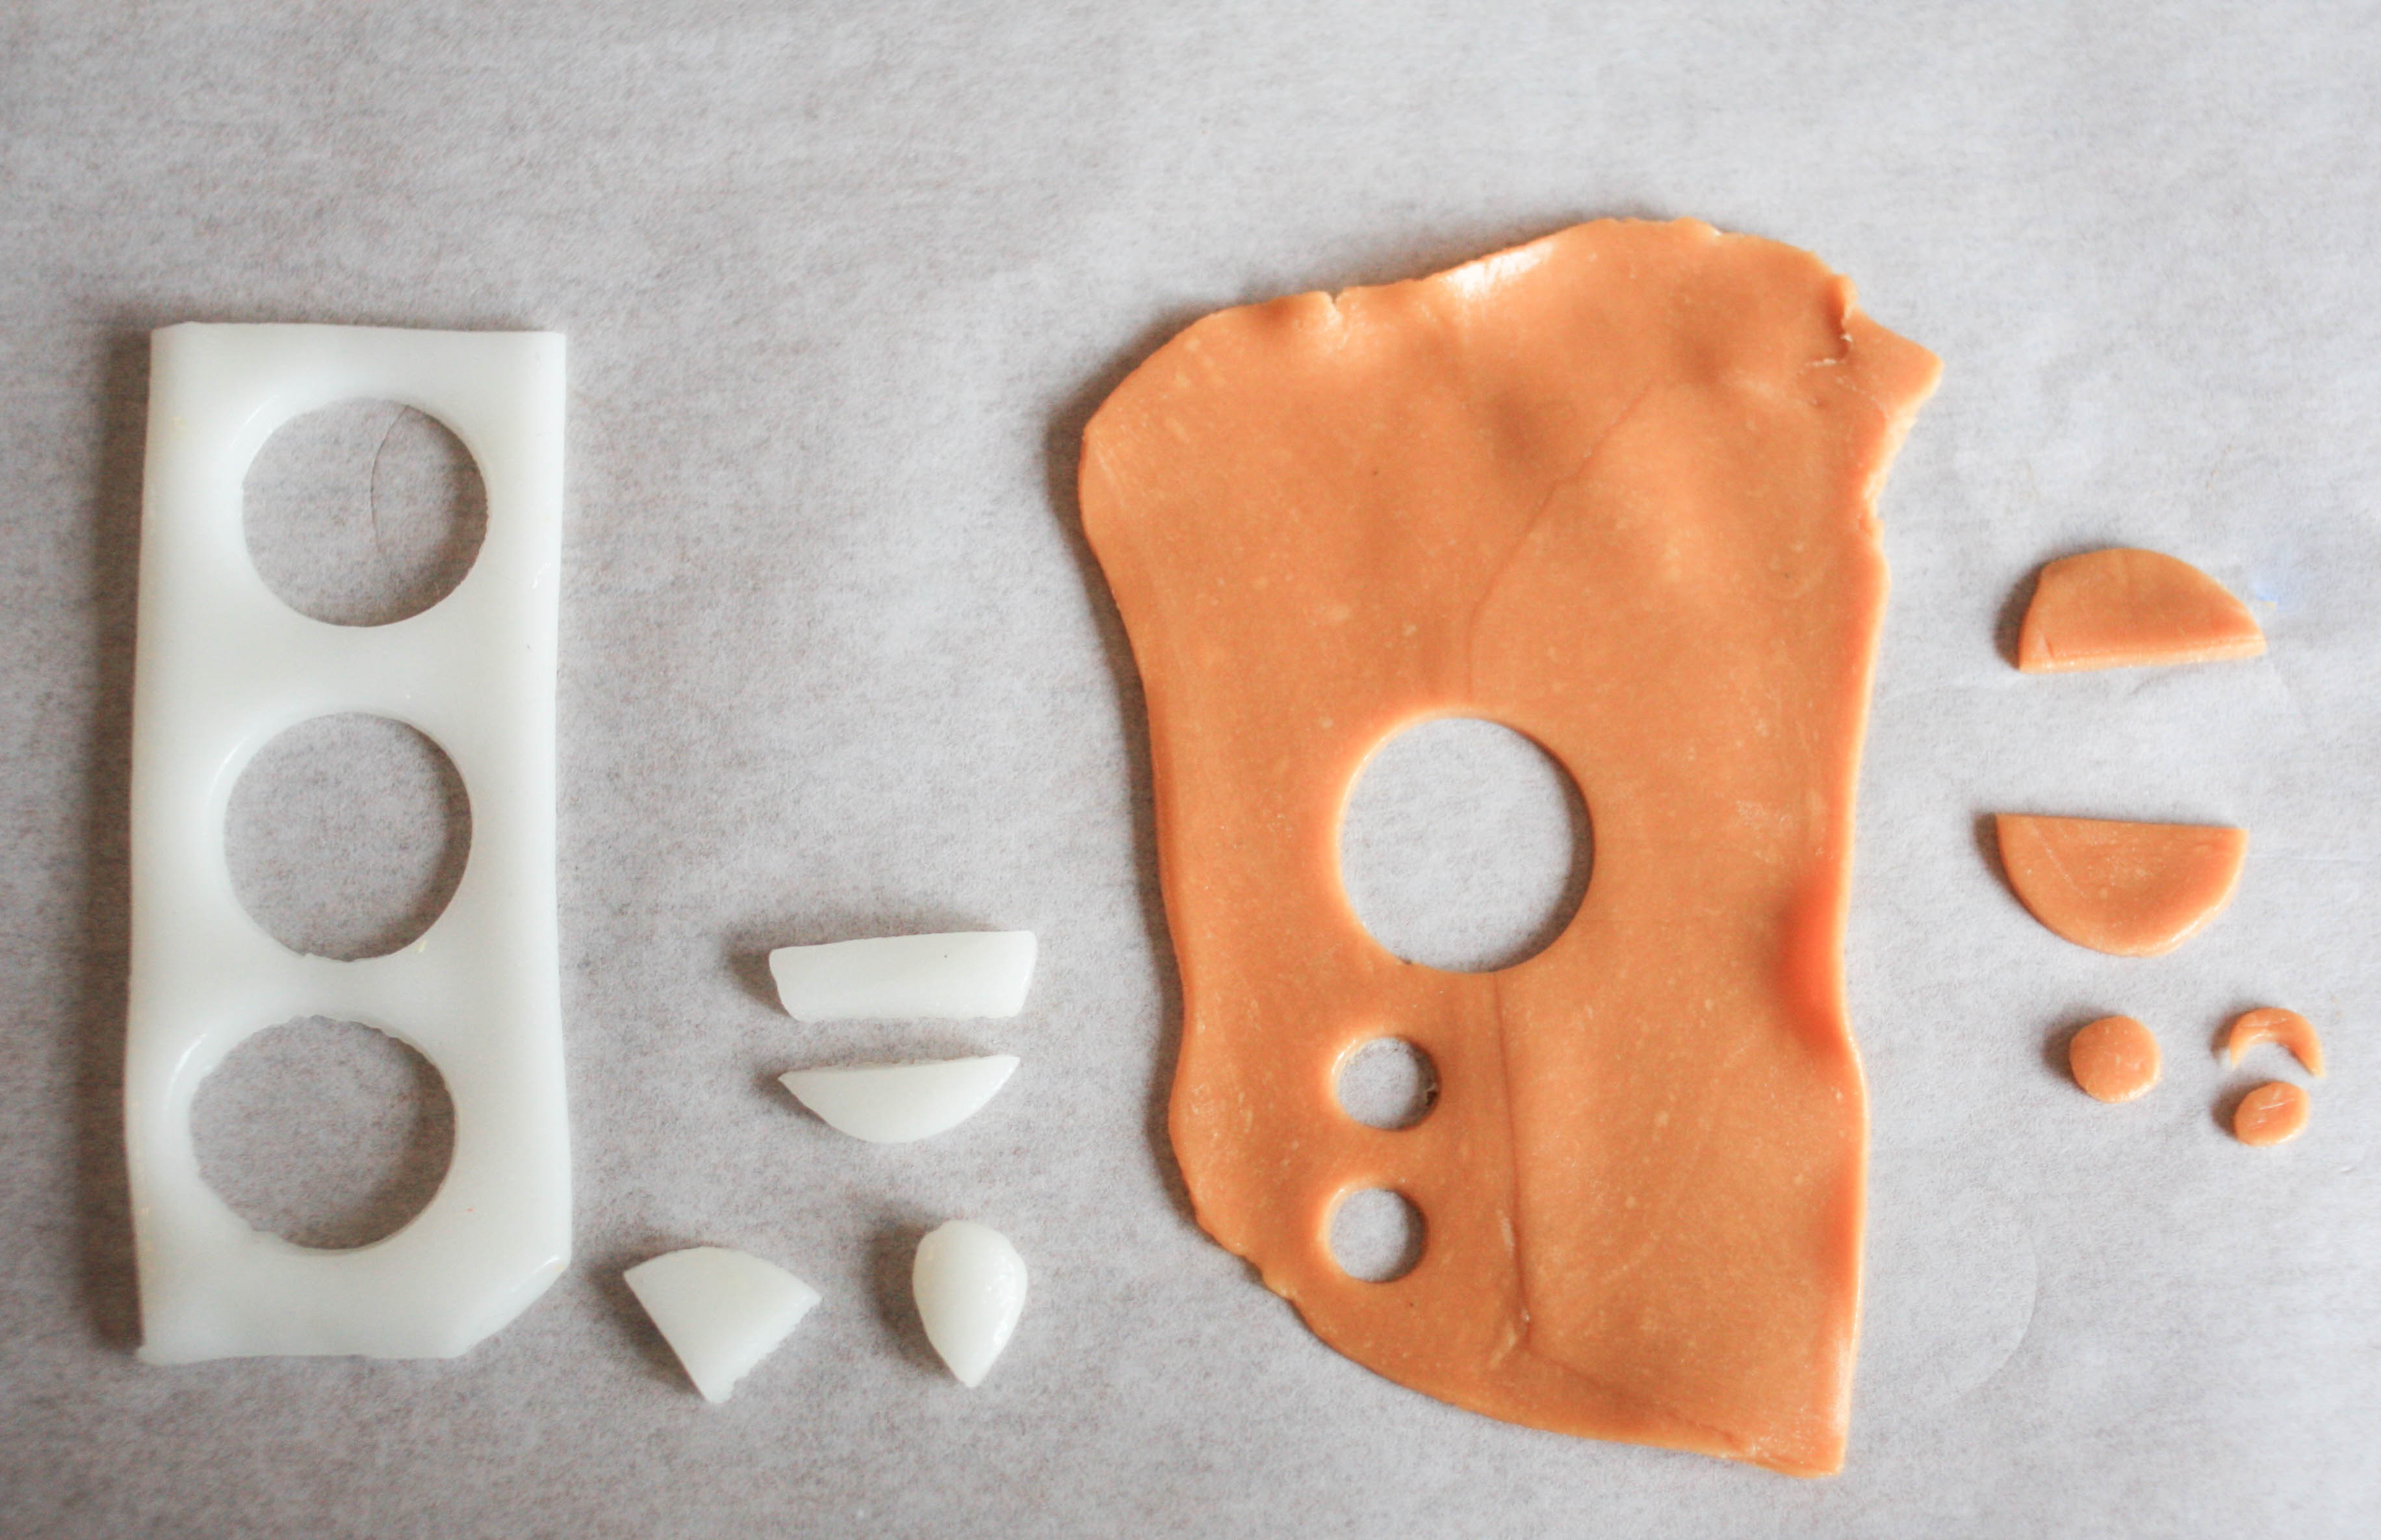
Cut a circle from the chewy blue candy then cut the circle into four pieces. Roll a piece between your finger tips to form a tier drop shape. Flatten the tear drop and place onto the cookie below the eyes.
Step 3:
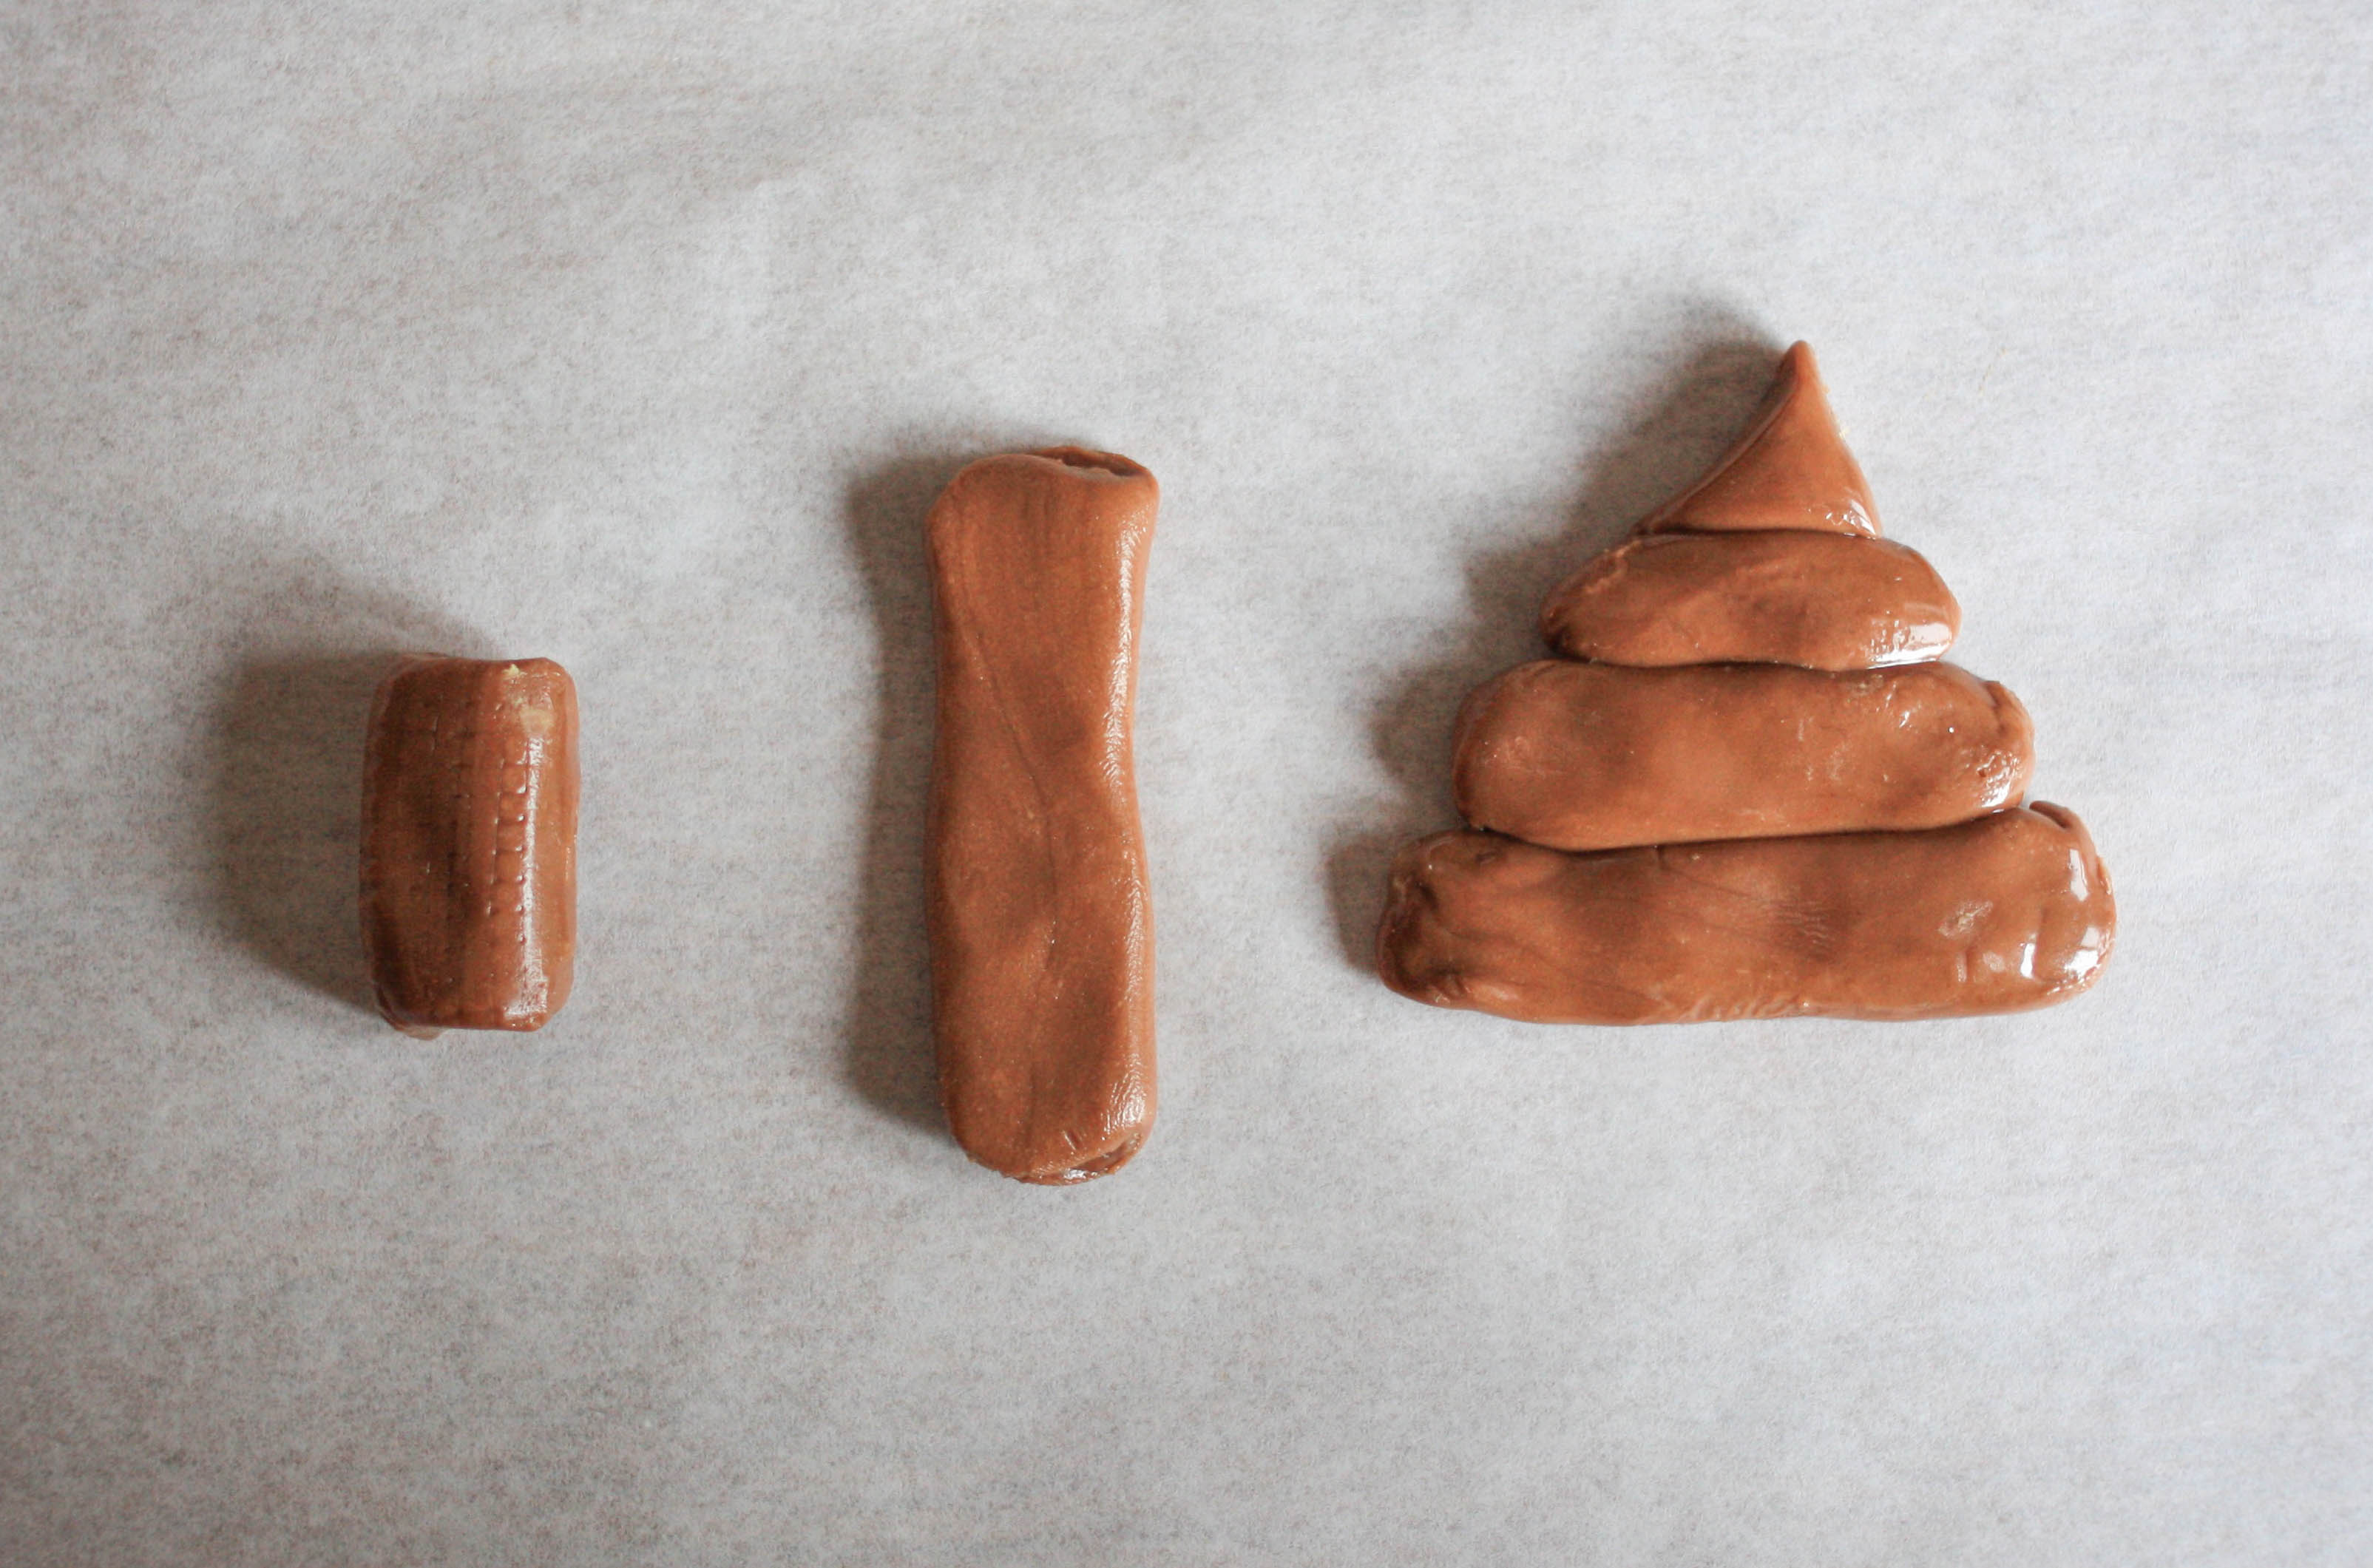
Chocolate ice cream emoji: (Ok, let’s be real here. This could also be a smiling poo emoji.) Roll the chewy chocolate candies into logs and then flatten them with the palm of your hand. Cut three pieces, each a little shorter than the next, to form the bottom of the swirl. Pinch a small piece of chocolate candy to create the swirl’s peak.
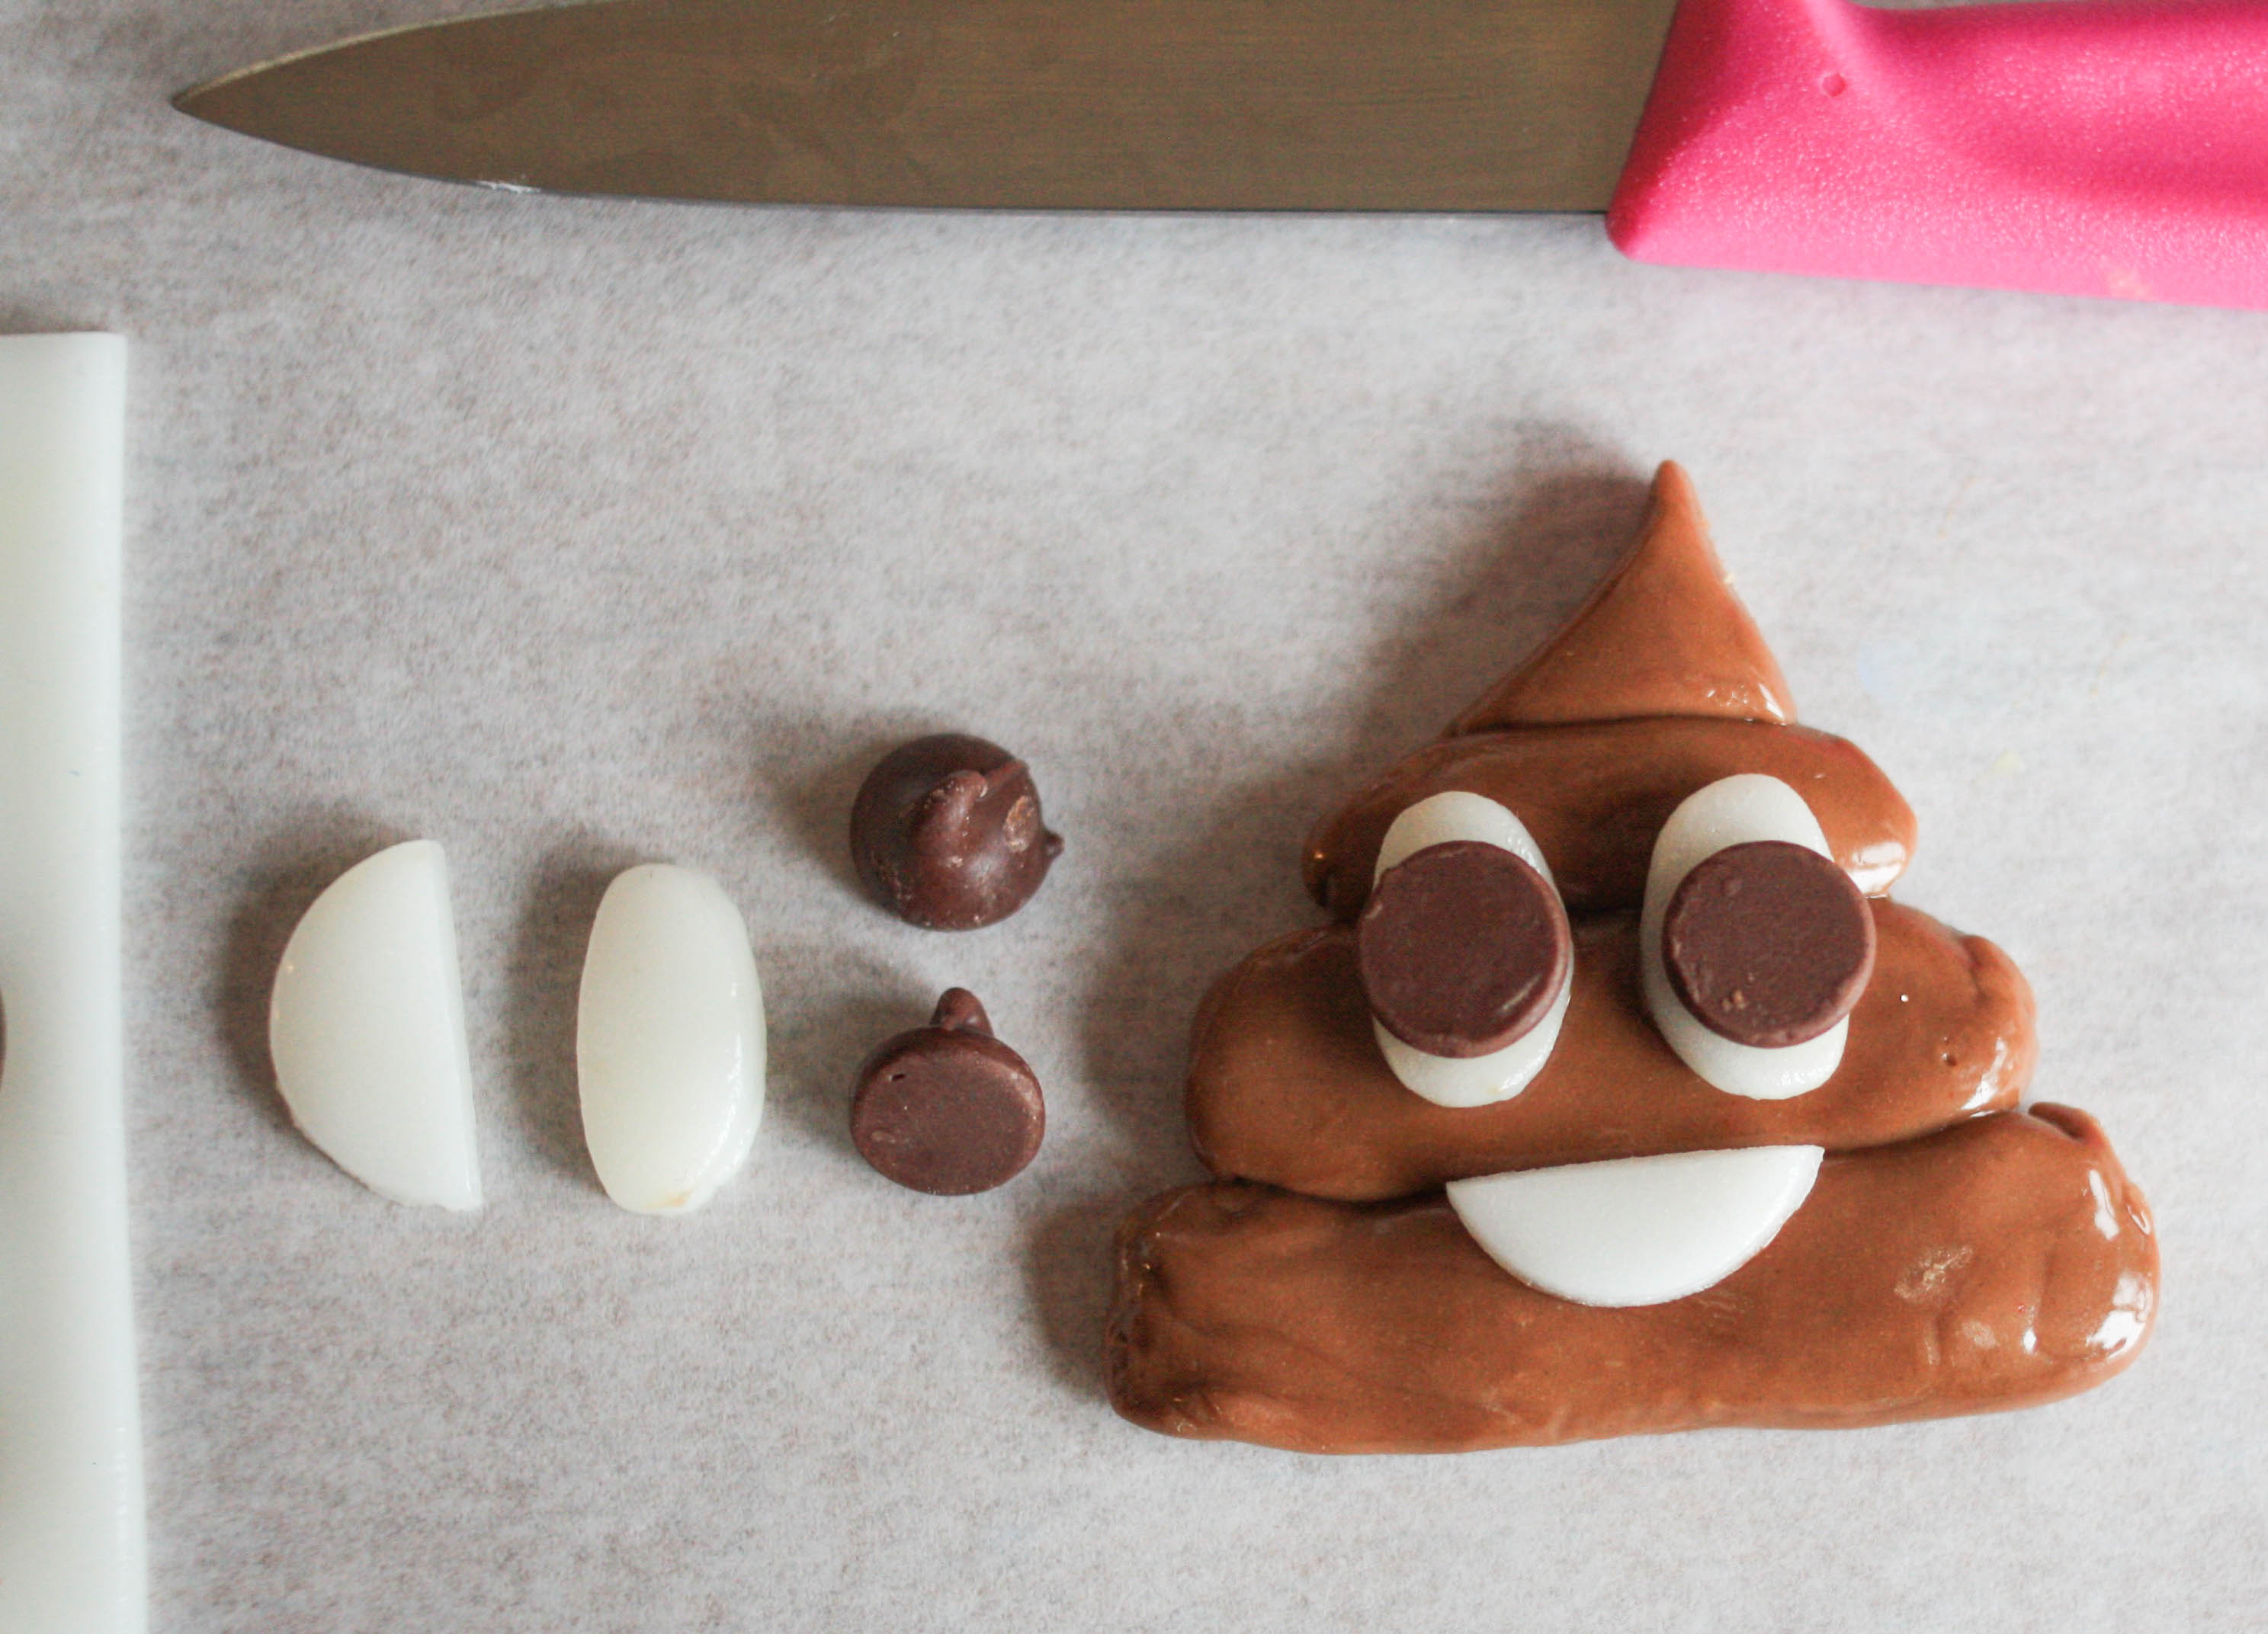
Cut a circle from the white chewy candy. Cut the circle in half and roll the halves between your finger tips to create ovals. Flatten the ovals and place them onto the ice cream swirl. Add chocolate chips for the centers. Cut another circle from the white chewy candy and cut it in half again to create the mouth.
Step 4:
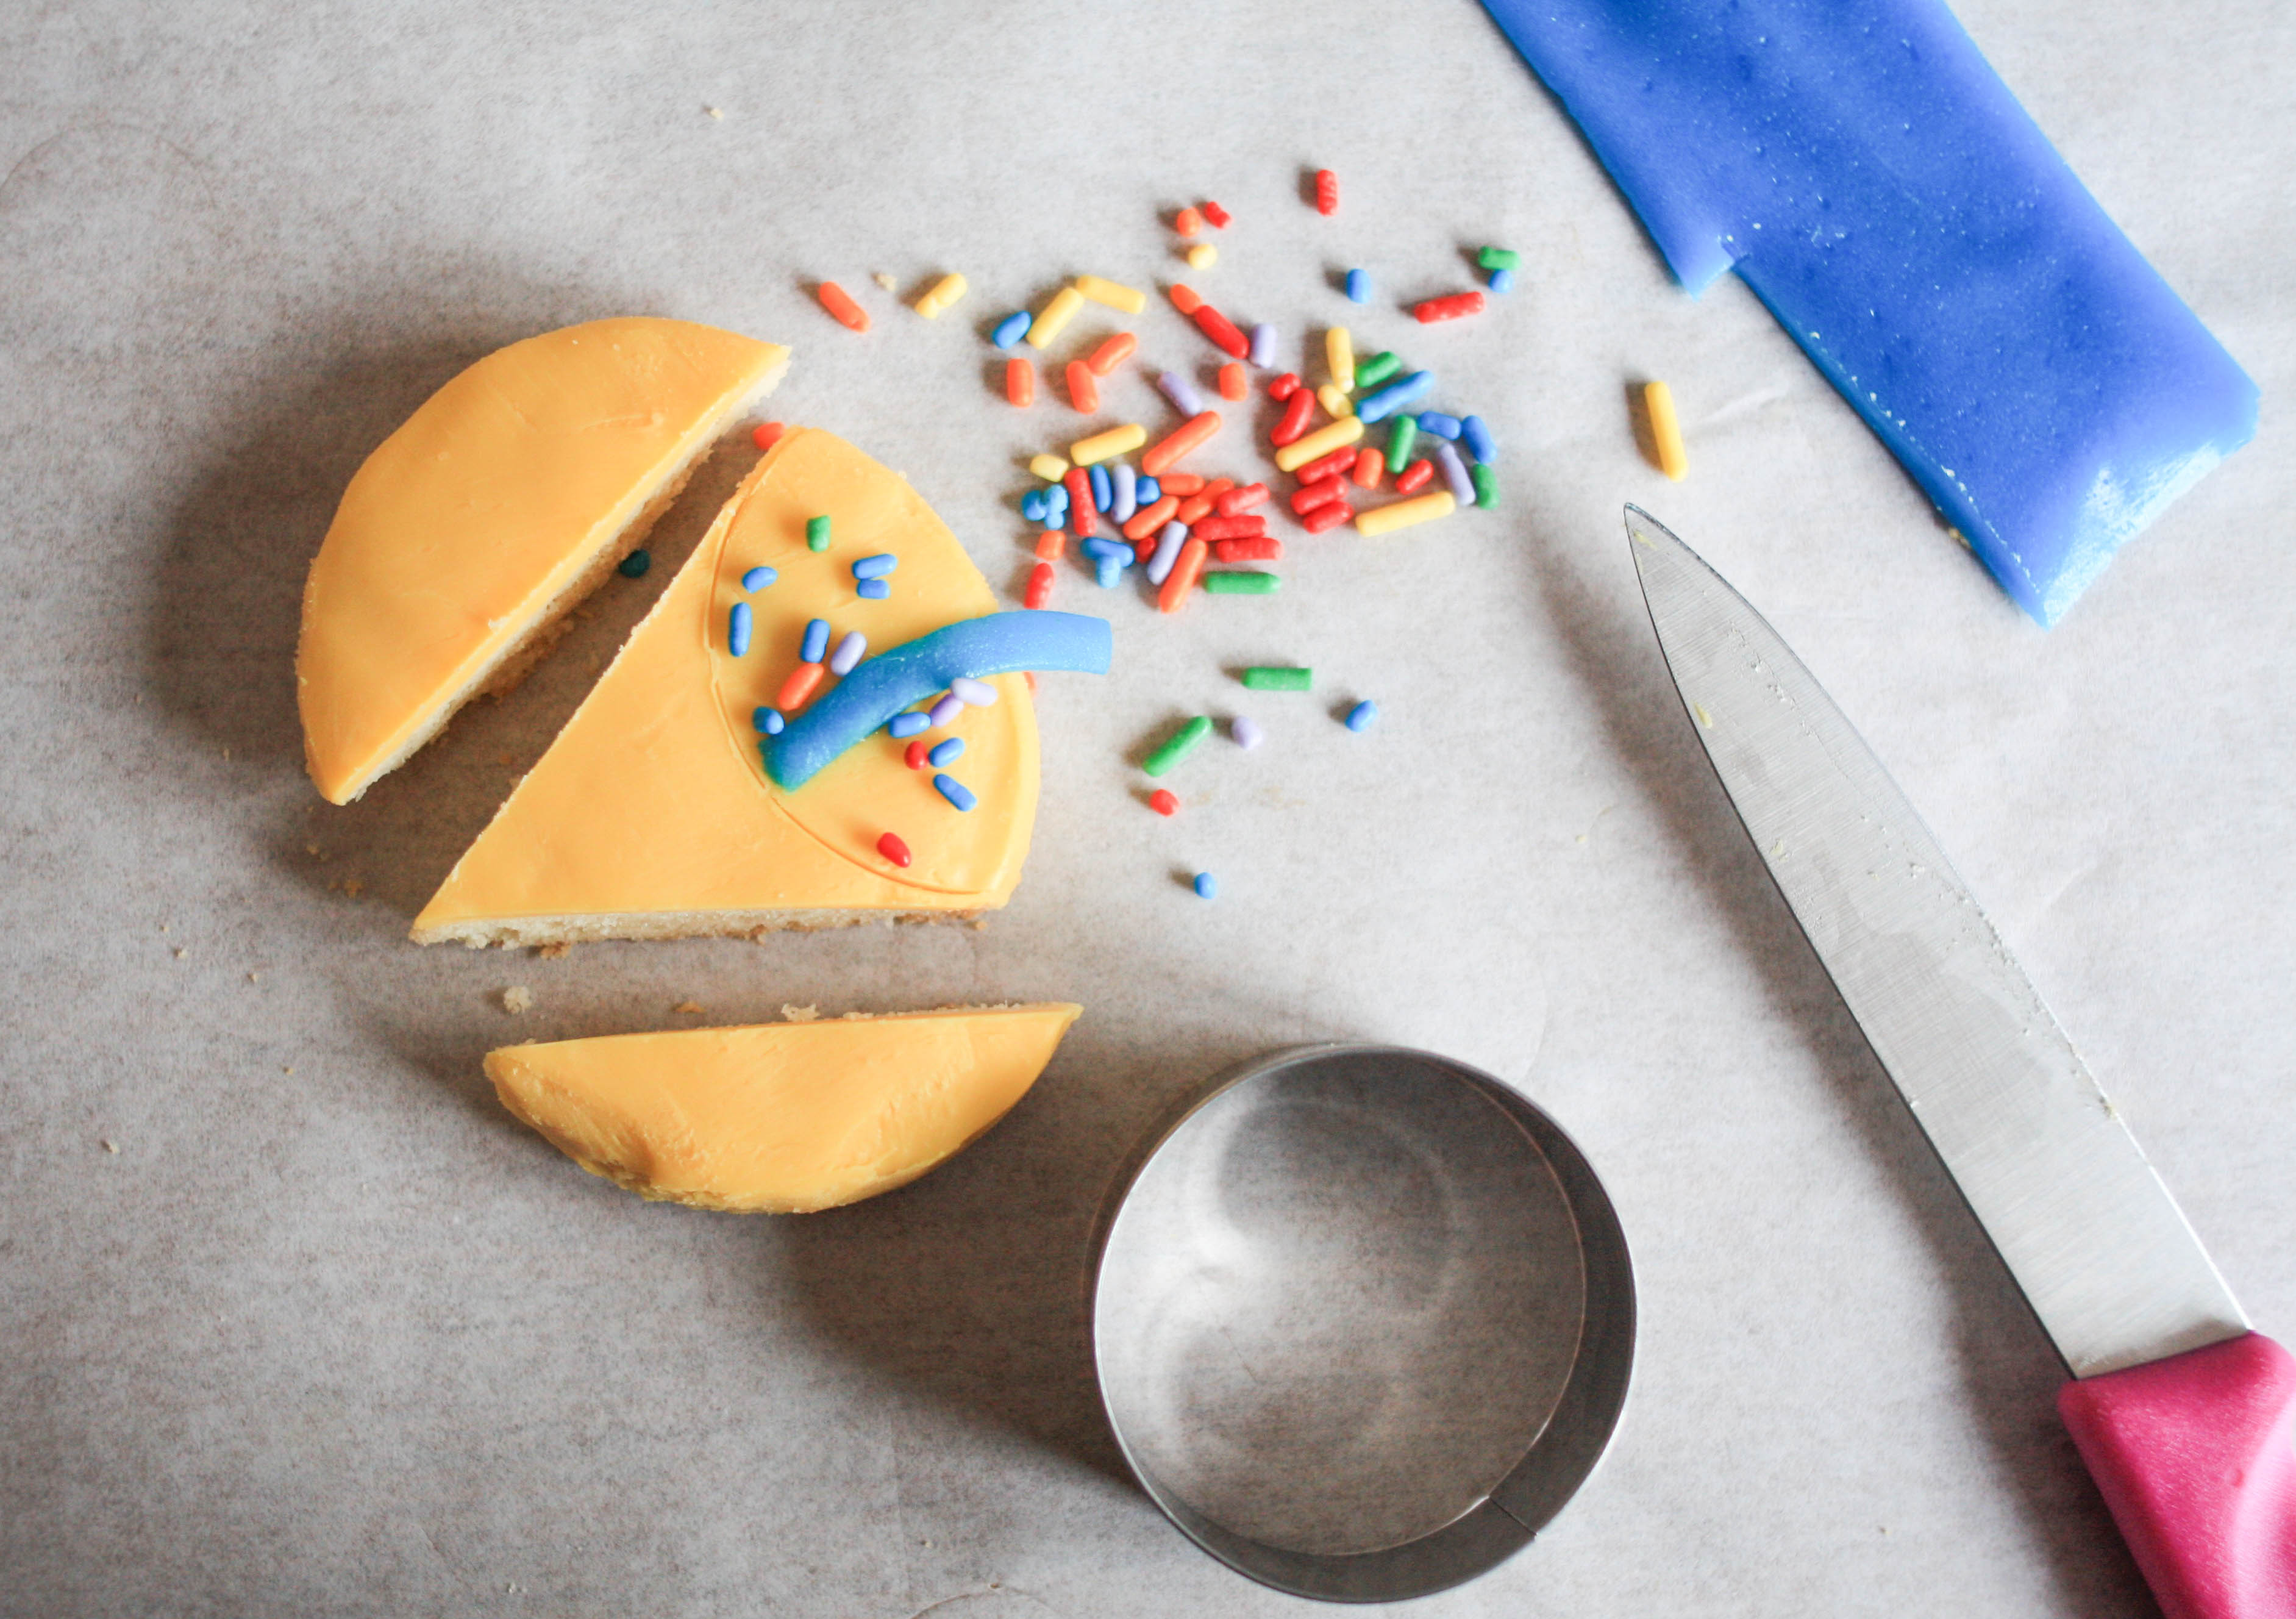
Confetti cone emoji: Cut a dipped cookie into a cone shape. Dip the cut sides in candy melts. Use a small circle cutter to create an indent where the opening of the cone would be. Cut a thin strip of blue chewy candy and place it on the cone. Add rainbow sprinkles as confetti.
Step 5:
Top the cake with your emojis and let the fun begin! ROTFL!
TTFN! ;)
Share tips, start a discussion or ask one of our experts or other students a question.
No Responses to “OMG! How to Make a Fun + Easy Emoji Cake That'll Make You :)”