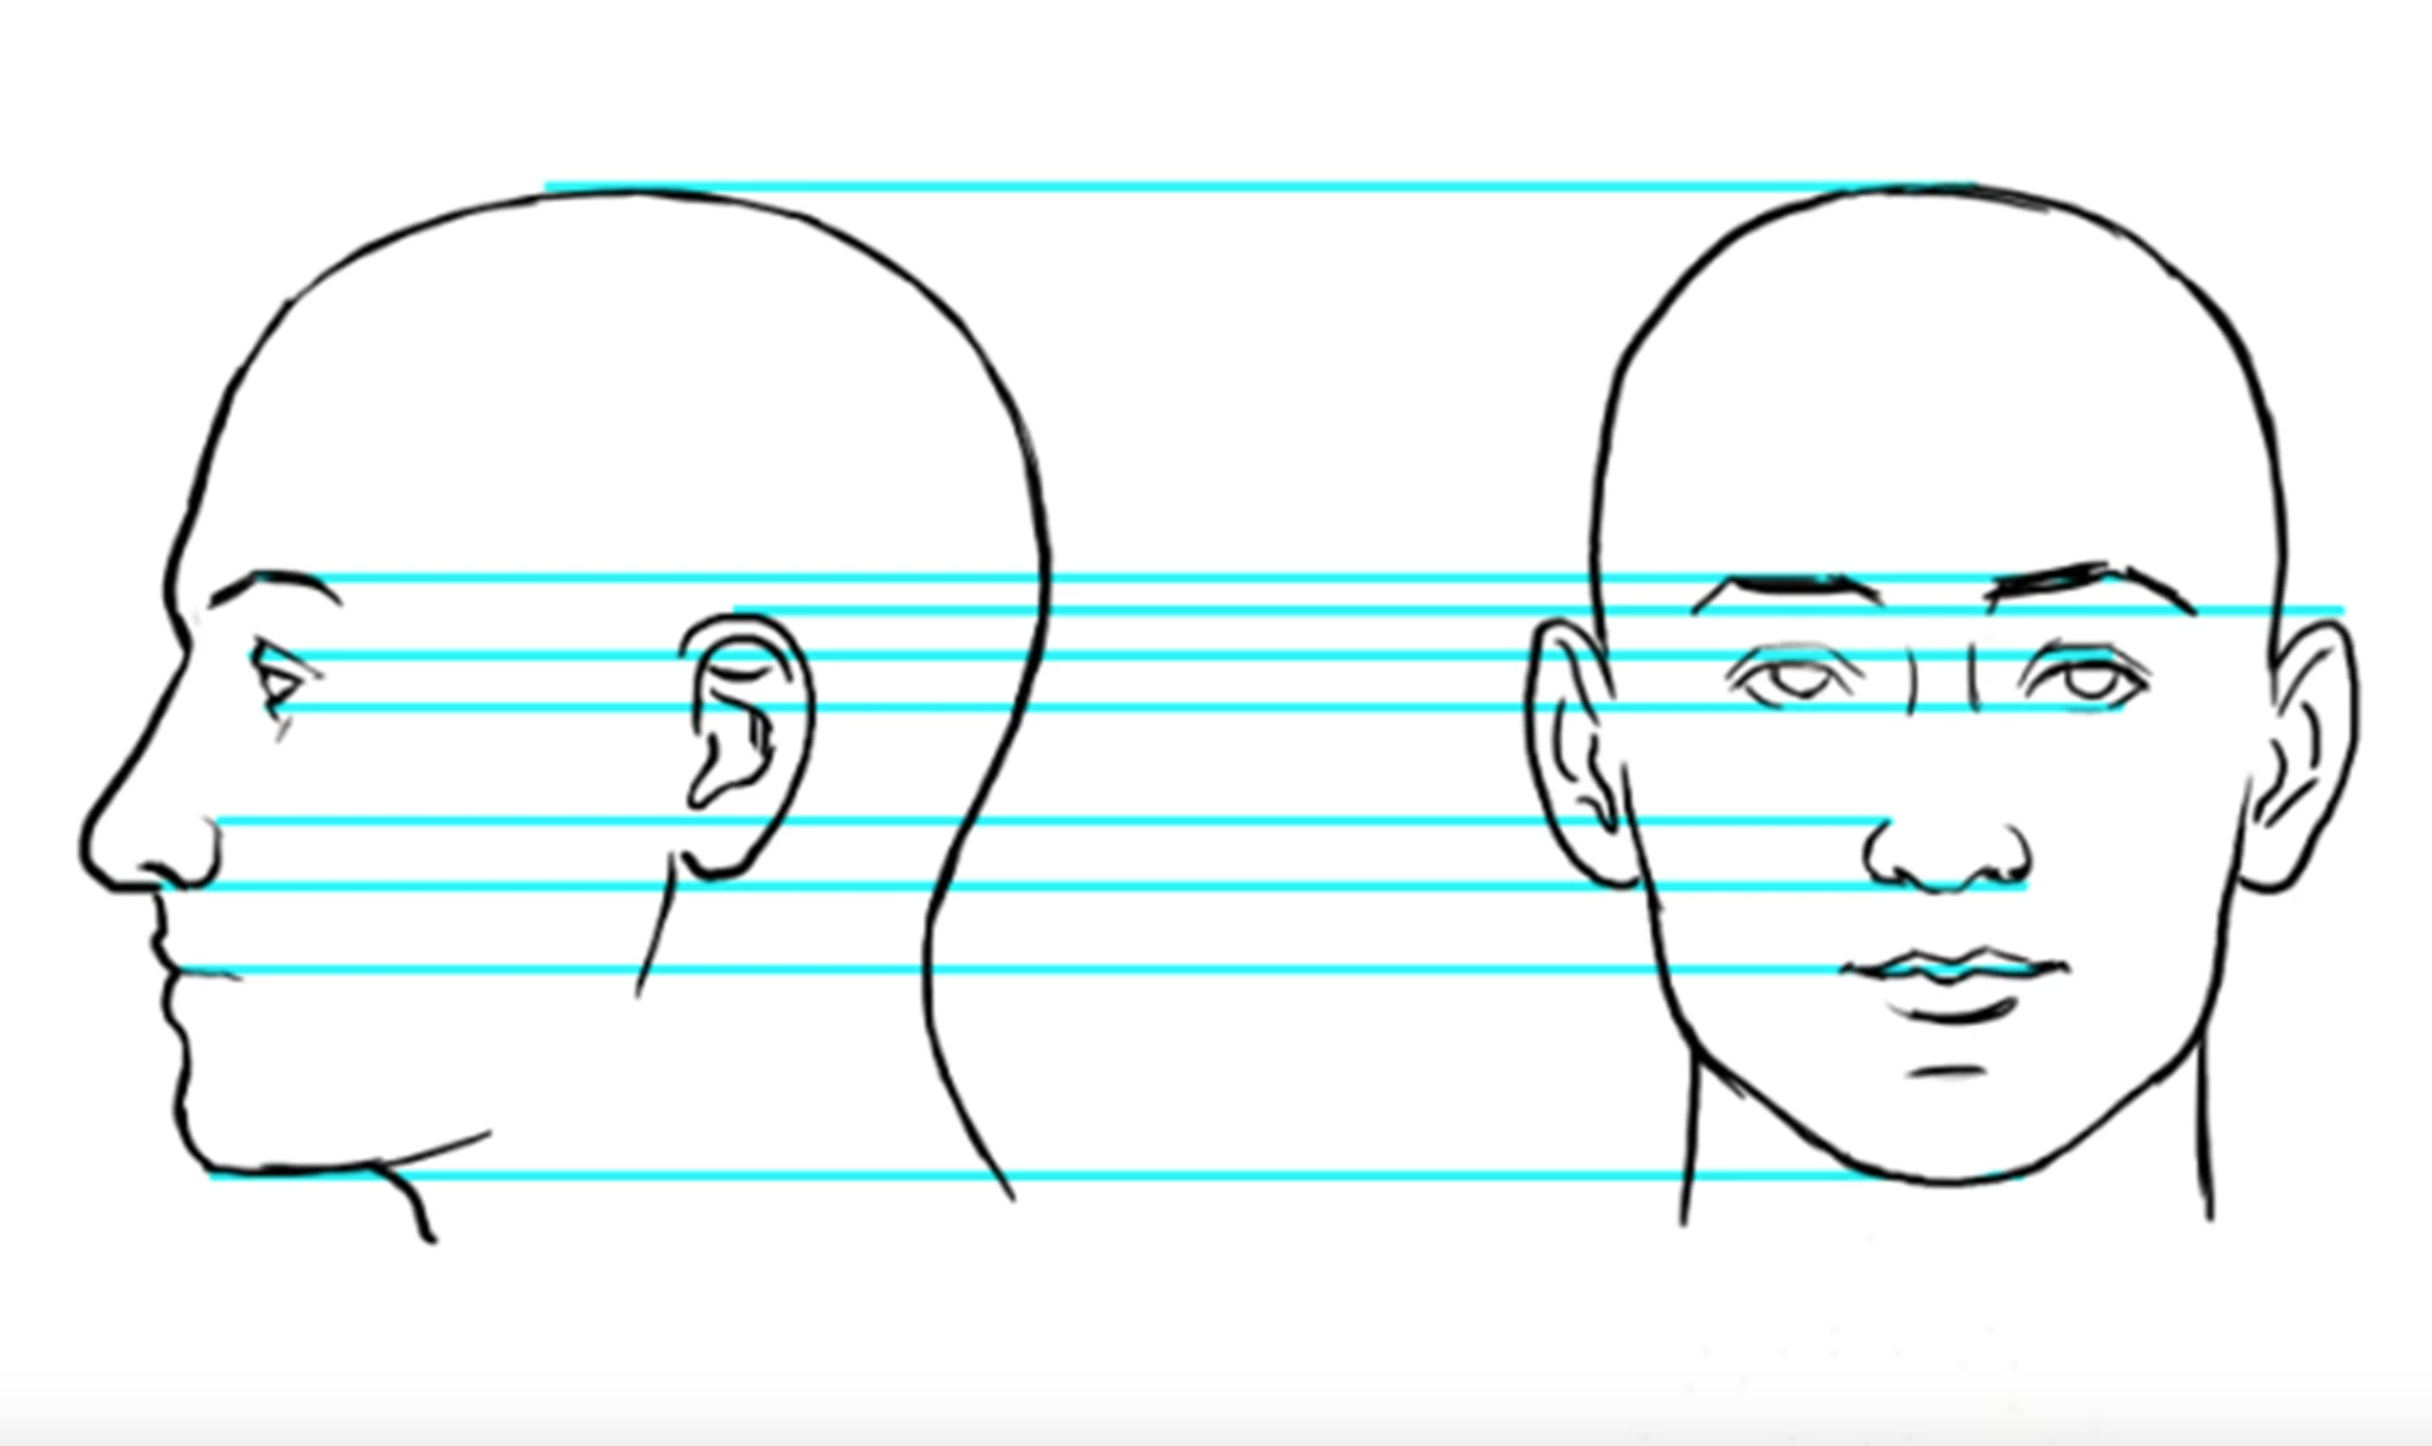
So you've mastered drawing a head — now, perfecting the facial features of your subject is a must.
The eyes, nose, mouth and ears makes your drawing unique and gives it personality. They're the keys to any effective portrait because no matter how well you can draw each feature, if you don't capture your subject's likeness, they won't recognize themselves in your drawing.
Take, for example, the face above in the front view and as a profile. The blue horizontal lines show how different features line up in each point of view. This a great reference for facial proportions, but there's one problem: in the real world, you’re not likely to only see the face in front and profile view. More often, the face will be somewhere in between and tilted up or down. We call this angled face a three-quarters view, demonstrated in the painting below.
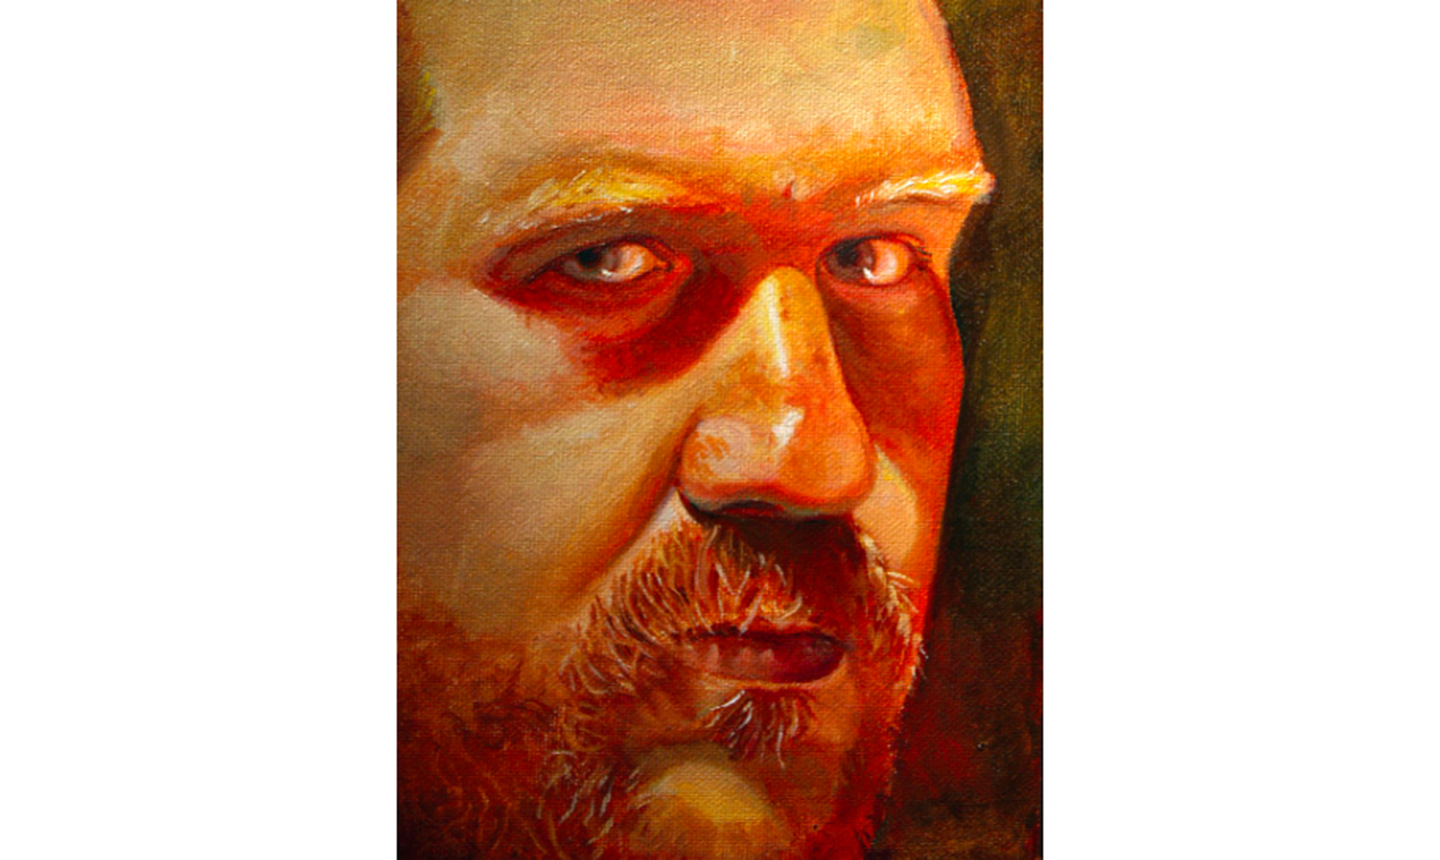
© 2013 Paul Heaston
The proportion rules for a front-view face are different, particularly between the eyes, nose and mouth, than they are in these three-quarters view faces. So let's look at each feature separately as they appear in the front view, profile and three-quarters view, to help make sure you capture your subject's likeness and nail each and every one of those facial features.
Eyes
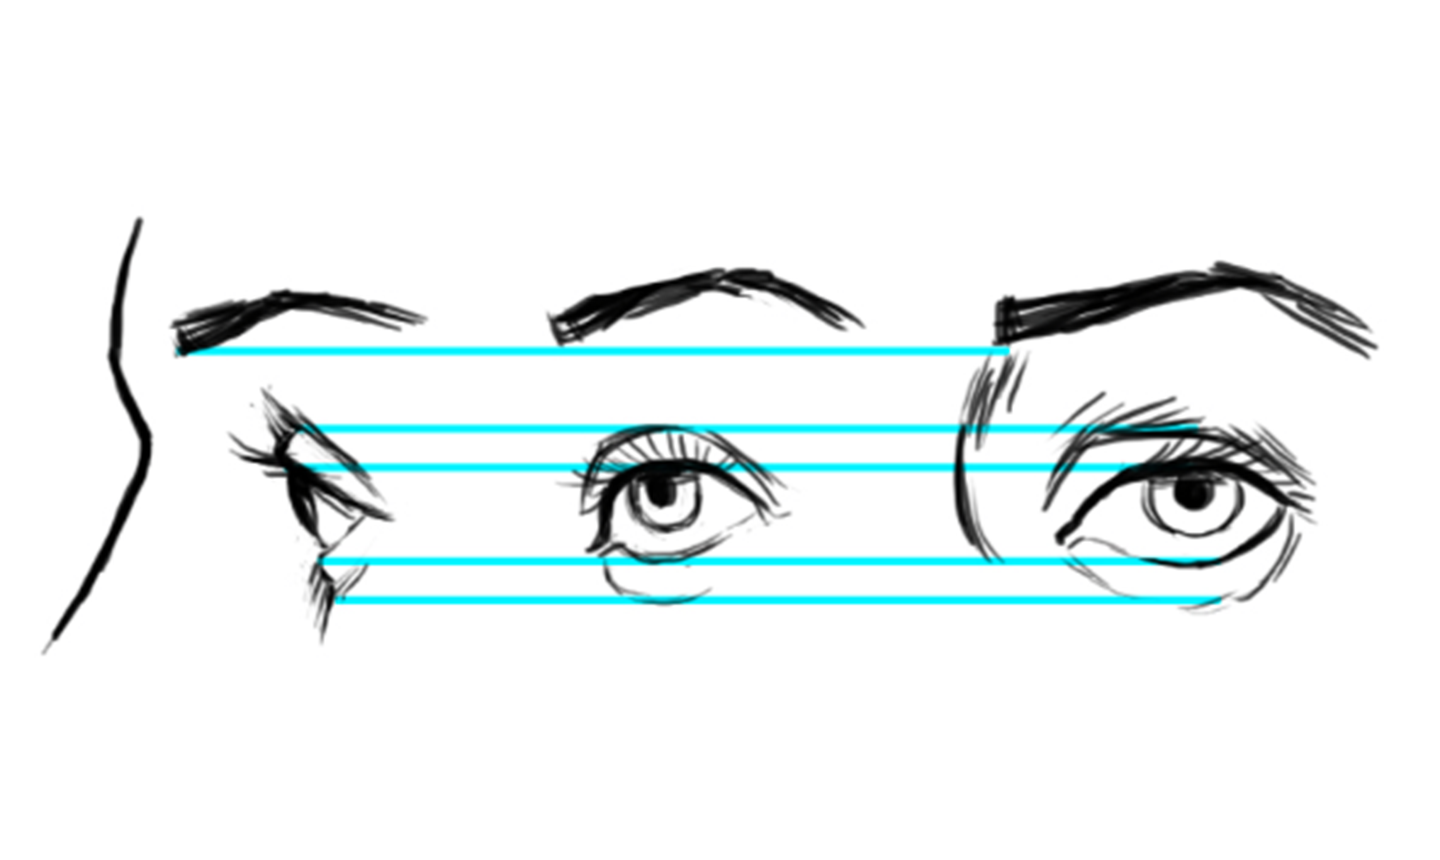
Profile View
Notice just how far back the eye rests from the bridge of the nose. This is because our brow and nose protrude from the face to protect the eye. In this view, the iris is only a sliver and the pupil even smaller.
Three-Quarters View
The eye, including the iris, is foreshortened, or compressed a bit from side to side. This is because the eyeball itself is a sphere, and the bottom and top lids wrapping around the eyeball stop more abruptly on the far side, while tapering more gently on the side facing us.
Front View
This is the traditional view of how you learned to draw an eye , where the eyeball resembles a football-like shape and the iris and pupil are circular.
Note that in all three views you can see clearly how the top of the iris meets and goes under the top eyelid, while the bottom contour of the iris remains visible. Remember, unless your subject is surprised, you will almost never see the entire iris.
Nose
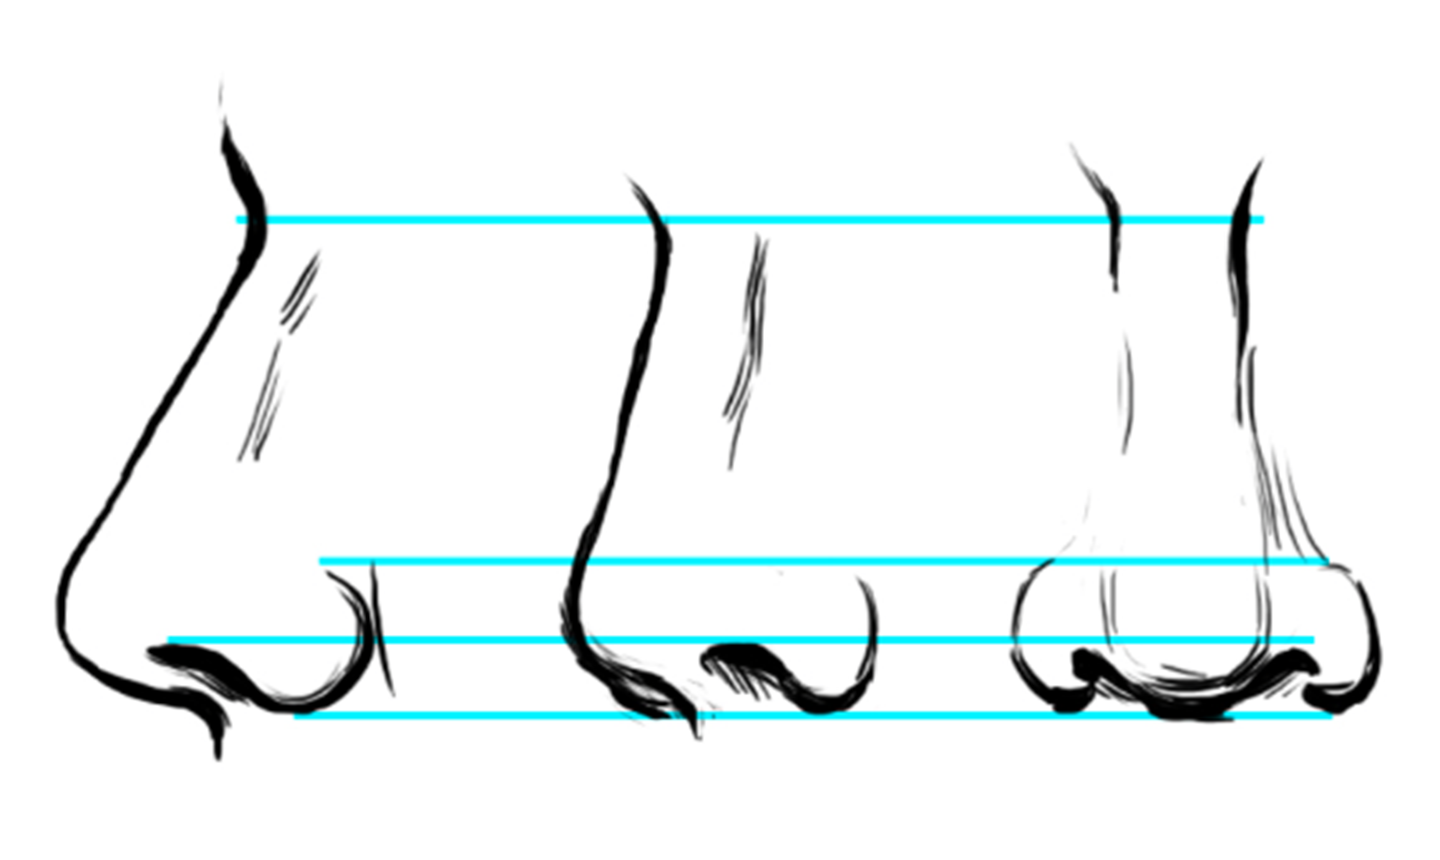
Profile View
The contour of the bridge is most clearly visible. Notice that the walls of the nostrils meet the face much further back than the septum (the cartilage that separates the nostrils), which meets the upper lip directly under the bridge.
Three-Quarters View
The bridge is partially visible and you can start to see both nostrils. Note that the nostrils, which we think of as being at the bottom of the nose, start a little higher than the actual bottom.
Front View
The bridge and nostrils are very softly defined, and rely on value to better indicate the shape.
Lips
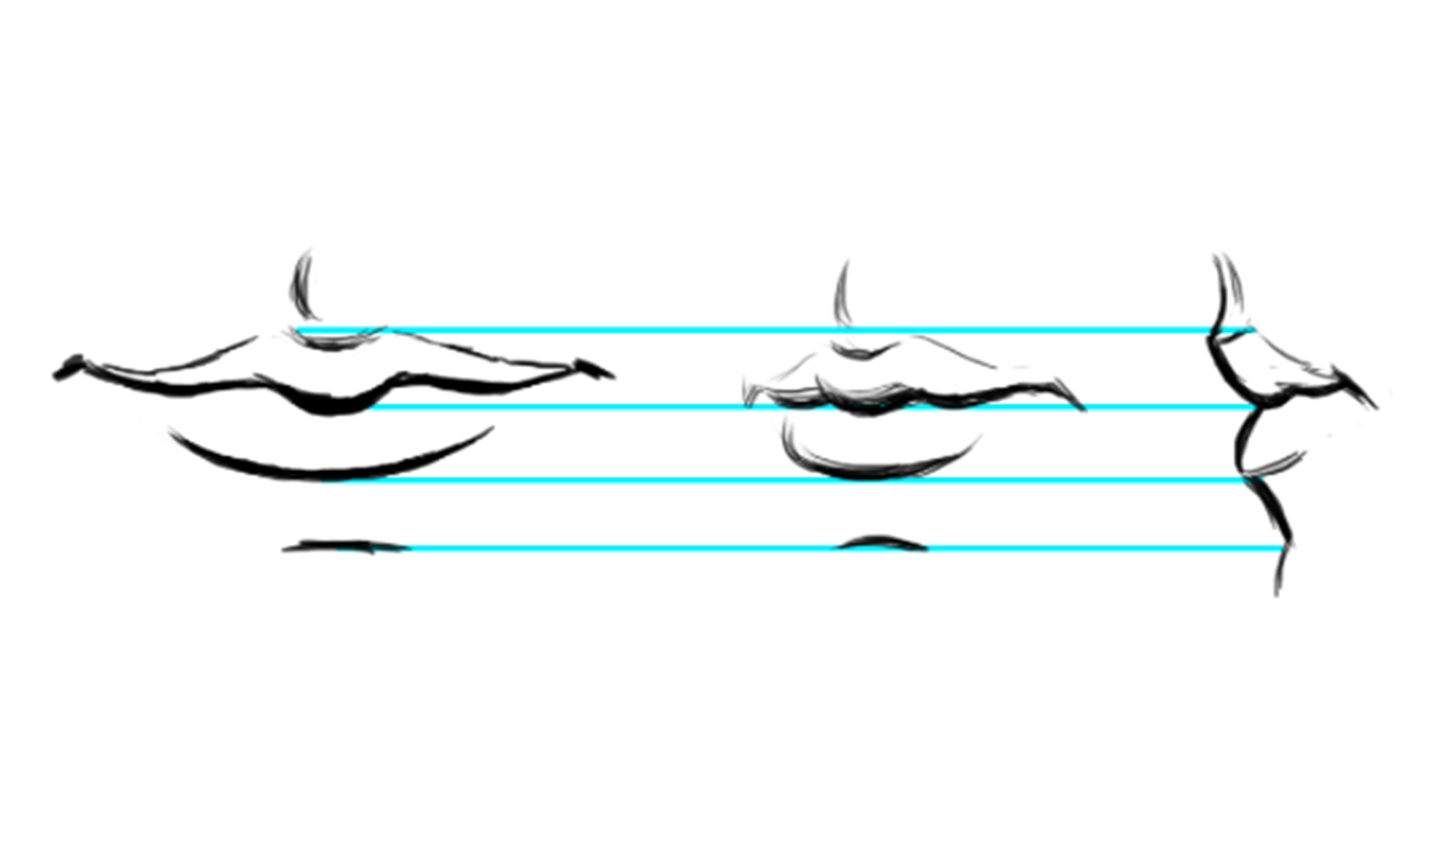
In the mouth drawn above, notice there's a little bump at the center of the top lip. Not everyone has one this pronounced, but there's often a little detail there. A thicker line along the bottom of this bump is a good way to indicate the volume — using just a line.
The bottom lip is usually (but not always) thicker than the top lip, and is generally a simpler curved shape, whereas the top lip is a bit more complicated. In addition to that bump, the top lip often has a depression in the center along the top from the philtrum (that little divot between the nose and lips).
Ears
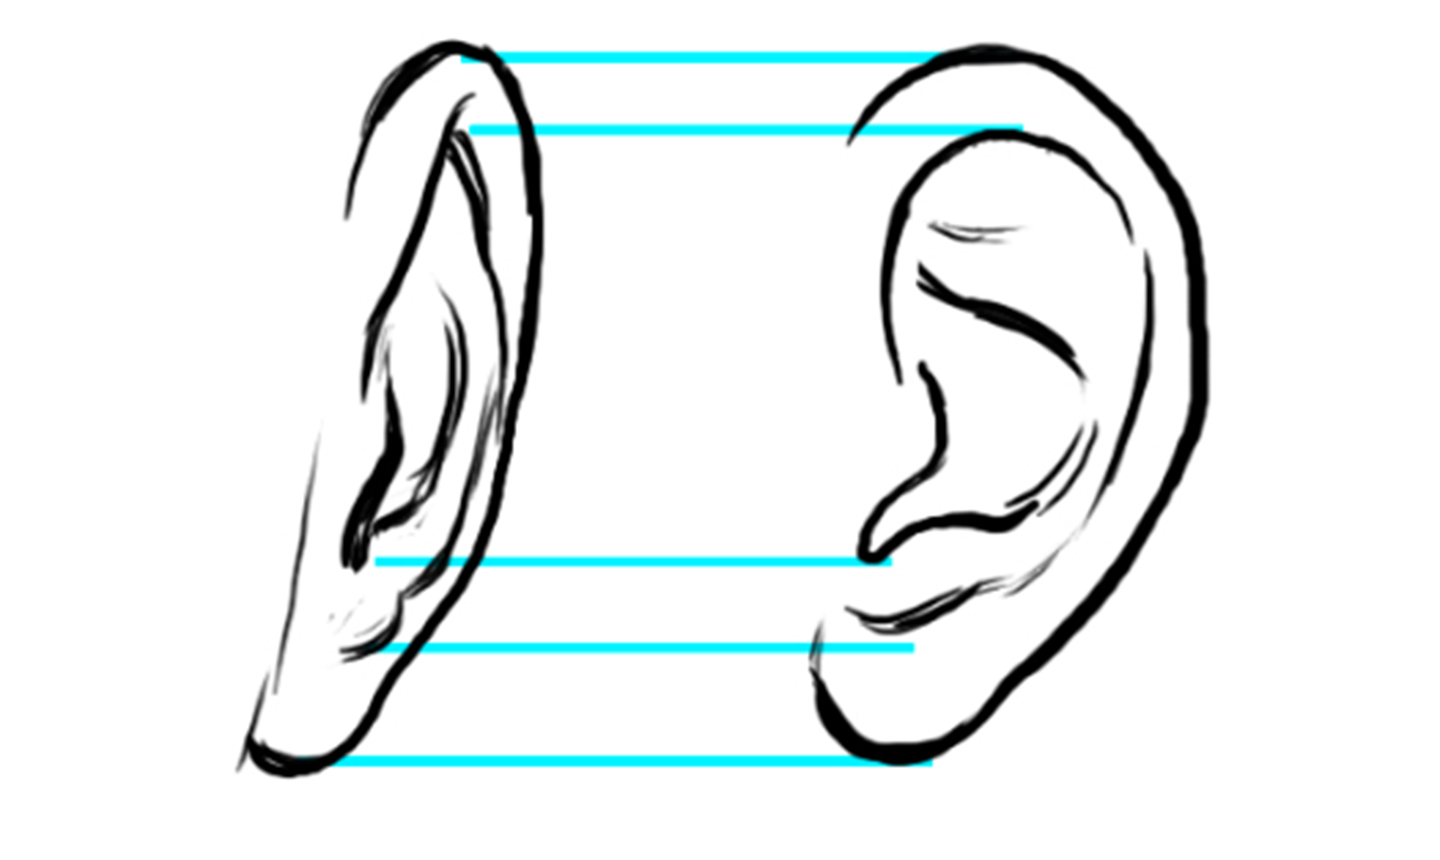
The differences of the ear in the profile, three-quarters view and front view are pretty subtle. Ears can vary a lot from face to face — some people have hanging lobes, some are connected, and some have shallow depressions and ridges within the ears while others don't.
It helps to think of an ear as a semicircle with a ridge around the back edge that doubles toward the bottom to become two ridges. The outer ridge flattens and becomes the earlobe, while the inner ridge starts from somewhere inside and underneath the other one and stops with a little bump above the ear lobe.
Now that you've got the basics, a good exercise is to try drawing your facial features individually in a mirror from different angles. How do they change as you look at them from below or above? What have you noticed about drawing facial features from different points of view, and how can you implement that into your work?


how long is this class
Wow, that helped a lot!
Ethnic variations of eyes, noses, and mouths would be very helpful. Thanks!
I have little to no depth perception how do I improve my sketches and make them realistic looking with no depth perception
Just enquiring about the course
Thank you