
If you’re reading this, then it’s safe to assume you’re either curious or obsessed with making cake pops. It’s very important to know some things before you dive deeper into the cake and candy coating abyss. If you’ve made them before, you know they can be quite a challenge! If you’ve not made any yet, I’m glad you’re here so you can start your cake pop experience in the best way possible.
Let’s get familiar with the “do’s” and “don’ts” of making cake pops!
A FREE Class for You: Creative Cake Pops

Learn dazzling techniques for designer cake pops with lifetime access to this FREE class from Wilton decorator Valerie Pradhan.
I’ve compiled a simple list of pointers to help you strategically tackle these delicious (and ever-popular) bite-sized treats. Check out my other posts about cake pop fundamentals for shaping and dipping to really master the art of these tiny treats. Bookmark all of these pages because I can guarantee you’ll be back again and again for this information!
Getting started with your cake pop design:
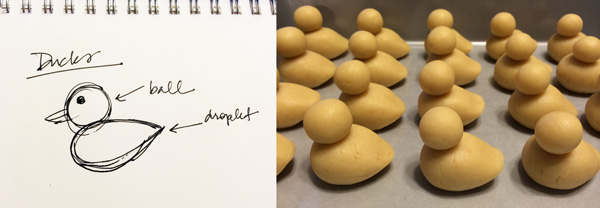
Do plan ahead. Make sketches to break down the design to simple shapes and add candy pieces to it to create more detail. Whatever it is you’re making, the best way to do it is to keep it simple. Don’t try to make a cake pop more complicated than it needs to be, especially if it takes the joy out of creating them!
Don’t be afraid to really push and shape the cake pop dough with your hands and fingers. If you follow my dough and shaping tutorial, you’ll have perfect pliable dough.
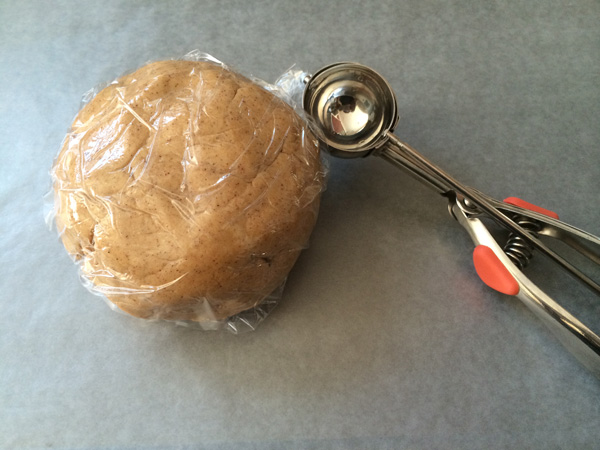
Do use a cookie scoop to make uniform portions.
Don’t make the portions too large if you’re not using a cookie scoop, as they can get really heavy and fall apart during the dipping process.
Do get into the habit of scooping only a few portions at a time and forming them. Repeat this process until all the dough has been used and formed.
Don’t keep the unformed dough exposed to air, it will dry out. Wrap it in plastic wrap while forming the portions.
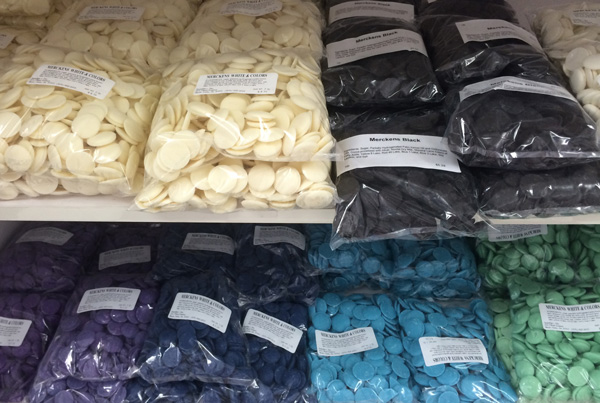
Mercken’s Colors at Standlee’s Cake, Cookie and Candy Supplies
The cake pop coating:
Do use candy coating, it’s made specifically for dipping. It melts smoothly and will harden completely. There are many different brands available at hobby, grocery, or cake and candy supply stores like Wilton Candy Melts, Mercken’s Colors, Clasen Coatings, Ghirardelli Melting Wafers, Guittard A’Peels, Make & Mold, CandiQuik and chocolate bark, to name a few.
Don’t use chocolate bars, chocolate chip morsels, pure chocolate or baker’s chocolate blocks. These types can be used in baking recipes but not for coating cake pops because the chocolate is either not tempered or contains a combination of ingredients that will not allow it to harden completely like candy coating.
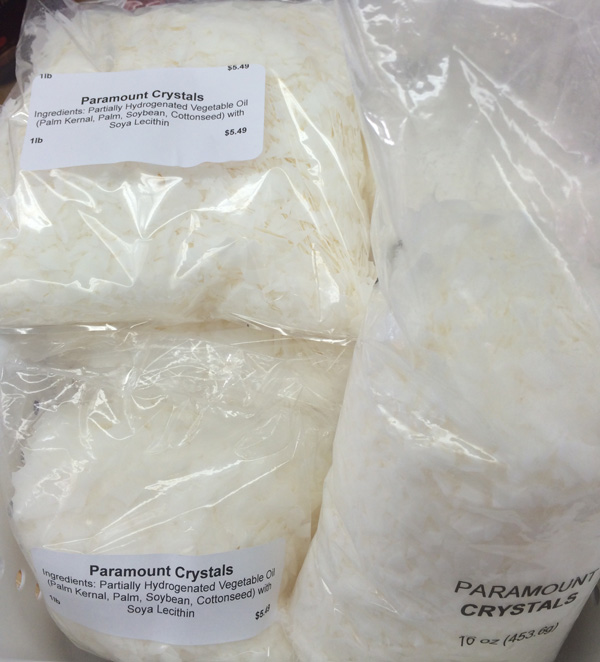
Do use Paramount Crystals to thin candy coating. It is the only product that will not alter the integrity of the coating.
Don’t ever use oil or butter to thin candy coating, your cake pop coating will never solidify like it should. Oil is only used in chocolate for chocolate fountains and butter is only used for baking with chocolate.
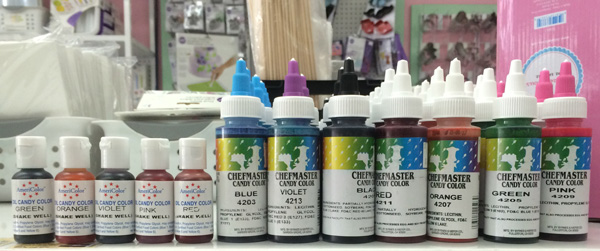
Candy dyes at Standlee’s Cake, Cookie and Candy Supplies
Do use only oil-based dyes if you wish to add this to the candy coating. I personally don’t recommend it because it will slightly change the texture and the taste of your coating. But if you choose to, just know that oil-based is the way to go.
Don’t add anything that is NOT oil-based to candy coating. This can also cause the coating to “seize”, making it unusable. Read the labels carefully, if it doesn’t say oil-based then it usually isn’t.
Tools of the trade:
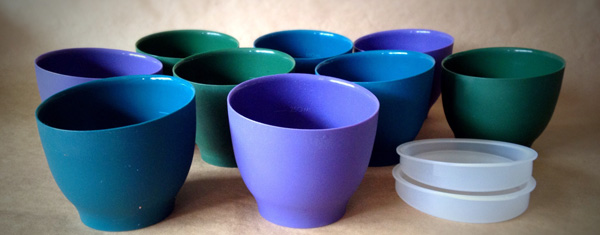
Do use small silicone or plastic, microwave-safe bowls or cups, about 1 cup capacity, to melt candy wafers. This is the best way to melt candy coating evenly.
Don’t use ceramic or glass containers as both retain too much heat, preventing the candy coating from heating or cooling at its own natural pace, which makes it more difficult to dip without the worry of cracks.
Do use a microwave (preferred) or a chocolate melting pot to melt the candy coating.
Don’t use a double boiler or any other method where the candy coating may come into contact with water or steam. This will cause your coating to “seize,” rendering it completely unusable.

Dipping & decorating the delightful dough:
Do dip cake pops when they’re no longer chilly to the touch and candy coating is no longer warm to the touch. The closer to room temperature both are, the better.
Don’t dip cold cake pops into too warm candy coating, you’ll get cracks for sure!
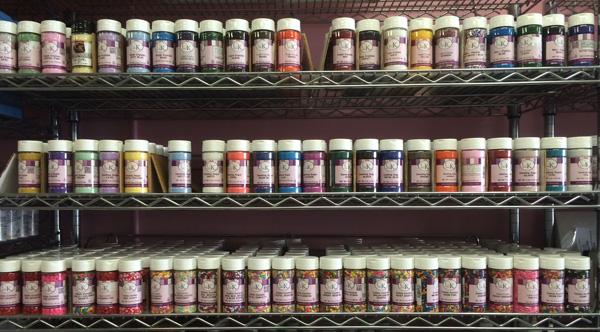
Sprinkles and nonpareils at Standlee’s Cake, Cookie and Candy Supplies
Do use sprinkles and nonpareils to decorate.
Don’t use candies for decorating the exterior of cake pops until you test them first! Always test the candy by placing it into the fridge for a few minutes. Remove from the cold and see how it reacts as it comes to room temperature then decide if you can use it or not.
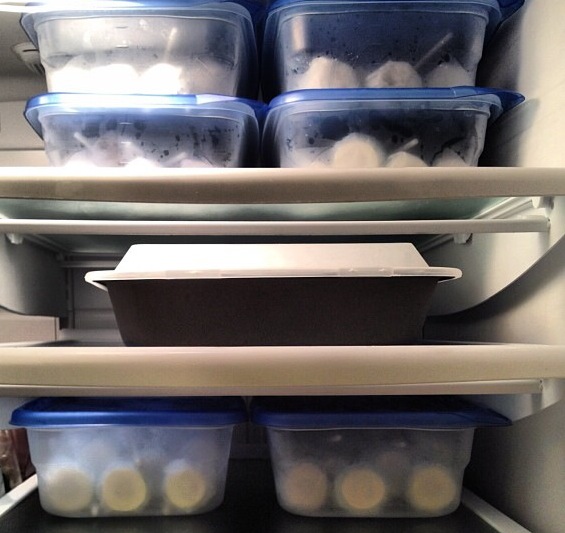
Storing your cake pops:
Do refrigerate and store completed cake pops in airtight containers in flat layers separated with paper towels (if they aren’t individually packaged). When defrosting, this method of storage will allow the condensation to collect on the outside of the container or package and not on the cake pops.
Don’t store them exposed, otherwise the pops will become sticky due to condensation collecting on the surface.
Do freeze shaped and uncoated balls for later use.
Don’t freeze coated and completed cake pops!
This lengthy list should help with troubleshooting your cake pop projects! It seems like a lot to absorb, but I want your cake pop experiences to be as pleasant and enjoyable as can be! Have fun with it, without the trouble of too much trial and error!
Do you have any questions about how to make cake pops? Let me know how I can help, comment below!
A FREE Class for You: Creative Cake Pops
Learn dazzling techniques for designer cake pops with lifetime access to this FREE class from Wilton decorator Valerie Pradhan.
What makes online Bluprint classes great?

Learn for life! With lifetime access to your classes, you can watch lessons at your preferred pace and easily revisit your favorite concepts with just a click.

Kick up your feet! Enjoy classes anytime from the convenience of your home or even on-the-go with our mobile apps.

Get personalized guidance! Ask your fellow students questions to receive all the answers and feedback you need to succeed.

Love it! There’s no risk in trying when it’s free.
Where do I find the silicone bowls to make cake pops?