
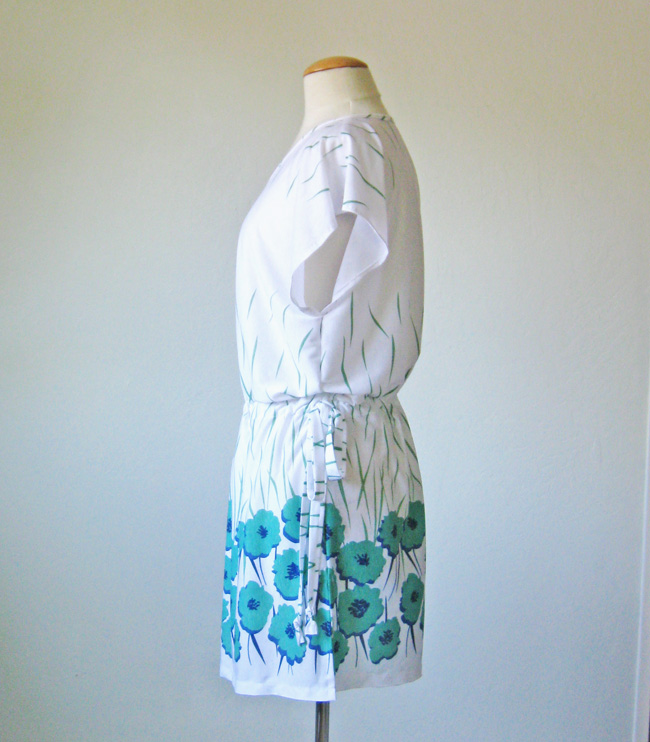
Ready to hit the beach or lounge poolside? Have the perfect new suit but nothing that matches? Sew up this quick and easy DIY cover-up to complement any swimsuit. There’s no pattern required to make this personalized and adorable summer style, so get creative with length and fabric!

How to make a DIY swimsuit cover-up
Step 1: Determine your length
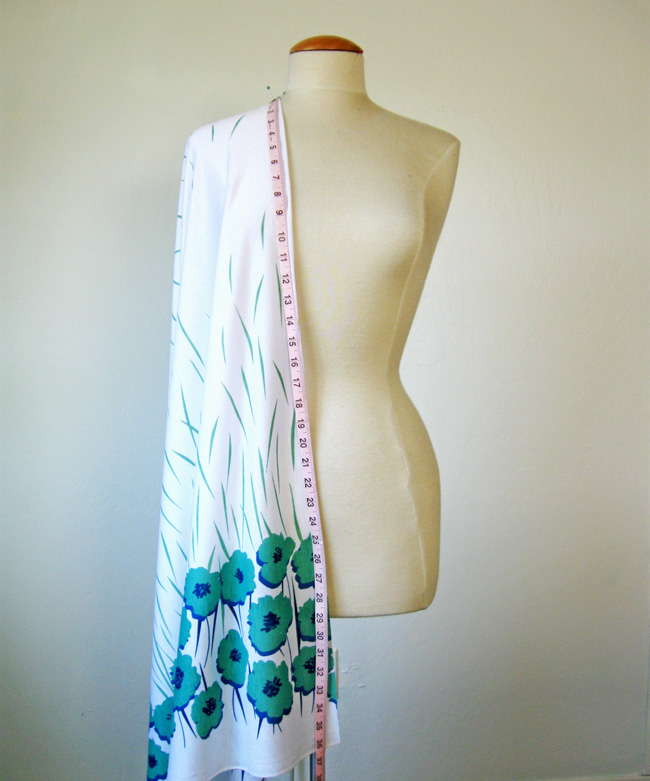
The fun thing about this cover-up is that it can be any length you’d like! Start by measuring your body to figure out the length. I decided it make mine hit above knee, so I measured from the top of my shoulder down to where I wanted it to end (the hem point). If you want yours to be a maxi dress, for example, measure from the top of the shoulder to the floor.
Add a couple of inches to that measurement to take care of the hem and the shoulder seam allowance. Exact numbers here are not necessary because everyone will be different!
Step 2: Determine the width
Once you’ve determined your length, it’s time to determine the width. Measure of the largest circumference of your body, be it your bust, hips, waist or anywhere else. Add 8″ to 14″ to that number, to allow wiggle room for fit and style, while also allowing for side seam allowances.
Divide the total number in half and then use that number for the width of the fabric. In my example, the width was 25″.
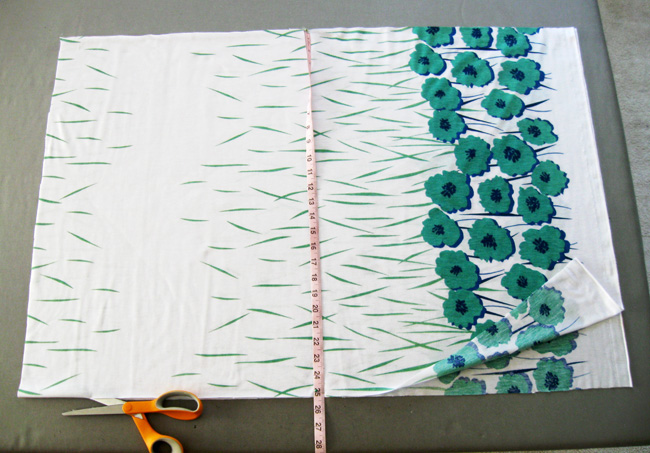
Step 3: Cut the fabric
Cut two large pieces of fabric into rectangles using the two measurements you just took. Place the two pieces of on top of each other.
Because I used a border print fabric, I folded it crosswise to get the most use of the border the border. If you’re not using a border, just cut two pieces of the desired size. To save time, use the selvedge as the hem edge finish (so there’s no need to serge it later).
Step 4: Cut an opening for the neck
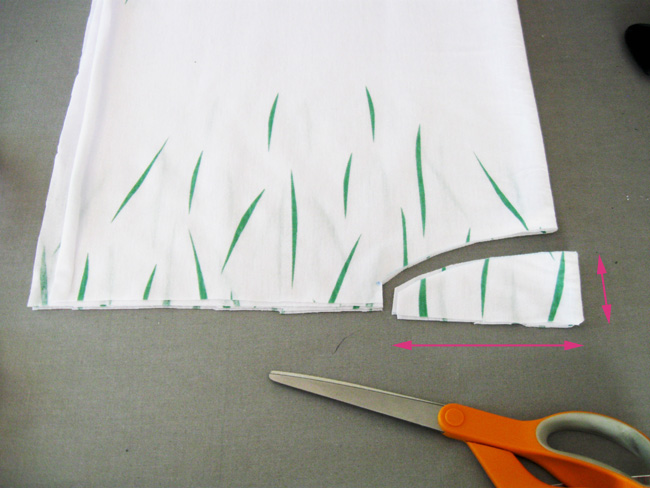
While the two rectangles are still flat on top of each other, fold them in half lengthwise. Cut a neck opening as shown above.
To determine how wide to make this neck opening, you can measure a T-shirt that has a neck opening you like. In this instance, I marked about 2″ down the fold and about 5″ along the cut edge. Cut a rounded edge as shown.
Set one of the rectangles aside — that will be the back of your cover up, and we’ll come back to it in a later step.
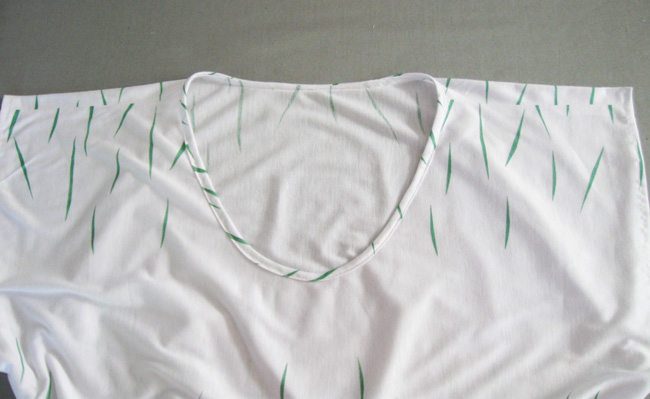
Step 5: Adjust the front neckline
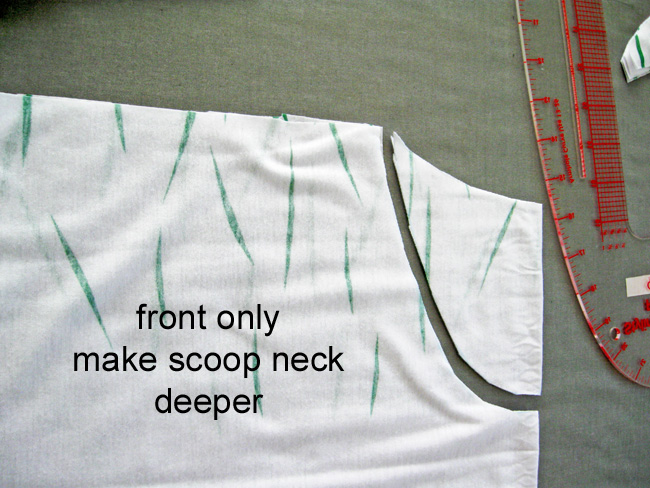
For the front neckline, I wanted it to be more of a scoop neck. Using the same T-shirt pattern, I measured the depth of the scoop and used the curved ruler to draw a new neckline. For the neckline, I used a ¼” seam allowance to add binding, so keep that in mind when you design your neck opening.
Step 6: Sew the shoulders and neck opening
Sew the two rectangles together at the shoulder seam, on either side of the neck opening you cut before.
Finish the neckline using whichever method you like. In this case, I used a narrow bias binding. Whichever neckline method you choose, it’s generally easier to do the neckline before sewing up the side seams.
Step 7: Mark the casing placement
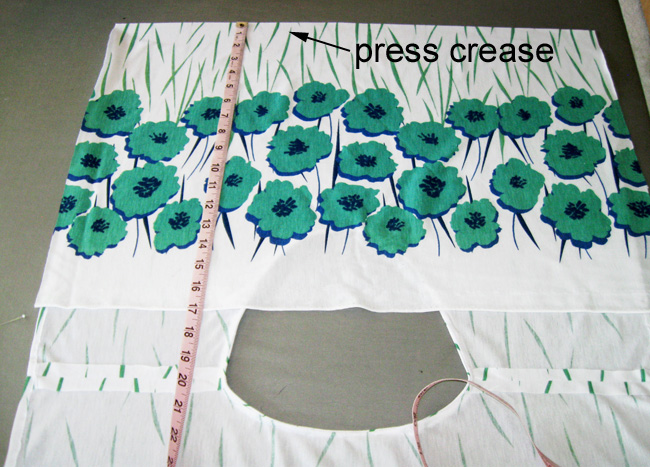
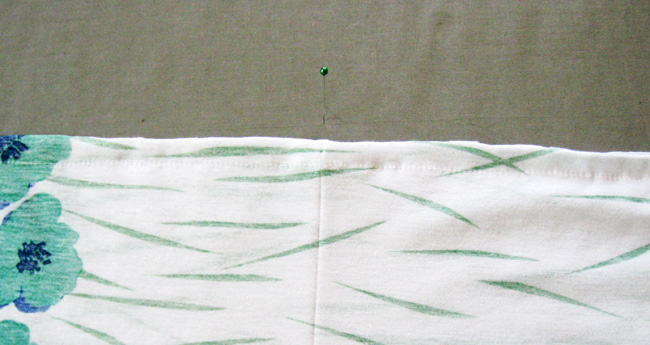
This cover up can have an elastic (or drawstring) casing. To mark the location of it, you can simply use your iron. Determine where you want the casing to be, and then fold the hem edge up evenly and press a crease with the iron to mark the placement. Do the same on the other piece of fabric.
Step 8: Sew one side seam
Mark about 11″ down from the shoulder seam along the side edge. That will be the bottom of the armhole. You can adjust for a deeper or shallower armhole as needed.
Sew the side seam together from the hem edge up to the armhole mark, matching at the crease line. If you would like openings at the side hems then you can adjust where the side seam begins.
Step 9: Apply the casing
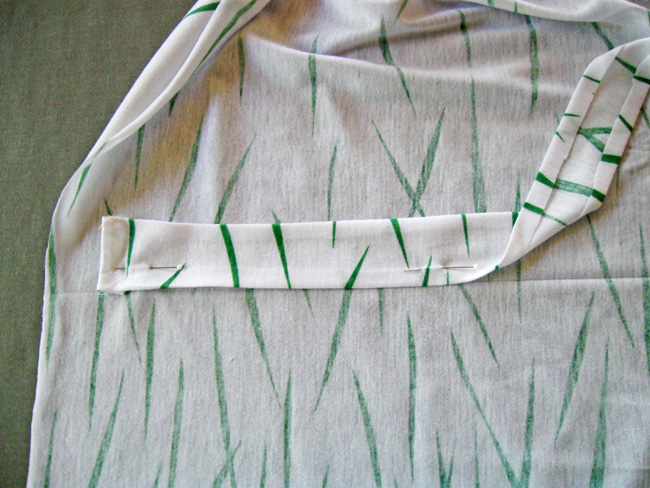
Before adding your drawstring, you need to create a fabric “casing” or tube for it. You can add the casing for the drawstring on the inside or the outside of the cover up. (There is one less step if you apply it on the outside, so that might help you decide.) I added mine on the inside.
To make my casing, I cut a strip of fabric about 1½” wide and turned it under ¼” on either edge. You could use pre-made bias tape as well.
Using the crease line as your guide, attach the casing from one side edge to the other around the waist. Leave about 1″ of space between the casing and the edge of the fabric, since you need to allow for the remaining side seam to be sewn.
Step 10: Sew the second side seam
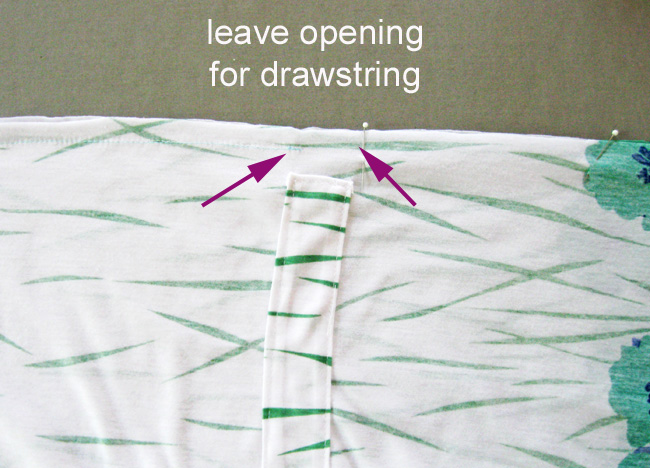
Bring the open sides together and sew up the side seam the same way you did for the first one, starting 11″ down from the shoulder seam to leave an armhole opening. For this second side seam, break your stitching to leave an opening for the drawstring, which will be added last.
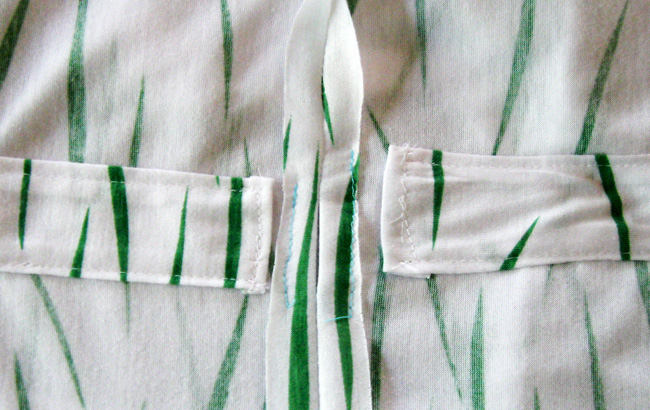
To keep the seam allowances in place, press open and stitch them down where the opening is.
Step 11: Finish the hem
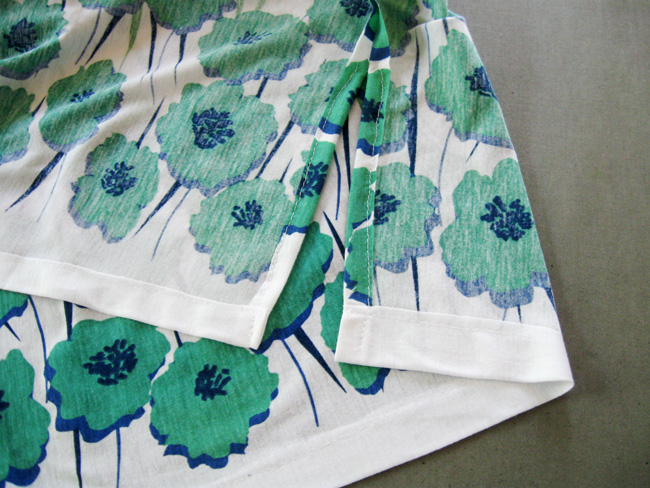
Depending on your fabric, you can do a turned-and-stitched hem, you can add trim, or enclose with binding for a contrast look.
Step 12: Make a drawstring
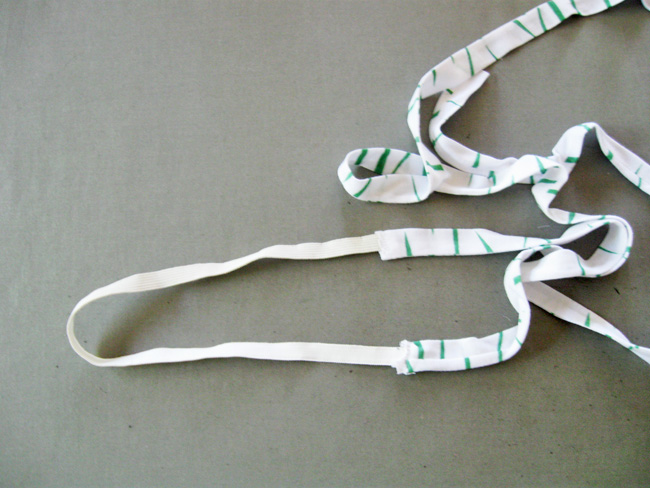
There are lots of options for the drawstring, as well. You can use ribbon, bias binding, cording or make a drawstring with fabric. I like to make drawstrings with a combo of elastic and fabric, which makes them more comfortable. By doing it this way, you don’t need to stitch as much of the tie portion, making sewing quicker!
Once you have your drawstring, thread it through the casing, grab your sunhat and head to the beach.
If this DIY cover-up has put you in the beach mood check out these free beach-inspired patterns!
Share tips, start a discussion or ask one of our experts or other students a question.
No Responses to “DIY: Easy, Beachy, Beautiful Cover-Up”