Cutwork embroidery is a technique commonly used on linens to give decorative flair. It's similar to appliqué, but instead of adding fabric you trim it away. Doing so leaves open areas that are finished with satin stitch.
It's easy to look at cutwork and think the intricate designs took weeks (or even months) to complete, but with an embroidery machine you can make elegant cutwork in a single afternoon. All you need to do is hoop, trim, stitch and rinse — it's that easy!
Traditional Cutwork
Level: Intermediate
What You Need
Instructions
1. Begin by hooping water-soluble mesh stabilizer. With your hoop together, pin the fabric to the stabilizer, or spray the back of the fabric with temporary spray adhesive and finger-press it to the stabilizer.
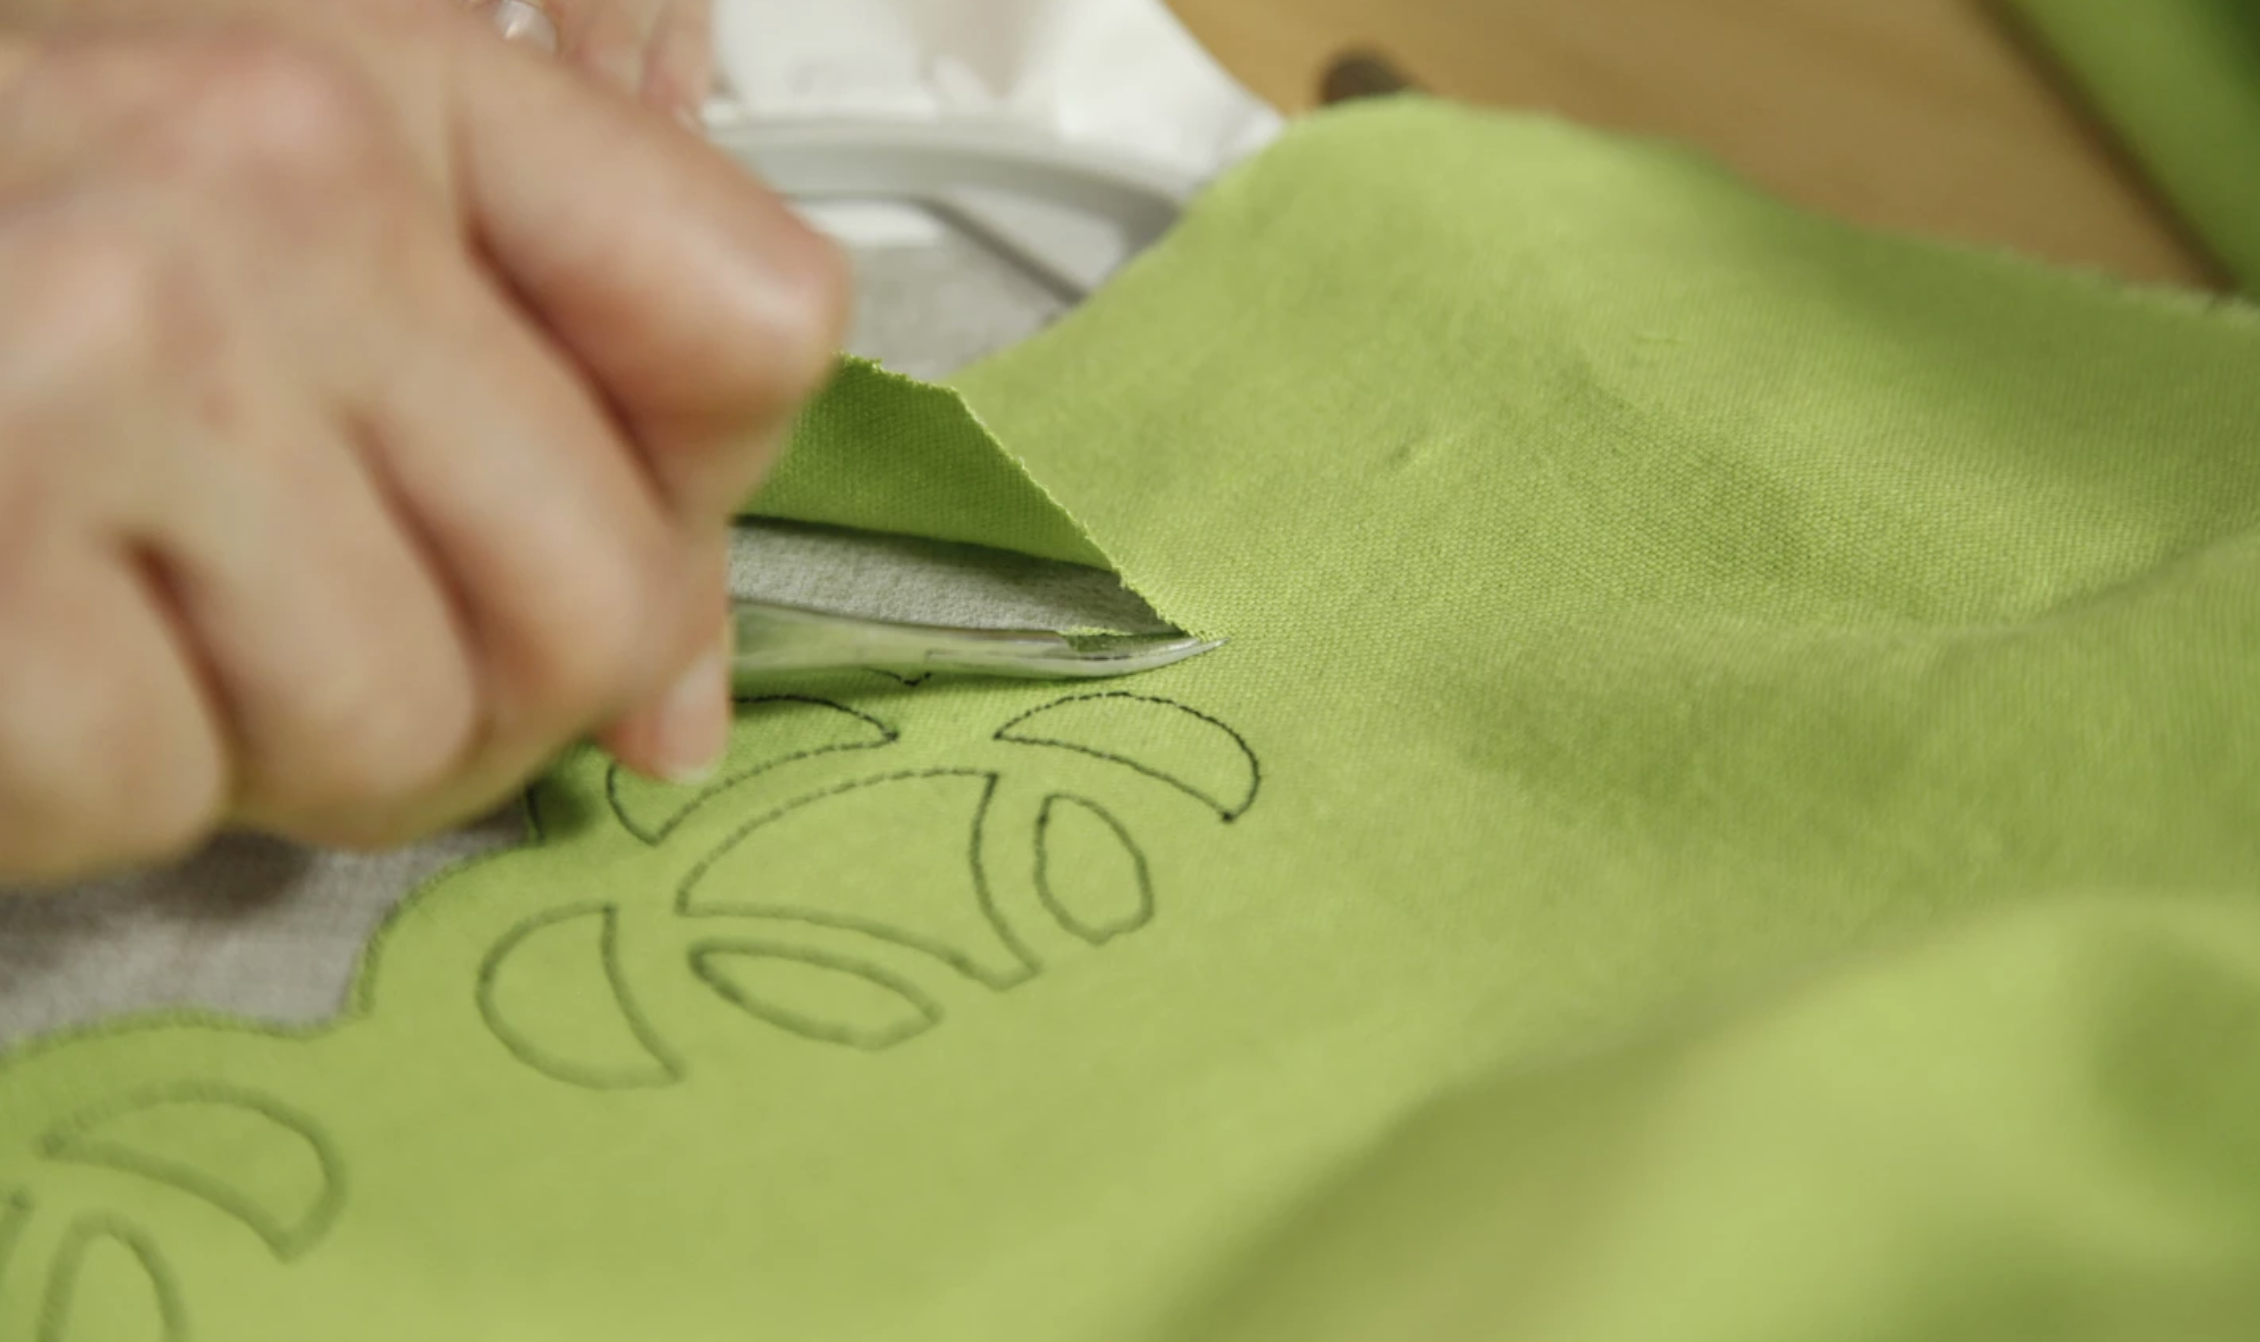
2. Run the cutwork tack-down stitch sequence to secure the fabric to the stabilizer.
3. Remove the hoop from the machine, leaving everything in the hoop. Place the hoop on a flat surface and carefully trim the fabric away from the tack-down stitches according to design directions.
Pro Tip: Be careful to not push on the stabilizer when trimming. If the stabilizer becomes loose, the cutwork stitching will not line up properly.
4. Place the hoop back on the machine and finish stitching the cutwork section. Remove from the hoop and trim away excess water-soluble stabilizer. Soak the rest away according to manufacturer instructions.
5. Lay your work flat, let it dry and press if necessary.
Cutwork Edging
Level: Intermediate
Cutwork edging is stitched in sections, just like the corner sample above. But in this case, the technique is stitched separately and then joined to another piece of fabric using a zigzag stitch . It's commonly used when making doilies.
What You Need
Instructions
1. Stitch out, soak, dry and press all edging pieces. Arrange the individual pieces according to the design instructions. It's helpful to use a cutting mat grid to square up edges.
2. Use a fine zigzag stitch to attach all edge pieces together. Match the bobbin thread to the embroidery thread so the front and back of the lacework matches.
3. Carefully pin the framework edging over a piece of fabric. Measure edge widths to be sure all sides are square.
4. Stitch around the innermost edge of the cutwork to attach the edging to the center fabric.
5. After securing the fabric to the framework, turn the piece over and carefully trim away the fabric outside of the stitch area, just as you would with an appliqué design.
6. Run a line of zigzag stitching around the trimmed fabric edge to secure.

A video would have been better for me 🤭