
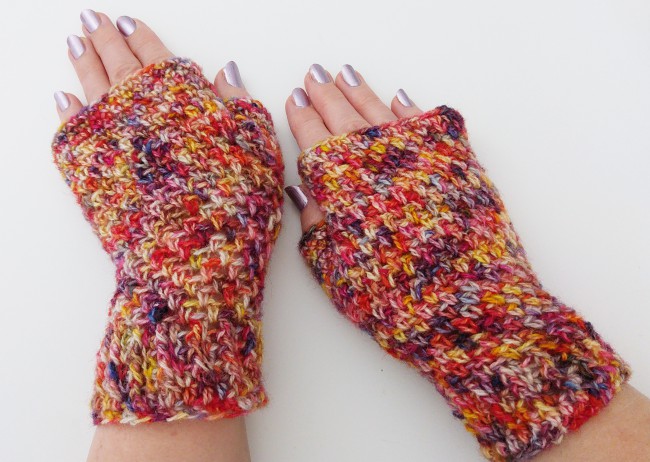
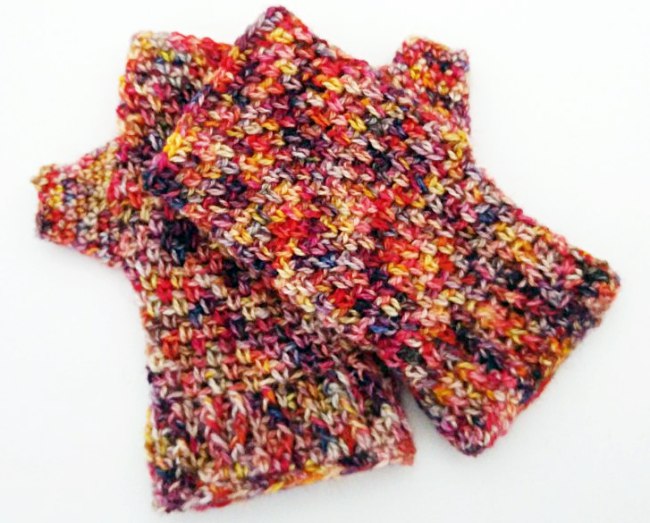
Crochet fingerless mitts are one of my favorite accessories. They’re quick to make, really useful and they can showcase a small amount of lovely yarn.
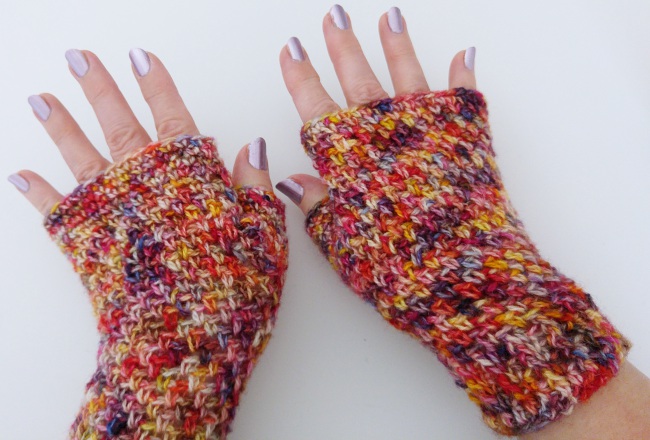
For this free pattern and tutorial, I’ve designed a crochet fingerless mitt pattern that uses just 70 grams of a fingering weight yarn. You can adapt it to any fingering weight, sport weight or DK yarn that you like.
For some of my demonstration samples, I used a plain colored DK weight acrylic, as its easier for you to see what’s going on.
Why we love crochet fingerless mitts
Although full mittens and gloves keep your hands and fingers warm, they don’t let you use the things yo use day to day — such as touch screens, buttons and the like.
Fingerless mitts provide warmth while letting you keep your fingers free. And, of course, you can still crochet, knit and stitch to your heart’s content while wearing them.
How are fingerless mitts constructed?
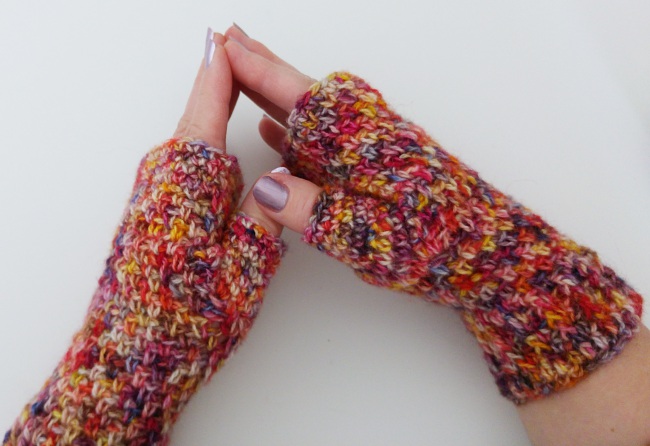
The most basic fingerless mitt design includes a ribbed, slightly stretchy cuff for your wrist and then the main body of the mitt that covers your palm. The body needs to be less stretchy, but still flexible enough to let you have a good range of hand movements. The mitt is open at the top and has a simple thumbhole at the side.

The pattern in this tutorial is worked completely in the round. It starts with a foundation hdc, which lets you to make sure your cuff is the perfect fit for your wrist, and then uses front post stitches to create stretch and texture in the cuff.
The main part of the mitt is worked in the round in linen stitch, then backward and forward to make the thumbhole, and then in the round again. After adding a simple edging to the top, the thumb is finished by making a short sc tube.
FREE crochet fingerless mitt pattern
If you’re an experienced crocheter, you’ll need only the written pattern, below. For beginners, I recommend reading the full step-by-step tutorial further in the post.
Abbreviations used (U.S. terminology):
- Ch = chain
- Sc = single crochet
- Sc2tog = single crochet two together (decrease stitch)
- Hdc = half double crochet
- Fhdc = foundation half double crochet
- Fpdc = front post double crochet
- Sl st = slip stitch
3.25 mm hook for fingering weight yarn
Cuff
- Round 1: Work 30 fhdc, joining with a slip stitch.
- Round 2: Ch 2 (counts as an hdc), 29 hdc. Join to the top starting ch with a sl st. Try on to check the size on your wrist, then close the gap in the fhdc round with the tail end and weave in.
- Round 3: Ch 2 (counts as an hdc). *Fpdc around the next hdc from the previous row (see tutorial below), hdc. Work the hdc into the central V at the base of the stitch, rather than through the top loops. Repeat from * to the end of the round, joining to top of the starting ch with a slip stitch.
- Rounds 4-6: Ch 2. *FPdc around the Fpdc in the row below. Hdc into the next hdc, working into the central V at the base of the stitch again, rather than through the top loops. Repeat from * to the end of the round, then join into the top of the chain 2 with a slip stitch.
Main body to the base of the thumb
- Round 7: Chain 1. Place marker to show start of round. Sc then *ch 1, sc* to marker. Do not join with a slip stitch.
- Round 8 : Sc into the top of the chain 1 from round 6. *Ch 1, sc into chain space. Repeat from * to marker. Do not join with a slip stitch.
- Rounds 9- 11: Repeat Round 8.
- Round 12: Move marker up, work in linen stitch for quarter of a round. Increase 2 stitches by working sc, ch 1 into the next sc. Sc into each chain space, ch1 for the next half of the round. Increase 2 more stitches in the same way. Complete the final quarter of the round. [4 stitches increased]
- Round 13: Repeat Round 8.
- Round 14: Repeat Round 11.
- Round 15: Repeat Round 8.
The thumbhole
- Row 16: When you reach the marker at the end of Round 15, stop working in continuous rounds. Turn your work, chain 1 (place marker here), the work on the wrong side in linen stitch until you reach the marker.
- Row 17: Turn, chain 1 (move marker to here) then work linen stitch on the right side until you reach the marker.
- Rows 18 – 25: Repeat Rows 15 and 16 four more times.
- Row 26: Repeat row 16 but when you reach the marker, join the gap by working two sc stitches together (as you would if decreasing by one stitch) between the last stitch before the gap and the first stitch after the gap.
Finishing the top of the mitt
- Rounds 27 – 44: Repeat Round 8
- Round 45: Work a sc stitch into each sc and each chain space to give the mitt a neat but simple finish. Cut yarn and weave in the ends.
Working the thumb
- Thumb Round 1: Join yarn and pick up 22 stitches at the thumbhole by working 22 sc evenly around the gap. Continue working in rounds, without joining with a slip stitch.
- Thumb Round 2: Decrease 6 times by making an sc2tog evenly as you work the round, reducing the number of stitches to 16.
- Thumb Round 3: Sc in each stitch around.
- Thumb Round 4: Decrease at the top and bottom of the thumb by working an sc2tog, reducing the number of stitches to 12.
- Thumb Rounds 5-7: Work sc in continuous rounds, closing the last round with a slip stitch. Cut yarn and weave in the ends.
Crochet fingerless mitt step-by-step tutorial
Step 1: Start the cuff with a round of foundation hdc (fhdc)
The cuff starts with a foundation hdc so you can adjust the stitch count to fit your own wrist. Just add or remove stitches, checking you have the correct fit before moving on to your first round.
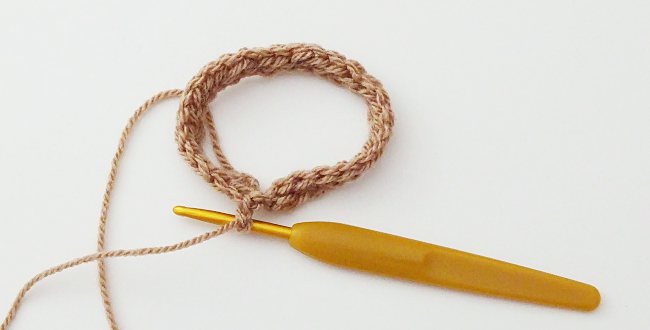
Using my fingering yarn, I used a 3.25mm hook and worked 30 foundation hdc before joining to work in the round. This fit over my hand but was not too loose on my wrist. You can adjust the number of stitches in your foundation round to fit your own wrist.
To start a foundation hdc, follow these steps:
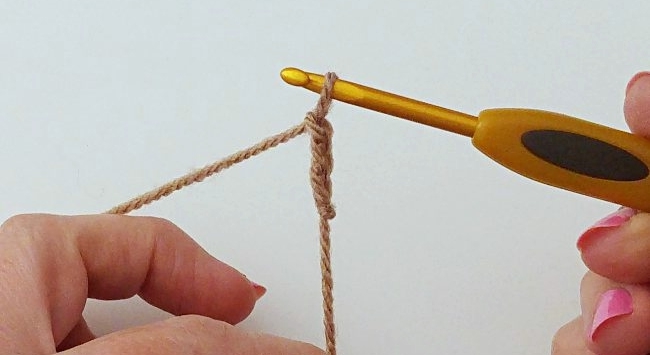
Step 1: Make 3 chains
Step 2: Yarn over, insert hook into first chain, yarn over and pull through a loop
Step 3: You have 3 loops on your hook. Yarn over and pull through ONE loop only
Step 4: You have 3 loops on your hook. Yarn over and pull through all three loops.
You have completed one fhdc.
Repeat Steps 2 – 4 above, inserting your hook into the extra chain you made as part of the previous fhdc. When the foundation hdc is complete, it looks a bit wobbly…
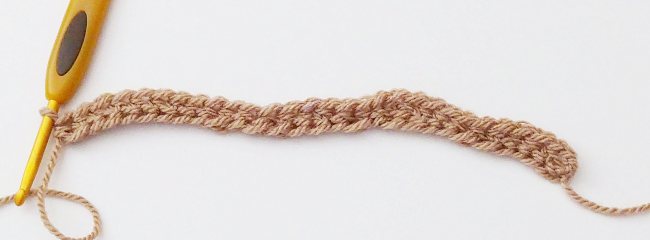
But once you join it to form a circle, those wobbles disappear..
To find out more about foundation stitches, you can enroll in a our class, Mastering Foundation Crochet Stitches with Marty Miller.
Step 2: Working the cuff with front post stitch ribbing
Make sure that your foundation hdc row is not twisted and that you start Round 1 working into the top loops of the stitches (not the bottom of the foundation row!).
At this point, check the cuff on your wrist for size. If you are happy with it, use the tail end to close the gap in the foundation hdc row and weave in the end.
Fpdc rib tutorial
The cuff, made in Rounds 3 to 6 of the pattern, involves making a front post double crochet rib.
Here’s how to make a front post double crochet rib:
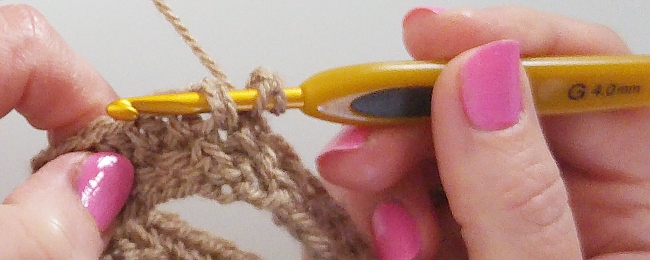
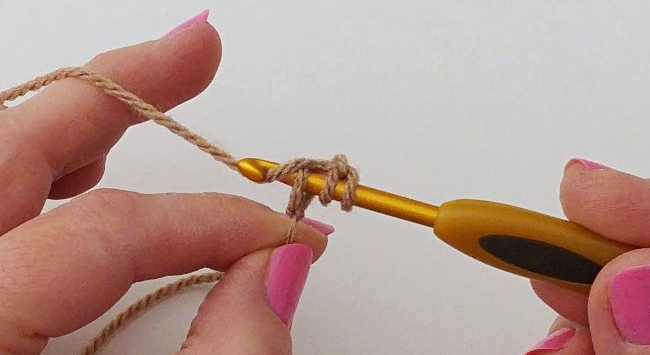
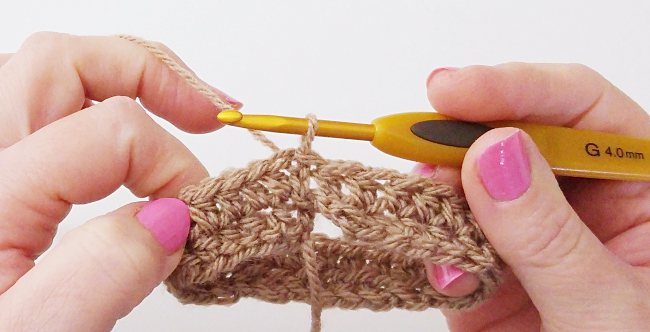
Yarn over hook and insert hook from right to left under the entire post of the next hdc stitch. Yarn over and pull through a loop.
You now have 3 loops on the hook; yarn over and pull through 2 loops.
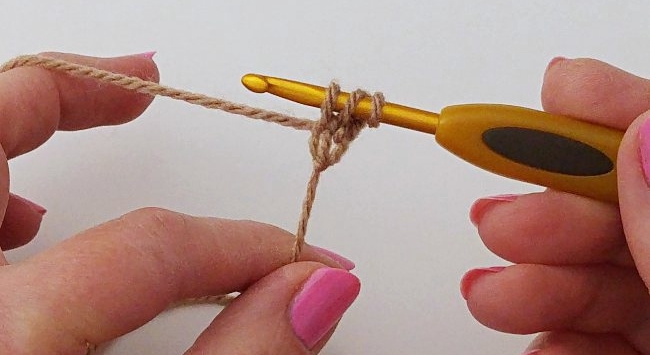
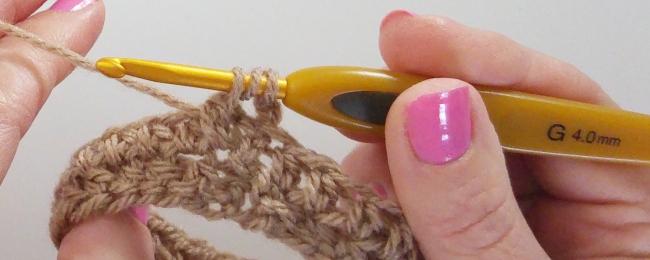
You now have 2 loops on the hook; yarn over and pull through 2 loops. Your fpdc is complete. Yarn over hook…
And then insert hook into the middle of the lower V of the next hdc. Yarn over and pull through a loop. You now have 3 loops on the hook:
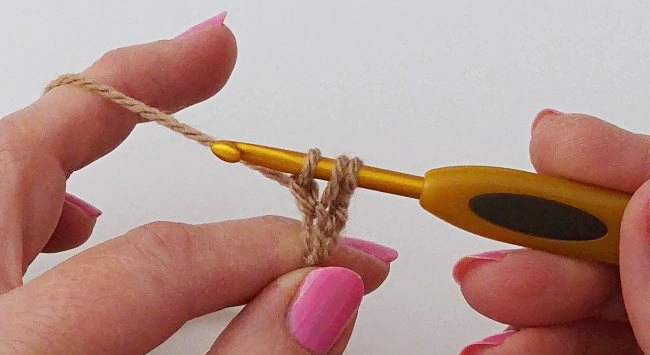
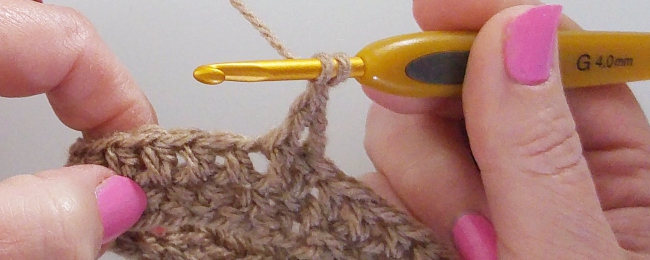
Yarn over and pull through all 3 loops. Your hdc is now complete.

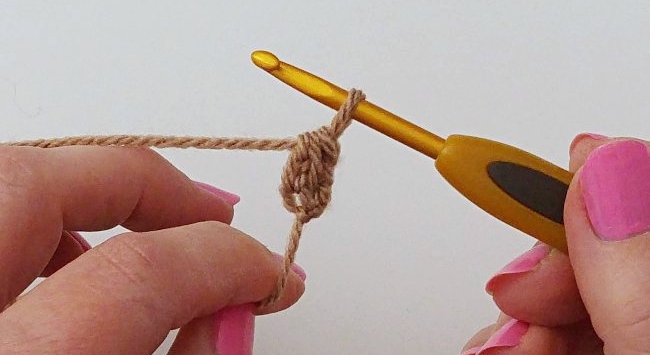
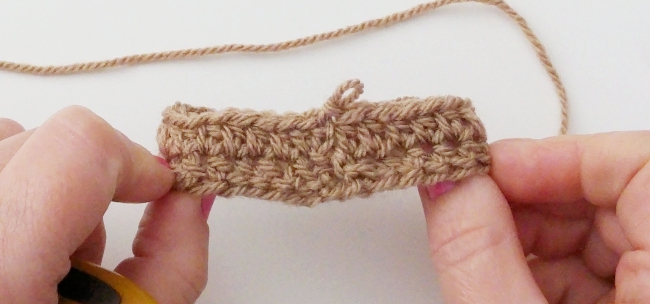
At the end of Round 3, you can see the texture of the rib beginning to emerge:
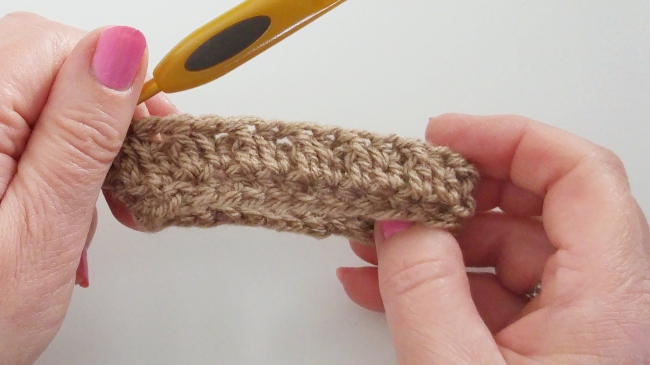
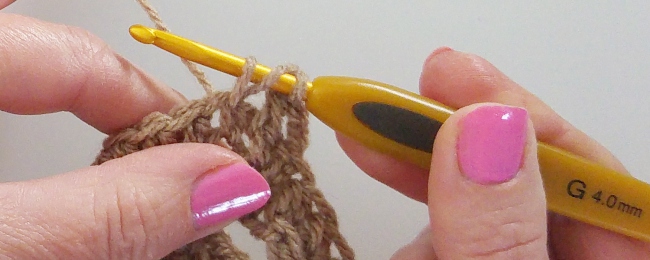
Carry on to work Rounds 4 -6, working the front post dc stitches around the fpdc in the row below. For the alternate hdc stitches, work into the central V at the base of the stitch, rather than through the top loops.
Once the cuff is complete, check it fits over your hand (it should be fairly snug) and then sits on your wrist comfortably.
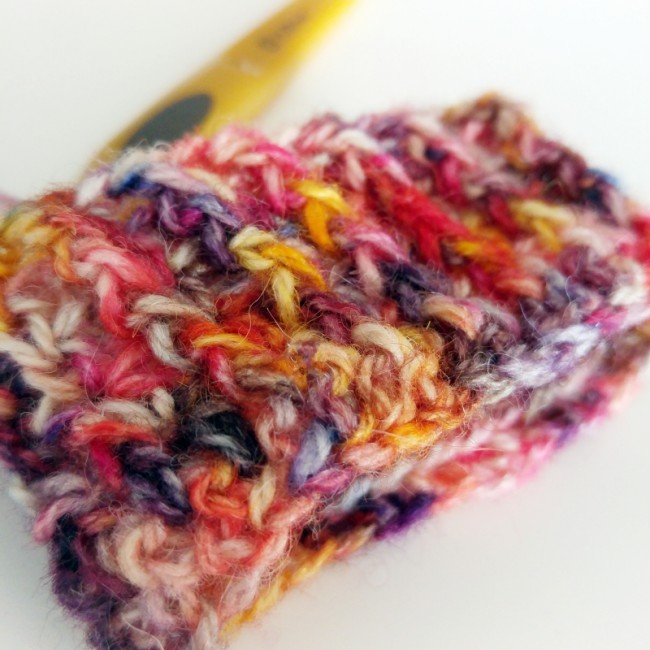
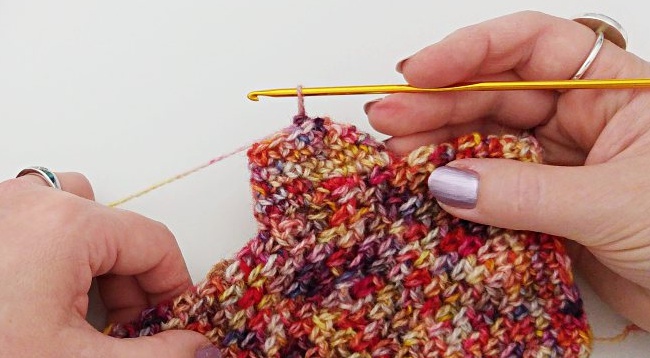
The textured rib that is easier to see in the solid colored yarn sample, but still adds a lovely ribbed effect in the variegated hand dyed yarn.
Step 3: Working the body of the mitt up to the thumb
Change up your hook size: I went up from a 3.25mm to a 4mm with my fingering weight yarn to make sure the main body of the mitt was stretchy and flexible but without being too lacy.
Follow the written pattern (above), working the first part of the body of the mitt in linen stitch (rounds 7 – 15). This is a simple stitch; sc, ch 1, sc, working the sc stitches into the chain spaces of the previous round.
This is how my fingerless mitt looked after Round 15: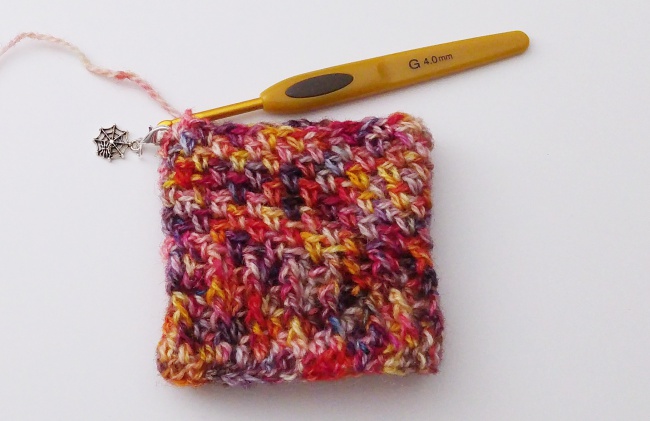
Step 4: Working the thumbhole
Work pattern Rows 16 – 26. You’ll still use linen stitch, but instead of working in the round, turn your work at the end of each row and work on the other side. This creates the hole where your thumb will go.
When you reach the end of Row 25, join to work in the round again, closing up the thumbhole. Join the gap by working two sc stitches together (as you would if decreasing by one stitch) between the last stitch before the gap and the first stitch after the gap.
Step 5: Finishing the body of the fingerless mitt
Once you reach the end of the pattern, try on the mitt and decide whether you want to add a short thumb. If you prefer to leave the thumb open, just complete the first thumb round, as this will make the opening neater.
Step 6: Finishing the thumb
Join your yarn in any stitch around the thumbhole. Make sure you have two strands of yarn on your hook as you pick up each stitch.
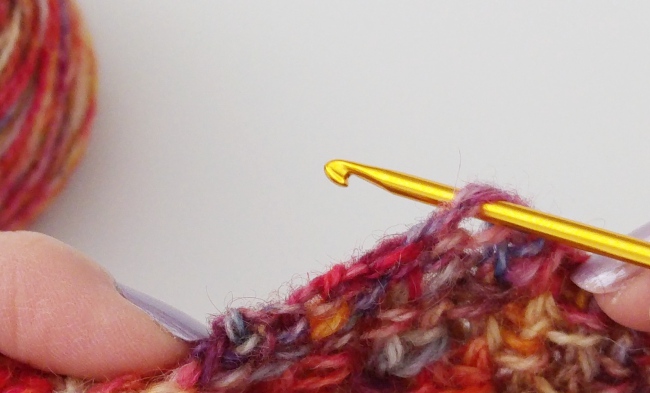
You can join by pulling through a loop and making or chain or by working a standing sc. (Yarn over hook, insert into first stitch, yarn over and pull through a loop, yarn over and pull through both loops on the hook.)
This is how my thumb looked after the first round. The stitches should be even and neat, with no obvious gaps.

In thumb Round 2, I decreased six times to reduce the circumference of the thumb, creating a better fit. You can decrease more or fewer stitches in thumb Round 4 to fit your hand.
I made quite a short thumb, but you can add extra rounds if you prefer a longer thumb.
All you need to do now is to make a second mitt! You can repeat the steps above exactly: The mitts fit both hands and you don’t need to do anything to make them right-handed or left-handed.
Share tips, start a discussion or ask one of our experts or other students a question.
No Responses to “How to Crochet Functional Fingerless Mitts (FREE Pattern!)”