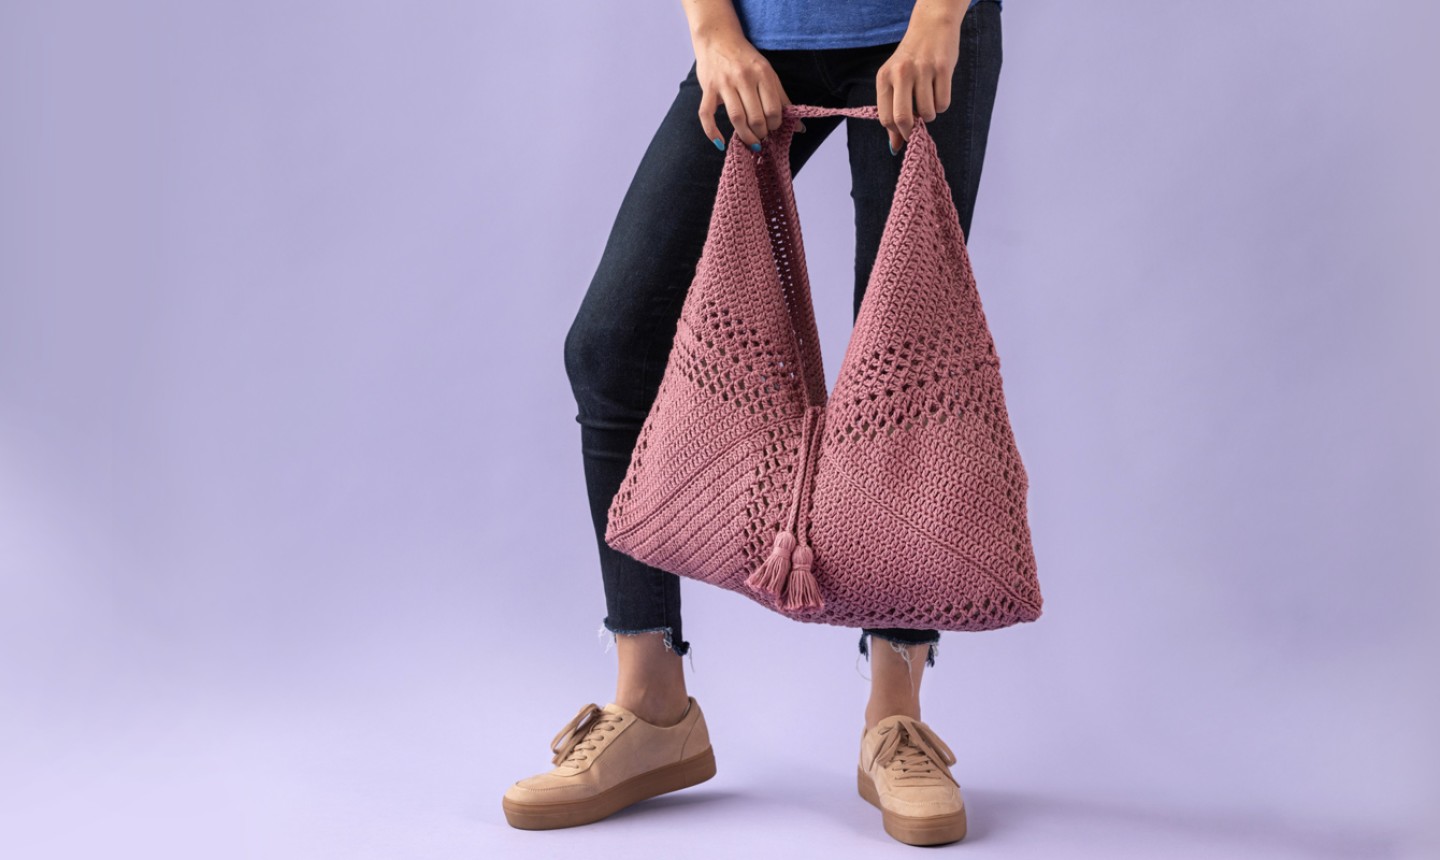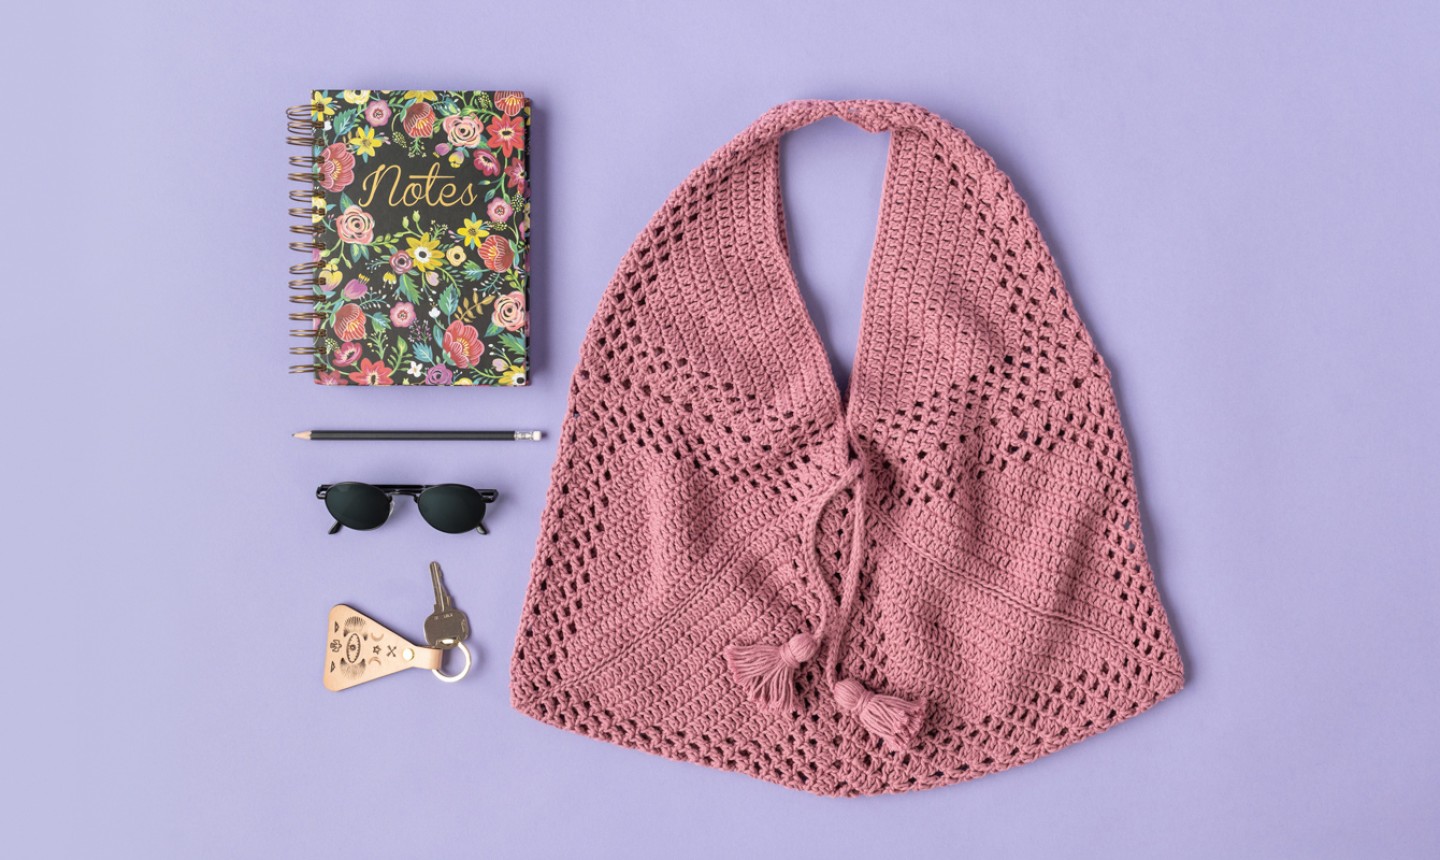
This chic bag has a secret — it's actually made up of three separate squares. What does this mean for you? It's so easy to make, you may decide to whip up one in every color.
Boho Market Bag
Level: Intermediate
Finished Size: 21 inches square; One square = 16 inches
Pattern by Salena Baca Crochet
What You Need
Gauge
7 patterns rows x 15.5 pattern sts = 4 inches square
Pro Tip: There's no need to make a separate gauge swatch here — just dive into your first square, and measure your gauge once you've worked a few rows.
Notes
This bag is made up of three crochet squares, each worked in the round. The squares are then joined together, using your crochet hook.
Abbreviations
Instructions
Crochet the Squares (Make 3)
Rnd 1: Into a magic ring, ch 6 (counts as first dc + ch 3), [dc, ch 3] 3 times, sl st to top of first dc to join — 4 dc + 4 ch-3 spaces
Rnd 2: Sl st into next st, ch 3 (counts as dc here and throughout), [(dc, ch 3, dc) into next st, dc into next 3 sts] 3 times, (dc, ch 3, dc) into next st, dc into last 2 sts, sl St to top of first dc to join — 20 dc + 4 ch-3 spaces
Rnd 3: Sl st into next st, ch 3, dc into next st, *(dc, ch 3, dc) into next st, dc into next 2 sts, [ch 1, sk 1 st, dc into next] 2 times, dc into next st * 3 times, (dc, ch 3, dc) into next st, dc into next 2 sts, ch 1, sk 1 st, dc, ch 1, sl st to top of first dc to join — 28 dc + 4 ch-3 spaces + 8 ch-1 spaces
Good to Know: Each time you work '(dc, ch 3, dc) into next st,' you're working the corner of your square. The corner is always worked in the center stitch of the ch 3 from the previous round.
Rnd 4: Sl st into next 2 sts, ch 3, dc into next st, *(dc, ch 3, dc) into next st, dc into next 2 sts, [ch 1, sk 1 st, dc into next st] 4 times, dc into next st* 3 times, (dc, ch 3, dc) into next st, dc into next 2 sts, ch 1, [sk 1 st, dc, ch 1] 3 times, sl st to top of first dc to join — 36 dc + 4 ch-3 spaces + 16 ch-1 spaces
Rnd 5: Sl st into next 2 sts, ch 3, dc into next st, *(dc, ch 3, dc) into next st, dc into next 2 sts, [ch 1, sk 1 st, dc into next st] 6 times, dc into next st* 3 times, (dc, ch 3, dc) into next st, dc into next 2 sts, ch 1, [sk 1 st, dc, ch 1] 5 times, sl st to top of first dc to join — 44 dc + 4 ch-3 spaces + 20 ch-1 spaces
Rnd 6: Sl st into next 2 sts, ch 3, dc into next st, *(dc, ch 3, dc) into next st, dc into next 2 sts, [ch 1, sk 1 st, dc] 3 times, dc into next 4 sts, [ch 1, sk 1 st, dc] 3 times, dc into next st* 3 times, (dc, ch 3, dc) into next st, dc into next 2 sts, [ch 1, sk 1 st, dc] 3 times, dc into next 4 sts, ch 1, [sk 1 st, dc, ch 1] 2 times, sl st to top of first dc to join — 60 dc + 4 ch-3 spaces, + 24 ch-1 spaces
Rnd 7: Sl St into next 2 sts, ch 3, dc into next, *(dc, ch 3, dc) into next st, dc into next 2 sts, [ch 1, sk 1 st, dc] 3 times, dc into next 8 sts, [ch 1, sk 1 st, dc] 3 times, dc into next st* 3 times, (dc, ch 3, dc) into next st, dc into next 2 sts, [ch 1, sk 1 st, dc] 3 times, dc into next 8 sts, ch 1, [sk 1 st, dc, ch 1] 2 times, sl st to top of first dc to join — 76 dc + 4 ch-3 spaces + 24 ch-1 spaces
Rnd 8: Sl st into next 2 sts, ch 3, dc into next, *(dc, ch 3, dc) into next st, dc into next 2 sts, [ch 1, sk 1 st, dc] 3 times, dc into next 12 sts, [ch 1, sk 1 St, dc] 3 times, dc into next st* 3 times, (dc, ch 3, dc) into next st, dc into next 2 sts, [ch 1, sk 1 st, dc] 3 times, dc into next 12 sts, ch 1, [sk 1 st, dc, ch 1] 2 times, sl st to top of first dc to join — 92 dc + 4 ch-3 spaces + 24 ch-1 spaces
Rnd 9: Sl st into next 2sts, ch 3, dc into next, *(dc, ch 3, dc) into next st, dc into next 2 sts, [ch 1, sk 1 st, dc] 3 times, dc into next 16 sts, [Ch 1, sk 1st, dc] 3 times, dc into next st* 3 times, (dc, ch 3, dc) into next st, dc into next 2 sts, [ch 1, sk 1 St, dc] 3 times, dc into next 16 sts, ch 1, [sk 1 st, dc, ch 1] 2 times, sl st to top of first dc to join — 108 dc + 4 ch-3 spaces + 24 ch-1 spaces
Rnd 10: Sl st into next 2 sts, ch 3, dc into next, *(dc, ch 3, dc) into next st, dc into next 2 sts, [ch 1, sk 1 st, dc] 3 times, dc into next 20 sts, [ch 1, sk 1 st, dc] 3 times, dc into next st* 3 times, (dc, ch 3, dc) into next st, dc into next 2 sts, [ch 1, sk 1 st, dc] 3 times, dc into next 20 sts, ch 1, [sk 1 st, dc, ch 1] 2 times, sl st to top of first dc to join — 124 dc + 4 ch-3 spaces + 24 ch-1 spaces
Rnd 11: Sl st into next 2 sts, ch 3, dc into next, *(dc, ch 3, dc) into next st, dc into next 2 sts, [ch 1, sk 1 st, dc] 3 times, dc into next 24 sts, [ch 1, sk 1 st, dc] 3 times, dc into next st* 3 times, (dc, ch 3, dc) into next st, dc into next 2 sts, [ch 1, sk 1 st, dc] 3 times, dc into next 24 sts, ch 1, [sk 1 st, dc, ch 1] 2 times, sl st to top of first dc to join — 140 dc + 4 dh-3 spaces + 24 ch-1 spaces
Rnd 12: Sl st into next 2 sts, ch 3, dc into next, *(dc, ch 3, dc) into next st, dc into next 2 sts, [ch 1, sk 1 st, dc] 3 times, dc into next 28 sts, [ch 1, sk 1 st, dc] 3 times, dc into next st* 3 times, (dc, ch 3, dc) into next st, dc into next 2 sts, [ch 1, sk 1 st, dc] 3 times, dc into next 28 Sts, ch 1, [sk 1 st, dc, ch 1] 2 times, sl st to top of first dc to join — 156 dc + 4 ch-3 spaces + 24 ch-1 spaces
Rnd 13: Sl st into next 2 sts, ch 3, dc into next, *(dc, ch 3, dc) into next st, dc into next 2 sts, [ch 1, sk 1 st, dc] 3 times, dc into next 32 sts, [ch 1, sk 1 st, dc] 3 times, dc into next st* 3 times, (dc, ch 3, dc) into next st, dc into next 2 sts, [ch 1, sk 1 st, dc] 3 times, dc into next 32 sts, ch 1, [sk 1 st, dc, ch 1] 2 times, sl st to top of first dc to join — 172 dc + 4 ch-3 spaces + 24 ch-1 spaces
Rnd 14: Sl st into next 2 sts, ch 3, dc into next, *(dc, ch 3, dc) into next st, dc into next 2 sts, [ch 1, sk 1 st, dc] 3 times, dc into next 36 sts, [ch 1, sk 1 st, dc] 3 times, dc into next st* 3 times, (dc, ch 3, dc) into next st, dc into next 2 sts, [ch 1, sk 1 st, dc] 3 times, dc into next 36 sts, ch 1, [sk 1 st, dc, ch 1] 2 times, sl st to top of first dc to join, fasten off — 188 dc + 4 ch-3 spaces + 24 ch-1 spaces
Seam the Squares
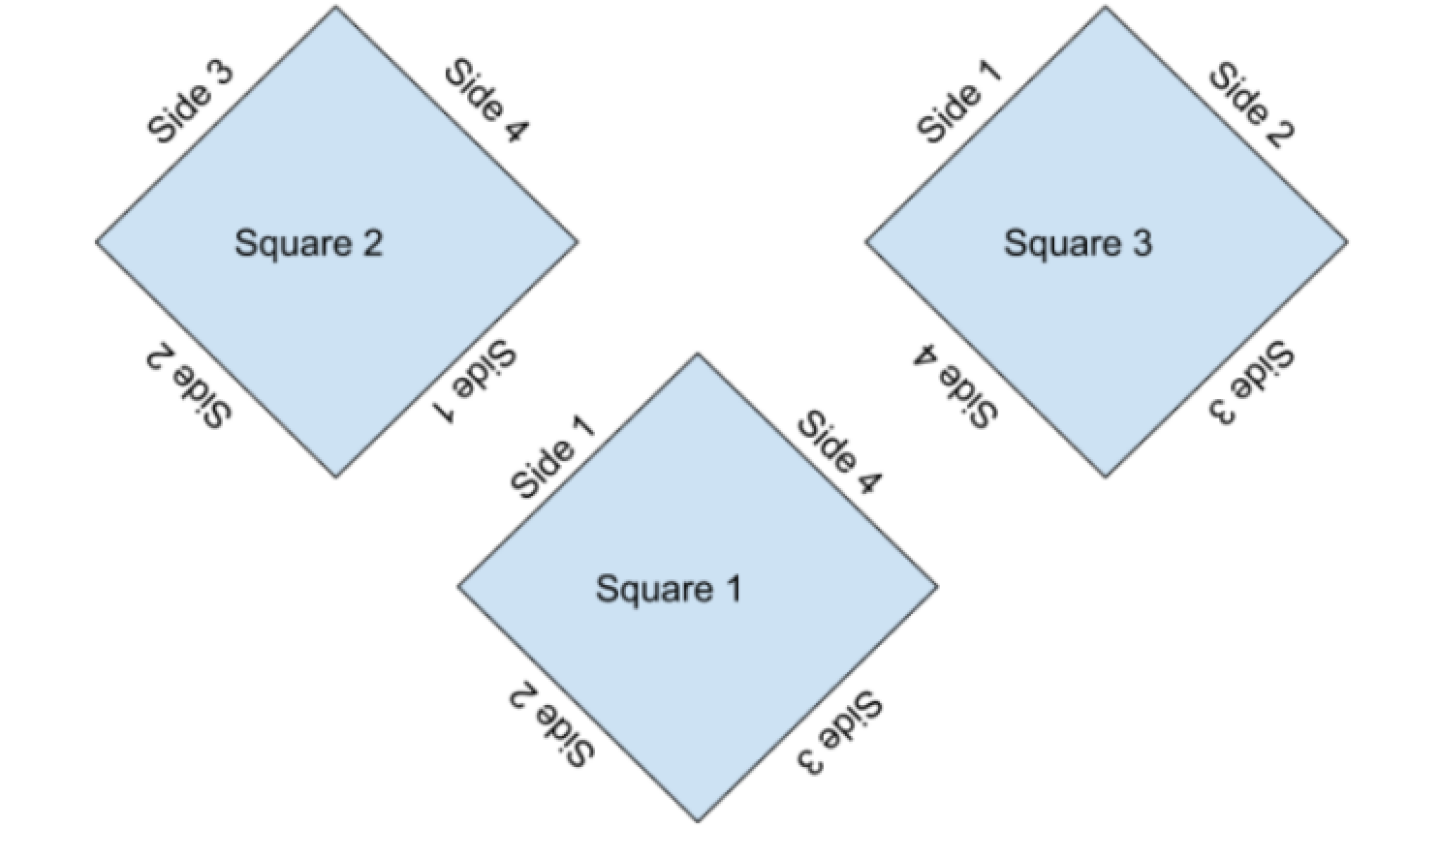
With right sides of fabric held together, hold squares 1 and 2 together. Beginning at any ch-3 space (corner), attach yarn into 2nd ch of space. Using BLO, sl st both squares together across side 1 and side 2 (see diagram below), until 2nd ch of 3rd ch-3 space (corner) meet.
Hold squares 1 and 3 together. Beginning at ch-3 space (these are your corners) between sides 2 and 3, sl st through BLO both squares together across side 3 and side 4, until 2nd ch of 4th ch-3 space (corner) meet. Fasten off.

Add the Handles
Side 1
Leaving a 6-inch tail, ch 30. With RS facing, sc into ch-3 space between side 1 and side 4 of square 1, sc into each st across side 4 of square 2 until 2nd Ch of 3rd Ch-3 space meet, sc into 2nd ch of 3rd ch-3 space of square 3, sc into each st across side 1 of square 3, sc into ch-3 space between side 1 and side 4 of square 1, sl st into next 30 ch sts; fasten off leaving a 6-inch tail.
Side 2
Leaving a 6-inch tail, ch 30, sc into ch-3 space between side 2 and side 3 of square 1, sc into each st across side 2 of square 3 until 2nd ch of 3rd ch-3 space meet, sc into 2nd ch of 3rd ch-3 space of square 2, sc into each st across side 3 of square 2, sc into Ch-3 space between side 2 and side 3 of square 1, sl St into next 30 ch; fasten off leaving a 6-inch tail.
Make the Tassels

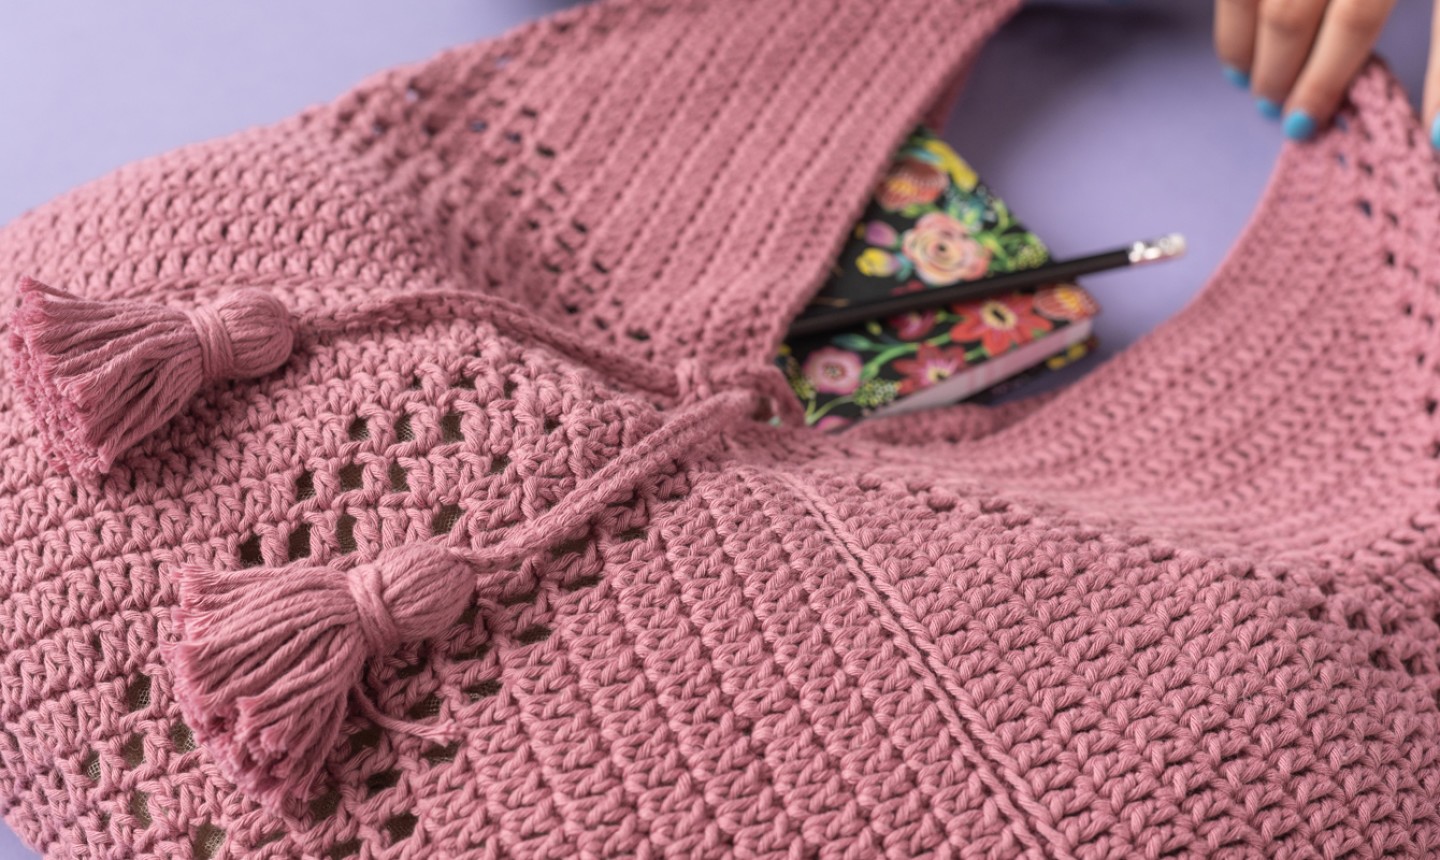
Wrap yarn around a 4-inch piece cardboard approximately 50 times. Thread the 6-inch strands of yarn from one handle through the top of the tassel, and knot tightly. Cut the yarn on the other end of your tassel, and remove the cardboard.
Finish the tassel by cutting a 12-inch strand of yarn, and wrapping it around the bundle, about 1-inch below the chain. Knot to secure, then trim the ends of your your tassel to even it out.
Repeat to make the second tassel on your other handle.

If this bag has you hooked on squares, we get it! Check out some of our favorite square motifs, and if you're feeling adventurous, use the same construction method as this bag to create a similar piece with a totally different look.

OMG! I must be really stupid, b/c I cannot figure this out at all. Granted, I am not an intermediate crocheter, so I thought maybe I could knit three squares instead, but now I can't figure out how to attach them to make the bag! WHY IS THIS SO HARD?
This is a nice bag, but not a well-written pattern. I had to re-read it several times to understand it, even with the key. There are other confusions, like what is the actual size of one completed square, and what is the actual hook size used? I am used to reading patterns, but maybe I am missing something.
Not only is this a poorly written pattern it isn't even for the bag pictured. Thankfully I am experienced enough to be able to recreate the tote pictures but this is really too bad for people who are still learning.
This looks like it would be a very cute bag, unfortunately the picture doesn’t match the pattern. Is there anyway to get the correct pattern? This is a little bit of false advertisement.
Very happy to see a modern Boho Market Bag, now how do I find the pattern?