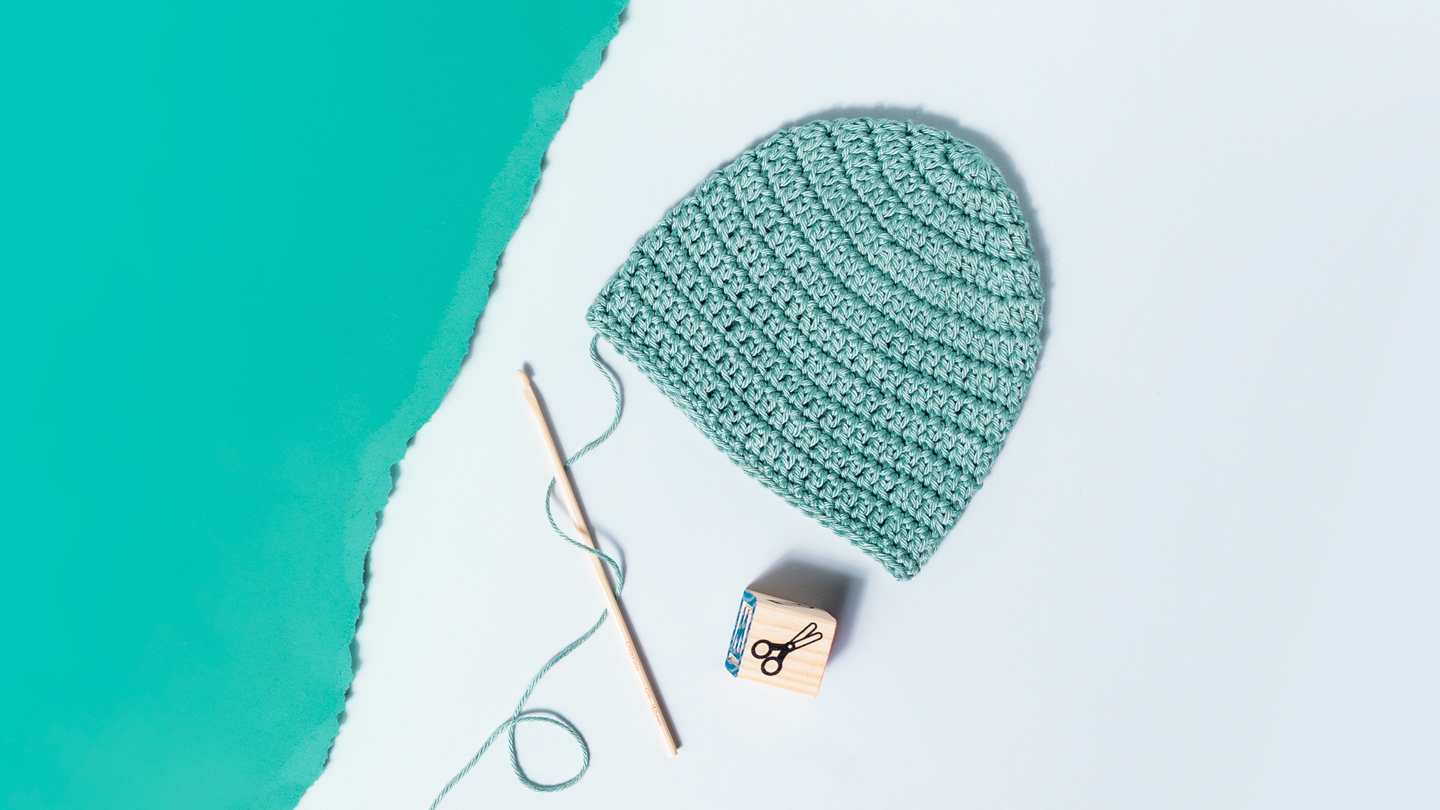
Having a solid baby hat pattern is a must: you can turn to it again and again, knowing you'll always have something adorable to bring to the baby shower. Just think of this tutorial about how to crochet a baby hat as a recipe — add in whatever yarn you want and crochet at whichever gauge makes you happy. There's always room to adapt and make the hat entirely your own.
Crochet Baby Hat
Level: Easy
What You Need
- Yarn (approximately 60 yards, will vary based on size)
- Crochet hook: pick a size suited to your yarn
Pro Tip: Choose a yarn that's soft (like wool, if baby isn't allergic), machine washable (new parents do not have time to hand wash) and fun to work with. We used Cloudborn Pima Cotton DK Yarn and a size G crochet hook.
Choose a Size
You need to know two measurements before you begin: the diameter and the length. For our example, which will be sized for a 6-month-old, we'll use a diameter of 4½" and a length of 5½". If you're not sure what those measurements should be for the size you want to make, follow these suggestions:
- Size: Premie (Diameter: 2¾"; Length: 4")
- Size: Newborn (Diameter: 3½"; Length: 5")
- Size: 0-3 Months (Diameter: 4"; Length: 6")
- Size: 3-6 Months (Diameter: 4½"; Length: 7")
- Size: 6-9 Months (Diameter: 5½"; Length: 7½")
- Size: 12 Months (Diameter: 6½"; Length: 8")
- Size: 24 Months-4T (Diameter: 6¾"; Length: 8½")
Remember, it's always better to err on the side of too big when it comes to hats for babies: they grow fast, and eventually that hat is going to fit.
Abbreviations
- Ch - Chain
- Dc - Double crochet
- Sl st - Slip stitch
Instructions
Start With a Flat Circle
This hat is worked from the crown down, starting with a flat circle.
Pro Tip: You can crochet the circle using any stitches you want, working as many rounds as necessary to achieve the desired diameter. We used double crochet stitches in the example shown here.
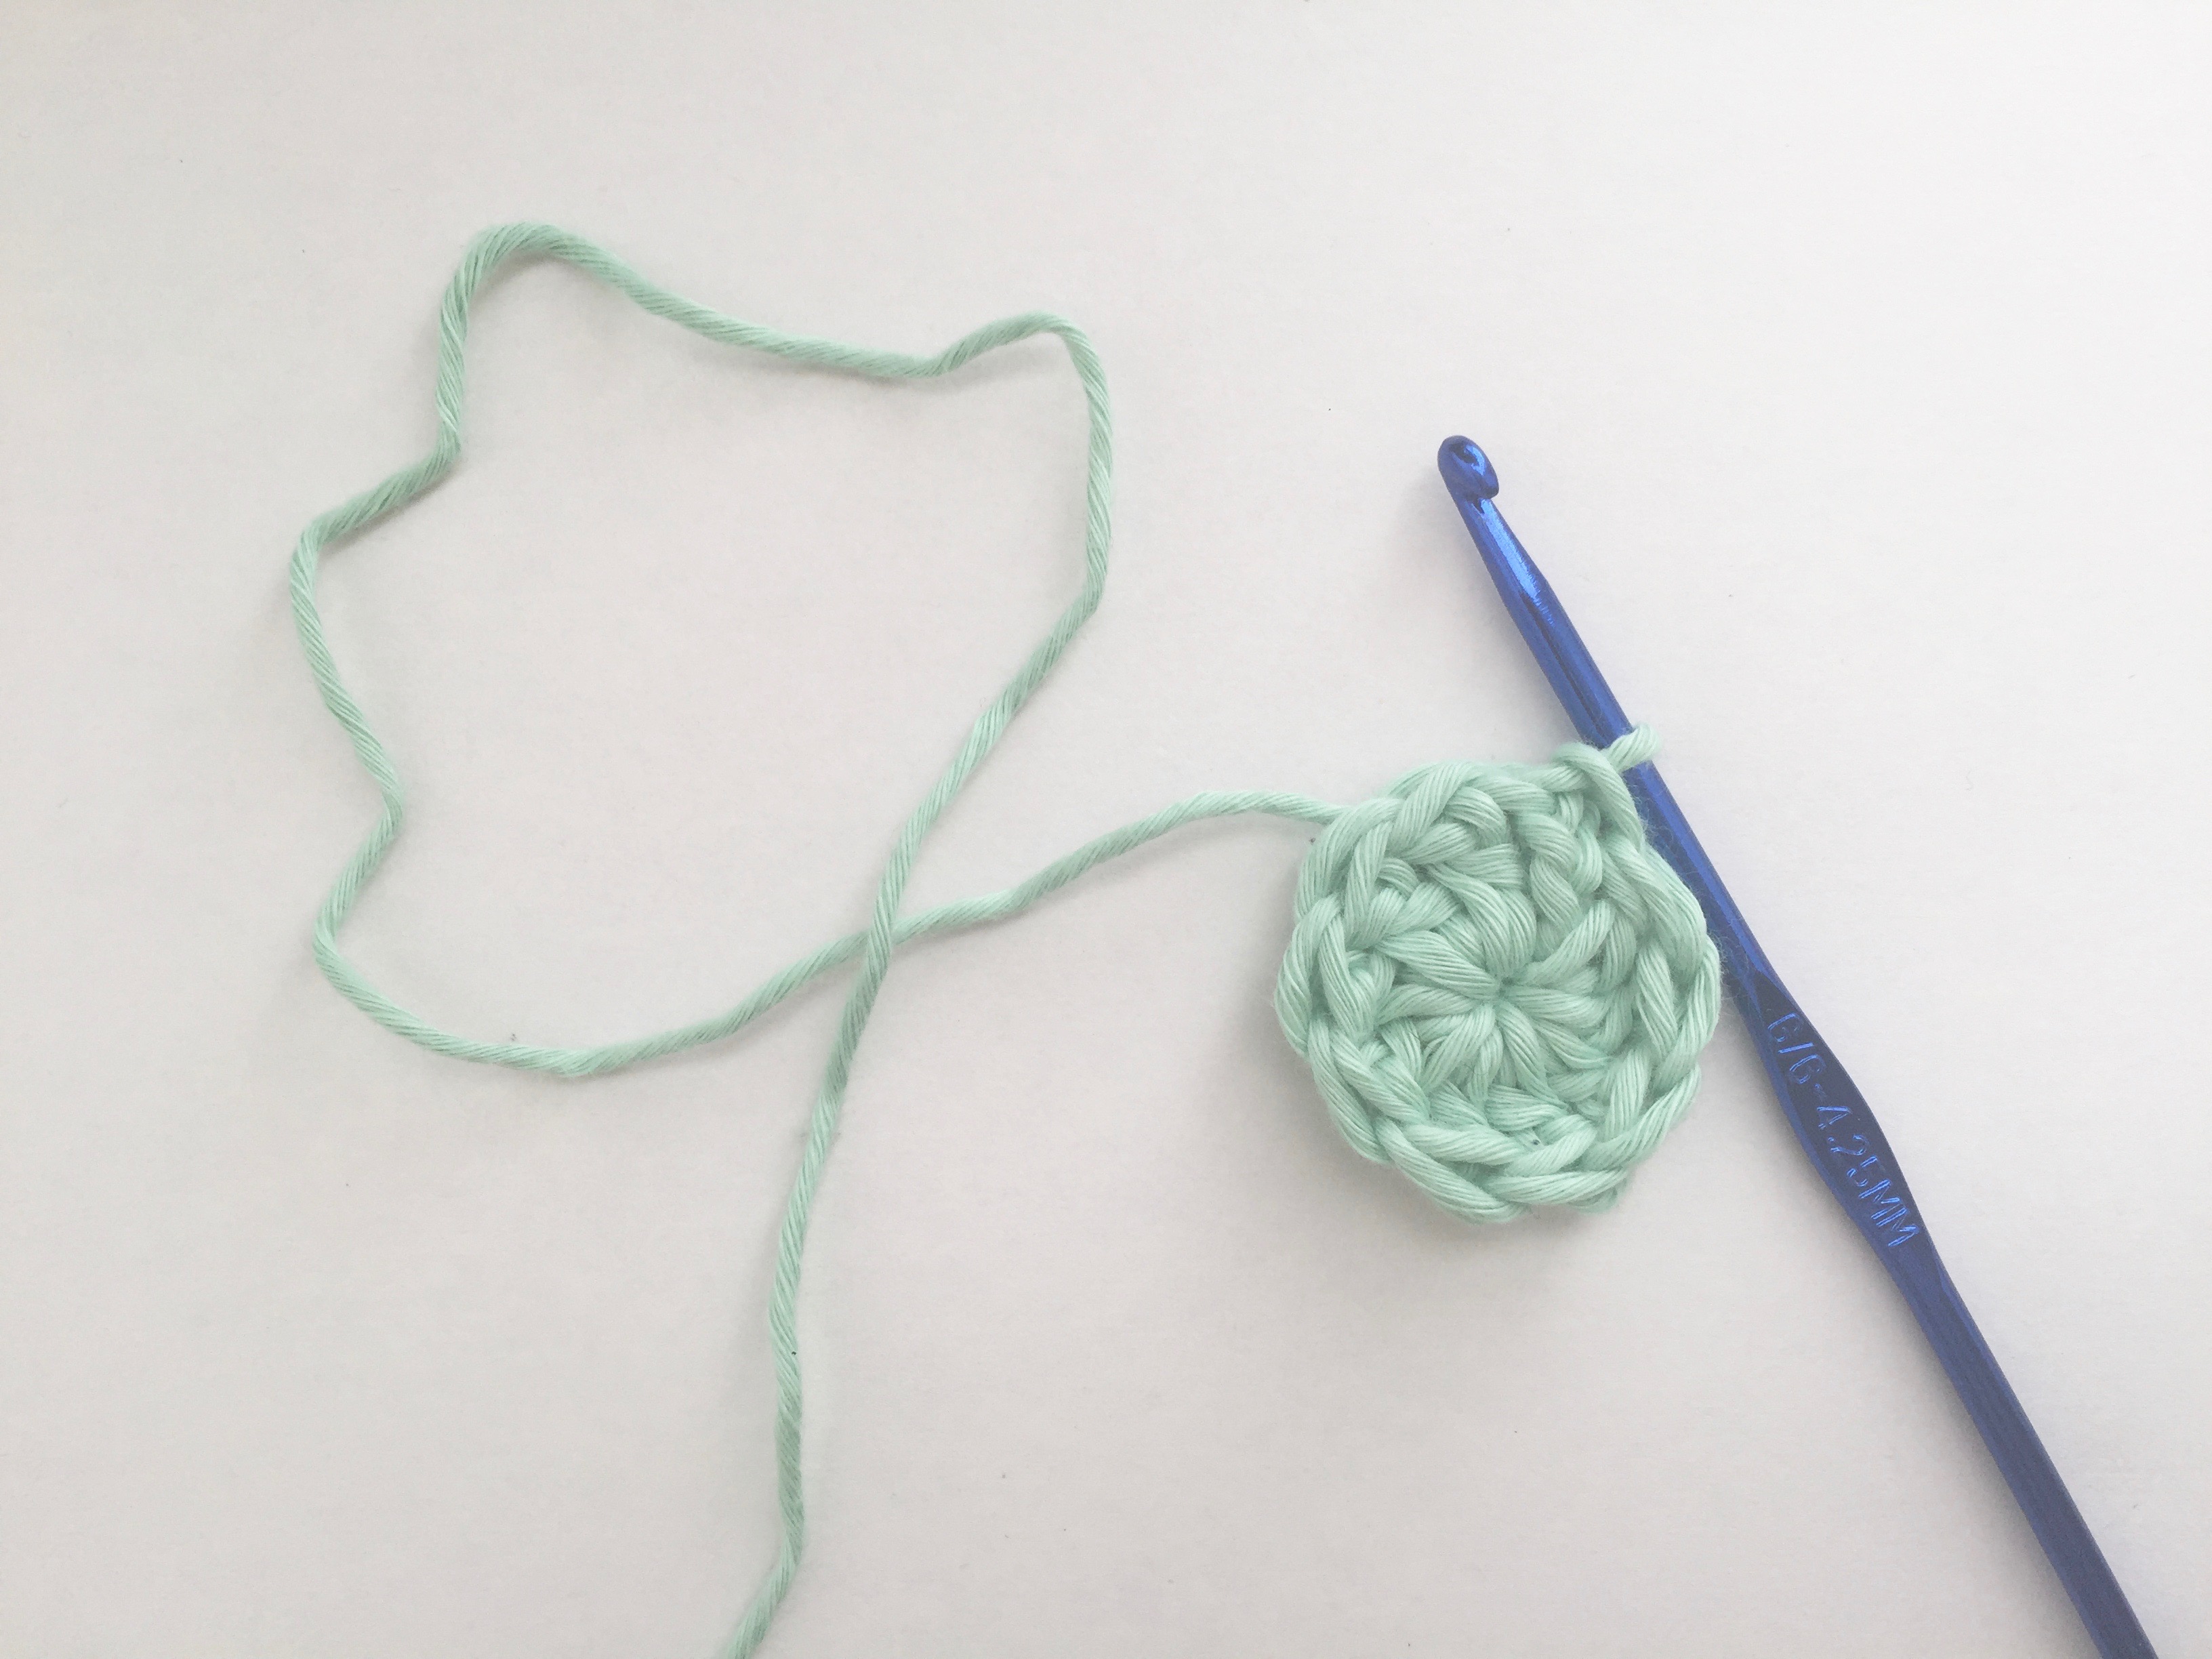
Round 1: Ch 3 and work 9 dc in third chain from hook. (Or crochet a magic ring or adjustable loop and make 10 dc inside it.) Join the last stitch to the top of the first stitch to close the ring. (Total of 10 dc st.)
Round 2: Chain 3 (counts as first dc). 1 dc in same stitch as ch 3. 2 dc in each stitch around. Sl st to top of ch 3 to finish round. (Total of 20 dc st.)
Round 3: Chain 3 (counts as first dc). 2 dc in next stitch. *1 dc, 2 dc. Repeat from * around. Sl st to top of ch 3 to finish round. (Total of 30 dc st.)
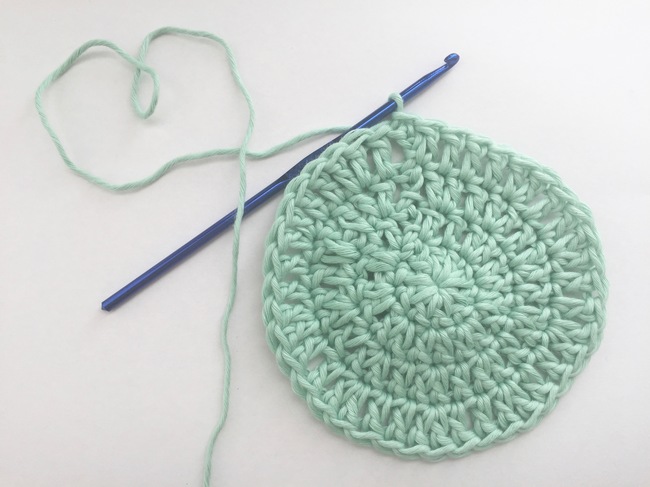
Round 4: Chain 3 (counts as first dc). 1 dc, 2 dc. *1 dc, 1 dc, 2 dc. Repeat from * around. Sl st to top of ch 3 to finish round. (Total of 40 dc st.)
Round 5: Chain 3 (counts as first dc). 1 dc, 1 dc, 2 dc. *1 dc, 1 dc, 1 dc, 2 dc. Repeat from * around. Sl st to top of ch 3 to finish round. (Total of 50 dc st.)
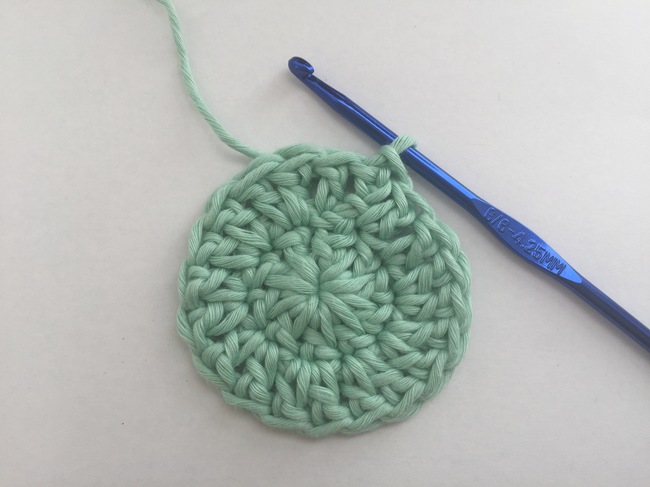
Remember to measure the diameter of your circle after each round to determine when you've reached the size that you want. In our example, we reached the 4½" diameter after five rounds of double crochet. You could continue with additional rounds until you reach your diameter, then it's time to move onto the body of the hat.
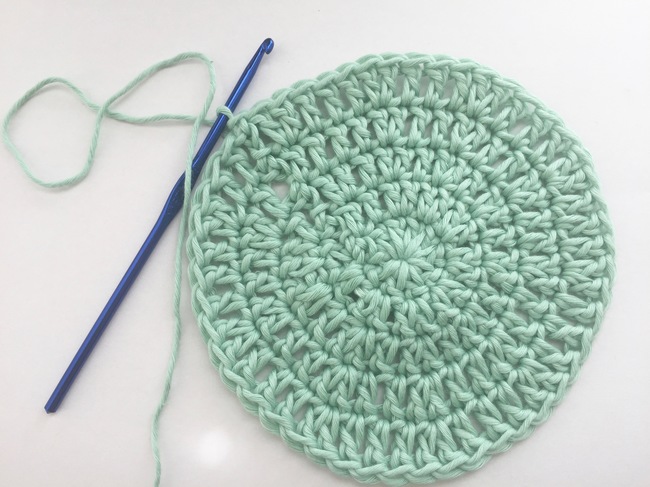
Crochet the Body of the Hat
You'll create the hat's body by continuing to create rounds but without any increasing. You'll simply crochet one stitch in each stitch from the round below, adding rows until you reach the length (from crown to bottom row) that you desire.
Round 6: Chain 3 (counts as first dc). Dc in each stitch around. Sl st to top of ch 3 to finish round. (Total 50 dc st per round).
Repeat Round 6 until your hat reaches your desired length. For me, I reached the 5½" length after five rounds of the body of the hat (10 rounds total in the hat).
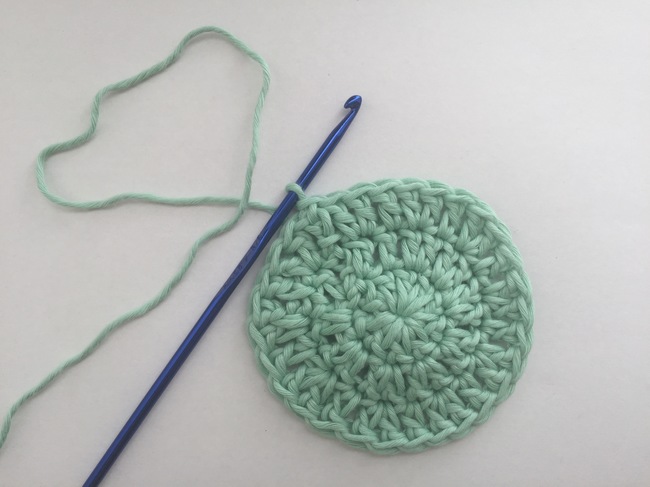
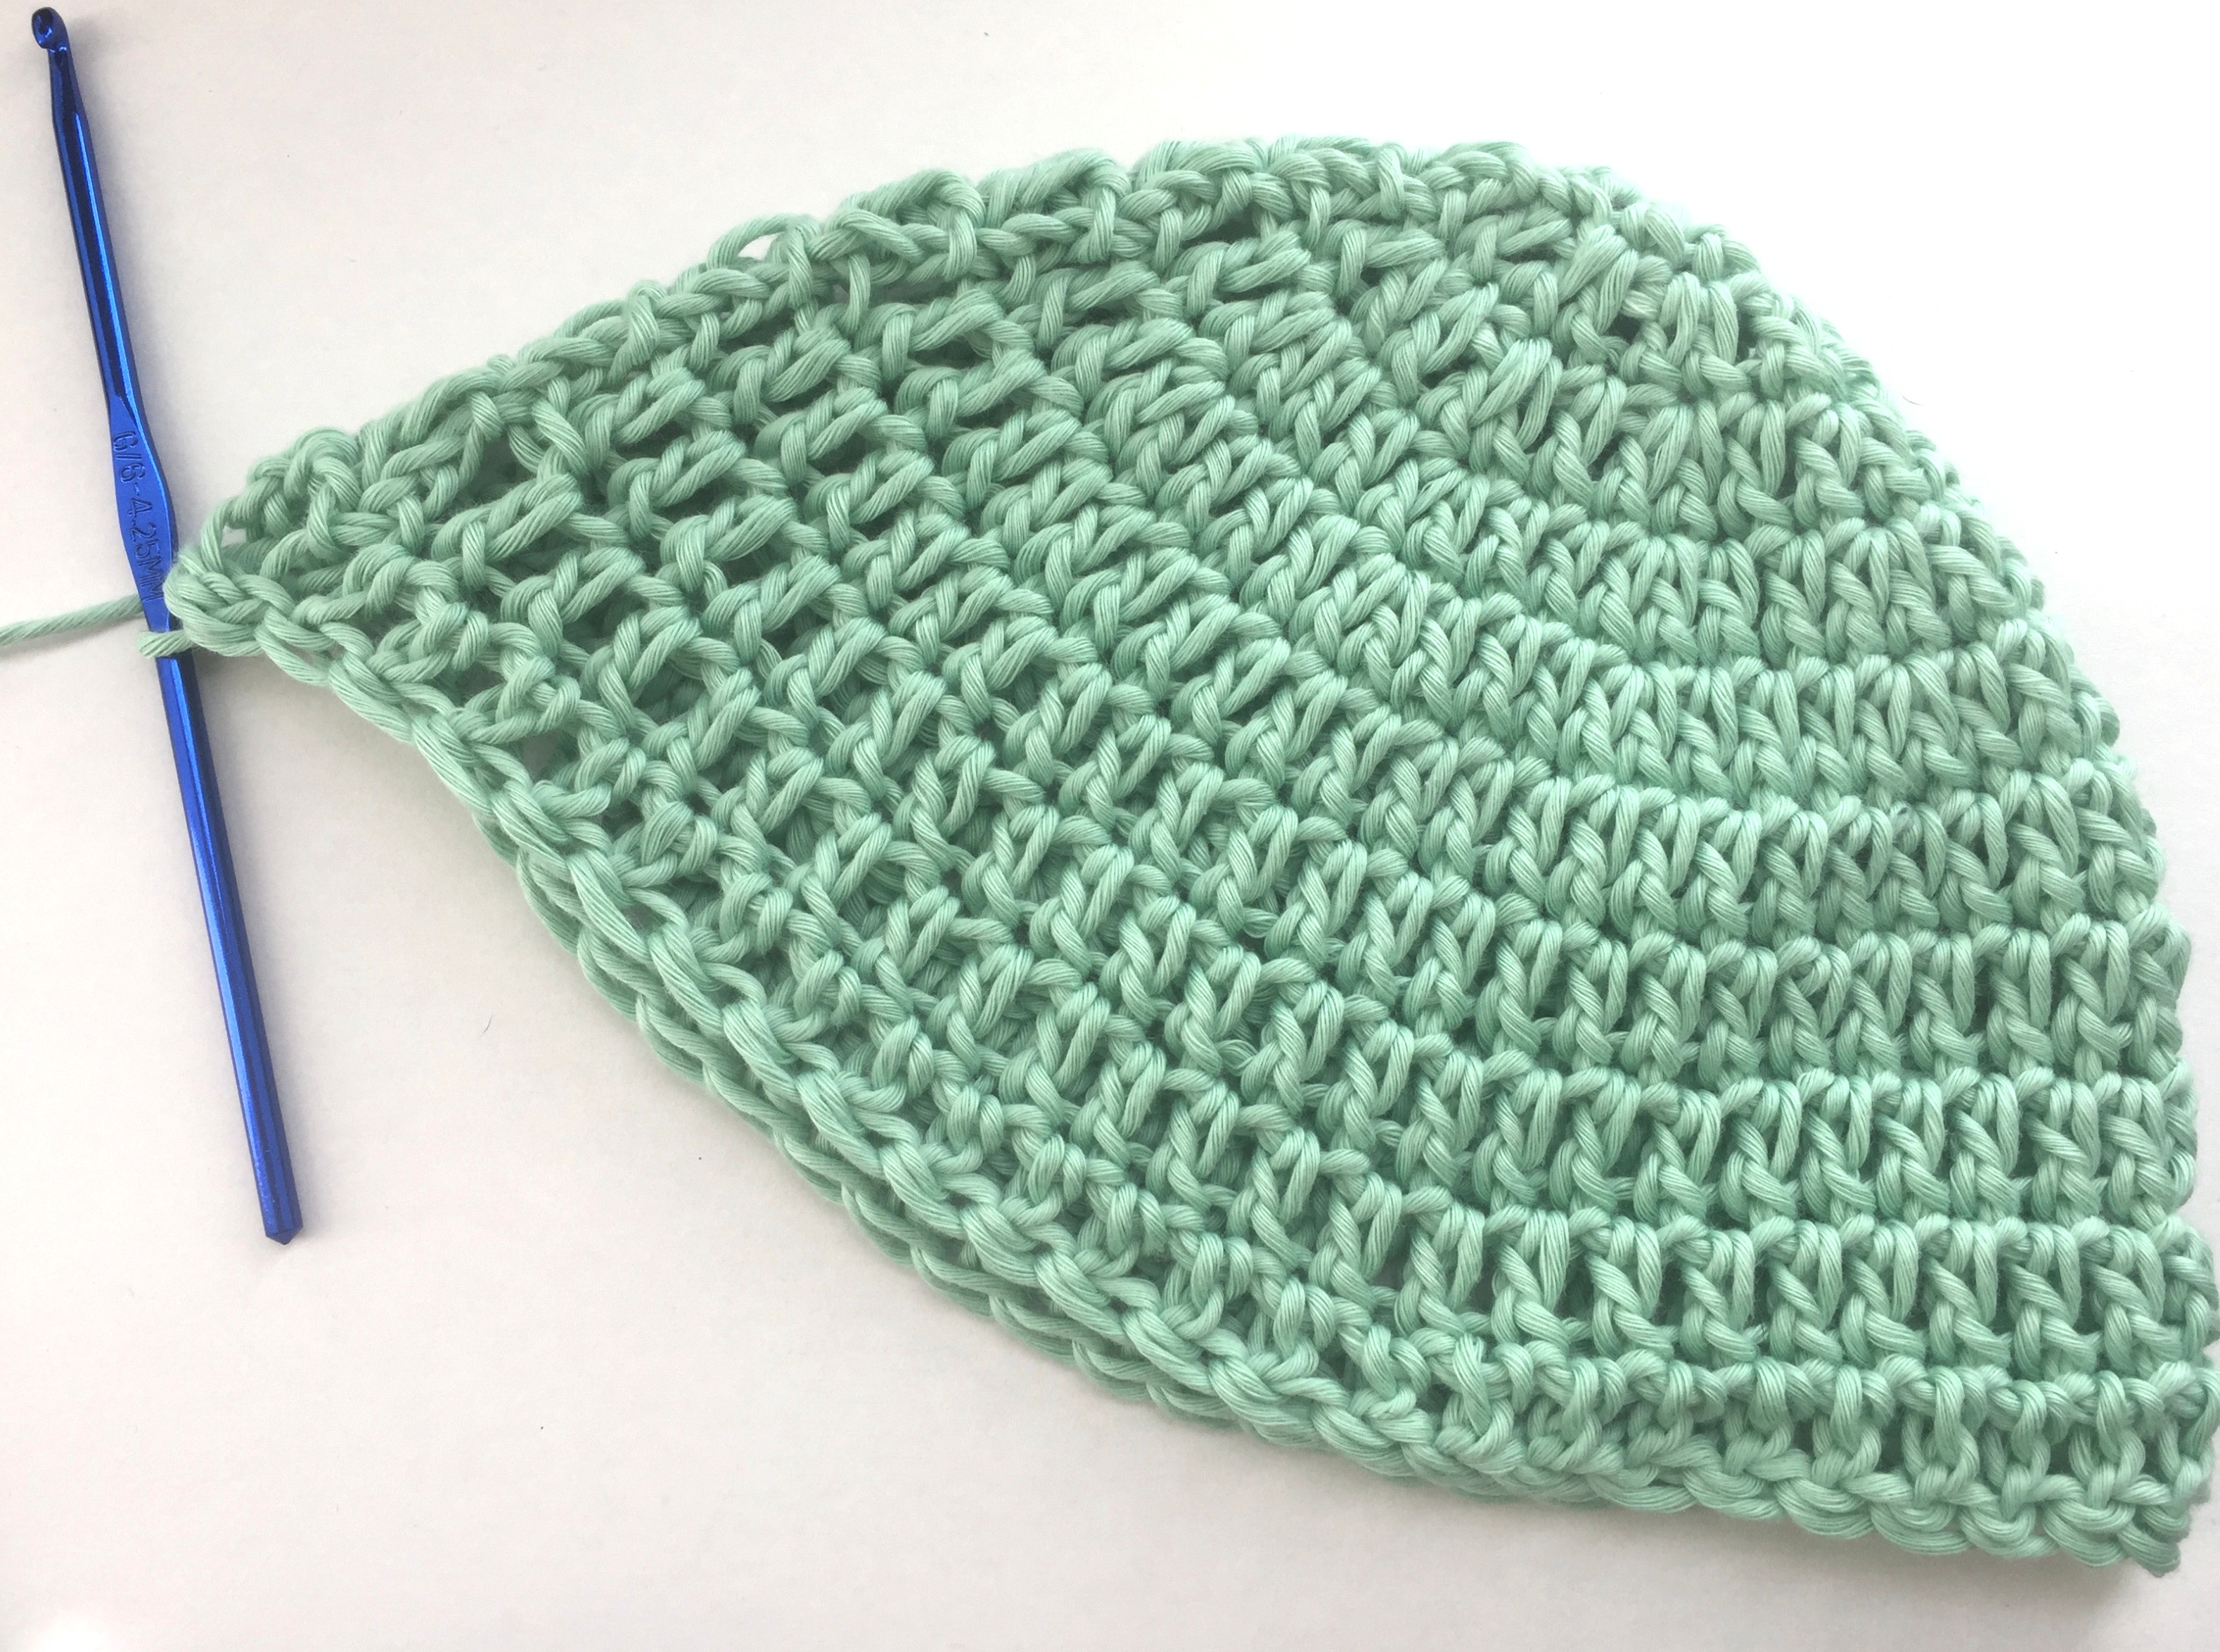
Add an Edging
Adding a crochet edging is totally optional, but definitely adds a bit of flair to an otherwise basic hat. Bear in mind that an edging will increase the overall length of your hat. If you're concerned about an exact fit, add the edging into your calculations.
An edging doesn't have to be fancy: we used a simple single crochet border by adding an 11th round to the baby hat by working ch 1 (counts as first sc), sc in each st around, sl st to ch 1 to close the round (for a total of 50 sc stitches).

Thanks for sharing!
very good and usefull
Fantastic. So so easy to follow. Thanks from South Africa.
The wool hat looks warm and cute. And it seems not tough to make. Thanks sharing.
Thanks for sharing. Can't wait to try it. Nice post.
How do I print intructions
Cant wait to try it!!
Pretty easy tutorial, I can't wait a try it now, thank you
Any way to print out the directions without the photos?
Thank you for your share. I hope I can make one as well.