
Do you have a technique, project or pattern that is unique? Do you want to make extra money selling your idea online? Are you lost when it comes to actually selling your tutorials?
Read on to learn more about best practices and tips for selling your own craft patterns.
Content
First, you need to make sure that your content itself is sellable. This means doing research first.
Some ways you can conduct this research are:
- Searching for trends
- Looking for similar patterns
- Doing sketches and practicing the pattern to make sure it works
- Posting photos of the finished project to get feedback
- Asking for tutorial requests
When you’ve decided what project you’ll create the tutorial or pattern for, the way you present it is extremely important in determining how popular it becomes. This includes the photos, the content, and the description and title.
Photos

Make sure that your step-by-step photos are clear, focused and close-up. Use a good camera, good lighting and frame the shot so that the step you’re capturing is clear and readable. You might want to try a photography class such as this basics of digital photography course. The project should be doable without ever reading the text, if necessary.
You could also use Bluprint’s online class Shoot It! A Product Photography Primer as a way to ensure you create beautiful, crisp, clear finished product shots (see below for more about the cover photo).
The finished shots are what will ensure that your pattern gets purchased, and the step-by-step shots will have them coming back for more!
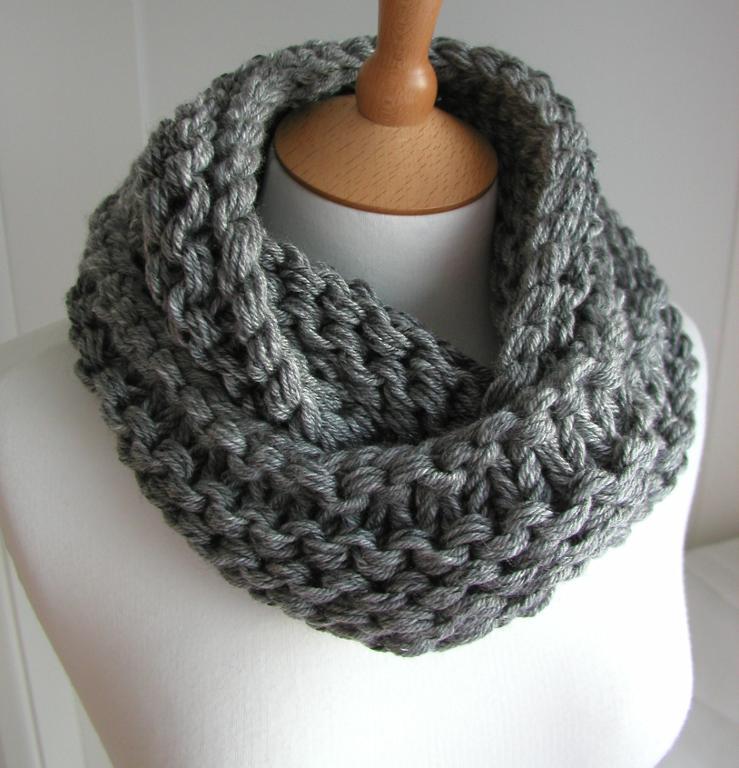
The cover photo for Crafty user Julia Marsh’s pattern Steel Grey Chunky Circular Scarf
Steps
Each photo should be accompanied by a clear, instructional description of what’s happening in that step. Begin each step with a command so it’s clear immediately what to do.
Some good command words are:
- Knit
- Wrap
- Pull
- Grasp
- Tie
- Twist
- Examine
Description
Use glittery, colourful words in the description; words that will make the reader feel they want to touch the project. Also make sure you use words that keep fear away.
Some examples:
- Luminous
- Wispy
- Shimmering
- Glimmering
- Understated
- Sun-drenched
- Smoldering
- Craggy
- Buttery
- Distinguished
- Sophisticated
- Stylish
- Edgy
- Slinky
- Jaunty
- Elegant
- Flexible design
- Simplifies
- Clarifies
- Tested
- Repeatable
- Trouble-free
Finally, choose a title that gives a clear description of the pattern. Include the words”how to” or “pattern” or “tutorial” in the title if you can.
Pricing

Coin photo by Ale_paiva
Pricing a tutorial or pattern stresses everyone out, no matter how long they’ve been doing it! But the first piece of advice I have might seem weird: price a few of your tutorials at $0. Giving away your work is the best way to ensure that people see the quality of your teaching style and gain their trust enough for them to open up their wallets and hand you cash.
For the rest, you should do research. What do other tutorials similar to yours go for? Is your pattern of higher or lower quality? How many pages/steps/images do you have? How advanced is the pattern?
Ask yourself all of those questions and price as you see fit, but in the end, I suggest keeping the price between $2-$10 until you build up a big audience and are able to provide extremely advanced tutorials for your customer base who trust you and are willing to pay more for quality instruction. You’re more likely to sell 100 tutorials for $2 each than you are to sell 10 tutorials for $20 each, so keep it accessible.
Marketing
Social Media
One of the most obvious things to do with your patterns is to share them on your social media — Facebook, Pinterest, your website and/or blog, Twitter, Tumblr, etc. What’s less obvious is HOW you do that! The two pieces of sharing your project are the photo and the description.
The social media cover photo
The most important part of a social media share is the cover photo. You want to choose a photo of the finished project that is clear, focused, zoomed in on the whole piece and readable (we shouldn’t wonder “what is that?” when we see the photo).
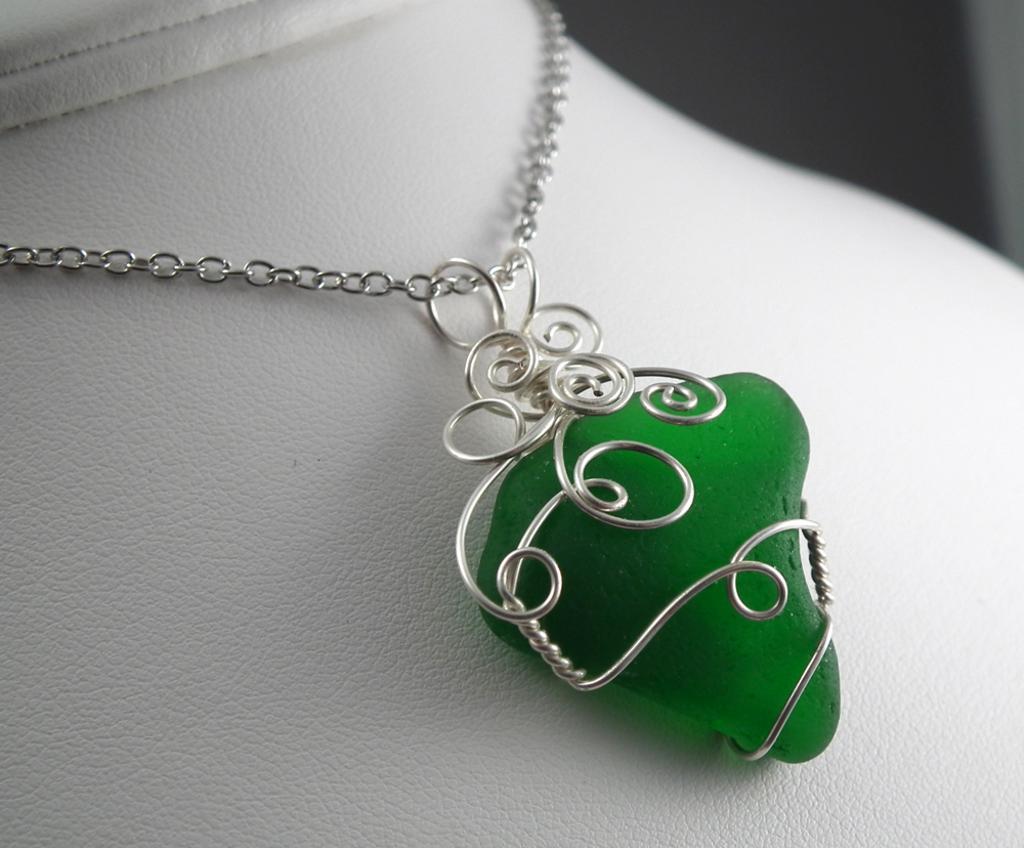
For instance, the photo above has contributed to nearly 10,000 downloads of my How to Wire-Wrap Beach Glass the Easy Way tutorial over the period of a few years. You should also have several good photos representative of the pattern available on the sales page to support the cover photo, but it’s this one that most readers will see and it should be beautiful and representative of the project.
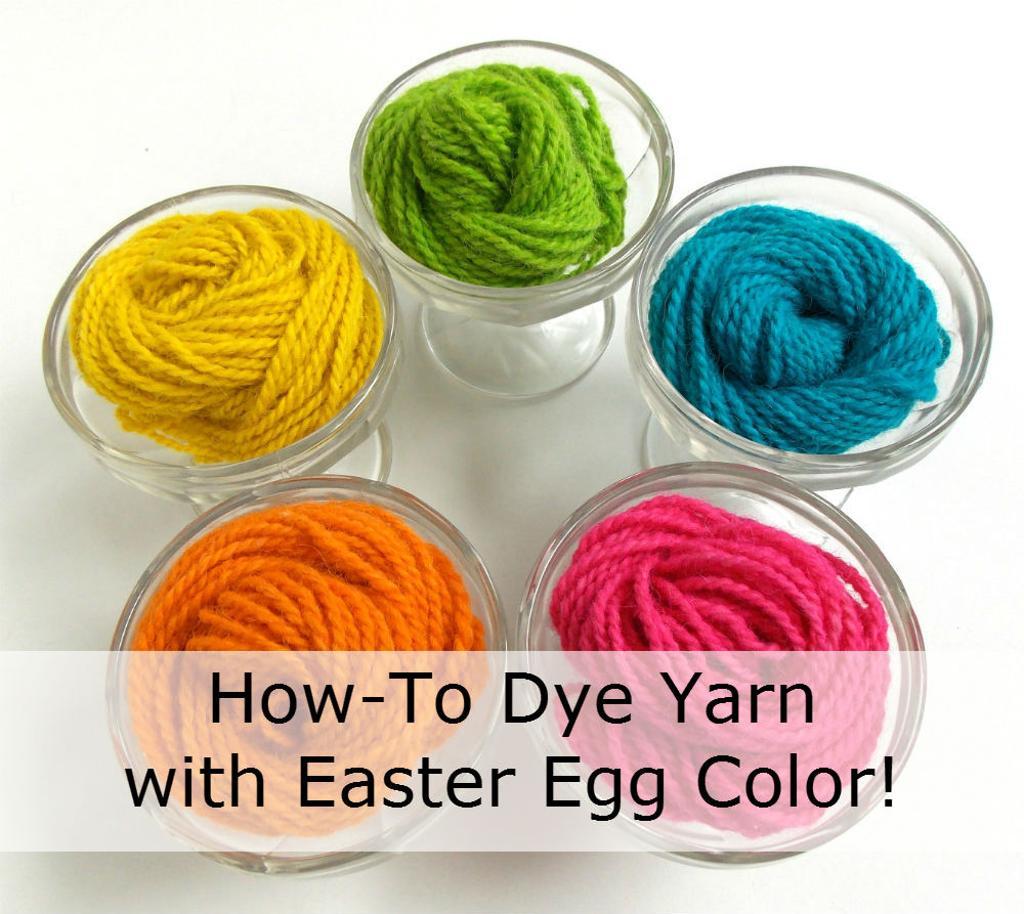
You might find that adding a title will help your audience realize that this isn’t a finished project for sale but in fact the instructions for making that project themselves! In addition to simply writing in the name of the pattern like the yarn-dying example above by Bluprint user FiberArtsy, other popular titles are “tutorial,” “pattern,” “pdf download,” “how to,” or “DIY instructions”. Experiment to see what works for you! You might also want to include your own name and branding, especially if your audience is already familiar with your work. However you build the cover photo, be sure not to obscure the finished object photo.

The size of the cover photo matters. You have to take into account not only the final size preferred from your market sale, but also the share-size of various social media platforms. The Social Media Examiner blog has a great post explaining how to optimize your images to work across social networks, covering Facebook, Twitter, and LinkedIn. It’s a great start to the concept. For example, the excellent cover photo above for the wildly popular Knot a Ring by Bluprint user BobbiWired is in a square-ish format, since that’s the way Bluprint pattern photos are best shown off. However, if the image was shared on facebook or twitter, it would be cut off, something like this:

Because of the dimensions of the image, either the text, the project, or both gets cut off when shared on social media. But this image can easily be edited to fit into a social media share format such that no information is ever cut off! For example, by reducing the size of the title and expanding the sides of the image:

The dotted lines show the “safe zone”, the area of the image that will not be cut off by the major social media shares. The project image, title and credit have all been adjusted to fit into this safe zone and can now be used on multiple platforms. You might find a class in image editing helpful, such as this Essential Guide to Adobe Photoshop here on Bluprint.
The social media description
The next thing you need to worry about with a social media share is the description. You want to use just one or two main keywords in the description. Ensure that your description is in your own tone and that it reflects the brand you’ve been building. Be excited about your own work!
Keep the description short. Twitter is a good example of getting a lot of info into a 140-character limit, and if you plan to share this on multiple sites, you might find your long, delicious description gets cut off in places. So stick to a quick description, a main benefit to buying the pattern, and a call to action words like “Buy Now” or “Get it Here” or “Download Right Away.”
Meaningful connections

Signpost image via Dedulo Photos
That takes care of how you present your patterns, but WHERE do you present them?! The list below is just a few ways to ensure you get your pattern in front of the right audience to buy. I mean, you can spend money to market your work cold to strangers, or you can spend time and effort to create a network of people who are receptive to your work — and probably make friends in the meantime! I know which one I prefer.
Your website
Be sure to create a meaningful entry on your website — either create a post if you’re using blogging software, or add a page for patterns. Link out to external places to buy if necessary, but make your own domain name the hub for finding your work.
Groups & boards
This one is tricky! You want to find groups and communities where there are people who would relate to your work, and you want to engage with them, but you don’t want to come off as spam. Again, you have to put in the time and make meaningful interactions here. Comment truthfully when someone asks for feedback, ask interesting questions, share content that isn’t just yours — and when it comes time to show them your work and ask them to buy, you’ll be familiar and welcome instead of dismissed as spam.
Follow others
Don’t forget to follow other artists who interest you. Don’t do it for the follow-backs, and don’t demand someone follows you if you follow them — just genuinely be interested in their work and hit “like” or “follow.” Don’t forget to comment if something an artist does moves you — don’t just lurk! Again, the key term here is engagement. You will soon find yourself immersed in a community of like-minded folks which might surprise you at how enriching it is in your life — and hey, if some of them follow you back, that’s just a bonus!
Galleries
Post pictures of your recent work in online galleries, especially ones connected to the pattern-sales sites you’ll be using. Ask for feedback, use the galleries as springboards for tutorial ideas to gauge how interested in a specific design the community is, and interact meaningfully with people who post on your work as well as those whose gallery designs speak to you. You’re creating a network, remember, so put in the time. You’ll be rewarded, promise.
Include bio & contact info
This one might seem obvious but it’s surprising what you can forget! Simply make sure that there is an author bio and ALL of your social connection information at the end of every tutorial you post for sale. Make it clear exactly how much support you intend to give for this tutorial and make it super easy for people to connect with YOU!
Connect related tutorials
This is a different kind of connection, but it’s an important one nonetheless: If you have more than one tutorial in the same style, make sure that when a user gets to the end of each one, they find links to the rest. That person will have (hopefully) just happily completed your instructions might appreciate easily being able to find more!
In the end
There are many pieces to selling your patterns and tutorials, but don’t feel overwhelmed. The key thing is to find your market and appeal to it. Using the tips above you’ll be a success at selling your own patterns!
Share tips, start a discussion or ask one of our experts or other students a question.
No Responses to “Top Tips for Creating and Selling Your Own Craft Patterns”