
Every sewer makes mistakes. We’ve all made them, including some doozies from yours truly. Whether your just starting out or have been sewing for decades, you do need to accept that sewing mistakes are going to happen from time to time. In most cases, simply ripping out a seam will fix the problem, but some mistakes can be so devastating that starting over is the only option.
Knowing how to rectify sewing problems comes with experience, but if you follow these tips, you can prevent those really bad ones from happening in the first place.
Discover successful solutions for your sewing mistakes!
Learn to mend sloppy seams, prevent overpressing, patch holes & more in 8 HD online video lessons you can watch anytime, anywhere.
1. Be as precise and accurate as possible from the get-go.
And pay attention to the details throughout the construction and assembly process — they matter! Being precise starts with the way your patterns are cut. Those cutting lines are there for a reason. The more disciplined you are to cut exactly along the printed cutting lines, the better your pattern pieces will reflect the integrity and fit of the pattern. Another key benefit is pattern pieces will join together more accurately making assembly easy and effective.
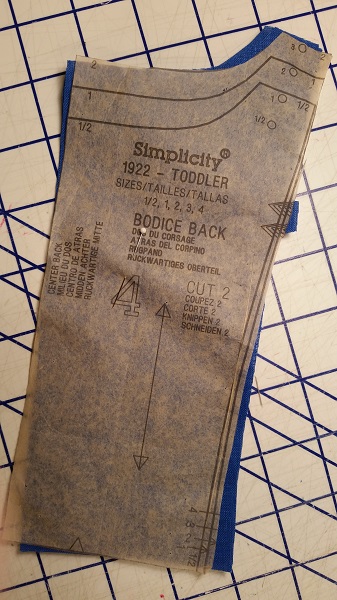
2. Keep patterns pieces pinned to the tissues until they are needed.
The biggest errors come when the wrong pattern pieces are joined together. The problem is once those tissue patterns are separated from the fabric, sometimes it’s hard to decipher what pattern piece it is. The more pattern pieces involved in making a project the more likely this becomes a problem. So, don’t remove the tissues all at one time, but rather remove them in the sequence of assembly.
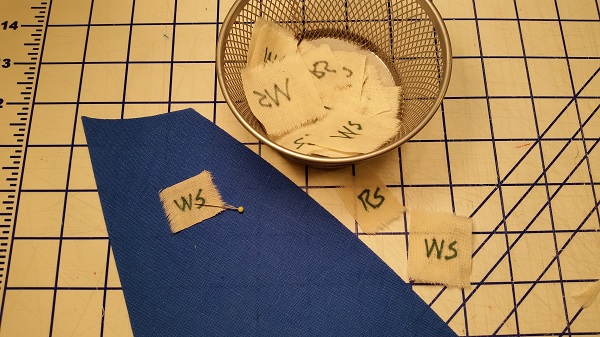
3. Sometimes it is difficult to distinguish the right from the wrong side of a piece of fabric.
In many cases, the difference is obvious, but for some the weave may differ on one side but the color on both sides may be indistinguishable. In other cases both sides can work as the public side of a garment. The sewer must pick a side that will serve as the “RS” and make certain the proper sides are joined together.
One way to ensure that is the case is to simply mark a big “WS” on the wrong side of each cut pattern piece with chalk or a fabric pen. For fabrics that will be marred by a marker, make small squares of fabric and write “RS” or “WS” on them. Either pin them to the appropriate side or hand stitch them in place. Make a bunch of these types of labels to have on hand when needed and you will be amazed at how helpful they become.
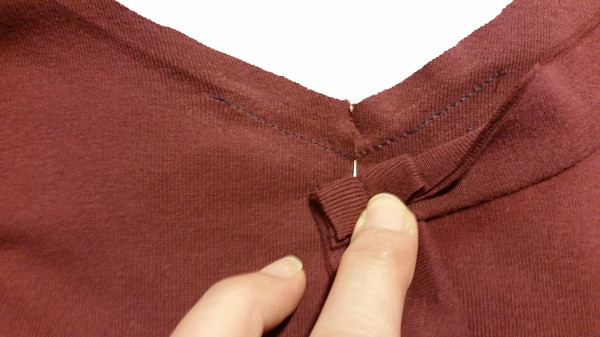
4. Clip and trim only when you are sure the fit and stitching are correct.
Many pattern instructions will advise the sewer to clip before sewing, which in theory is the correct thing to do. But it is best to exercise some caution before doing so, as once clipped further adjustments are sometimes difficult. Furthermore, sometimes clipping too soon leaves an edge vulnerable to stretching out. This can be a particular concern when sewing with knits. So in the end, don’t clip too soon and only when you are assured no adjustments will be necessary.
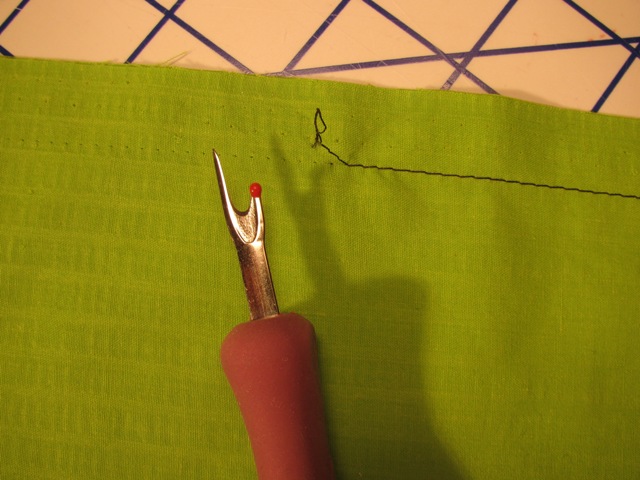
5. Test before you sew.
This is one of the most important things to do to avoid making big sewing mistakes. Once pattern pieces are cut and you are ready to sew take a scrap of the fashion fabric and sew a line or two of stitching to test the worthiness of the machine needle, the stitch length for that fabric and the stitching tension. A worn needle will skip stitches and may snag the material, which could ruin a potential pattern piece. A simple test up front will set the stitching parameters for your project and avoid ruining your first set of stitches.
Share tips, start a discussion or ask one of our experts or other students a question.
No Responses to “5 Common Sewing Problems + How to Avoid Them”