
At this point, you have practiced and taken tons of amazing cake decorating classes like the ones offered by Bluprint, and now you feel ready to make cakes for real customers! Not friends and family, but true paying customers. You’re ready to get going with your very own cake decorating business.
Join me on a cake journey through preparation, planning and production
We will start with the initial consultation and end with the delivery. (Taking a nap after the delivery is optional.)
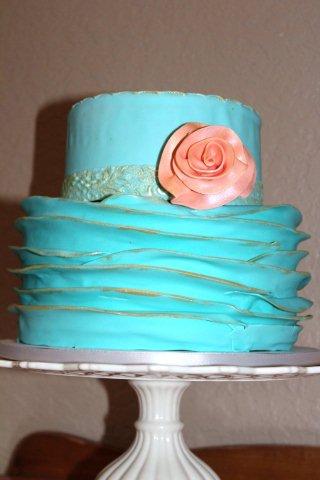
Photo via Wendy Woo Cakes
1. The Consultation
Whether your cake consultation is in person or over the phone, meet with your customer to discuss and understand what they want. Together, during the consultation design and sketch a rough idea of what the customer is looking for. If you have access to a copy machine, make a copy of the design and details for your customer. If you do not have a copy machine, scan or fax them a copy. For further tips for this initial meeting, check out my recommendations for making consultations a breeze.

2. Receive a deposit
After the consultation, send the customer a thank you email. If you have not yet done so, give them pricing and the cost of the deposit. Do not agree to the cake or send a final sketch until they have paid the deposit. Visit here for more pricing information.
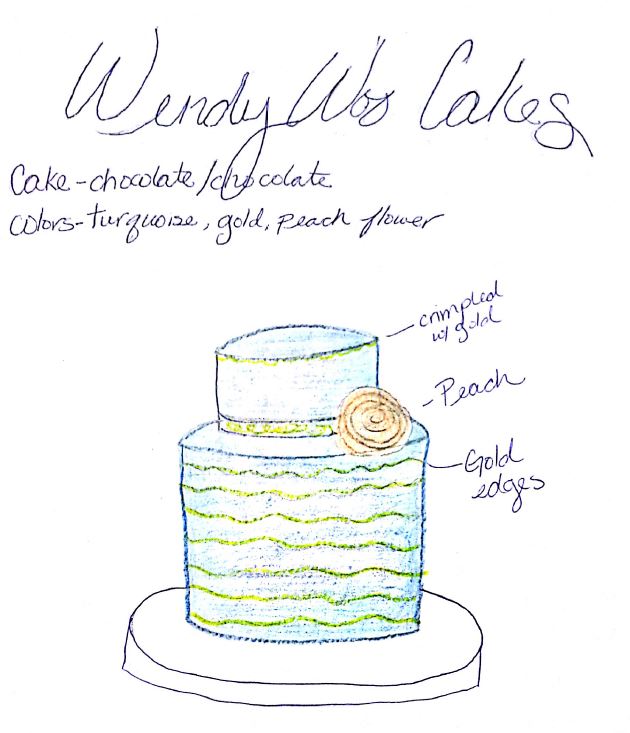
3. Send a full sketch of the cake
Once your customer has paid the deposit, draw up a full sketch with all of the details for their approval. Send it with their write up and invoice.
4. Plan, plan, plan
Once the deposit is paid and the sketch is approved by the customer take the time to plan for the cake. Even if the cake will not be made for a few months or even a year, you may forget minor details or find you have missing information.
Here is a list to check when planning your cakes ahead of time:
- cake flavors
- buttercream flavors
- fillings
- colors and amount of fondant
- pan sizes
- cake board sizes
- structures
- decorations
- delivery times and the destination
After you have planned you can then file it away knowing that when you are ready to make this cake you are prepared and have everything you need.
5. Waiting
Now that you are ready, you can use this time to practice or prepare decorations early so you are not frantic at the very last minute.
6. One Month Away
Three to four weeks before the cake is due send out a final invoice for the remaining amount. This will give them some time to respond and pay the bill. Also, take this time to go over any questions they may have. Discuss the details again to make sure everything is still accurate.

7. Two weeks away
Make sure your cake is paid in full. Get out your material list you made at the beginning and make sure you have everything you need. If you haven’t done so, make the decorations or flowers that can be pre-made for the cake. Contact other key vendors such as the wedding planner, the florist, and the venue to coordinate deliver times and places. Your customer may have given you that information but double check with the vendors. If you have not been to the venue before make sure you know where you are going and that your GPS will get you there if needed.
8. One week away
Finish the decorations and remember to always make extra, especially if they are fragile. Color your fondant and if you need to build a structure or special stand it is best to finish it before starting on the cake.
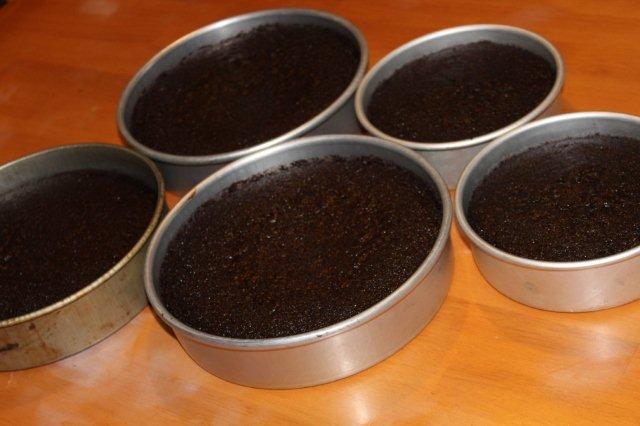
9. Three or four days before delivery
It is finally time to bake the cake! Depending on the design of the cake and the amount of time it will take to decorate, you can determine if the cake will need to be baked three or four days before the event. If you are making a lot of cakes you can also bake the cakes one week in advance and freeze the cakes if necessary. Usually if I have a delivery on a Saturday evening, I will bake the cake on Wednesday night. Bake all of your cakes and then leave them in the pans to cool. Check out our article on how to cool cakes quickly. Wrap them tightly in a double layer of plastic wrap and place them in the refrigerator to chill overnight. Make your icings and fillings so you are ready to rock!
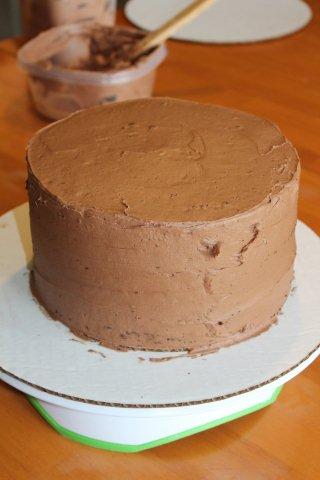
10. Two days before delivery
Your cakes will be cool and easy to remove and work with. Fill and stack your cakes, crumb coat them and place them back in the refrigerator to chill. Cakes are always easier to work with when they are cold. Once the cakes are chilled (20-30 minutes) pull them back out of the fridge and wrap them in two layers of plastic wrap. Let them chill again over night. If you do not have time or would like to speed up the process, you can let them chill for about two hours and then cover them in fondant, but I like to give them plenty of time to chill all the way through.
11. The day before delivery
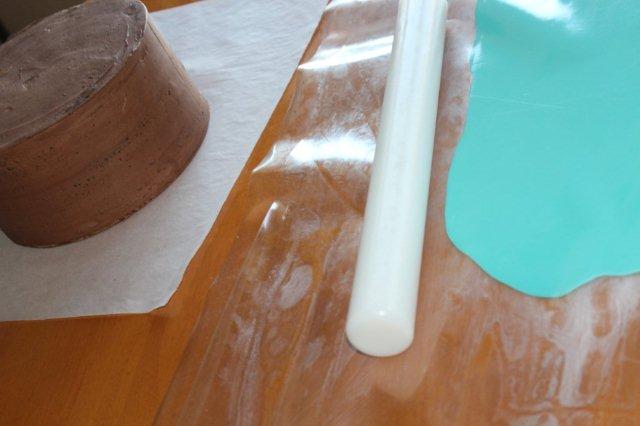
Now comes the fun part! You have beautifully crumb coated cakes that are ready for fondant. Cover your cakes in fondant, stack them and begin decorating! (It sounds so easy, right?) Make sure to let your fondant dry on your cake before adding heavy flowers or decorations.
12. It’s go time!
Finally the big day has arrived! Finish decorating the cake if you need to. If you are adding heavy decorations, it may be best to add them once you arrive at the venue. Pack a tool box full of everything you may need in case something goes wrong. Leave yourself plenty of time to take pictures of the cake. Box up the cake for delivery and make sure to leave early!
Worried about an unexpected cake accident? You should always be prepared with a cake delivery kit! Items such as scissors, extra fondant and a cake board will be essential to have on hand for those unexpected “whoops!” moments.
Plan to always be early, check traffic patterns before you go and be sure to know where you are going. I always tried to arrange to be about two to three hours early so I had time to set up. I also wanted to be early in case some unforeseen accident happened. I wanted to make sure I had time to fix the problem. Remember to give yourself plenty of time to take pictures at the venue too. Once you arrive, leave the cake in your vehicle, go into the venue and introduce yourself, find out where the cake will be set up, so you know where you are going. Then return to the car and carry in the cake.
Find what works for you!
Other decorators may do things differently, but as with most cake decorating, find what works for you, be conscious of food safety, be professional, on time and ahead of the game.
Note: If you are making multiple cakes in one week, it is best to keep the same schedule. Set aside time at the beginning of every week to review cakes that will be coming up in the next 2 weeks. Plan ahead for them and you can greatly reduce your risk of getting behind or forgetting something.
Other vendors and especially your customers will love that they can rely on you and know that you will keep your word and be on time. That alone can help spread the word like wildfire about your fabulous cake business.
Share tips, start a discussion or ask one of our experts or other students a question.
No Responses to “Cake Inc: A Cake Journey from Concept to Completion”