
In the left corner, weighing a couple of pounds, astoundingly sturdy and ready to absorb brute force, we have…cake pop dough! In the right corner, weighing in at one pound, fluid and ready to engulf anything that comes its way, we have…candy coating! Let’s take this dance into the kitchen, and I’ll teach you how to work your quick hands to throw punches, working these boxing glove cake pops into the ropes and giving a TKO like a champ! All with this easy six-step tutorial.
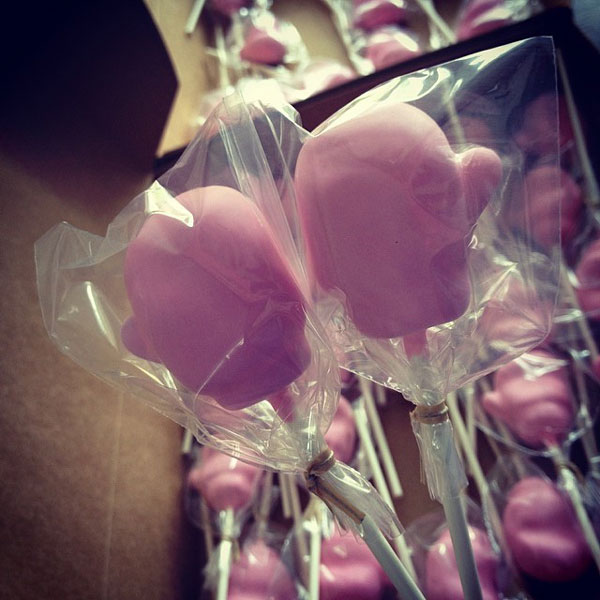
Ready to make boxing cake pops? Fight!
These boxing glove cake pops are perfect for pleasing the fans at boxing-themed parties for kids or even an adult fight night party! Either way, with these sweets, you’re sure to come out a winner and a fan favorite.
Believe it or not, these cake pops were inspired by a little 8-year old Muay Thai fighter, I know, who loves the boxing sport so much. Instead of having a pink princess party, more typical of girls her age, she chose to have a pink all-things-boxing party instead.
You’ll need:
- Cake Pop Dough
- Lollipop sticks
- Candy wafers in the color of your choice
- Wax paper
- Straw or paintbrush handle (sturdy cylindrical object)
- Styrofoam block or cake pop stand
Cover your work surface with wax paper.
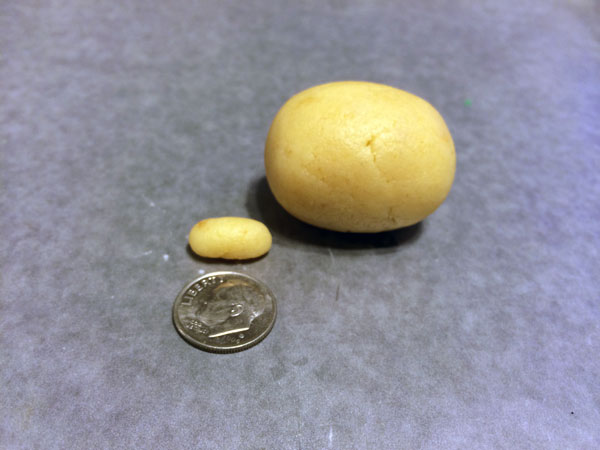
Step 1:
Starting with a scoop of cake pop dough, pinch off a tiny piece and roll into a tiny log. This will be the thumb. Then roll the cake pop dough into a ball, then into an oval.
Step 2:
Use the thin edge of a plate or the thin edge of a flat surface to create the wrist area. Push and roll the bottom ¼ of the oval onto and along the flat surface.

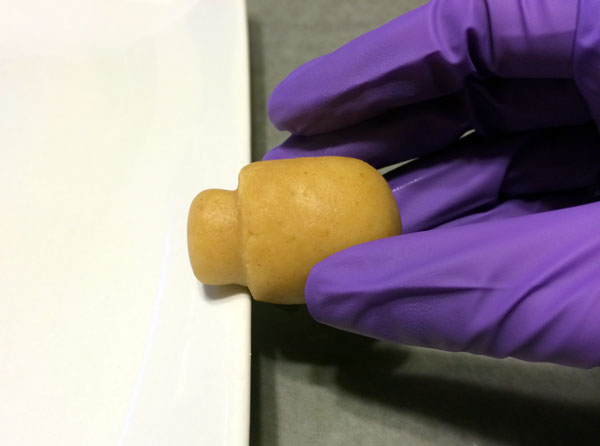
Step 3:
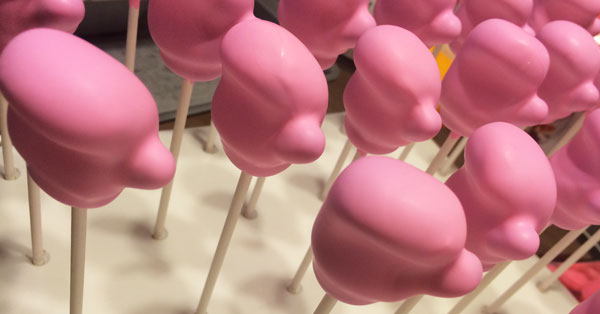
On one side, use a sturdy or nondisposable (souvenir) straw or some kind of thin cylindrical object, and press it horizontally against the middle. This forms the rounded top area and the palm. Refrigerate the gloves and thumb pieces.
Step 4:
Melt candy wafers in a microwave-safe bowl or cup.
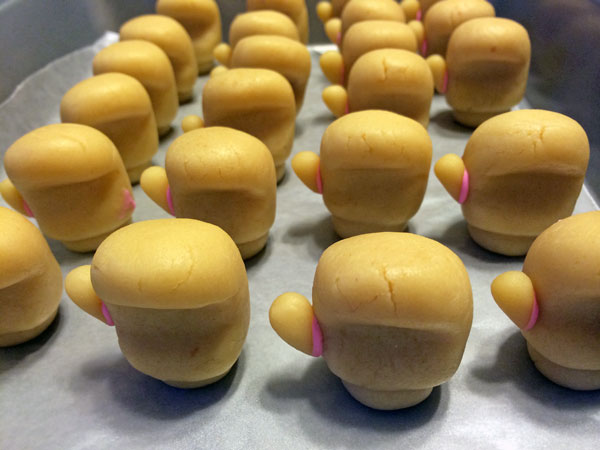
Step 5:
Remove all pieces from the refrigerator. Let sit at room temperature for a few minutes to take the chill off. Let’s start assembling the pieces together. Using the candy coating, dip one tip of the thumb and press it against the side of the glove. Repeat this until all thumb pieces have been attached. Since the pieces are still cold, it will only take a few seconds to adhere and set.
After all, thumbs have been attached, dip about a ⅓ inch of a lollipop stick in candy coating and then insert it into the bottom of the glove wrist area until it’s about halfway into the glove.
Step 6:
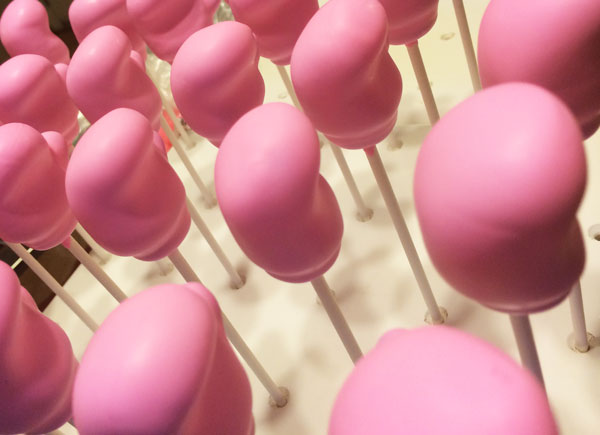
Dipping these gloves will be easy. Hold the cake pop upside down and dunk, into the candy coating until you see the coating cover the entire cake pop and meet the stick. Then lift up to remove from the coating. Let the excess coating drip back into the bowl using a gentle up and down motion. Turn right side up and tap off the excess as needed.
Use toothpicks to puncture air bubbles if you notice any and gently wiggle the cake pop side to side so the coating can work itself out to cover the area the bubble once was. Place on the styrofoam block and let dry completely.
Share tips, start a discussion or ask one of our experts or other students a question.
No Responses to “Let's Get Ready to Rumble With These Boxing Cake Pops!”