
Baby quilts are great for beginners because they come together fast and the small size is easier to work with. I highly recommend a beginner quilter start with a baby quilt before tackling a larger quilt. So today, I’m sharing a simple, beginner-friendly quilt pattern for a cute baby quilt.
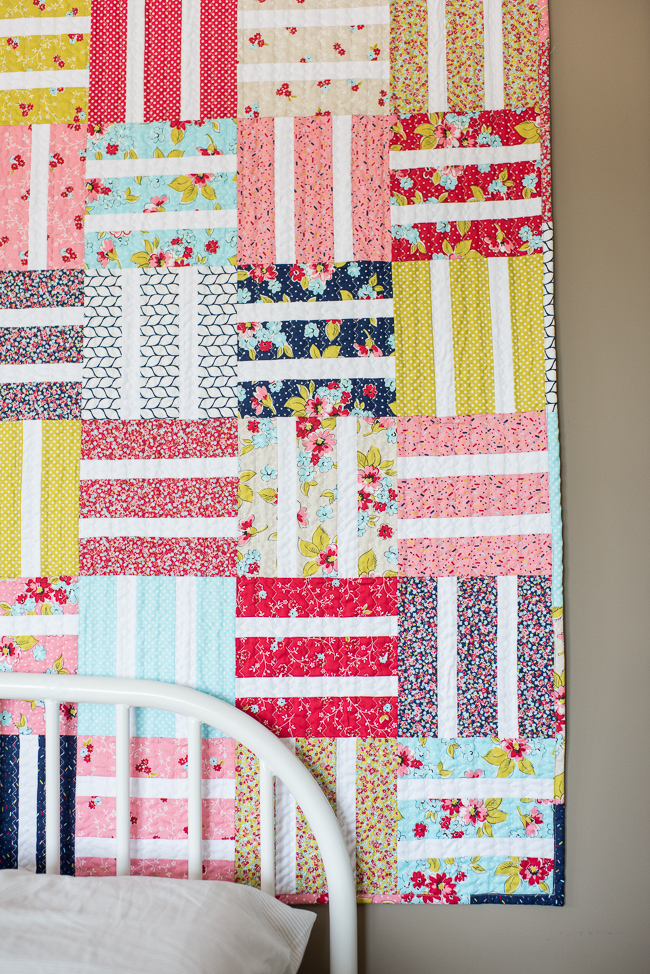
This baby quilt is a fun one to put together and beginner friendly!
It’s made up of pre-cut 10″ squares, which provide all of the print fabrics you need for this baby quilt. Pre-cuts are a good choice for beginners who may not have a stash of fabrics to choose from just yet. I used Boundless Flower Shoppe for my baby quilt.
This beginner baby quilt only takes an afternoon or two to make. Grab your supplies, and let’s get quilting!
Supplies:
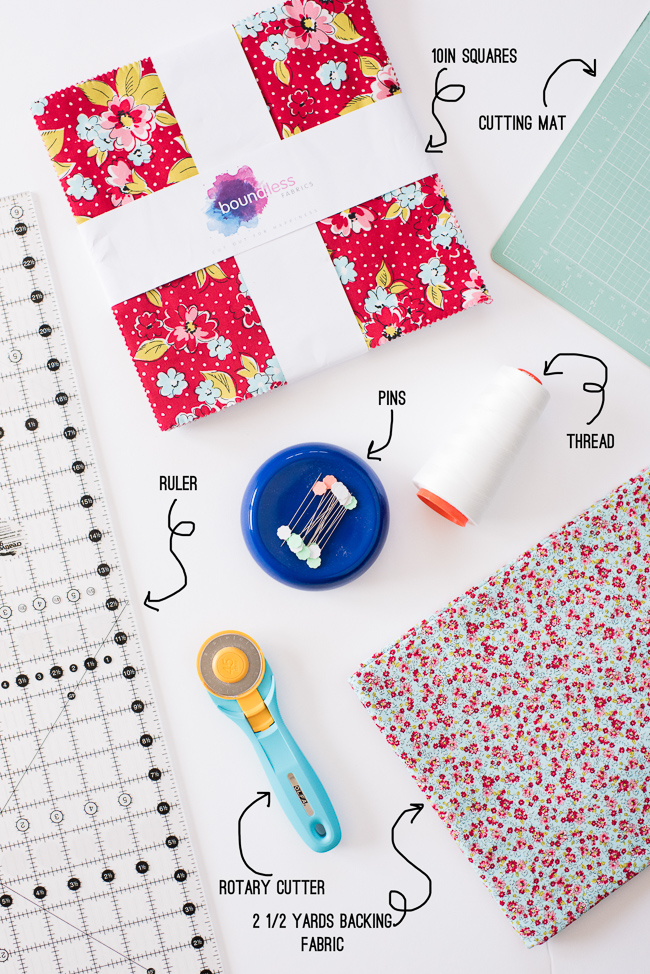
- A 10″ square bundle (37 pre-cuts in total)
- 5/8 yard white or neutral fabric
- 2½ yards backing fabric
- Baby size batting
- Thread
- Pins
- Rotary cutter
- Cutting mat
- Quilt ruler
Learn more about must-have beginner quilt supplies here.
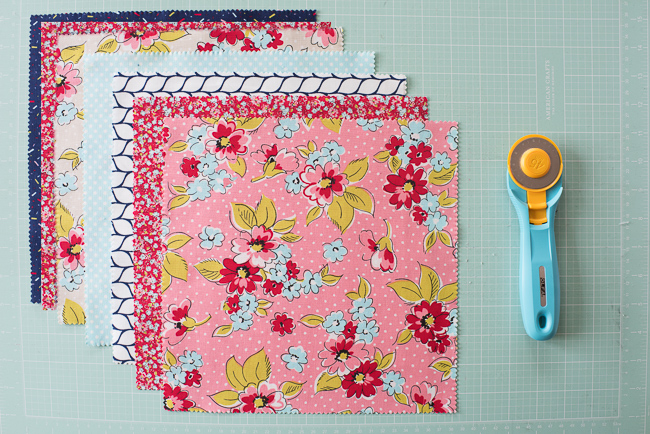
Step 1: Choose your fabrics
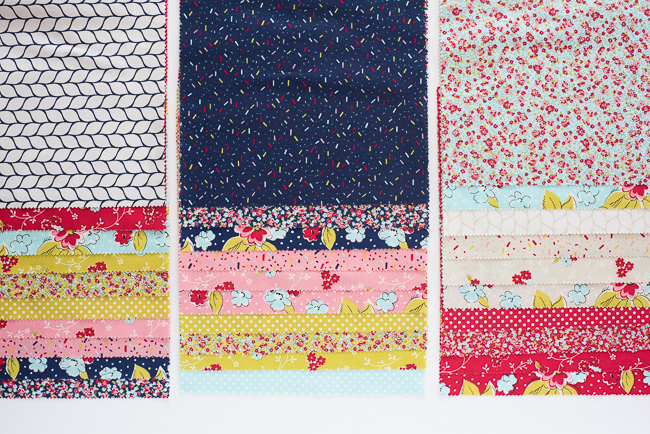
First, choose thirty 10″ squares from your pre-cut bundle for the quilt blocks. Set aside seven 10″ squares for the scrappy binding.
Step 2: Cut the neutral fabric
Next, cut two strips of the neutral fabric to 8½” x width of fabric (WOF). Then, from each strip, sub-cut 28 rectangles that measure 1½” x 8½”.
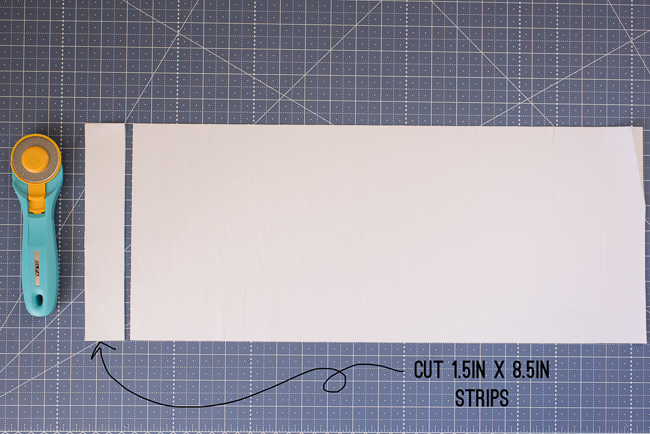
Then, cut one strip that measures 1½” x WOF, and sub-cut the strip into four strips, each 1½” x 8½” (a total of 60 strips).
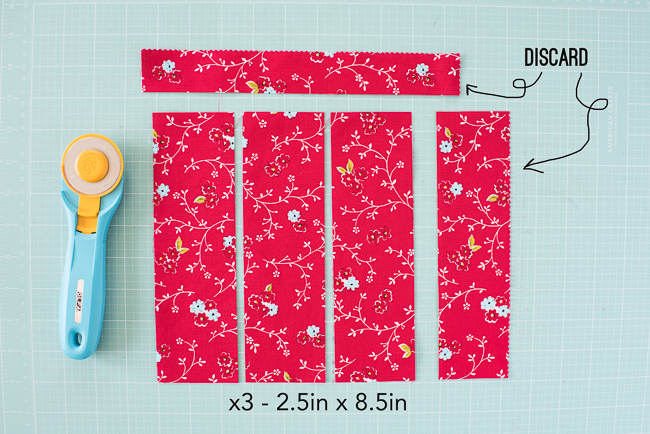
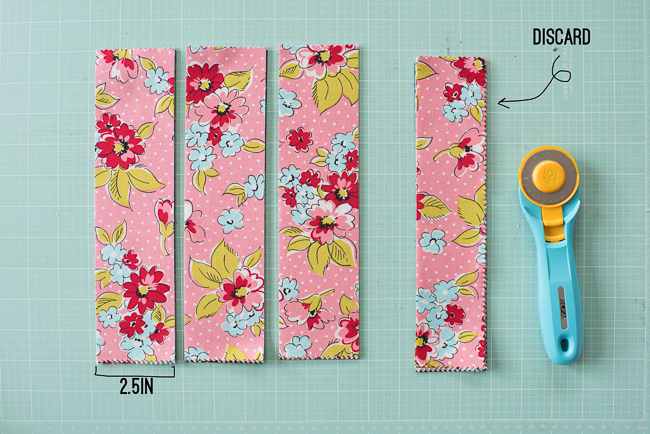
Step 3: Cut the 10″ squares
From each 10″ square, cut three 2½” x 8½” rectangles. You can stack three to five squares at time to speed up the cutting process. Discard the extra fabric (or save these scraps for a future scrappy quilt!).
Step 4: Make the blocks
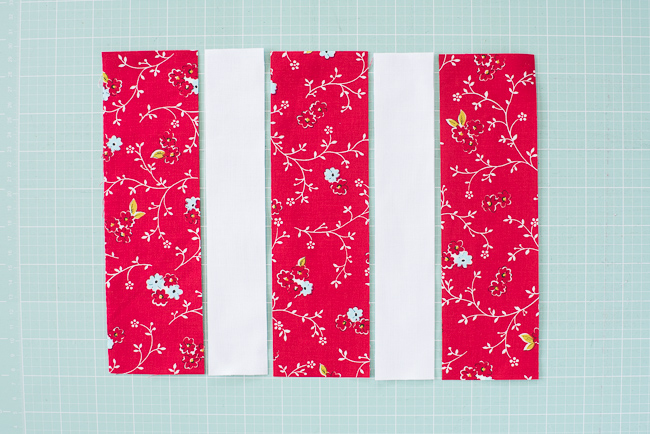
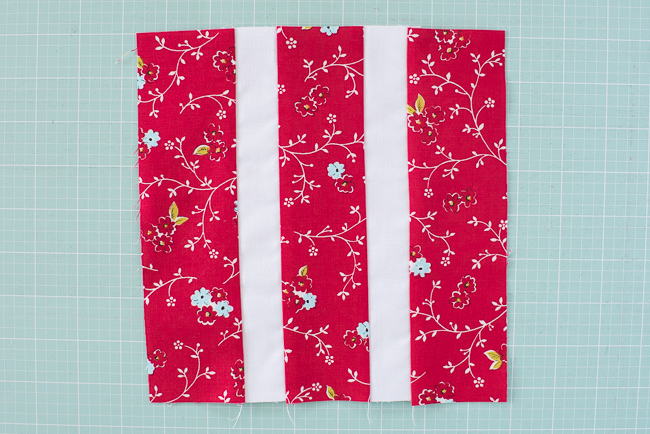
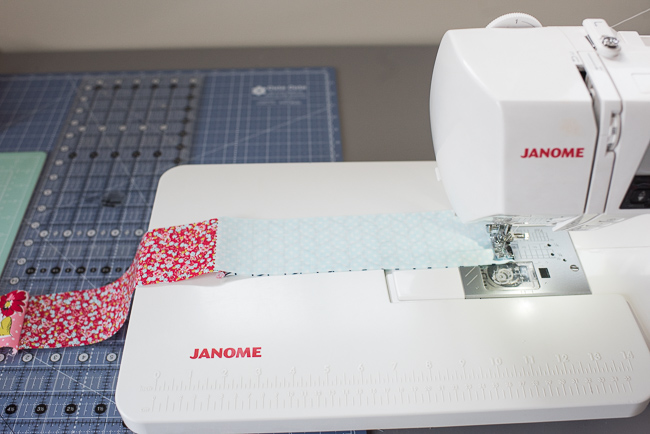
Each block for this easy baby quilt is made up of the three 2½” x 8½” printed strips and two 1½” x 8½” neutral strips.
Lay out the block as shown below.
Sew block together using a ¼” seam allowance. Start by placing the neutral strip right sides together (RST) onto the first printed piece. Sew along the long edge, ¼” away from the edge.
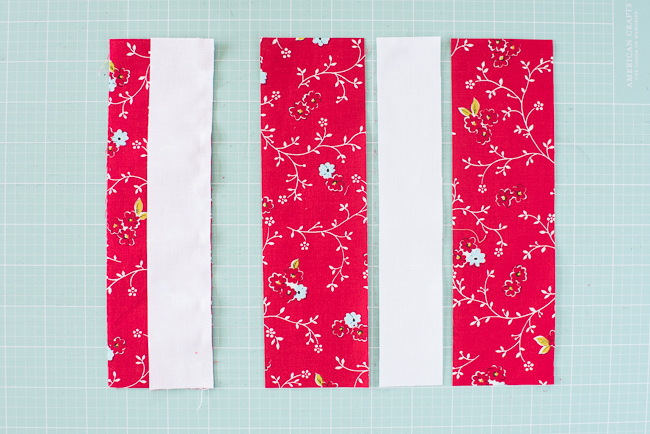
Press seam toward the dark fabric. Repeat with each strip until the block is sewn together, as shown below.
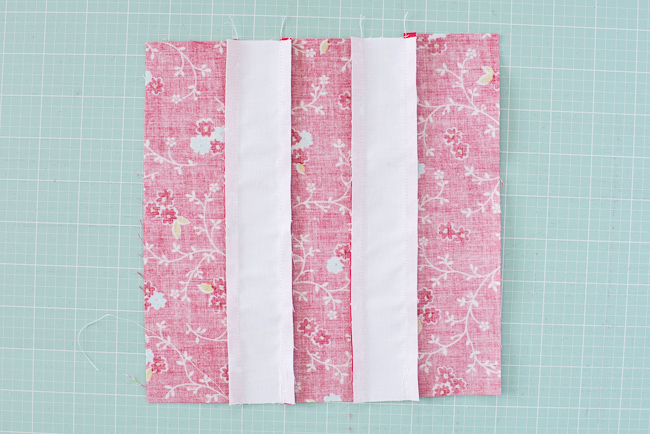
Each finished quilt block should measure 8½” square. If yours doesn’t meet the measurement, try pressing the seams open. My blocks shrunk too much when I pressed toward the side, so I switched to pressing the seams open and that did the trick!
Repeat this process until you have 30 finished quilt blocks.
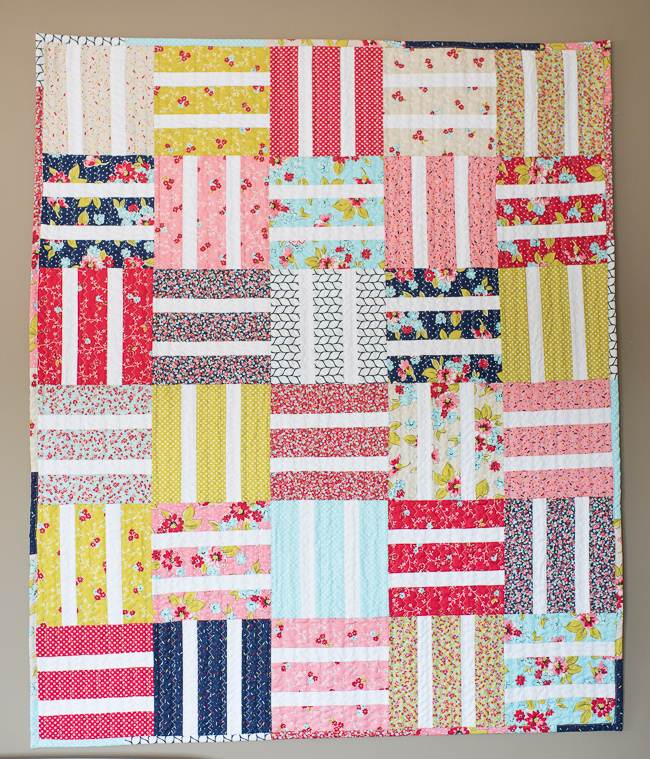
Step 5: Assemble the quilt top
Once all your quilt blocks are done, arrange them as desired in rows of five, rotating the neutral strips.

Next, sew the rows together one at a time: Place one quilt block RST with its neighbor and pin. Be sure the neutral strips are going in the opposite direction.
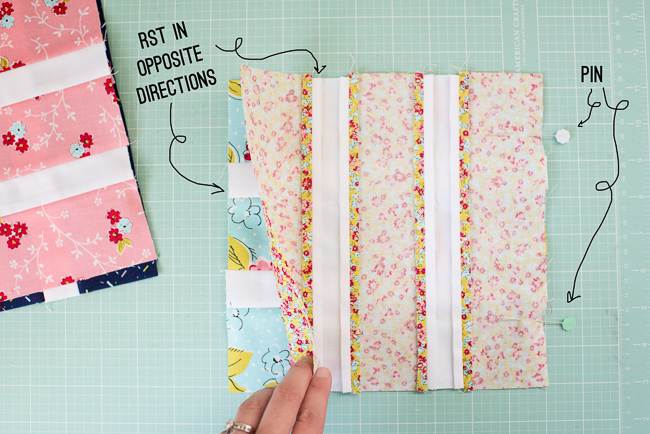
Sew the blocks together on one edge, using a ¼” seam allowance.
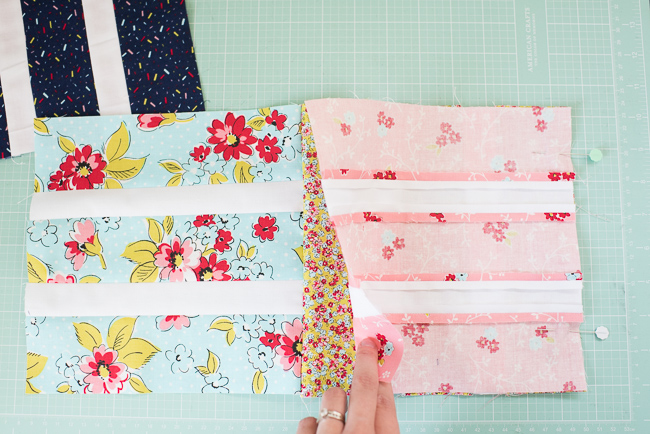
Once the first two blocks of the row are sewn together, pin and sew the third block and so on until the row is complete. Press your seams open, or press each row in the opposite direction to nest your seams.
Once all the rows are assembled, finish your quilt top by sewing the rows together. Start by laying your second row RST on top of the first row. Pin at the seams.
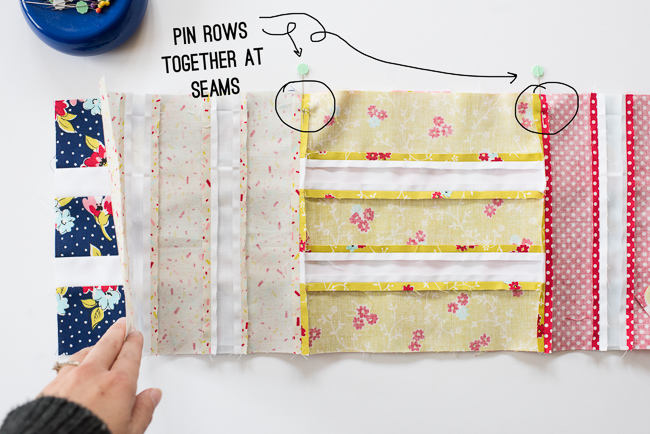
Sew together along the pinned edge, again using a ¼” seam allowance.
Continue joining your rows until your baby quilt top is done! Press your seams open or to the side.
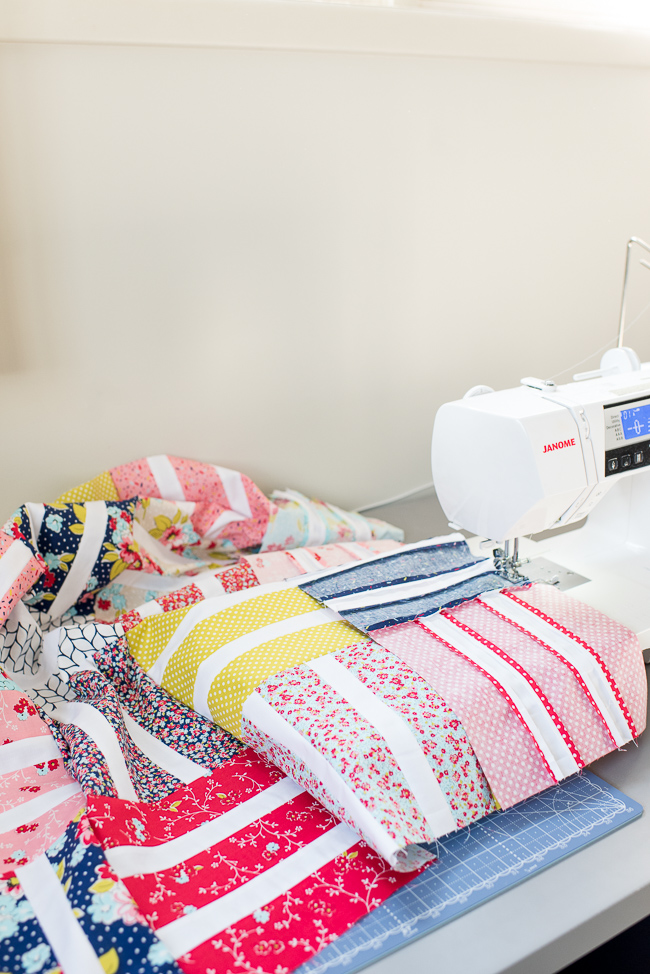
That’s it! The baby quilt top is done.
Step 6: Baste and quilt
Now it’s time to baste and quilt this baby quilt. This article Spray Basting Your Quilts: A Step-by-Step Tutorial will walk you through the basting step.
There are so many quilting options for this baby quilt! Baby quilts are a good opportunity to try new quilting techniques or to learn to machine quilt. The Quilter’s Path class is a good place to start as a beginner quilter.
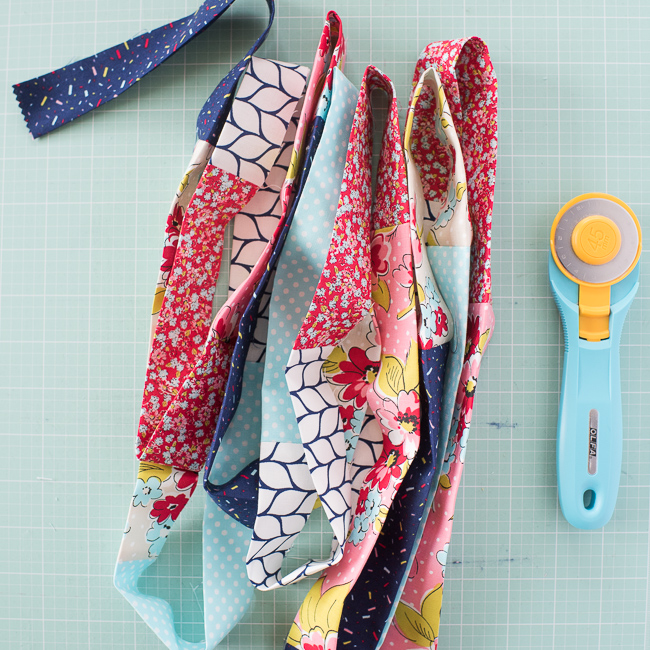
Step 7: Make a scrappy binding
Lastly, make the quilt binding. Use the leftover pieces from your pre-cut bundle to make a scrappy binding for your baby quilt.
Cut three 2½” strips from each square. Discard the extra fabric or save it for a future scrappy quilt.
Next, sew these 2½” pieces together end to end using a ¼” seam allowance.
Press the seams open so the binding has less bulk. Fold the binding strips in half lengthwise and press.
Your binding is now ready to attach to your quilt. I have a simple machine binding tutorial for beginners here.
Now this easy baby quilt is ready to be gifted to the new baby in your life. I hope this beginner friendly baby quilt tutorial gives you the confidence to go on and tackle more quilting projects!

Share tips, start a discussion or ask one of our experts or other students a question.
No Responses to “A Quick & Cute Baby Quilt Tutorial for the Beginner Quilter”