
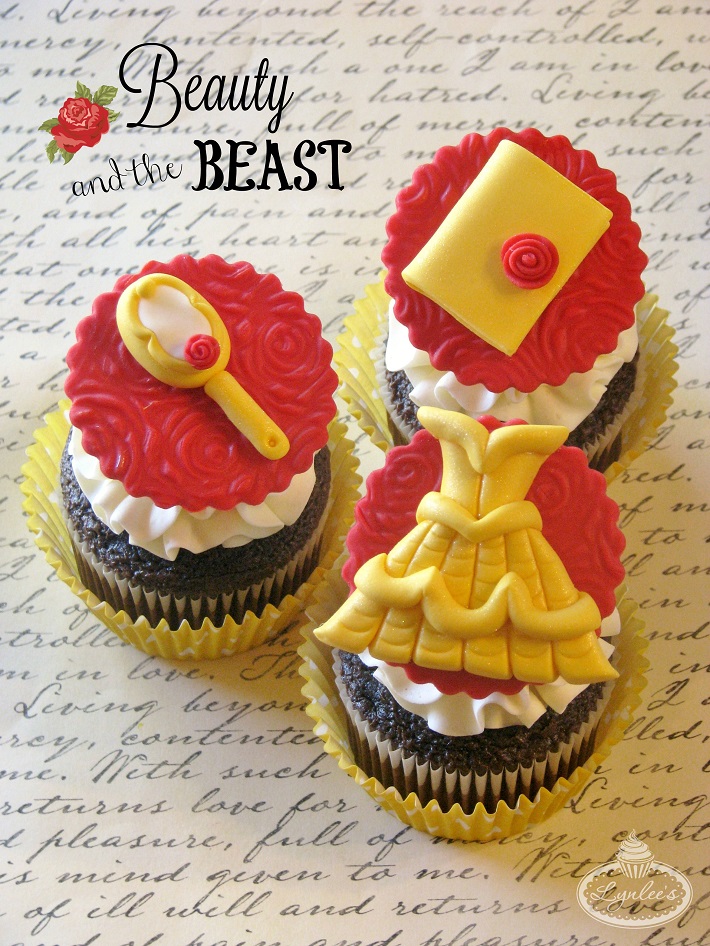
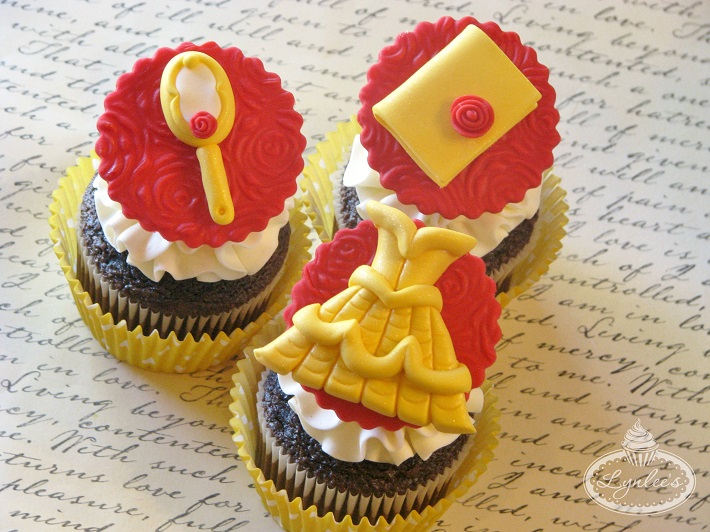
With the upcoming release of the new live-action film Beauty and the Beast, I’ve create these cupcakes that are certain to be the belles of the ball!
Be our guest and follow this tutorial to create Beauty and the Beast cupcakes!
What you need:
- Fondant in yellow, red and white
- Fondant rolling pin with 1/8” and 1/16” guide rings
- Two ¼” wooden dowels
- 2¼” round fluted cutter
- Large square cutter
- Small oval cutter
- Knife tool
- Rolling pastry cutter
- Precision knife
- Round decorating tips Nos. 1 and 12
- Water/edible glue and brush
- Gold shimmer dust and brush
- Vegetable shortening
- Floral impression mat
- Optional: fondant extruder
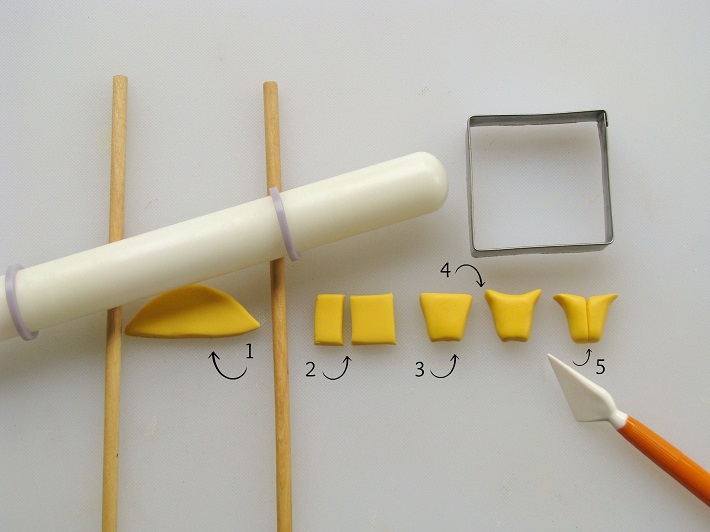
Step 1:
Roll out yellow fondant thick with the rolling pin and ¼” wooden dowels as guides.
Step 2:
Use the large square cutter to trim a small rectangle (approximately 1” in width and just a little longer in length).
Step 3:
Use your fingers to narrow the bottom of the rectangle.
Step 4:
Smooth out the perimeter of the rectangle with your fingers (apply a bit of vegetable shortening, if necessary), continuing to narrow the bottom and pinching the top edges.
Step 5:
With the knife tool, make an indentation vertically through the center of the rectangle, starting from the bottom all the way to the top, up and over to finish off the bodice of the dress.
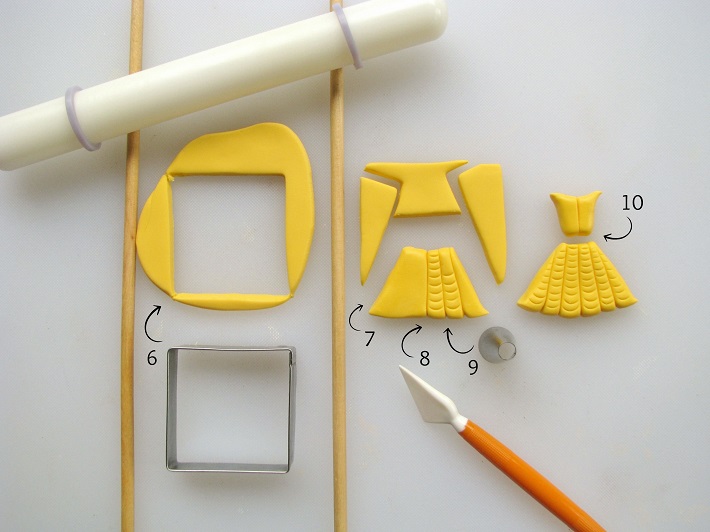
Step 6:
Roll out additional yellow fondant thick with the rolling pin and 1/4″ wooden dowels as guides. Cut out a square with the large cutter.
Step 7:
With the help of the large square cutter, trim off the skirt into a triangular shape, but cut off the top. Dip your finger in shortening and smooth out the perimeter of the dress, narrowing the top and flaring out the bottom sides.
Step 8:
With the knife tool, make vertical indentations to make pleats on the skirt, starting from the very bottom and pressing down up and over the top.
Step 9:
With round decorating tip No. 12 held at a 45-degree angle, make indentations in between the pleats of the skirt with the bottom portion of the tip only.
Step 10:
Make sure the top of the skirt is narrow enough to fit below the bodice and glue them together.
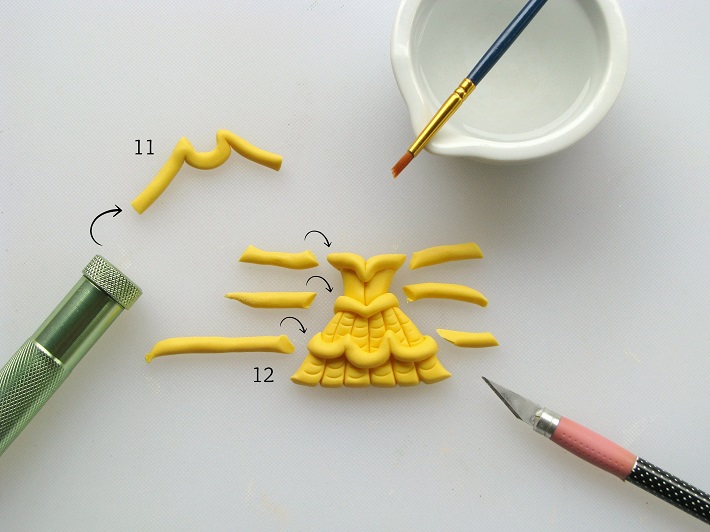
Step 11:
In this step, we’ll be rolling out yellow fondant to create trims for the dress. If you have a fondant extruder, you can insert the yellow fondant inside it and press out the fondant. If not, you can roll the fondant into snake-like shapes on your work surface. If you are doing the latter, try to make the size as uniform as possible. Make the three different dress trims by forming the fondant into shapes as pictured and pinching them to make the folds.
Step 12:
Place the trims directly onto the dress and form them to hug the sides. Trim the excess off with a precision knife. Glue them into place. Brush on gold shimmer dust to the entire dress.

Step 13:
Next, we will make the mirror. Roll out yellow fondant thick with the rolling pin and 1/4″ wooden dowels as guides. Cut out two ovals with the small cutter, along with two circles with round decorating tip No. 12.
Step 14:
Combine the two yellow ovals and roll them into one ball.
Step 15:
With your fingers, shape it into an oval shape and flatten it a bit to create the back of the mirror.
Step 16:
Roll the two other small circles into one ball, then roll it onto your work surface to create the mirror’s handle.
Step 17:
Make a small indentation at the bottom of the mirror’s handle with round decorating tip No. 1, then glue it to the back of the mirror.
Step 18:
Roll out white fondant with the rolling pin and 1/8″ guide rings and cut out an oval with the small cutter.
Step 19:
Roll out yellow fondant into a thin, long, snake-like shape and wrap it around the perimeter of the white oval. Trim the excess and glue it in place.
Step 20:
Roll out red fondant thin with the rolling pin and 1/16″ guide rings. Use a rolling pastry cutter to trim a strip, approximately ¼” wide. Begin to roll one end into itself until you’ve created a small rose. Trim off the excess, as well as a piece off the bottom to make sit up.
Step 21:
Use the knife tool to make indentations in the center of the sides of the mirror. Roll a small yellow ball and glue it to the top of the mirror and glue the rose to the bottom.
Step 22:
Brush on gold shimmer dust to all the yellow parts of the mirror, then glue the pieces together.
Step 23:
Roll out white fondant thick with the rolling pin and ¼” wooden dowels. Cut it into a rectangular shape for the inside of the book.
Step 24:
Roll out yellow fondant with the rolling pin and 1/8″ guide rings. Use the rolling pastry cutter to trim it into a rectangular shape, long and wide enough cover the white fondant block as the book cover.
Step 25:
Roll out red fondant thin with the rolling pin and 1/16″ guide rings. Use a rolling pastry cutter to trim a strip, approximately¼” wide. Begin to roll one end into itself until you’ve created a rose like you did before, except this time make it larger to decorate the book. Trim off the excess, as well as a piece off the bottom to make sit up.
Step 26:
Wrap the book with the yellow cover, glue it in place, then brush some gold shimmer dust over it. Then, glue the red rose to the cover.
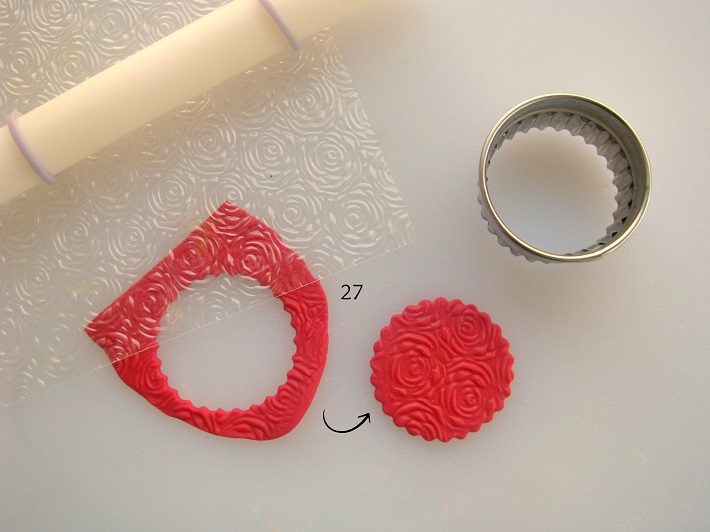
Step 27:
Roll out red fondant a bit thicker than normally, then apply a very thin layer of shortening. Place your impression mat over the fondant and use the rolling pin to impress the pattern. Keep the 1/8″ guide rings on to make sure the thickness stays the same. Punch out a circle with the 2¼” round fluted cutter.
Repeat for as many toppers you need, then glue the toppers to the red discs. Allow the toppers to dry thoroughly prior to decorating your cupcakes.

Get Lynlee’s NEW Cake Kit!
Make cute Panda & Bamboo Cupcakes with a custom cake kit, including step-by-step directions by Lynlee Beckett and all the specialty tools you need.
Share tips, start a discussion or ask one of our experts or other students a question.
No Responses to “Be Our Guest: Step-by-Step Beauty and the Beast Cupcakes”