
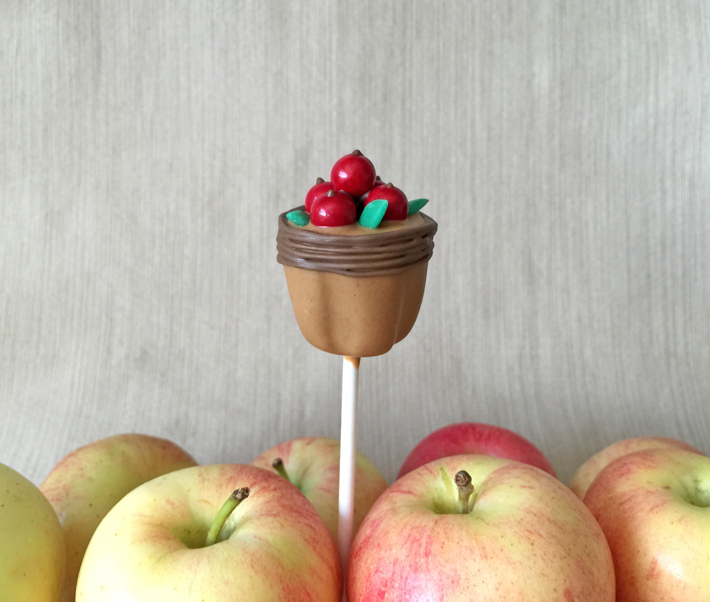
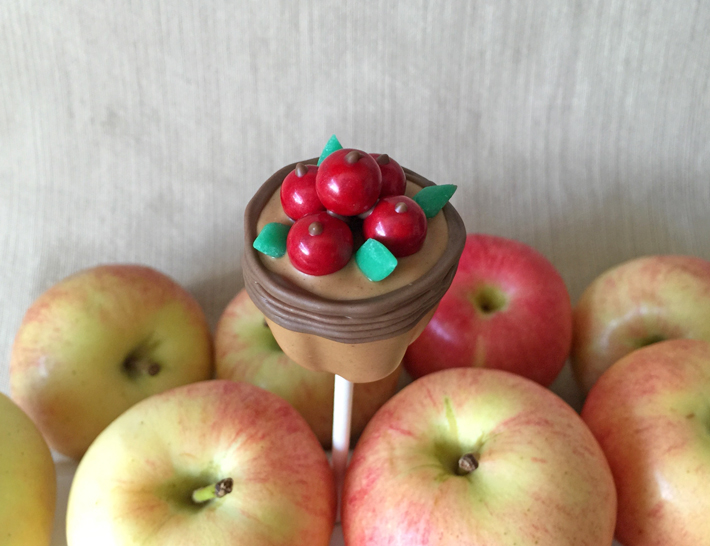
I love this time of year: It’s starting to cool down, and apple orchards are ripe for the picking! Today, in the spirit of apple-picking season, I’ll teach you how to make apple cake pops — pickin’ style!
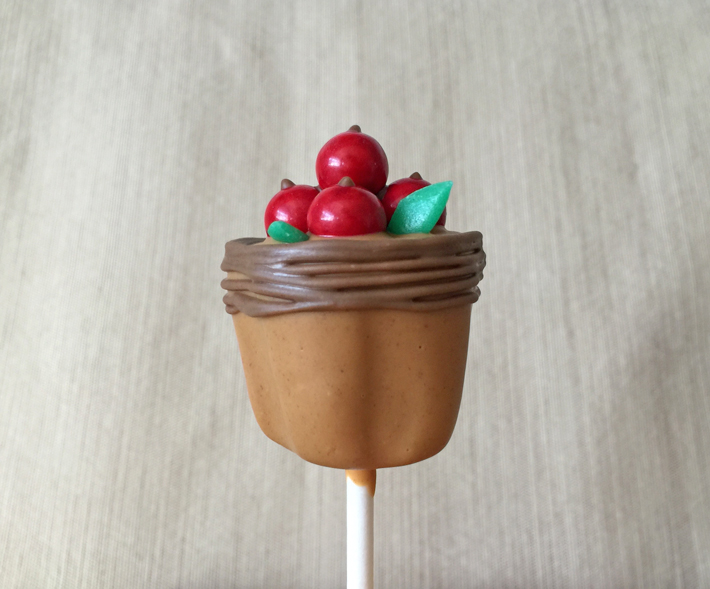
Basket of apples cake pops
You’ll need:
- Cake pop dough ready for shaping
- Light brown candy wafers, separated
- Yellow candy wafers
- Sixlets candies in red
- A green, flat, taffy-like candy (I used Airheads)
- Lollipop sticks
- Waxed paper
- Small ziplock bag for piping
- Toothpicks
- Cake pop stand
A bag of only red Sixlets may be hard to find. I usually buy a multicolor bag and sort out the red. The other colors can be used for another baking project later on!
Shaping
Step 1:
Line your work surface with waxed paper. Portion cake pop dough by using a cookie scoop. Use this cake pop dough tutorial to create cake pop dough that’s easy to shape.
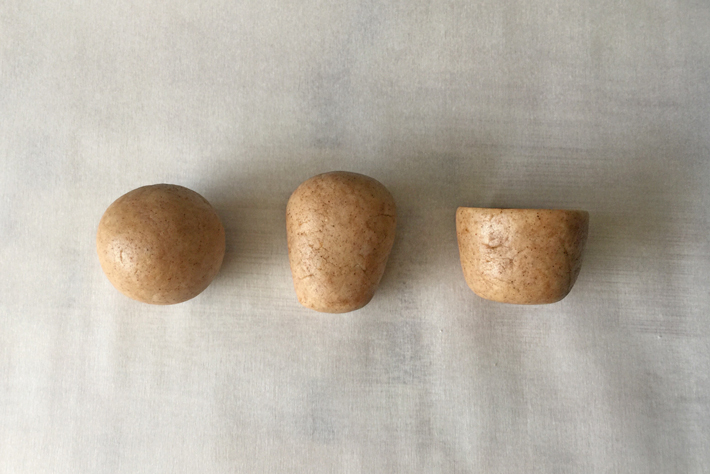
Step 2:
To form each portion into a basket, roll into a ball and then shape into a tapered log.
Step 3:
Tap each end against your work surface to flatten. Turn it to the side and roll it along your work surface to smooth out the sides.
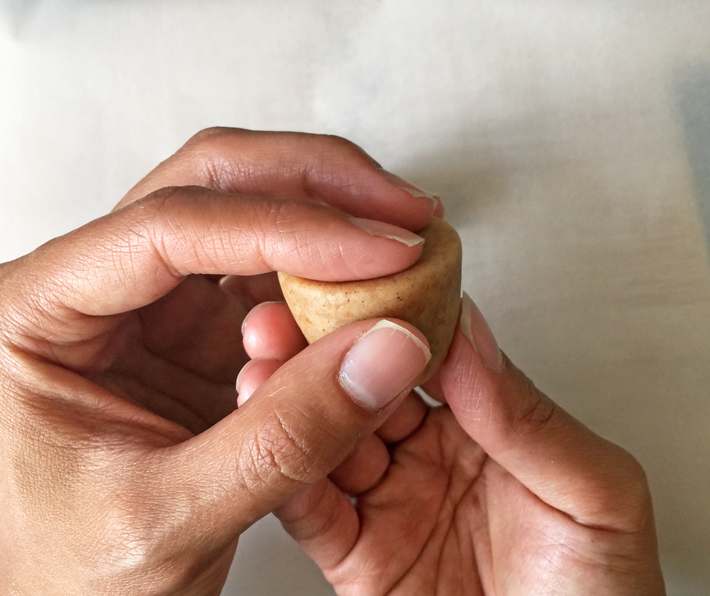
Step 4:
Pinch the edges of the top rim (the wider end) so they don’t round out too much after dipping.
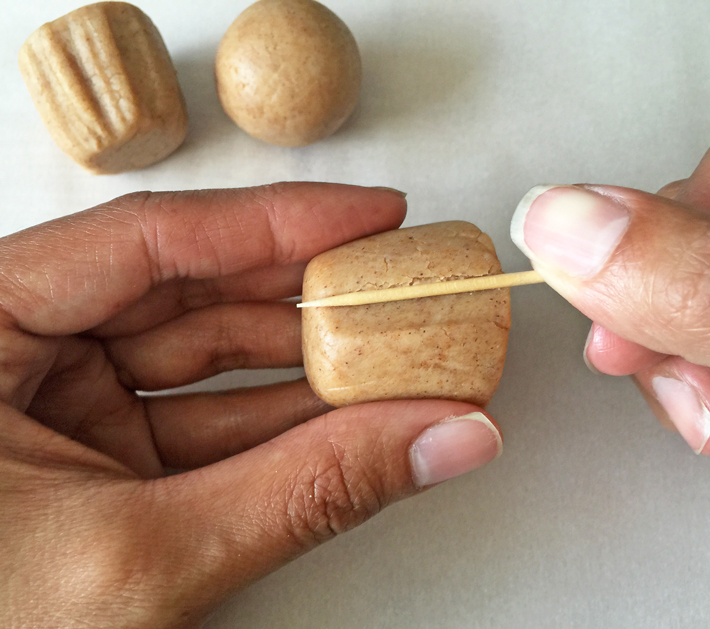
Step 5:
Use a toothpick to create indents along the sides. Do this by pressing the toothpick down with a bit of pressure and rolling it against the dough.
Step 6:
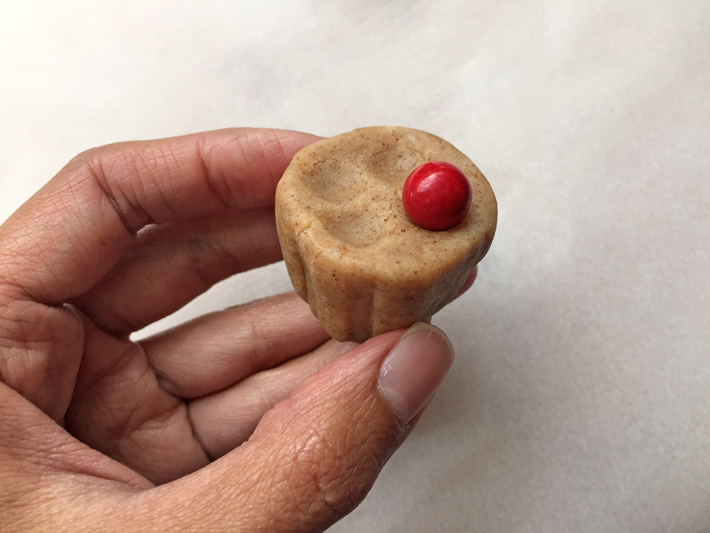
Use a Sixlet to create divots on the top. This will help after dipping: You’ll know exactly where each one will go, and the candies won’t roll around in the wet candy coating.
Step 7:
Refrigerate all pieces on a waxed paper–lined cookie sheet while you do the next few steps.
Decorating
Step 1:
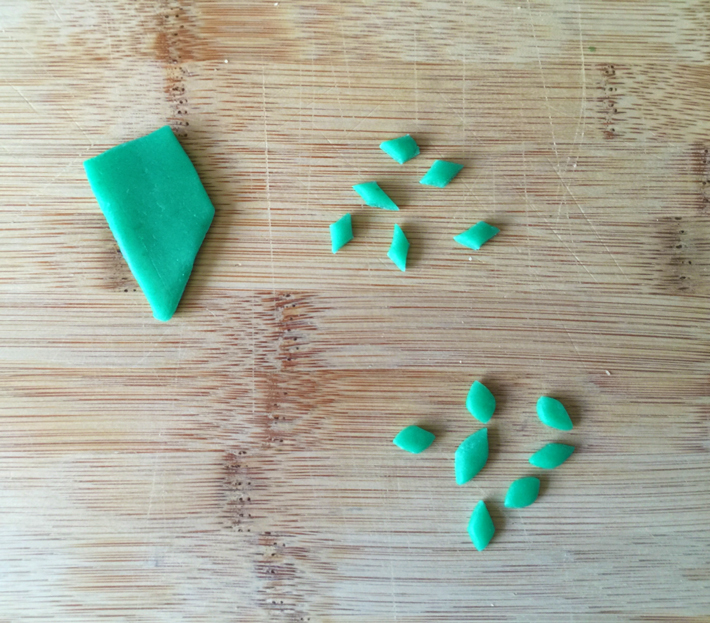
Cut the green taffy candies into small diamonds. You’ll find that squeezing them between your fingers puffs them out a bit and rounds out the edges.
Step 2:
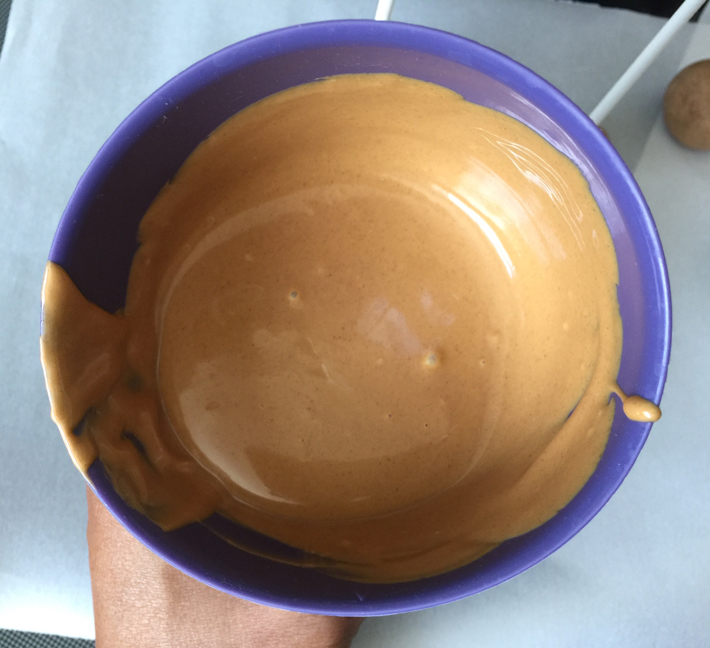
Melt equal parts light brown and yellow candy wafers in a microwave-safe bowl. This will yield a tan color. Make sure to put aside some light brown candy in a ziplock bag to pipe the finishing touches later.
Step 3:
Remove cake forms from the refrigerator. Let stand in room temperature for a couple of minutes to take the chill off. Dip a lollipop stick about ⅓” into the melted coating, then carefully push it into the cake until it’s about halfway into each basket.
Step 4:
Dip each basket into the tan coating. Carefully shake off excess and use a toothpick to pierce any air bubbles.

Step 5:
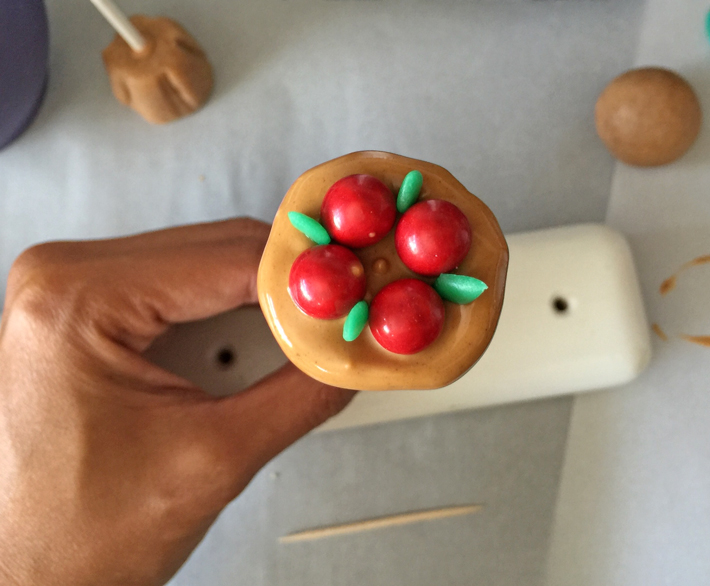
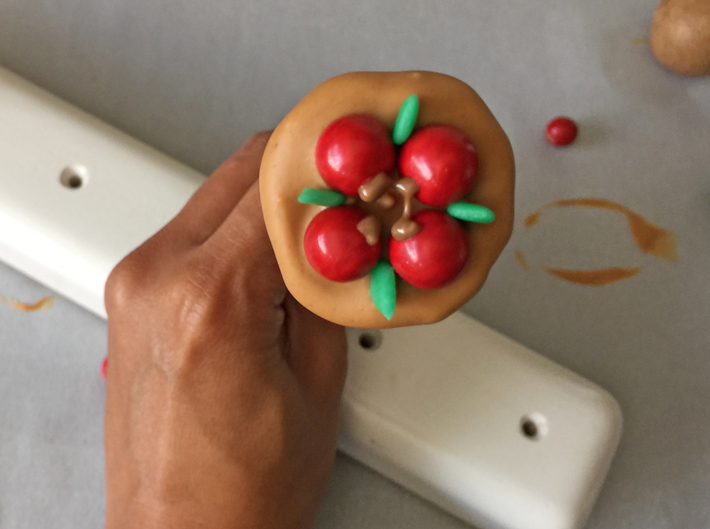
While the coating is still wet, place four Sixlet candies into the four divots you created earlier.
Step 6:
Place a green candy “leaf” in between each Sixlet “apple.” Place on a cake pop stand and let dry completely.
Step 7:
Melt light brown candy wafers in a small, plastic ziplock bag. Once melted completely, snip the tip (make only a small cut). Carefully pipe candy into the inner part of the Sixlets to “glue” another apple over the four.
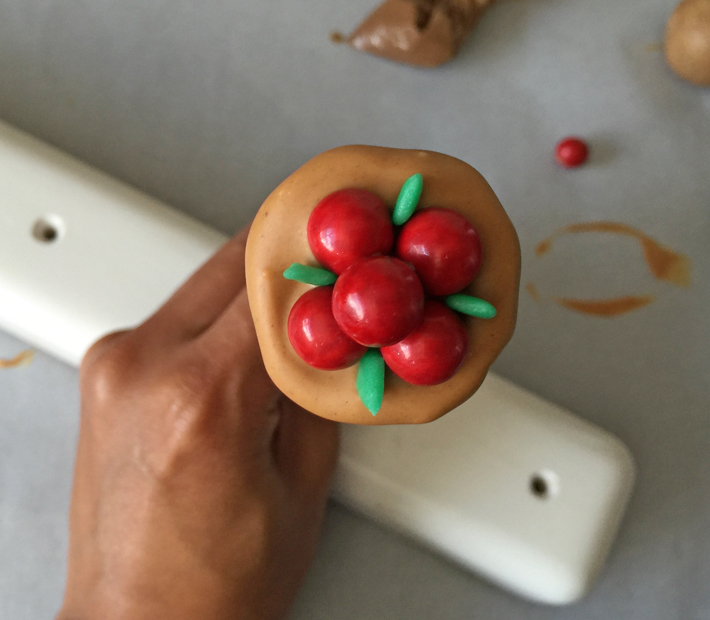
Add the Sixlet on top.

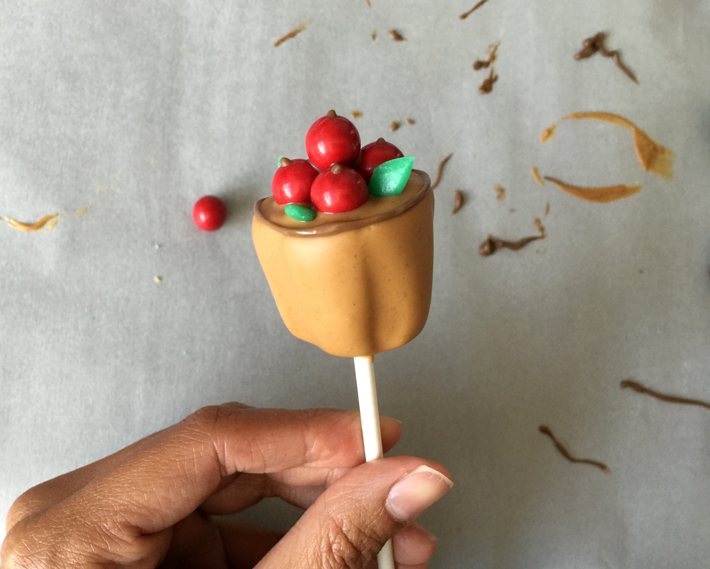
Step 8:
Dot light brown candy coating on the top of each apple to create stems.
Step 9:
Once completely dry, pipe a ring around the edge of the basket. This will be your guide.
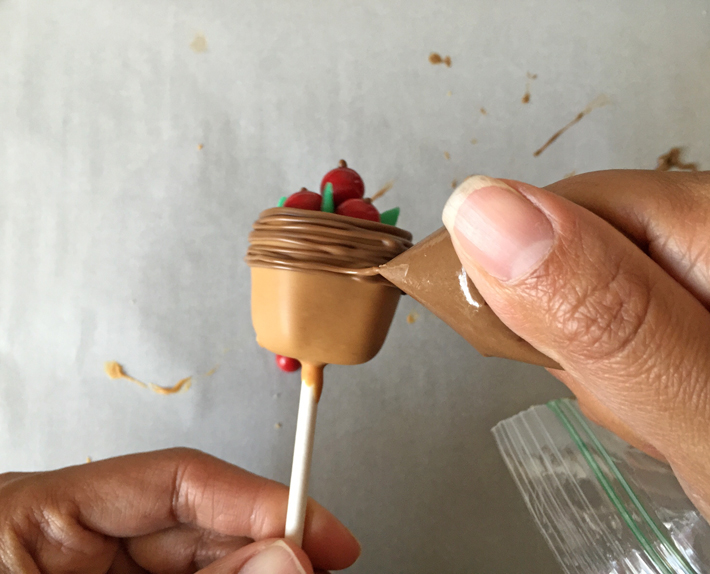
Then, use one hand to rotate the cake pop and the other to hold the piping bag still while squeezing to create a wicker effect around the neck and about a quarter of the way down the basket. Place on a cake pop stand and let dry completely.
Share tips, start a discussion or ask one of our experts or other students a question.
No Responses to “Adorable Apple Cake Pops Ripe for the Pickin'!”