
For woodworking to go well, marking out must be done well and that means using the right tools. Marking knives, scribers and pencils, like all woodworking tools, have proper roles and must be understood to be used effectively.
Marking knives
A marking knife can consistently produce a very fine, precise line better than a pencil can. What’s more, the knife line can act as a physical demarcation, especially across the grain of the wood, which provides a registration for subsequent tools. For example, the knife line defining a tenon shoulder acts as a stop when forming a V groove into which the tooth line of a crosscut backsaw can be placed to start the cut.
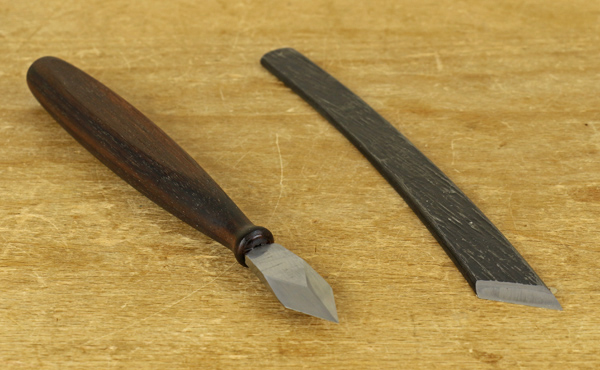
Unlike most knives, a marking knife is beveled on only one side; the other side is flat, as shown below. The flat side is held against a reference edge to guide it in making the mark. The reference is most often a steel square or rule but can also be the edge of wood, such as in marking dovetail pins from the tails.
The marking knife on the right is “right-handed” because it is held in the right hand as the left hand holds the reference. Sometimes the situation must be reversed, so you could have a right and left pair of knives or you could use a V-point marking knife like the one on the left, which will work both ways. This type is especially handy for laying out dovetail pins because marking must be done from both sides of the tails.
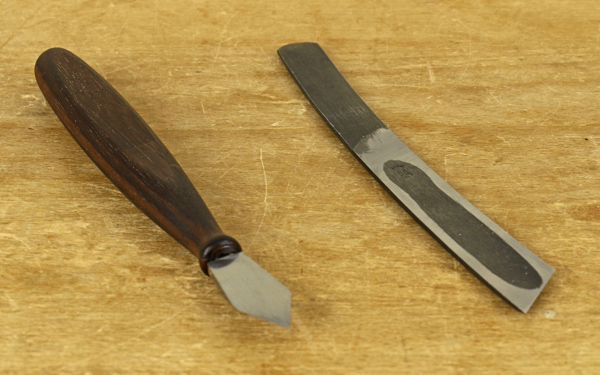
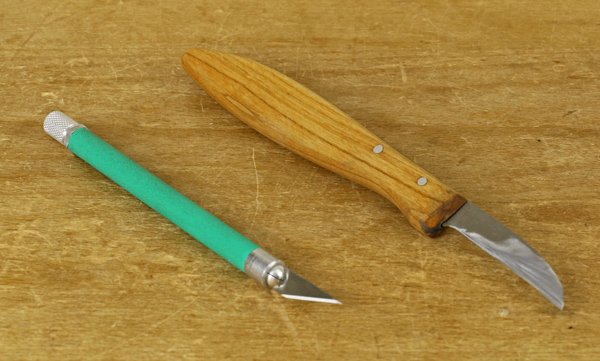
Other knives that can be used for marking are shown below. On the right is a chip carving knife but notice that the face has been ground flat so there is no secondary bevel. The craft knife on the left may seem very precise but it is beveled on both sides, which can produce inaccuracies.
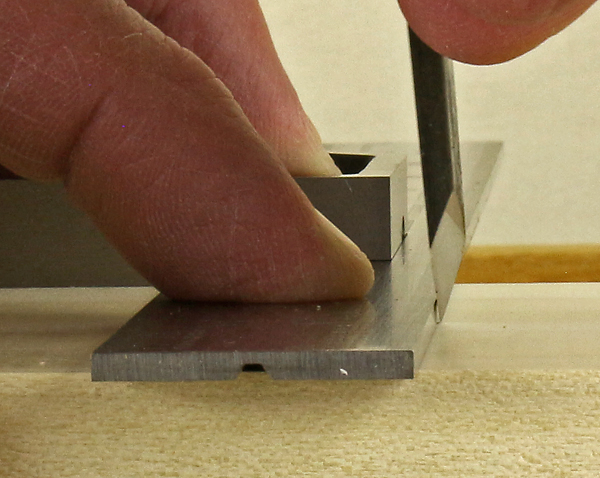
In the photo below, note that the craft knife blade is touching the blade of the steel square, which can feel like you are making an accurate mark, but there is actually a gap between the tip of the blade and the square, which is created by the bevel on that side of the knife.
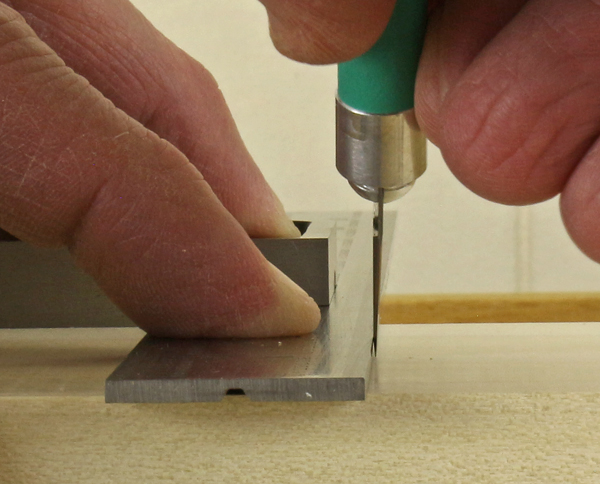
This pitfall can be solved with by placing the flat side of a true marking knife against the square but only if it is done properly. In the first photo below, the knife is touching the square at the top but the cutting tip is away from the square and thus not accurately representing the position of the square. In the next photo, the very tiny gap above the cutting tip ensures that it is tightly against the square where it is cutting into the wood and is thus accurately representing the position of the square.
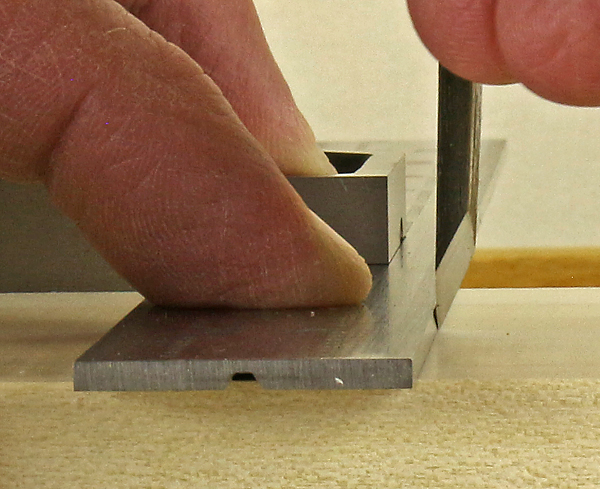
The flat side of the marking knife can also be held perfectly flat against the square but this is somewhat difficult to perceive accurately, and so I recommend the allowance for error described above. When marking against wood, however, you have to avoid cutting into it, so I suggest keeping the knife dead flat against the wood, which will typically be much taller than a square and thus afford more tactile registration.
Scribers
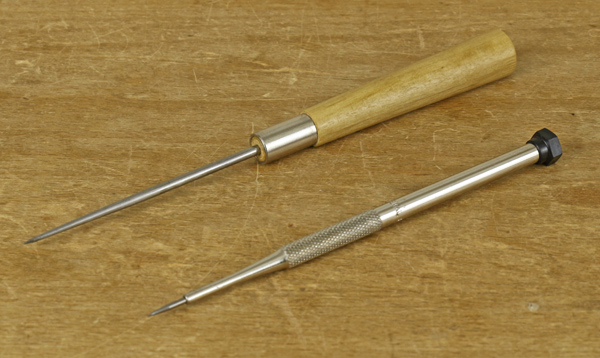
Think of a scriber – a simple, very sharp point – as a knife without an edge. I find these tools especially handy for several reasons. First, a scriber makes a more visible mark than does a knife when working along the grain of the wood, where it also has less tendency to deviate by following the grain.
To my eyes, a scriber mark is also more visible than a knife line on the end grain of many woods. Further, when marking out pins from tails, a scriber virtually eliminates any tendency to cut into the reference wood.
A scriber is of little use in marking across the grain of the wood where it tears the fibers and thus makes a fuzzy line.
Pencils
Well, of course you need these! But let’s look at options and refinements.
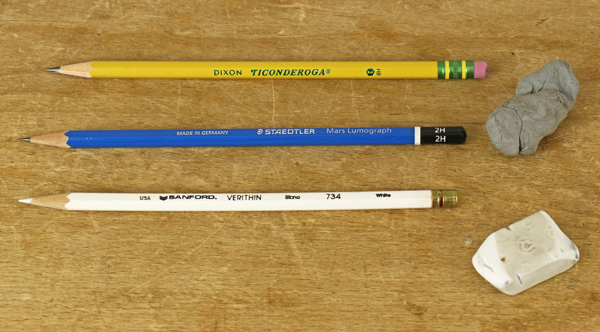
In the photo above, at the top, is the good old #2 (HB lead) pencil, still a good workhorse and handy for general stock preparation layout. Next is a harder 2H pencil that will retain its sharp point longer but makes a lighter, less visible line on most woods. The white pencil is useful for marking dark woods.
In the photo below, at the top, is a 0.5 mm mechanical pencil with HB lead. I use this more than any other in the shop. It produces a fairly fine line but its main advantage is that the line is of consistent width if the pencil is held approximately vertically.
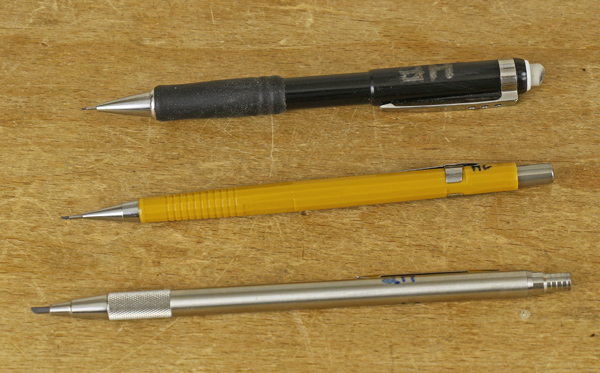
The 0.9 mm drafting pencil in the middle and the 2 mm drafting lead holder are sharpened to a chisel point, as shown in the close up photo. Make this type of point with a single pass on very fine sandpaper. I use 2H lead to retain this edge longer and make a very fine line.
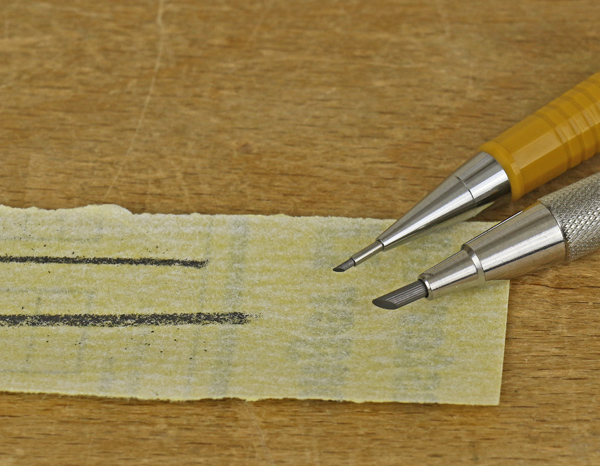
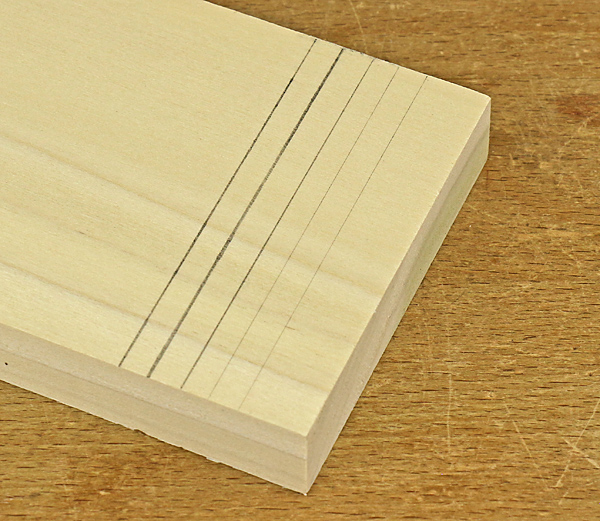
Below, the set of five lines shows that pencils are worth thinking about. The lines on poplar, from left to right, were made by: a freshly sharpened #2, a used #2, the 0.5 mm mechanical pencil with HB lead, the chisel-point 0.9 mm and 2 mm drafting pencils with 2H lead.
Oh, and to the right of the set of the pencils in the first photo are erasers. You’ll need those. A lot. The gray kneaded eraser does not produce crumbs but the white “plastic” eraser does a more thorough job.
Like most everything else in woodworking and craft, these seemingly simple woodworking marking tools have subtle refinements. Once understood, however, the work is very doable, so get started woodworking and making things!
Special Savings on Popular Woodworking Classes

Learn from the best instructors. Get up to 33% off classes you can watch anytime, anywhere, forever.Enroll Now to Save »
Share tips, start a discussion or ask one of our experts or other students a question.
No Responses to “Tools to Get Started in Woodworking: Marking Knives, Scribers and Pencils”