
Constructing projects from wood is a great way of making beautiful objects that will last a very long time. In order to do that, you’ll most likely have to put together pieces of wood to complete your project. Get the most out of your woodwork by knowing when to use these six wood joinery techniques.
Note: There is one characteristic of wood that should be kept in mind when considering joinery options, and that is that wood is made of fibers running side by side. Gluing up wood so that the sides of the fibers (the long grain) are next to each other results in a strong glue joint, but gluing the ends of the fibers (the end grain) will be a very weak joint.
FREE Guide: Dovetail Joinery Demystified

Start making strong, beautiful dovetail joinery today with this free PDF guide, available exclusively on Bluprint.
1. Edge joint
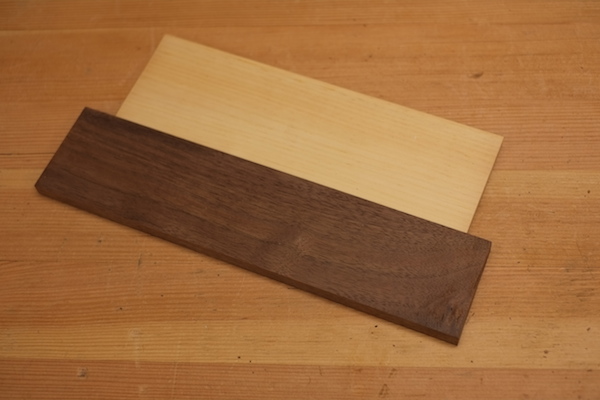
Having large boards from which you can make the pieces of your project is great. Unfortunately, often you’ll need to make a panel that is 8” wide, and the widest board you have is only 6” in width. Luckily, gluing up boards side by side is an easy way to make wider boards from the ones that you have. Although it looks like there’s not much going on other than applying glue to the edges and clamping the boards together, this joint is very strong. In fact, if you try to break the board, the wood around the glue joint will break before the glue does. Sometimes woodworkers will use biscuits or dowels to help align the boards, but they are not needed for strength.
Gluing wood fibers end to end is considerably weaker, so using this technique to lengthen a board will not work.
2. Miter joint
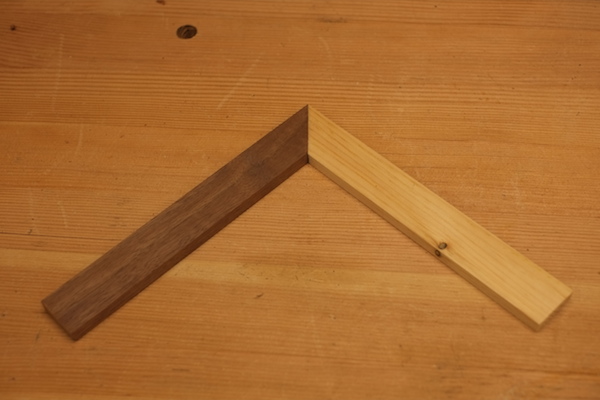
This will provide a slightly better glue surface, since the 45-degree angle provides a semi-long grain to long grain glue surface. However, this is still not ideal, and often a biscuit or splines are used to add strength. Miter joints are also often used in situations where strength is not critical, such as in a face frame.
3. Butt joint
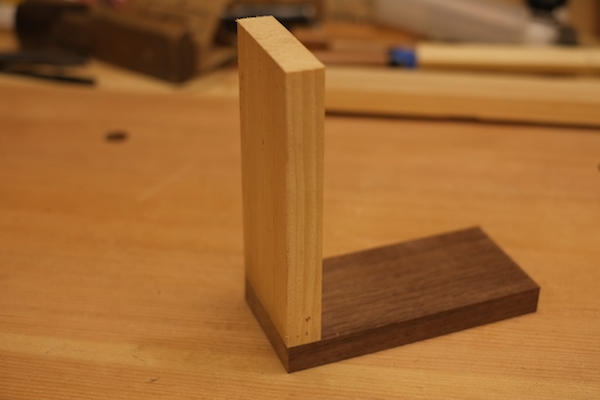
This is a quick and easy way to join two boards at right angles. However, because the end grain of one board is mating with the long grain of the other, glue will not hold these boards together very well at all. Usually these joints are reinforced with screws or nails.
4. Dovetail joint
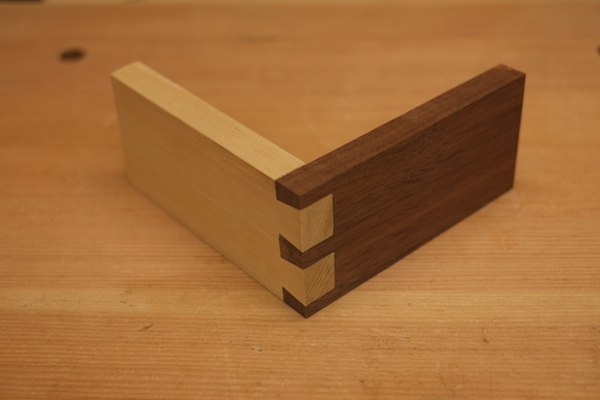
Dovetail joinery is one of the most famous wood joinery techniques, and is often used for decoration as well as strength. The interlocking of the tails and pins make for a very strong joint as well as multiple long grain to long grain glue surfaces. Tight fitting dovetails are considered to be a sign of great skill, but the truth is that even a sloppy dovetail joint can be very strong.
(Learn everything you need to know to get started with dovetail joinery today with our FREE downloadable guide, Dovetail Joinery Demystified.)
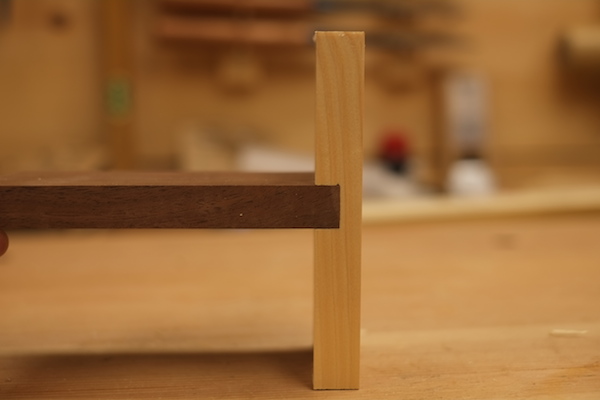
5. Mortise and tenon joint
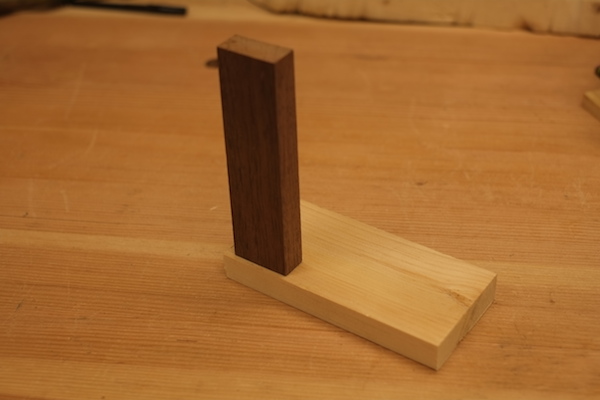
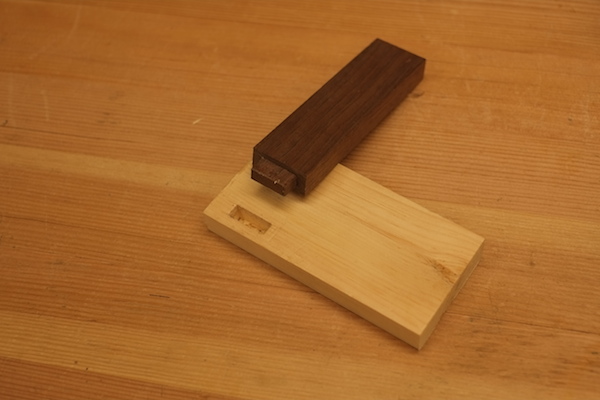
This is a great way to joint two pieces of wood at right angles if the pieces are relatively narrow, or if one piece intersects the other in the middle. Although this may look like a butt joint from the outside, on the inside the tenon on one piece fits into the mortise on the other piece. This provides a lot of strength and glue surface. There are many varieties of the mortise and tenon joint, including mortise and tenons that incorporate wedges or pins to lock the joint in place.
6. Dado joint
This is also a great way to join two pieces of wood if one piece intersects the other in the middle. A groove is cut in one board that the second board fits into. This is a common way to provide a rigid shelf in a case.
As you become more familiar with these joints, you will understand where and when they should be used in a woodworking project. Soon, you’ll be able to decide which joints to use where, even if the plans don’t specify the joinery method to be used, which will really free up your options when making a woodworking project.
Free Woodworking Class

Learn how to use a bandsaw to make beautiful cuts safely and easily
I would like to learn more for my house and tinny bouget