
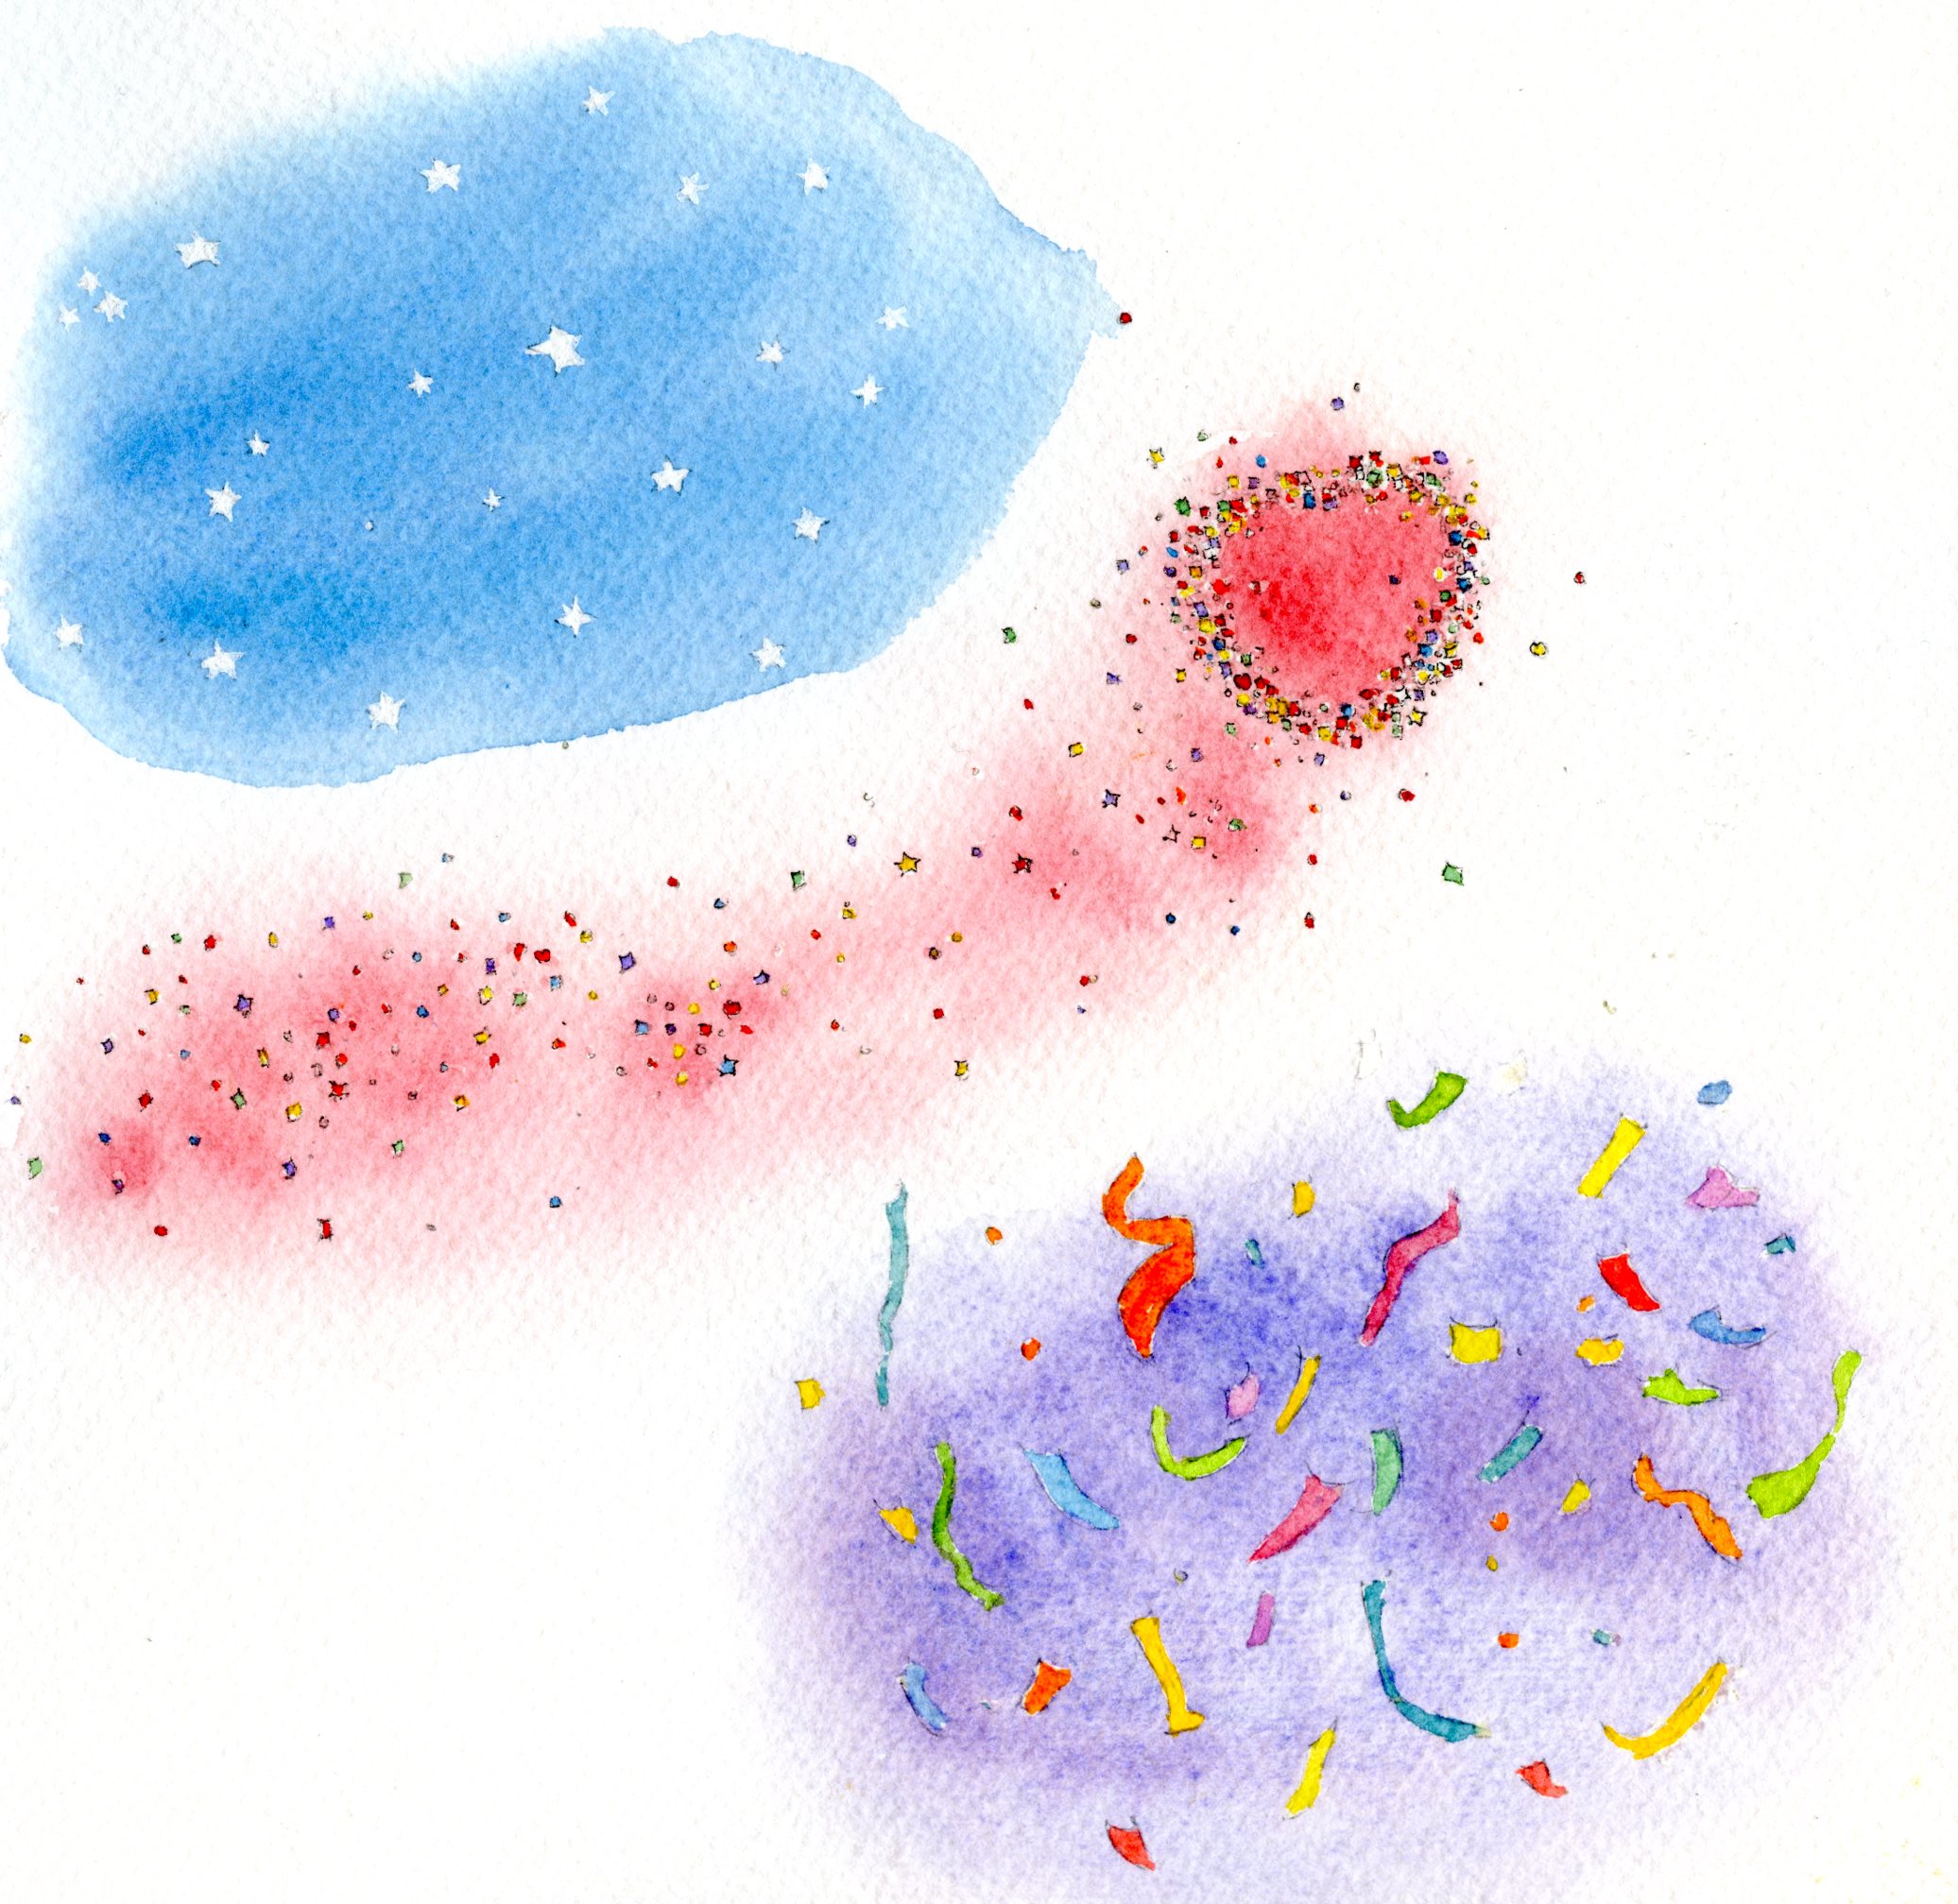
Twinkling stars, confetti floating through the air and sparkly glitter are easy and fun details to add to your artwork. They are easy to create and you will be able to manipulate these accents into a strong point of your paintings with a little practice.
Have your sketch ready to apply these watercolor special effects!

Stars:
There will be times when stars only need be randomly placed since they are not a main feature of your painting. Other times they will need to be a little more stand out and eye catching, perhaps to help evoke the emotion of your work.
Either way, here is a way to create nice bright stars:
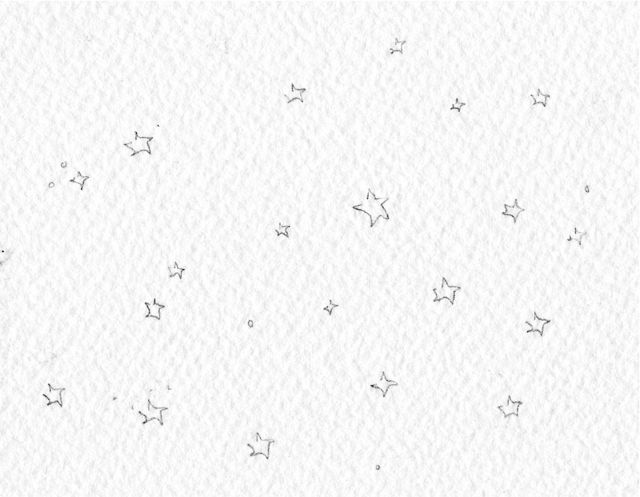
Step 1.
Pencil your stars into your composition. It helps to make them uneven in size because it looks more natural.
I will try not to press too hard with my pencil here since I usually do not use an ink outline on my stars, therefore I need to be able to see the outline of the star while I work, especially for placement purposes now and any correction purposes after.
Step 2.
Apply masking medium as carefully as you can to each star. It will be hard to get the medium precisely out to each point of the stars (thought by the photo, it looks like I did, but I am sure I did not as you will see soon) but this can be corrected with a little gouache afterwards if desired.
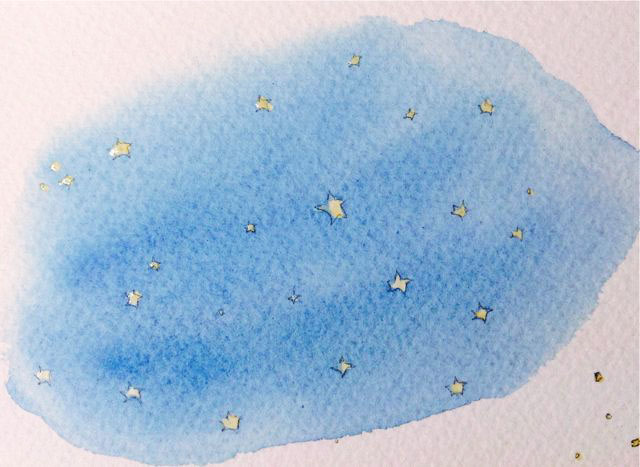
Step 3.
After your masking medium is dry, paint your background (night sky color here) right over the stars.
Step 4.
When dry, gently remove the masking medium.
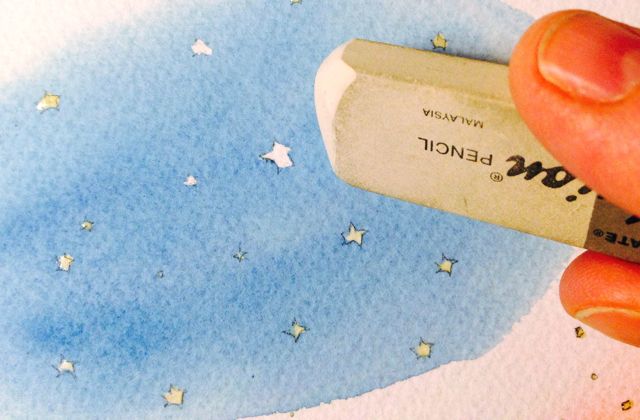
Step 5.
Assess any corrections or cleaning up you want or need around the stars. Imperfections can add to the effect of stars but usually some cleaning up, even if just gently erasing any visible pencil lines will be necessary.
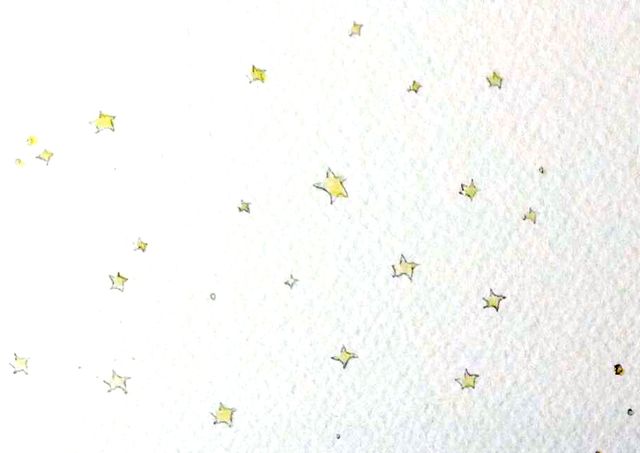
Tip: A nice way to enhance or correct your stars is to use a little gouache to detail the points of the stars, even to enlarge or reshape them is possible with gouache.
(I have only added gouache detailing/corrections to the stars on the left. You can see the difference by comparing to the stars on the right side. It is not essential to your artwork to make the stars perfect, though sometimes you may want them to be.)

Glitter:
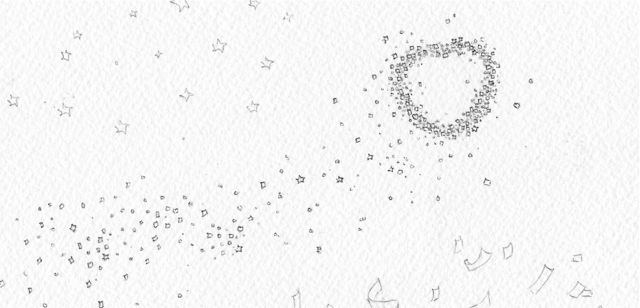
Step 1.
Prepare your glitter with tiny circles, squares, hearts, any shape you like. Keep them a little uneven in size and space some out while clustering others.
I have used ink to outline the glitter, it will help to make them stand out more since they are so tiny.
Step 2.
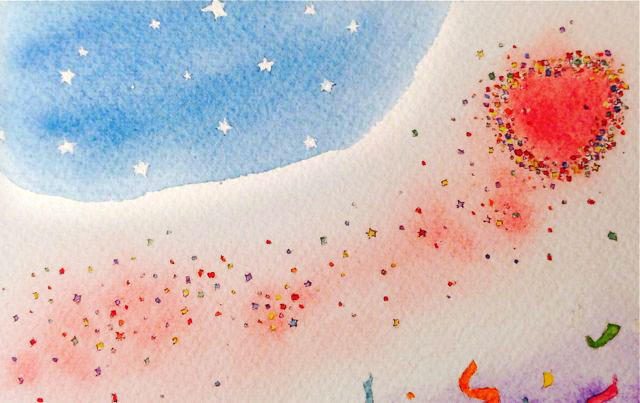
Apply masking medium and allow to dry and follow steps 3 and 4 for the stars above.
Note: The deeper color saturation where the glitter is more dense. This will help illuminate the glitter.
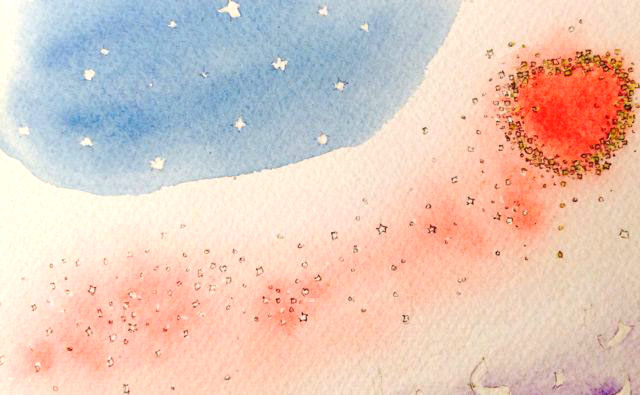
Step 5.
Paint the glitter a variety of bright and vibrant colors to make them come alive.
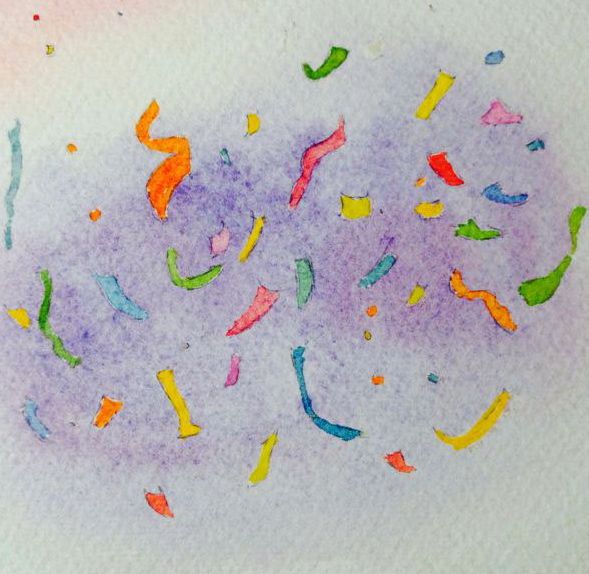
Confetti:
Step 1.
Create your confetti in free flowing multiple size lengths rectangles. (This is a good time to exercise your fingers drawing free flowing and twisty shapes which will help increase your skills drawing any free flowing forms.)
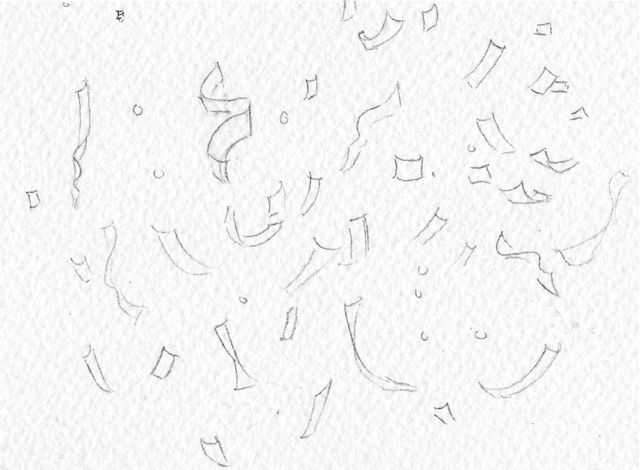
Follow the same steps as with the stars and again, choose nice bright colors when painting the confetti.
Do you have some special tried and true methods to incorporate any of these details to your artwork?
Special Savings on Popular Painting Classes

Learn from the best instructors. Get up to 33% off classes you can watch anytime, anywhere, forever.Enroll Now to Save »
Share tips, start a discussion or ask one of our experts or other students a question.
No Responses to “Easily Paint Glitter, Confetti and Stars: Tutorial With Watercolors”