
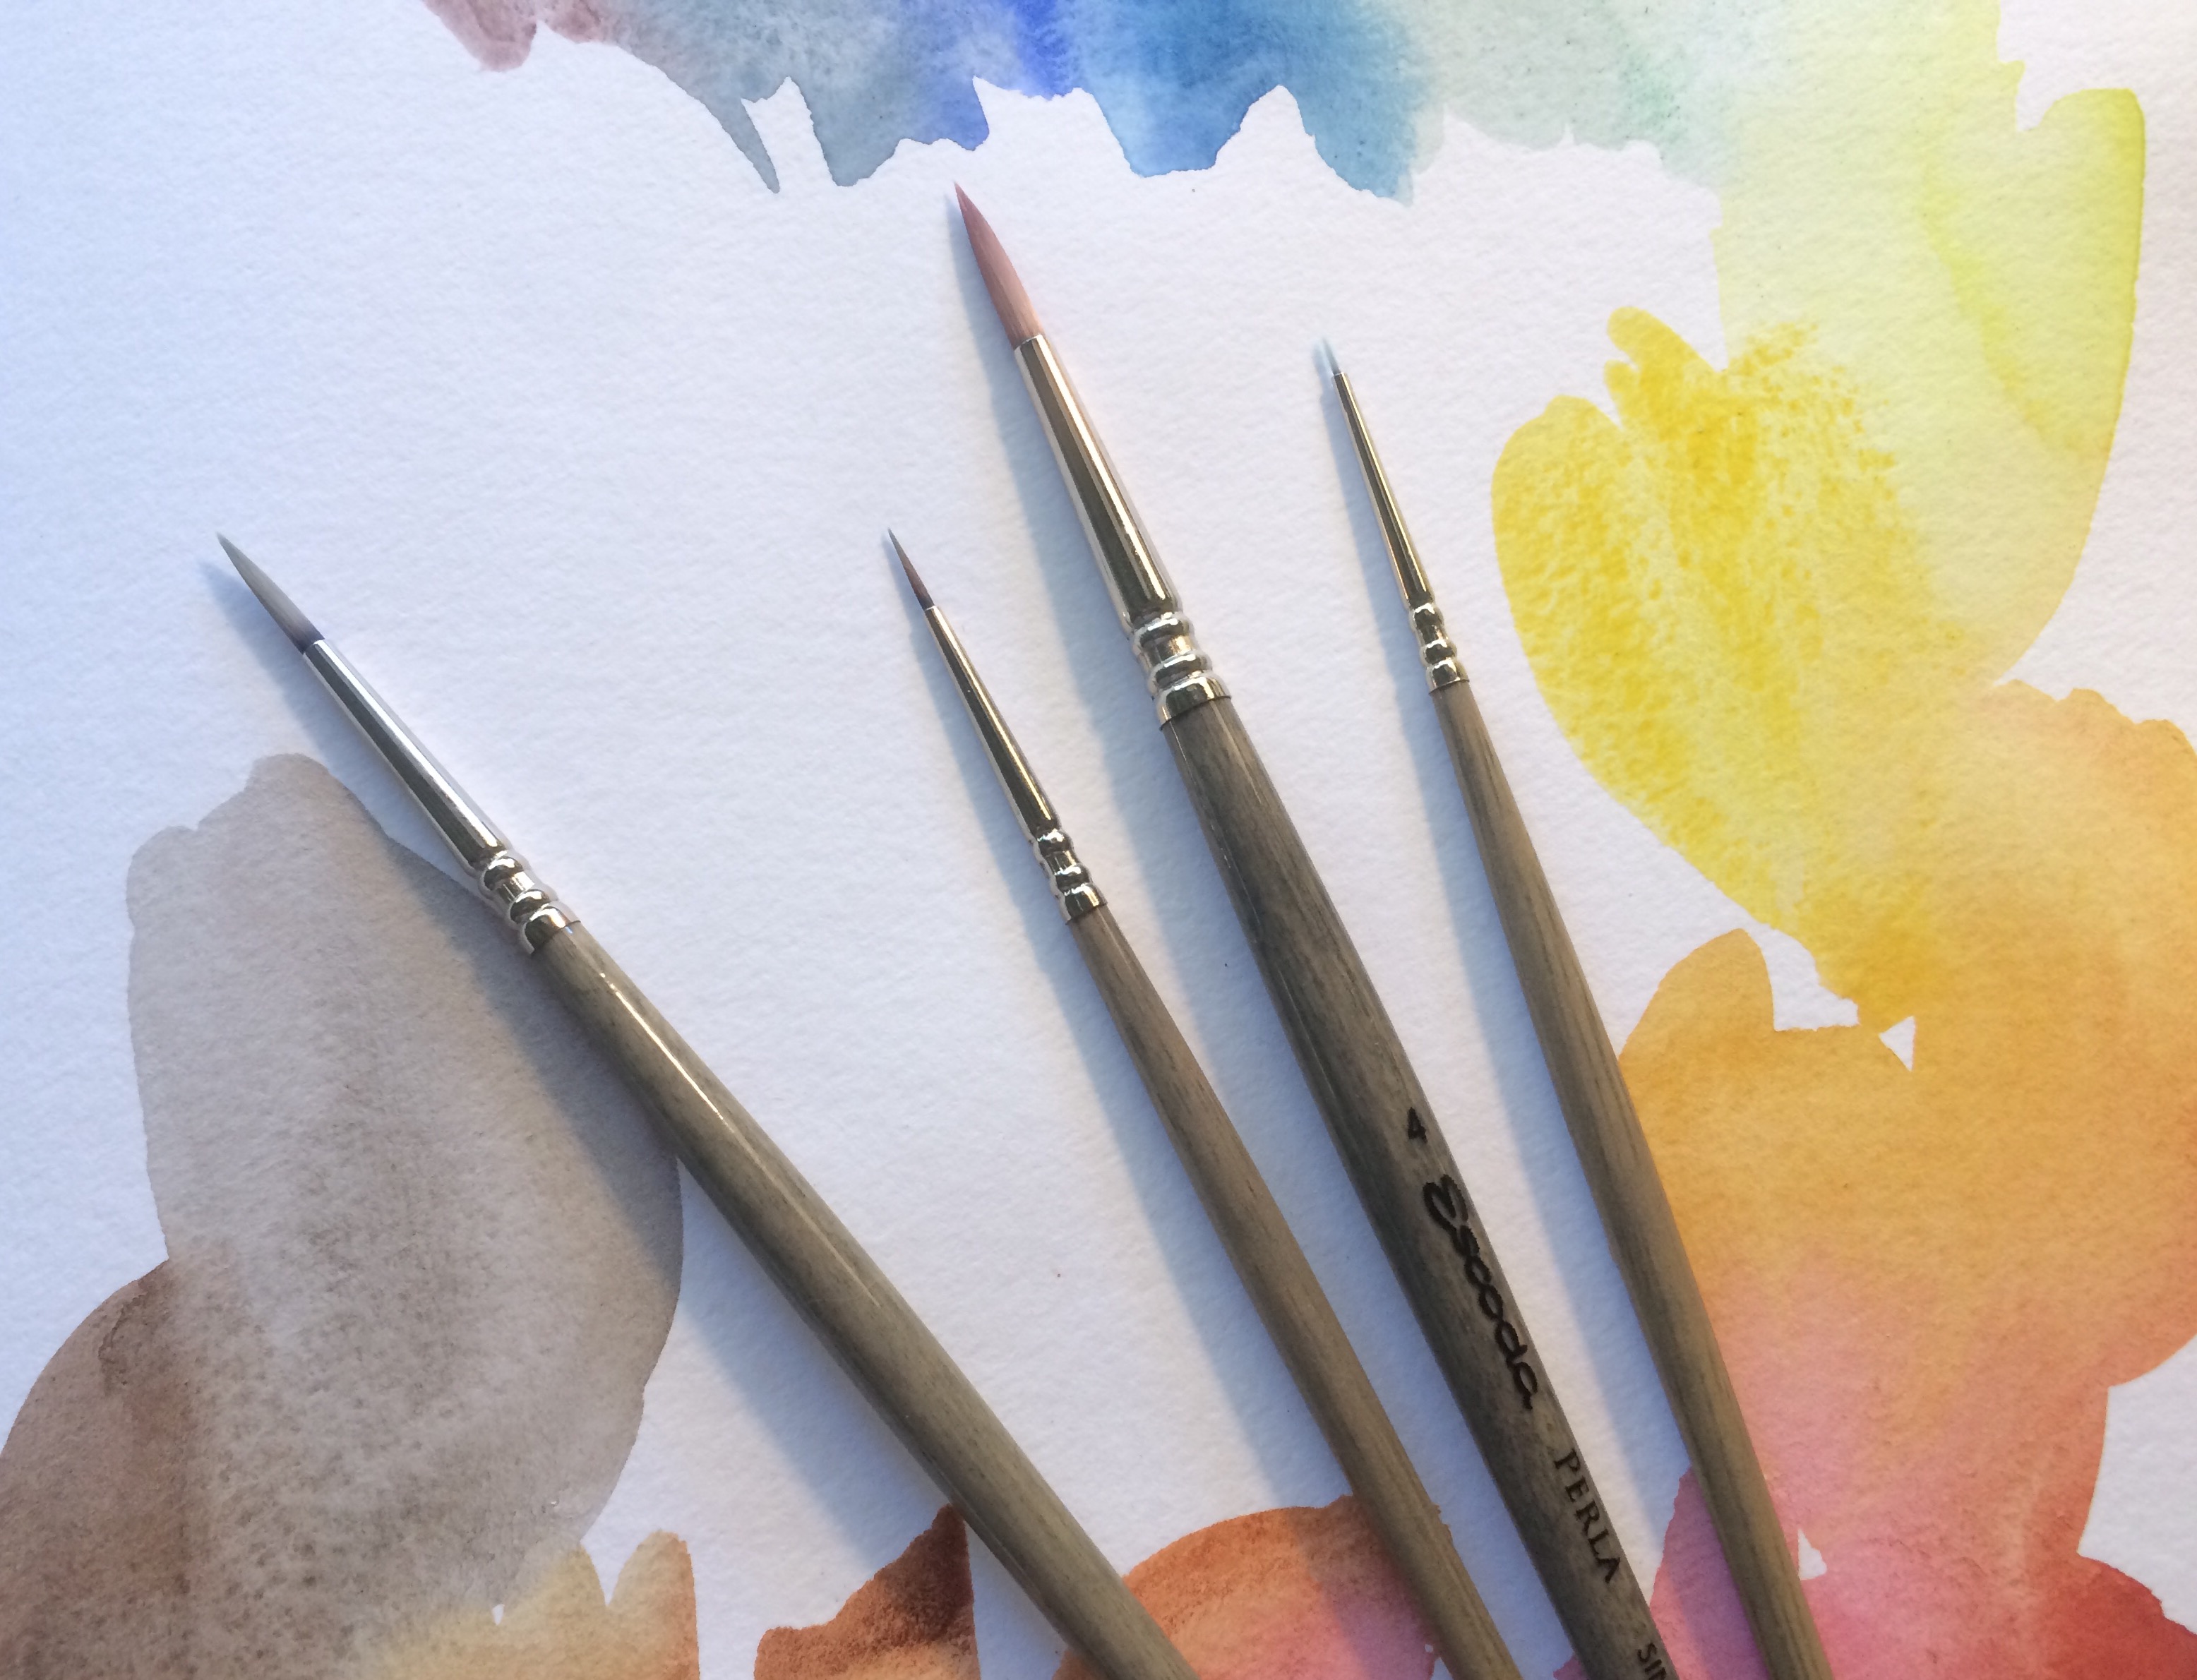
Essential watercolor brush strokes that you need to know!
Master these nine types of watercolor brush strokes and you’ll be creating watercolor works of wonder in no time.
1. Lines
 Like in drawing, watercolor can be used to paint lines. Simply put, all you have to do is dip your brush in paint and use your brush to draw lines of any shape, size or thickness.
With watercolor, there are two key ways you can create lines, and they’re often combined in a single painting.
Like in drawing, watercolor can be used to paint lines. Simply put, all you have to do is dip your brush in paint and use your brush to draw lines of any shape, size or thickness.
With watercolor, there are two key ways you can create lines, and they’re often combined in a single painting.
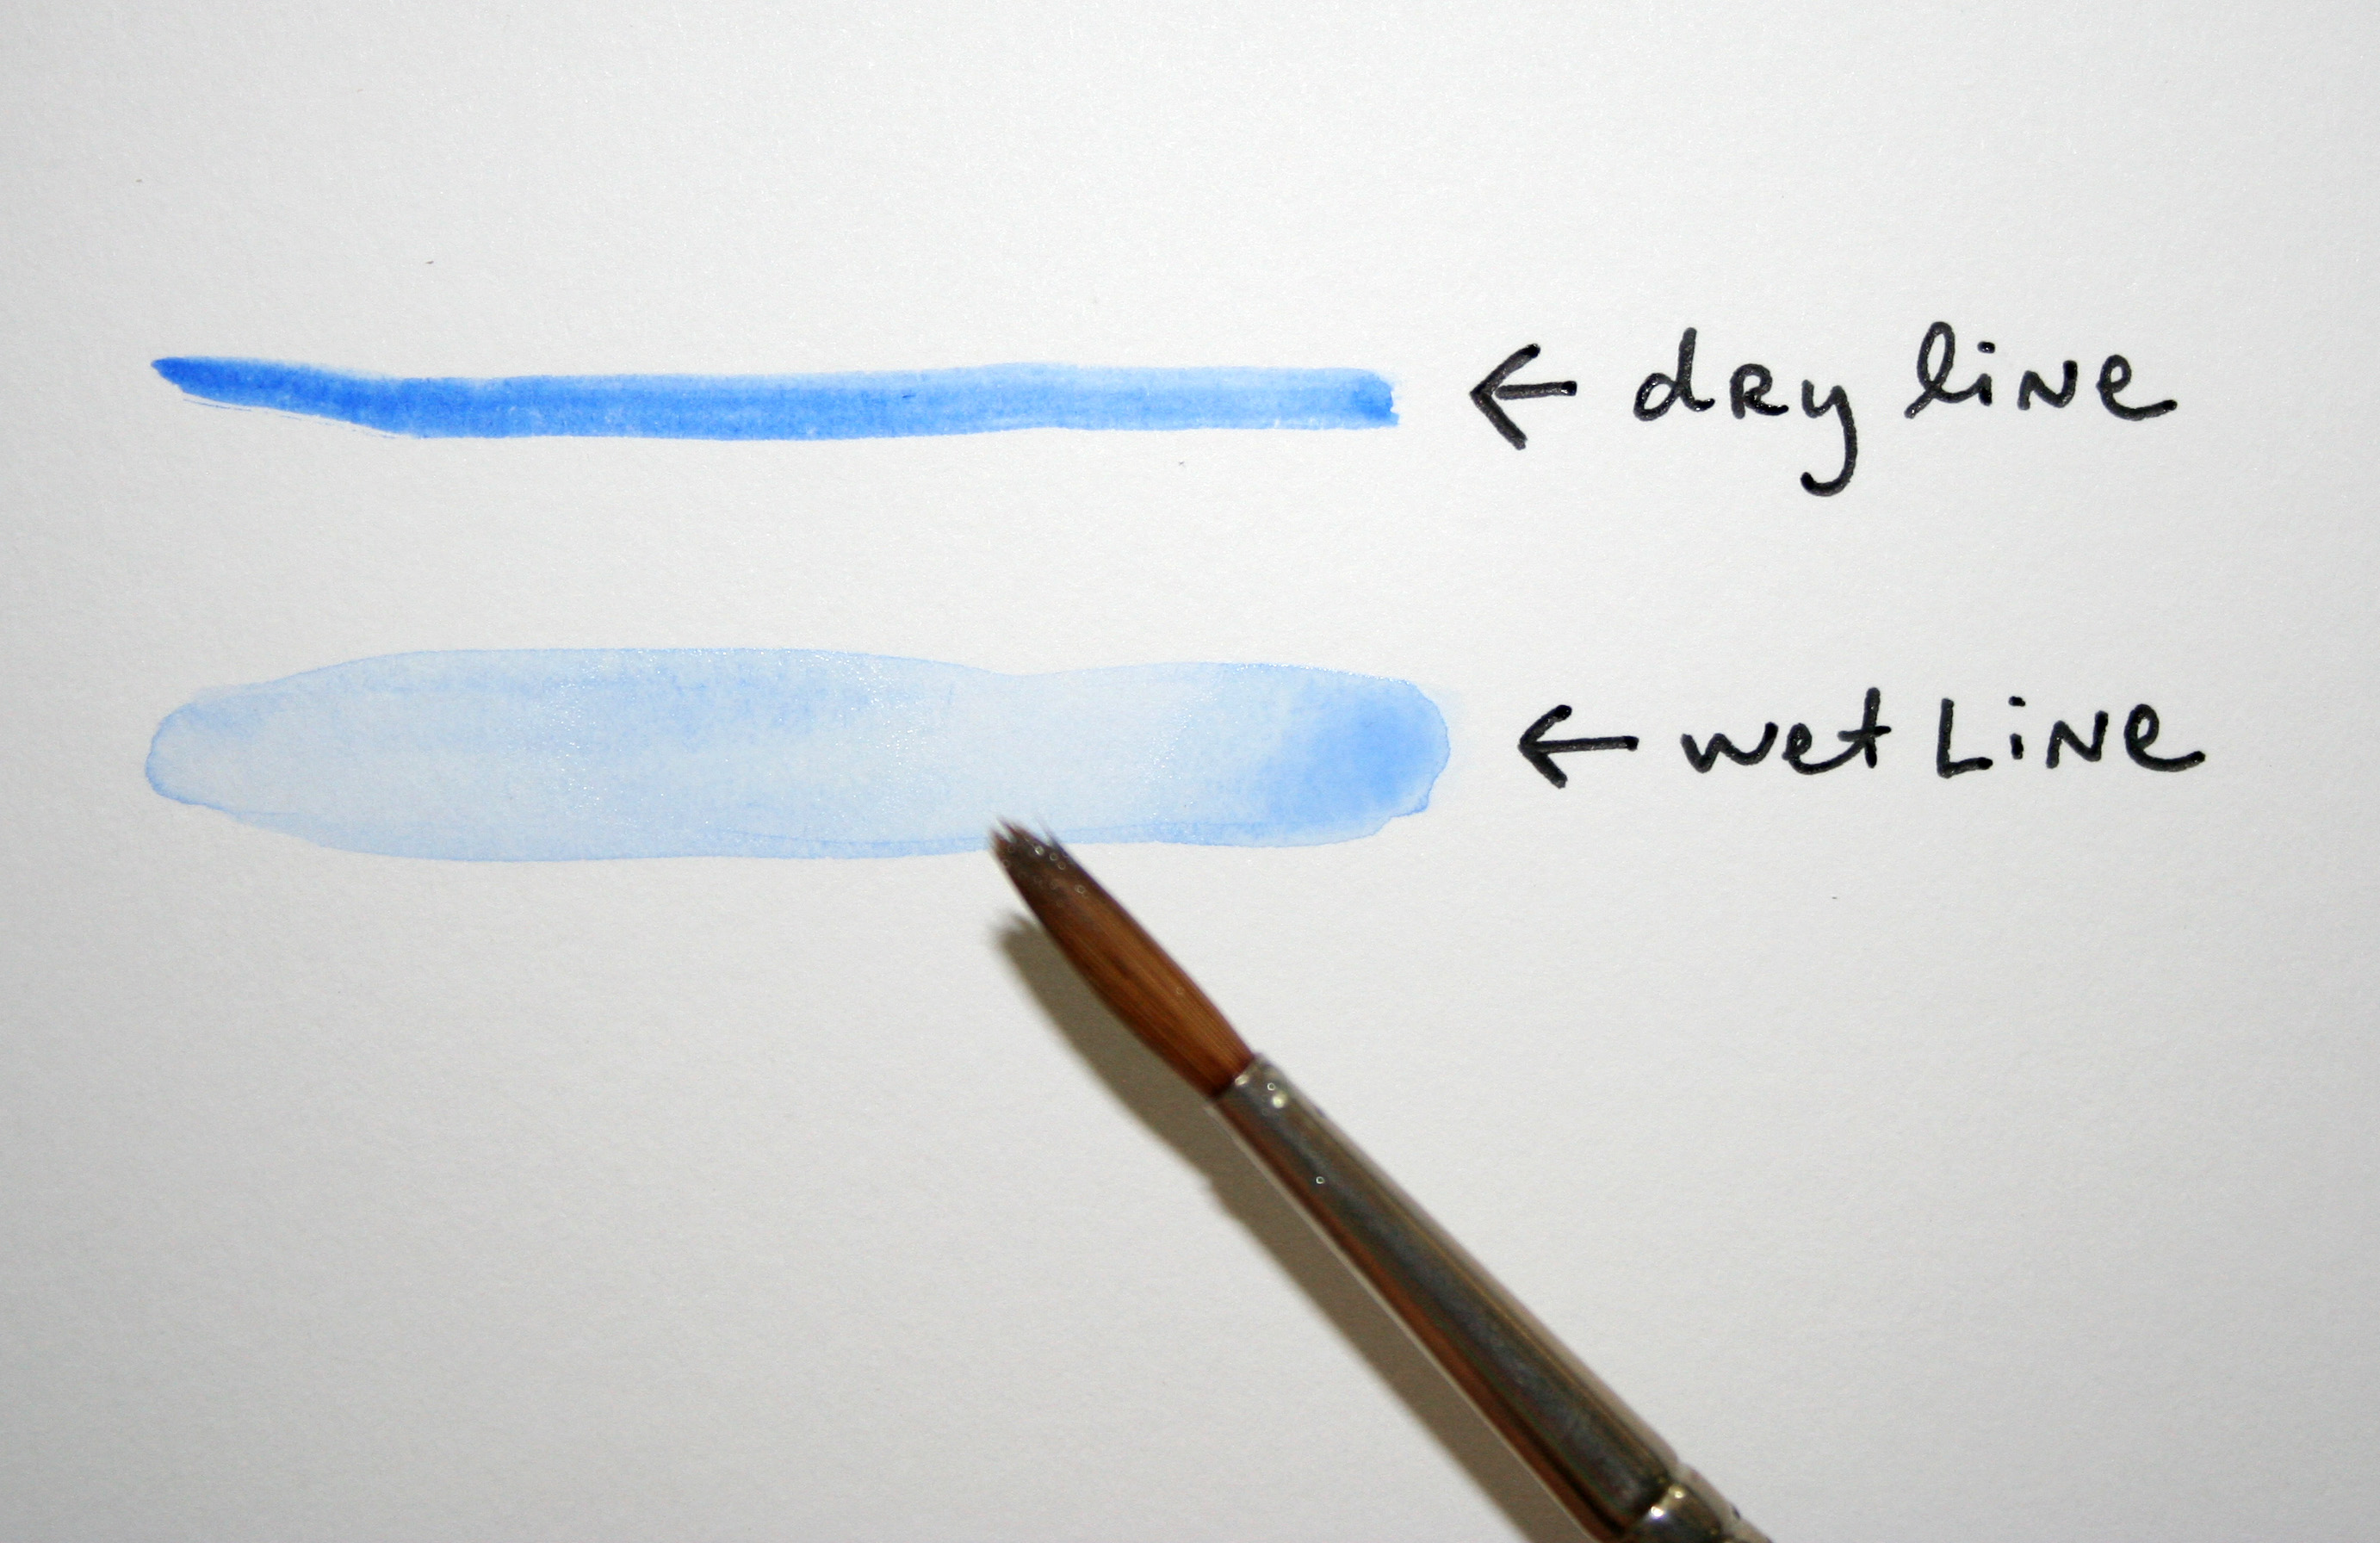
Dry lines
Either using watercolor from a tube, or minimally wetting your brush to use watercolors in a pan, you essentially use a “dry” brush to apply paint. You’ll have dark, clear lines, but they will not have the flowing quality that is most usually associated with watercoloring.Wet lines
By simply wetting your brush, either a little or a lot, you’ll get a different consistency with your lines in watercolor. Note: a “dry” or “wet” approach can be used with any of the brush strokes featured in this post for a different effect!2. Hatching and cross hatching
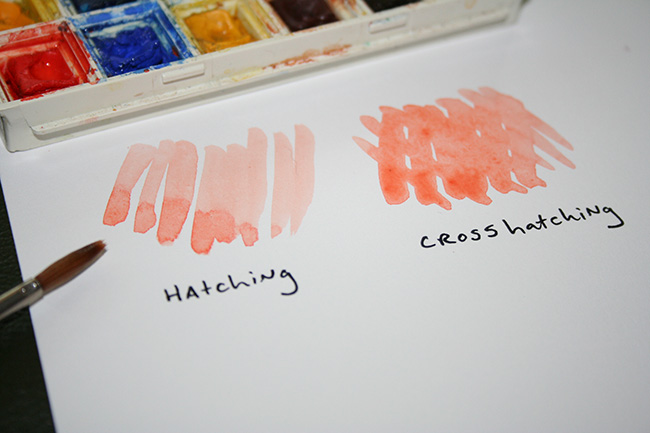 If you draw, you’re probably already familiar with hatching and cross-hatching. To create hatching, you create a series of lines close together, all going in the same direction, to create a sense of texture.
Cross-hatching takes it one step further, and overlays a second layer of paint lines on top, aligned in the opposite direction. As you can see, the effect on the texture is quite different.
If you draw, you’re probably already familiar with hatching and cross-hatching. To create hatching, you create a series of lines close together, all going in the same direction, to create a sense of texture.
Cross-hatching takes it one step further, and overlays a second layer of paint lines on top, aligned in the opposite direction. As you can see, the effect on the texture is quite different.
3. Mashing
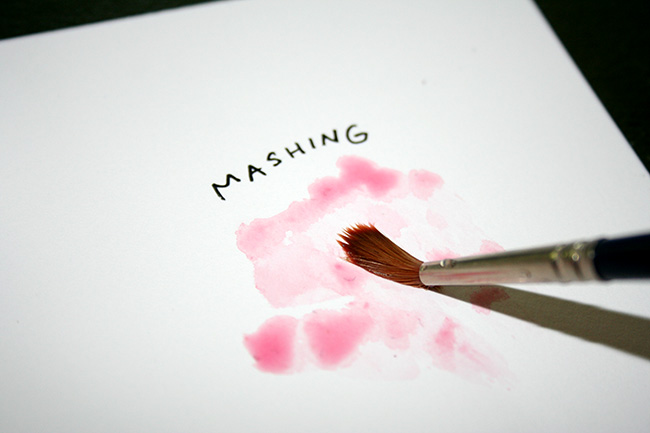 I don’t know what the technical term for this is, so I’ll stick with “mashing.” Basically, you’ll mash a paint-loaded brush on your painting surface. Take care with this method, because over time it can destroy delicate brushes. Or, have a specific brush dedicated to this practice.
4. Scumbling
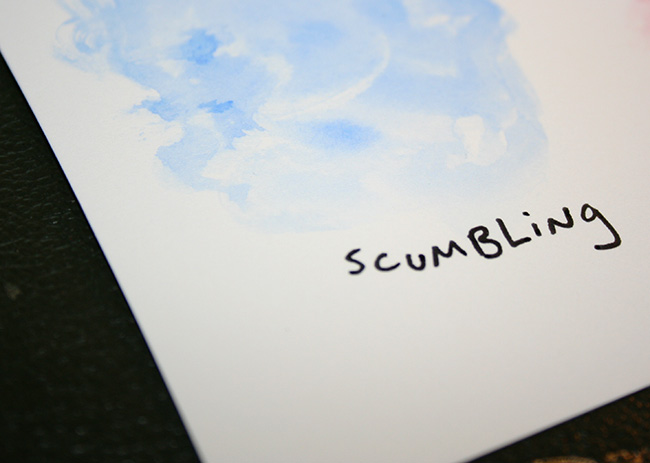 Spell check and autocorrect dislike this word, but I promise it is a thing. Scumbling is a term used to describe irregular motions to make either a line or layer on paint. It’s best to not think too hard about it: simply paint irregularly in an area. It will give you a cool texture.
5. Stippling
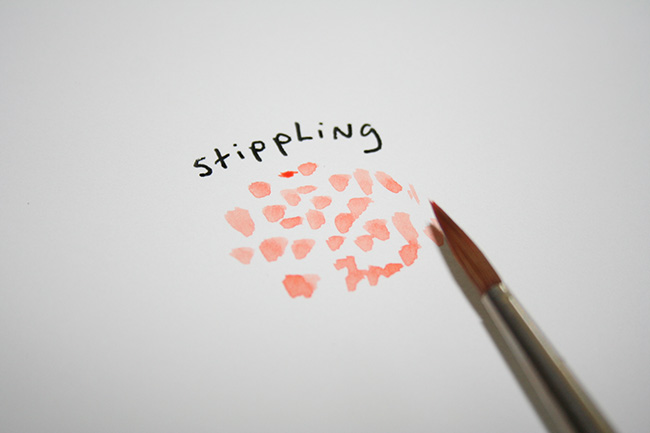 If you’ve ever seen the pointillist works of Seurat, you have an idea of what stippling is. Basically, instead of applying lines or areas of paint, you’re painting tiny dashes or dots in an area. Once you have created quite a number of them, they will fill an area with color and add a fascinating texture.
Stippling can be neat and tidy, or the marks can overlap in a more freeform way.
If you’ve ever seen the pointillist works of Seurat, you have an idea of what stippling is. Basically, instead of applying lines or areas of paint, you’re painting tiny dashes or dots in an area. Once you have created quite a number of them, they will fill an area with color and add a fascinating texture.
Stippling can be neat and tidy, or the marks can overlap in a more freeform way.
6. Tapping or splattering
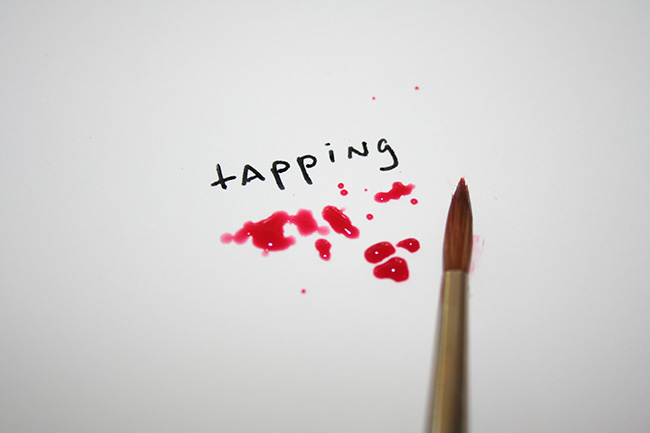 Tapping your brush (not letting it actually touch the paper) is an interesting method of applying paint — perhaps we can call it the non-brush stroke!
To make this type of mark, load up plenty of wet paint on your brush and hold the brush close to the paper. Use one hand to hold the brush, and your second hand to gently tap the top of the brush, right above the bristles. The paint will come down in irregular spatters.
Tapping your brush (not letting it actually touch the paper) is an interesting method of applying paint — perhaps we can call it the non-brush stroke!
To make this type of mark, load up plenty of wet paint on your brush and hold the brush close to the paper. Use one hand to hold the brush, and your second hand to gently tap the top of the brush, right above the bristles. The paint will come down in irregular spatters.
7. Washing
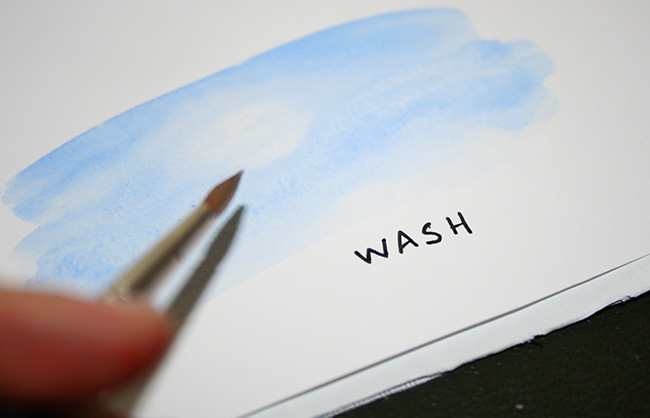 Creating washes in watercolor is one of the most common and well-known brush strokes. To create a watercolor wash, mix a desired color and make sure it’s wet enough to glide across the paper. Apply the paint to dry or slightly wet paper. Use largest brush you have and make your strokes confidently! The wet paint will form a wash, covering an area with paint.
Are there any videos to illustrate how to do the above techniques?