
I think sergers are among the greatest machines ever invented. They can overcast seam allowances, create all-in-one seam+overcast edges, produce lovely rolled hems, coverstitch garment edges, and much, much more. And they do it all while sewing very FAST, which is pure awesomeness in my book.
If you’re new to the world of serging, Bluprint is here to help! Get started with Beginner Serging: Machine Basics & Techniques, taught by Amy Alan. Or, if you’re ready to take your serging to the next step, check out Creative Serging: Beyond the Basics with Angela Wolf.

Photo via Bluprint member Joy in Georgia
Sergers can seem intimidating. Serger stitches use more spools of thread (usually three or four) than a sewing machine, and you need to learn something about cutting width, differential feed and tension to balance the various kinds of stitches available on your serger model. It definitely takes some time and energy to learn about serging, but you can totally do it.
You sew, so automatically you are a smart person, right? Taking some time to experiment, run samples and keep a record of the impact of different settings will increase your knowledge and confidence quickly. The two most popular uses for sergers are overlocked seam edges and rolled hems — so concentrate on nailing those two stitches first. Once you learn to manage the cutting width, differential feed and thread tensions, you will be well on your way to becoming a serger pro!
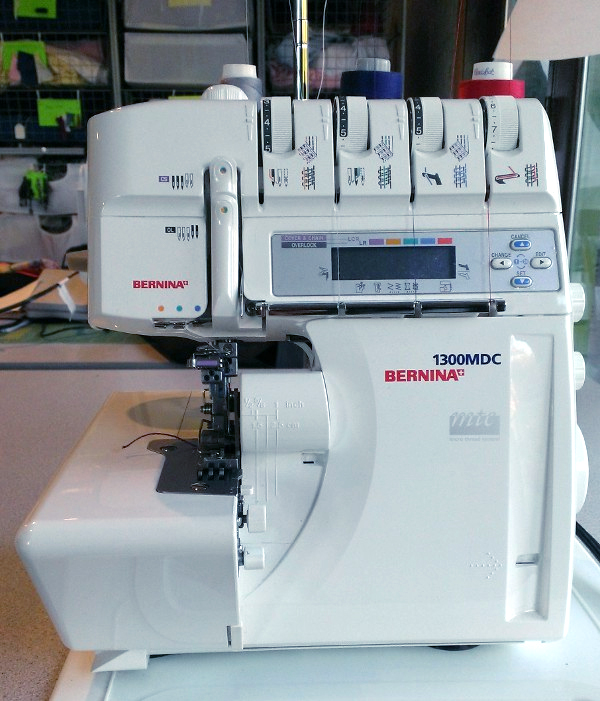
Bernina 1300 MDC serger, including overlock, coverstitch and chainstitch functions
Cutting width
The cutting width adjustment affects the amount of fabric that is within the seam. If you want more fabric within a seam or rolled hem, change the cutting width to a higher number.
For example, if you are trying to create a rolled hem and your fabric is really ravelly or quite thick, increasing the cutting width might help. For fine delicate fabrics, you might need to reduce this setting to get a nice rolled edge. If there is extra fabric bunching up under your overlock stitching, try reducing the cutting width.
Differential feed
There are two sets of feed dogs in sergers with a differential feed system. The front feed dogs actually push the fabric under the presser foot, and the back feed dogs push the fabric out of the serger. Usually for a medium weight fabric setting, the differential feed on “N” or 1 causes the fabric feed uniformly through the serger. Moving the setting to a higher number causes the fabric to gather, and moving it to a lower number will cause it to stretch out a little.
So how can you use this to your advantage? Try increasing the differential feed (turn the dial to a higher number) when you want to ease something in, such as a sleeve cap into the armscye or the hem of a flared skirt. Try decreasing the differential (turn the dial to a lower number) if you are sewing on a lightweight fabric that is puckering.
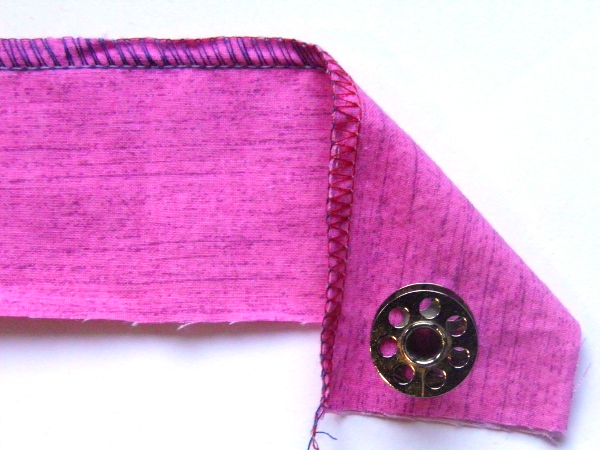
Balanced tension, 3 thread overlock
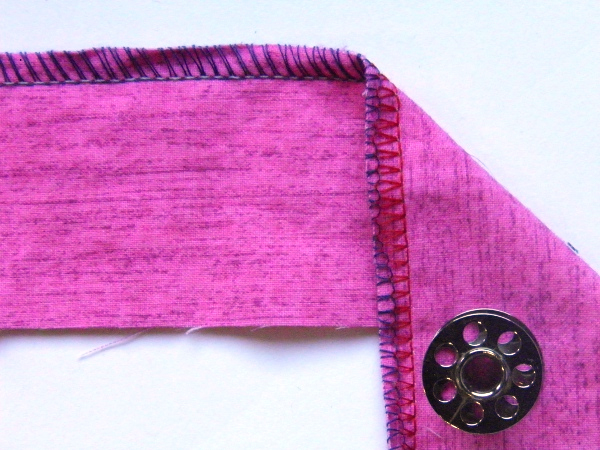
Lower looper tension too tight, or upper looper tension too loose, 3 thread overlock
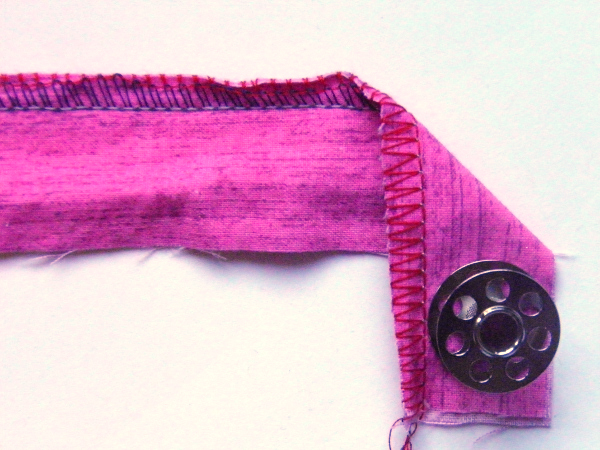
Upper looper tension too tight, or lower looper tension too loose, 3 thread overlock
Thread tension
Thread tension settings are the source of many serger stitching woes.
First, start by using the recommended settings for your serger and the stitch you plan to use. If that doesn’t produce the result you want, try threading your machine with a different color thread in each placement so you can more easily identify which thread is creating the problem.
Once you identify which thread is causing the problem, adjust the tension setting by a smaller amount and test again. Continue until the stitch quality is appropriate for the intended stitch. For 3 and 4-thread overlock stitches, you want a balanced stitch with both looper threads visible and “connected” along the cut edges.
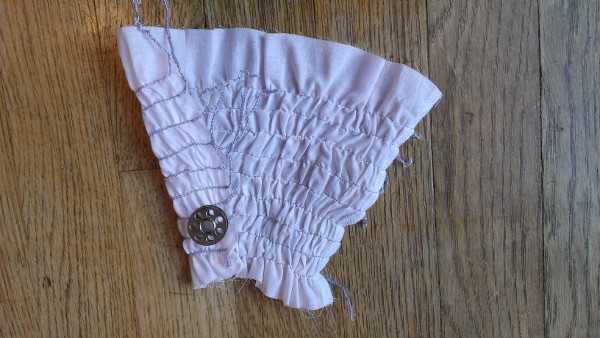
Once you have mastered the basics, have some fun playing with your serger sewing. I experimented with using elastic thread in the chain stitch on my serger, and was able to produce a shirred look to test strip of lightweight batiste. I think this technique could be useful for a dress for my darling granddaughter!
Tomorrow on the Bluprint blog, we’ll share a helpful tip for stopping your fabric from fraying excessively.
Share tips, start a discussion or ask one of our experts or other students a question.
No Responses to “Overcome the Fear of Using a Serger”