
One thing I really like about the lathe is that beginner woodturning doesn’t have too steep a learning curve. In one afternoon you can master enough skills to turn out a simple, yet beautiful project. I also love simple lathe work because you can often start and finish an entire project in one day. Turning green wood bowls is also a lot of fun, and an added bonus is that the wood for these projects is usually free, so it’s a lot easier to justify plenty of practice.
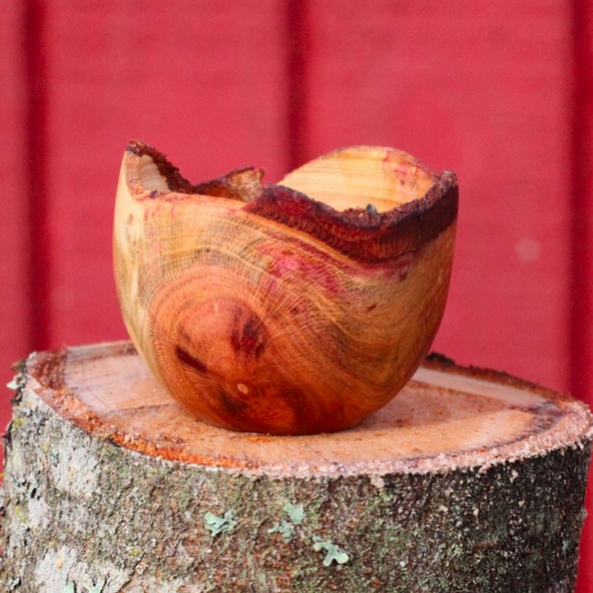
Let’s learn how to turn a small, live-edge bowl from a fallen branch.
Safety notes
Something that needs to be mentioned up front is that green wood is a lot less predictable than dry wood when turning. Wet wood can act funny as tension is released from the structure of the wood while you turn away the interior and exterior of the bowl. You need to be a lot more attentive and careful when turning green wood. Your workpiece needs to be tightly secured to the lathe at all times to avoid flying off and breaking something across the room or, worse, hitting you.
Turn off your lathe on occasion and check to ensure your workpiece is still well attached. Always wear eye protection, always use sharp tools, and ALWAYS keep an eye on where and how your chisel coming into contact with the wood. If you have long hair, keep it securely tied in a bun or, better yet, covered entirely with a hat.
This method is best used only on very small bowls. We want to start and finish this project in one afternoon and skip the year (or more) drying times required for larger bowls. Depending on the species of wood and the finished thickness of the bowl, it is likely to distort, warp, or crack as it dries but since this is a small, decorative piece with a rustic feel, those things will only add character.
Professional turners creating large, perfectly round bowls with a smooth, mirror polished finish first rough turn the shape green, leaving plenty of extra thickness to allow for warping, wait for a year (or more) for the piece to dry out entirely, then finish by turning the final shape and dimensions once the wood is completely dry. Others use their ovens like a kiln to speed up the drying process. We can ignore all that for now.
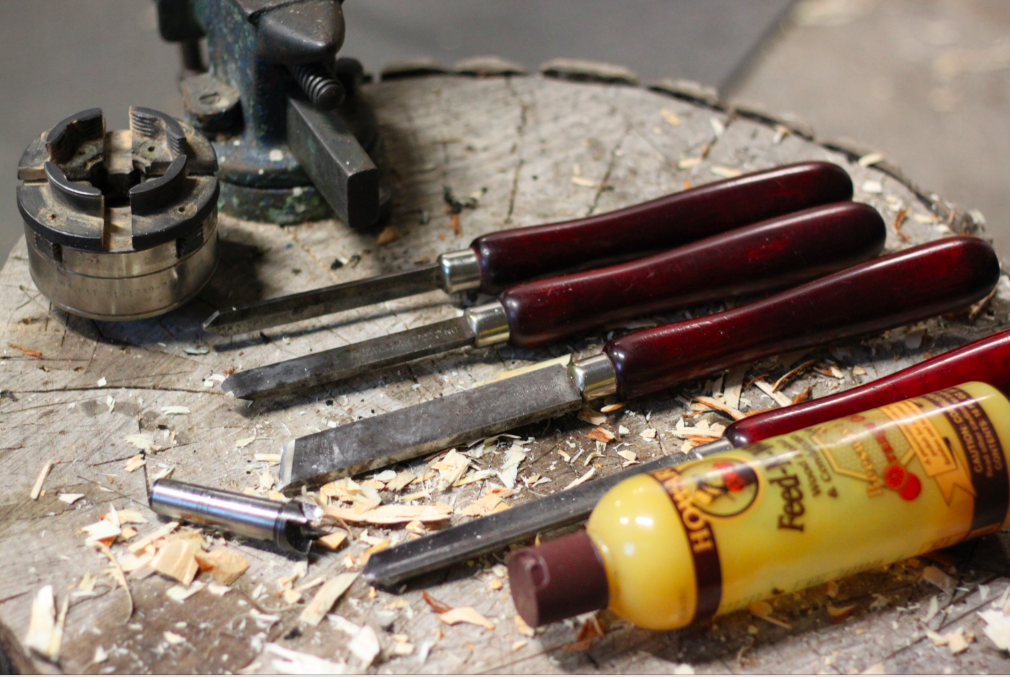
For this project, you need:
- A lathe
- Sharp lathe chisels (and a grinder to keep them sharp)
- A fallen branch of a medium-hard wood. I like maple, walnut, hickory fruit tree branches… Whatever is easily accessible due to local abundance.
- Safety glasses
- A spur and tailstock as well as a 3 (or 4) jaw chuck.
- Finish of your choice (I am using a beeswax based finish)
Step 1: Select and prepare your wood
Your bowl can be turned from as small a branch as your tool selection will allow. I recommend something 4-6″ long and between 4-10″ wide. Don’t go too big with this bowl or it will be prone to cracking and severe warping as it dries. Big pieces are also much more dangerous for beginners to turn.
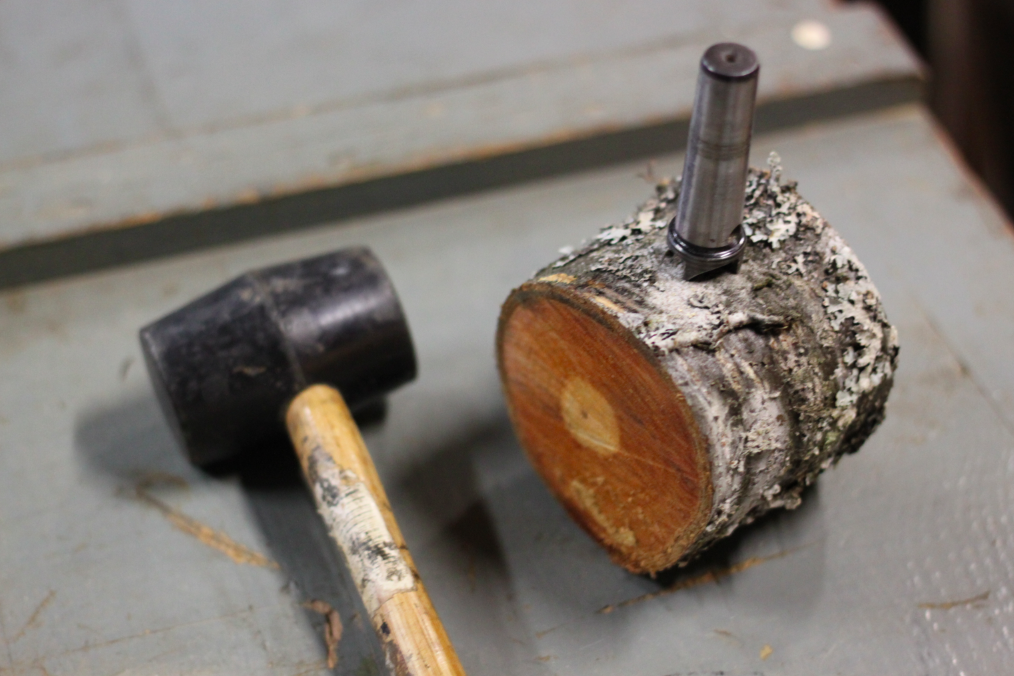
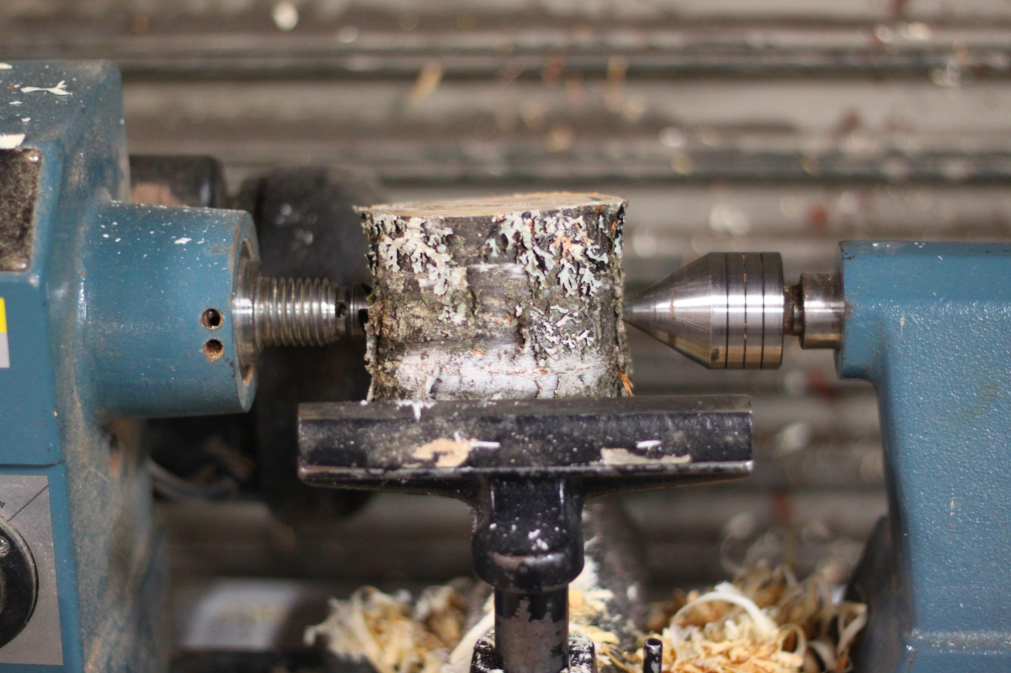
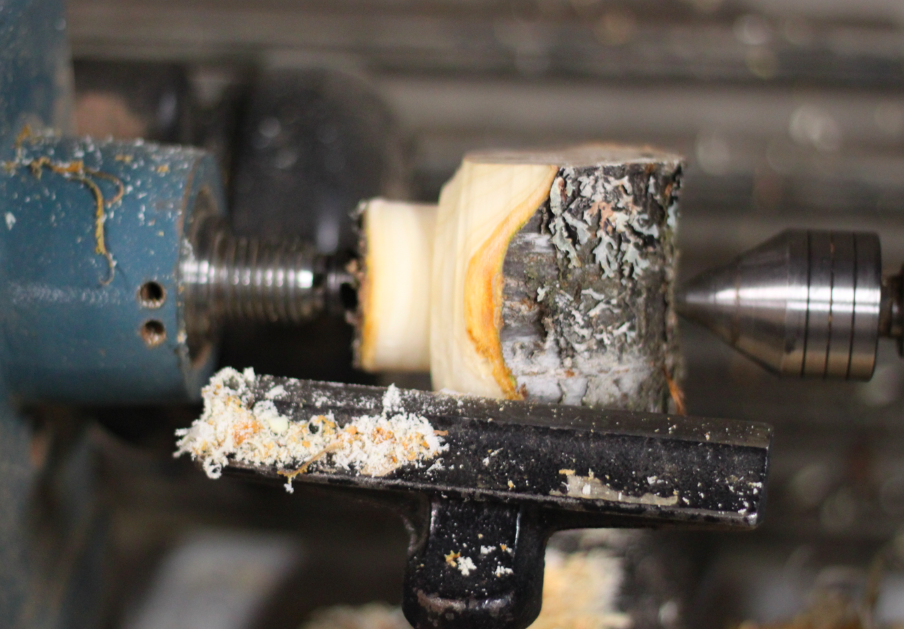
Step 2: Mount your workpiece
First, you will mount your piece between the spur and tailstock to turn down a ½” tenon which will allow you to mount the bowl blank in your three- or four-jaw chuck. When mounting, I try to eyeball the basic center of either side of the piece and call it good. Extreme accuracy here isn’t needed. A good tool for making the tenon is your parting tool. I also use my gouge a bit to make some extra clearance for the jaws of the chuck. Leave as much material on your tenon as your jaw chuck will allow to give you the most stability possible. Now, remove your workpiece from the spur and mount it in your three-jaw chuck using the tenon you just turned.
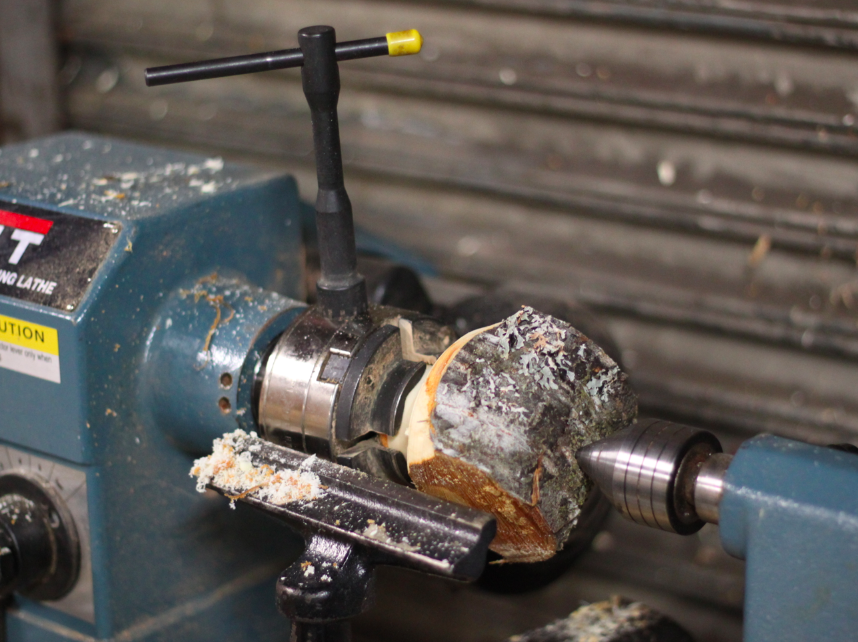
Step 3: Shape your bowl
Using a gouge, carefully turn your workpiece round. Take light passes and be mindful that your gouge doesn’t “catch” below the piece or lodge between the wood and your tool rest. This is especially dangerous before your piece is completely round. Using your large gouge and a skew, shape the entire exterior of the bowl (aside from the very bottom, which you will leave attached until parting it at the very end). With a practiced hand and sharp chisels, you should be able to achieve an acceptable finish straight off the chisel. Because the wood is still wet, sanding will not be very effective here.
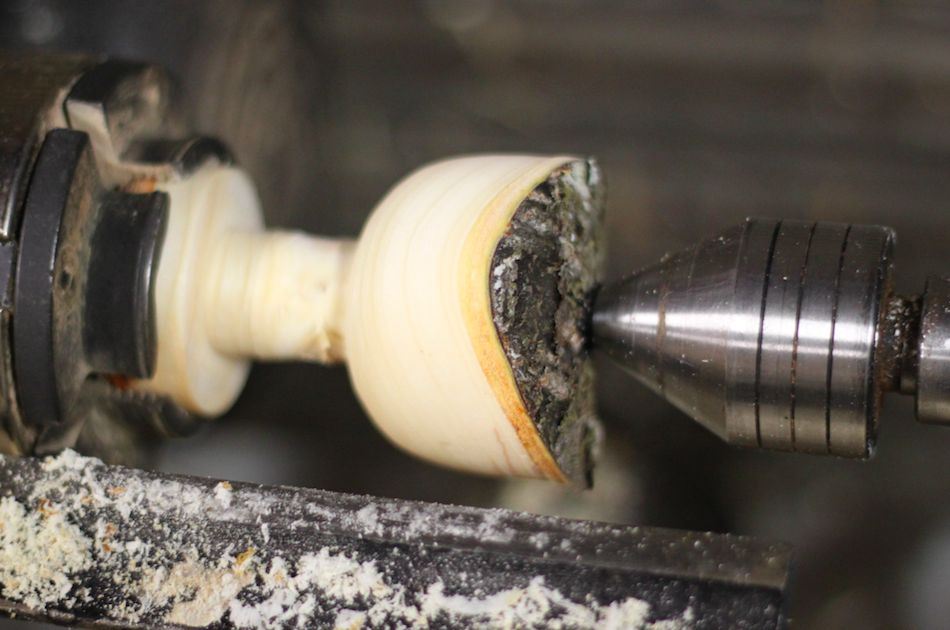
Step 4: Hollow out the bowl
After the outside of your bowl is fully formed and finish turned, remove your tailstock and readjust your tool rest to be perpendicular to your workpiece.
Using a bowl gouge, remove the waste from the center of your bowl. Turn off your lathe on occasion and use your fingers or calipers as a gauge for the thickness and depth of your bowl. When you are satisfied as to the thickness, take a few finishing passes along the interior with a freshly sharpened chisel. A good light is very helpful during this process. I like to use an arm lamp to shine on different places of the bowl. When the sides are just beginning to become translucent, I am pleased. For your first few attempts, leaving the sides of your bowl a bit thicker will make things easier.
Like I said earlier, this kind of turning uses free wood, so there should be plenty of chances to practice and failures in practice are not failures at all, but lessons learned. So don’t get frustrated — I’ve broken (and continue to break) my fair share of bowls at one point or another in the process.
Step 5: Finishing
Move the tool rest away from the bowl for the finishing process. If this will be a decorative bowl, using a CA glue finish will be helpful in keeping the bark intact. I prefer to leave the “intactness” of the bark up to fate and to use a simple burnished beeswax finish on my turnings. The beeswax will help slow the release of moisture and extend drying time for the wood and thus reduce cracking and warping as the bowl dries. Using beeswax also means I don’t have to wear gloves or a mask, and I kind of like that too. I just put a dab of beeswax on a cotton rag, then turn on the lathe and apply a nice even coat of wax with a light touch all over the bowl. I then get another dab of wax on my cloth and then add a bit of pressure as I touch the spinning bowl with my cloth. This action helps melt the wax and the fibers of the cloth perform a buffing action on the bowl.
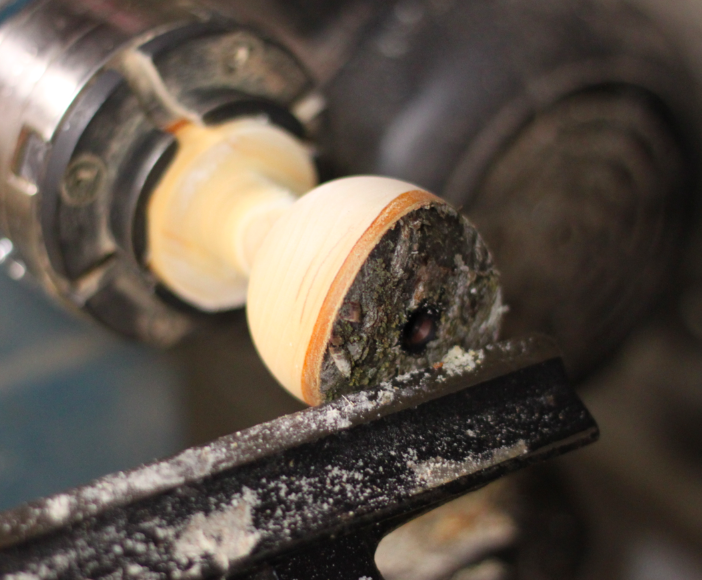
Step 6: Separate the bowl
When you’re satisfied with the finish, it’s time to part the bowl away from the tenon you turned. Replace your tool rest parallel with your workpiece and carefully part away the bottom of the bowl using your parting tool. With careful, even pressure, point your parting tool into the center of the tenon. Rocking it slightly back and forth to keep the tool from catching or overheating, use even pressure to push the parting tool into the tenon to separate your bowl. I like to use an ever-so-slight inward angle as I cut the bowl away so I can guarantee the bowl will sit flat on the slight rim made by a concave cut.
As you near the very center of your tenon and the piece attaching the bowl to the chuck gets to be about ¼” thick, get ready. Use your free hand to catch the bowl as it breaks away. Since this is the bottom of your bowl, you can leave it rough or finish it. I like to make a few quick strokes with my carving knife to clean up the bottom and then call it good. If I know someone will be looking at the bottom of my bowl, I might wait until it is dry, then sand and finish the bottom.
And there you have it, a beautiful rustic bowl for jewelry, or other tiny collections.
Happy Shavings!
Share tips, start a discussion or ask one of our experts or other students a question.
No Responses to “Turn a Rustic Bowl From a Fallen Branch in Just 6 Steps”