
Shooting, like most seemingly simple craft techniques, depends for its success on subtle refinements along with practical solutions. Because this is such a valuable technique, let’s take a closer look at the shooting board, tools, and methods.
Choose a plane and give it a ride
1. Don’t wait until you have the perfect plane for shooting, just start shooting.
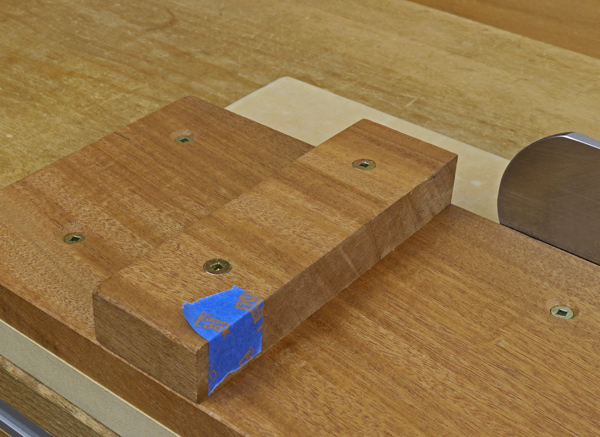
The common bevel-down #5 jack plane, though not ideal, will perform adequately if it is properly tuned. Set the chipbreaker close to the cutting edge to reduce blade chatter. If the sidewall is not quite square to the sole, be practical: shim it with appropriately placed blue tape.

2. So what is the ideal plane for shooting?
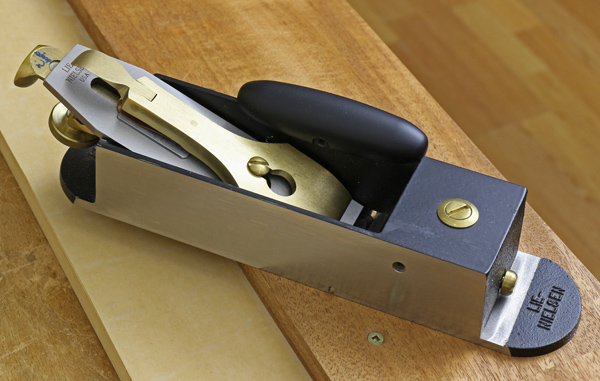
I recommend a bevel-up plane with plenty of mass in the body and blade, such as the Lie-Nielsen #9 shown here, or the Veritas shooting plane. While such dedicated planes are great, a heavy bevel-up general bench plane such as a bevel up jack or jointer will also do very well. A block plane, though it is bevel-up, does not have enough mass for effective shooting.
3. Don’t even think about shooting unless your blade is wicked sharp.
A dull blade will make you work harder and less accurately, while the effect of nicks in the blade edge will be obvious on the end grain of the work piece. Choose your steel, A-1 for endurance or O-1 for keenness and ease of sharpening, but get it sharp. It’s an easy edge to make – straight across, no camber.
4. Forget the regular handles on the plane.
Wrap your hand around the sidewall near the mouth and bring your fingers firmly down onto the lever cap. This will allow you to control the bearing of the plane on both the guide edge and the track, and to feel the cutting action. I’ve actually removed the wooden handles from my #9 and replaced them with the “hot dog” handle seen in the photos.
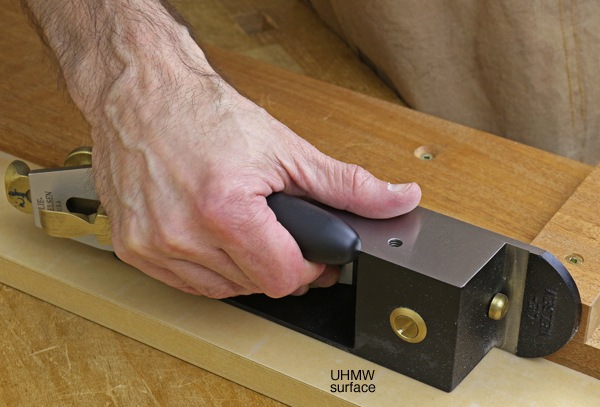
5. Apply “UHMW” slick tape with pressure sensitive adhesive to the track on which the side of the plane rides.
This is an easy and inexpensive upgrade that will make the plane glide marvelously, improving the ease and accuracy of your work.
Cool ways to be square
6. It’s OK to attach the fence with screws.
It is elegant to make a precise dado in which to set the fence, but it’s more hassle and it won’t enhance the functionality of the shooting board. Furthermore, the screw attachment allows a bit of tweaking of the angle before you sock them down tight.
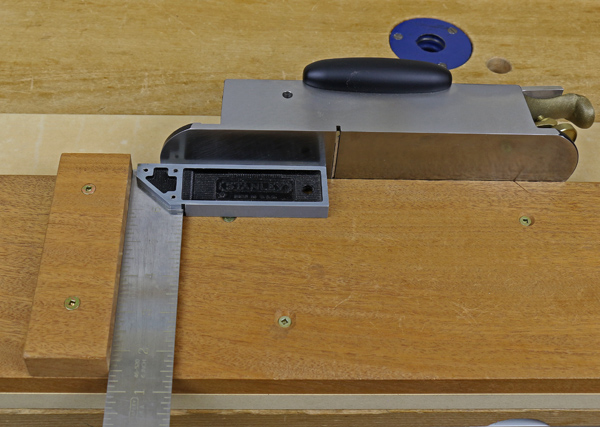
7. The easiest and most accurate way to square the fence is to use the sole of the plane as a reference.
As shown below, place the square against the fence and the sole. This is more direct than using the shooting board’s guide edge, which is also awkward to use because of the tiny rabbet in it.
8. Everything in your project is not perfectly square, so deal with it.
In woodworking, dead-on square is usually less important than dead-on matching. So, if for example, the side of a drawer pocket is slightly out of square, simply shoot the side of the drawer front to match it. How? Use the magic of microadjustment with shims. Place a bit of blue tape, or even a shaving, at the appropriate place on the fence to minutely adjust the angle to be cut on the end of the work piece.
Hands on
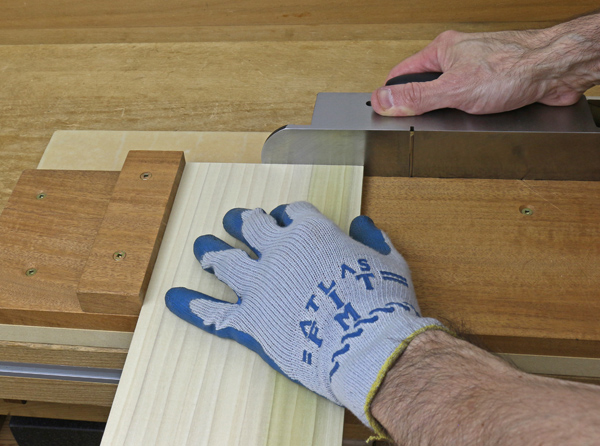
9. The work piece must be advanced laterally after each stroke to extend it into the cutting depth of the blade.
Refer to the schematic diagram in my previous post on shooting. After each stroke, retract the plane to a position where the toe of the sole overlaps the work piece. Then, simply advance the work piece to meet the sole, as shown below, and start another cut. This is tactile accuracy and it becomes second nature.
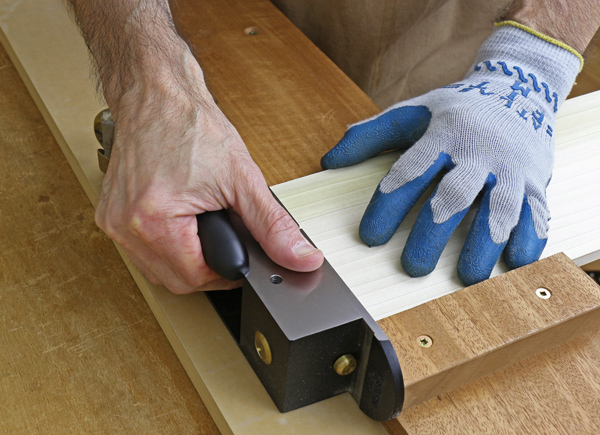
10. Use a grippy glove on your left (non-dominant) hand to manage the work piece.
This markedly strengthens your ability to prevent the wood from being torqued away from the fence by the cutting resistance, especially with long or wide pieces. It also makes it much easier to control the lateral advancement between strokes. It’s a big help — try it!
More than one way
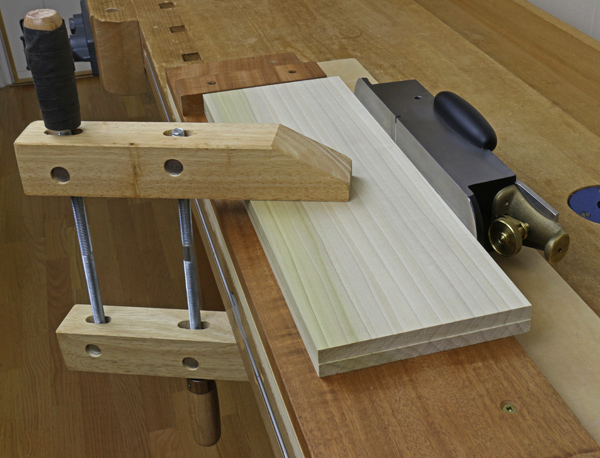
11. Plane both edges together using the shooting board.
A fast, effective way to make an edge-to-edge joint for boards up to about two feet long, especially in thin stock such as for drawer bottoms, is to plane both edges together using the shooting board. Arrange the joint to your liking, then “fold” the two pieces, and clamp them onto the jig with the edges overhanging the jig’s guide edge, as shown below. For this, the fence is used only as a stop. Plane with the same considerations that you normally use to create a good edge joint, but this is so much easier because the plane is registered on its side and on the work.
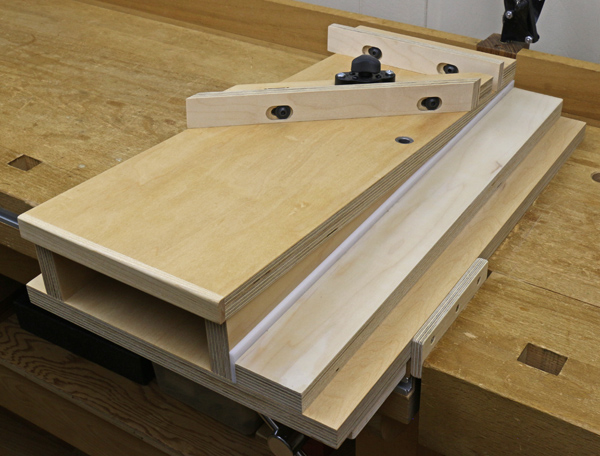
12. The proprietary shooting board shown below refines the process to the next level by using a ramped work support.
This spreads cutting pressure over a greater width of the blade edge and makes a shearing cut. It is shown here with its miter fence attached as a reminder that any shooting board can be used to create precise miters.
Share tips, start a discussion or ask one of our experts or other students a question.
No Responses to “12 Tips to Improve Shooting”