There are so many ways to cast on, but the simplest, most straightforward is the thumb cast-on.
Thumb method cast-on knitting — also known as the single cast-on, e-wrap cast-on or the backward loop cast on — is so easy to learn and is so versatile. There aren’t any complicated loops to form, and it’s so easy that you’ll often see knitting instructors use it when teaching new knitters.
When to use the single cast-on
While thumb cast-on knitting is easy, the results can be a little frustrating depending on what you’re knitting. If your cast on tension is too tight, the loops can be difficult to knit into when you knit your first row. If your tension is too loose, you might have a very loopy first row of knitting.
This cast on will give you a loose, thin edging on your work, so it’s not recommended if you need a super stable edge on your knitting. It is useful, however, for certain types of lace work that would benefit from a looser edge.
A lot of knitters also use the thumb method cast on when they have to cast on in the middle of a project and only need to add a couple stitches to the beginning or end of a row.
How to make the single cast-on
Step 1:
Make a slip knot and place it on your right-hand needle. Leave just enough of a tail to weave in later; this isn’t one of those cast ons that require a long tail.
Step 2:
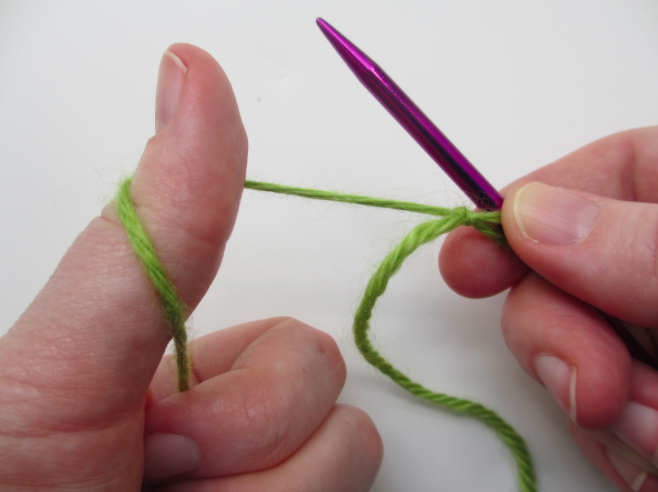
Grab the ball end of the yarn with your left hand. Wrap the yarn around your thumb from front to back and grasp the ball end of the yarn with your left-hand fingers.
Step 3:
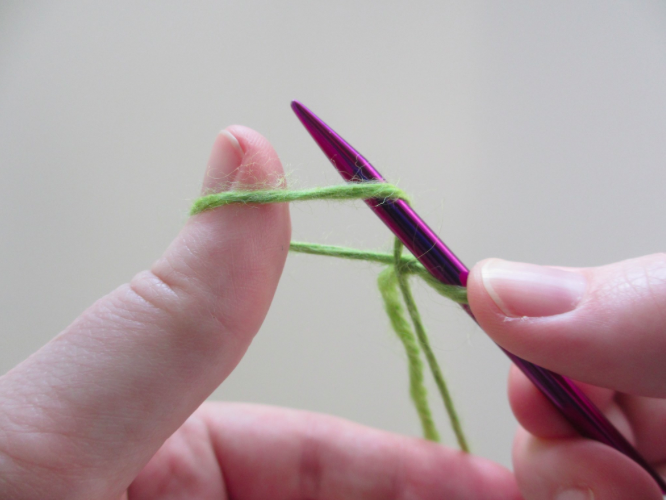
Use your needle to go up into the loop just created by wrapping the yarn.
Step 4:
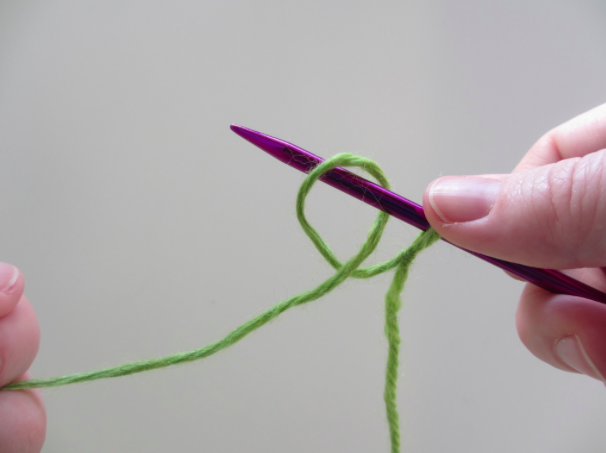
Drop the loop from your thumb. The loop will look like a loop around your needle, as shown above.
Step 5:
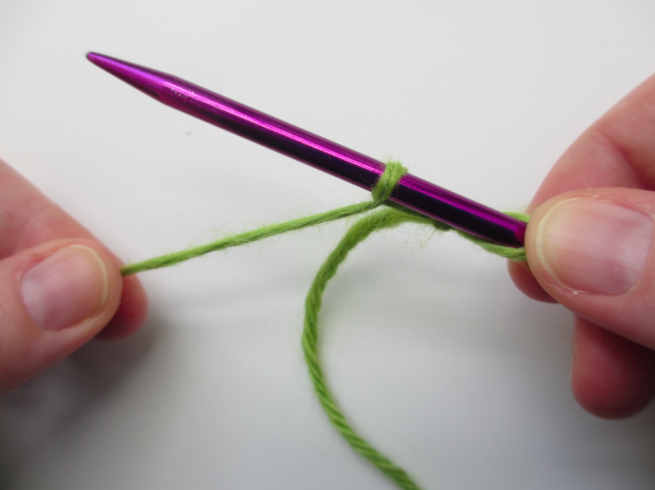
Pull taut to tighten the stitch. The tension here is very important. If you pull too tightly, you will have difficulty knitting into the cast on stitches when you start your first row. If you don’t pull tight enough, you’ll have a very loose first row. You may have to test the cast on a few times to get the tension just right.
Step 6:
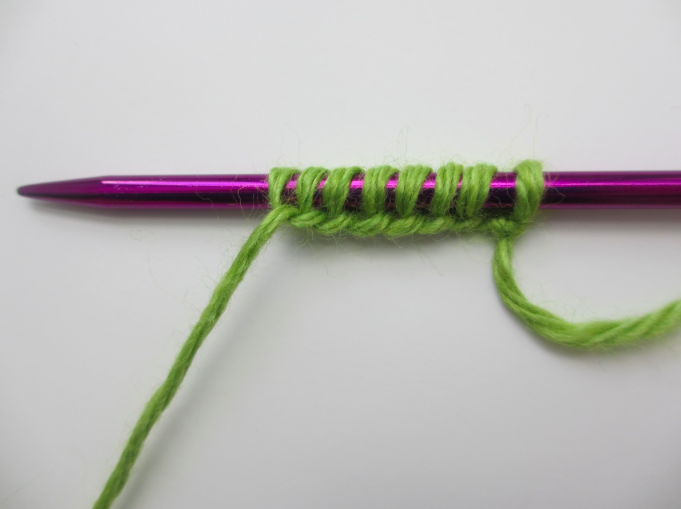
Repeat until you have the desired amount of stitches on your needle.

Learn to Knit From Start to Finish
Interested in knitting but don’t know where to start? This is the class for you!

Share tips, start a discussion or ask one of our experts or other students a question.
No Responses to “The Backwards Loop Cast-On Knitting Tutorial”