
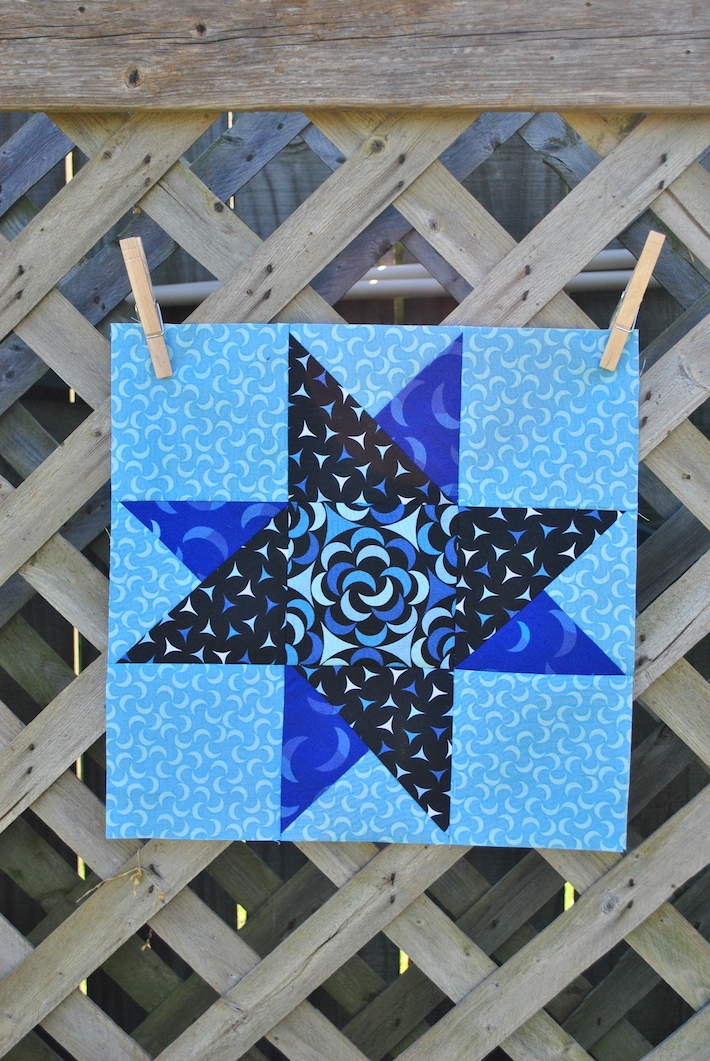
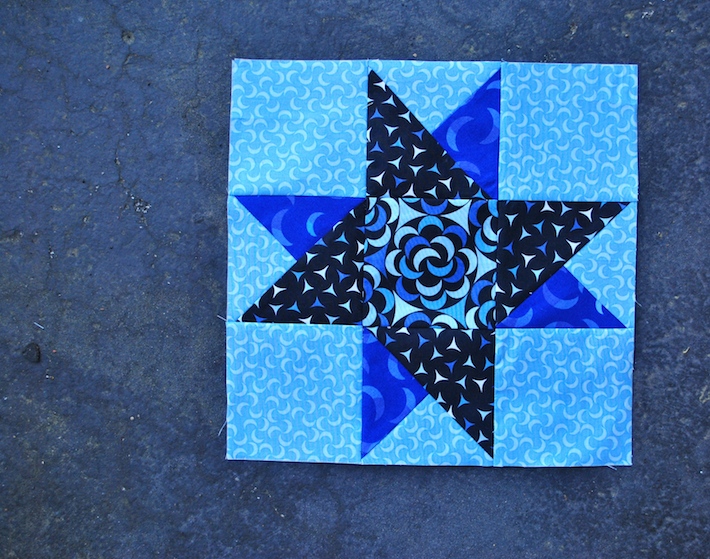
The illusion that the spinning star block is actually spinning is created by the combination of quarter-square and half-square triangles.
Sew several blocks in coordinating fabrics to make a quilt, or mix and match this block with others like the Ohio Star quilt block for a neat sampler quilt!
Make a spinning star quilt block with this easy tutorial!
Block size:
12 1/2″ x 12 1/2″ unfinished, 12″ finished
Notes: Use a scant 1/4″ seam. I used Luna Lounge fabric by Carol Van Zandt for Andover.
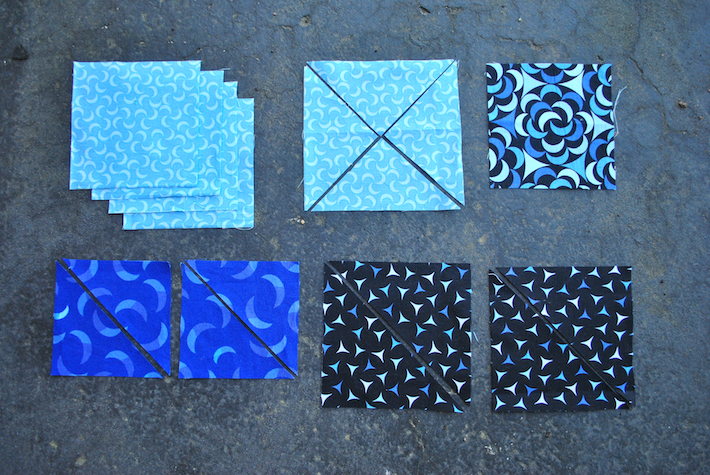
Fabric cutting
Aqua print (background):
- Cut 4 squares 4 1/2” x 4 1/2″ for corners
- Cut 1 square 5 1/4” x 5 1/4″, then cut diagonally twice to make 4 triangles
Black with blue moons (center):
- Cut 1 square 4 1/2” x 4 1/2″
Blue moon print (small triangles):
- Cut 2 squares 3 7/8” x 3 7/8″, then cut in half diagonally once to make 4 triangles
Black with white and blue triangles (large triangles):
- Cut 2 squares 4 7/8” x 4 7/8″, then cut in half diagonally once to make 4 triangles
Block assembly
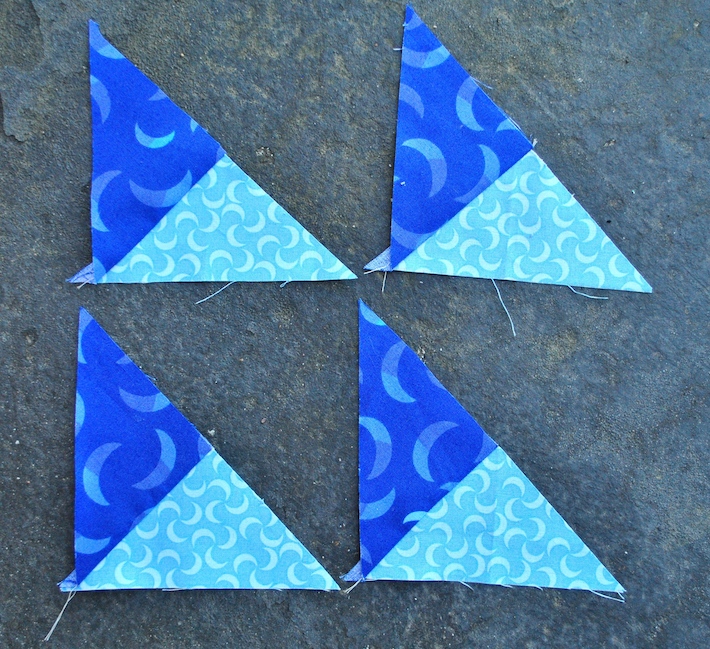
1. Piece the small quarter-square triangles as pictured. The background fabric (aqua) should face up like a roof on a house. Align the other small triangle (royal blue) on the left side, so the short sides of both triangles touch. Stitch together with right sides facing, then press the seam toward the darker fabric.
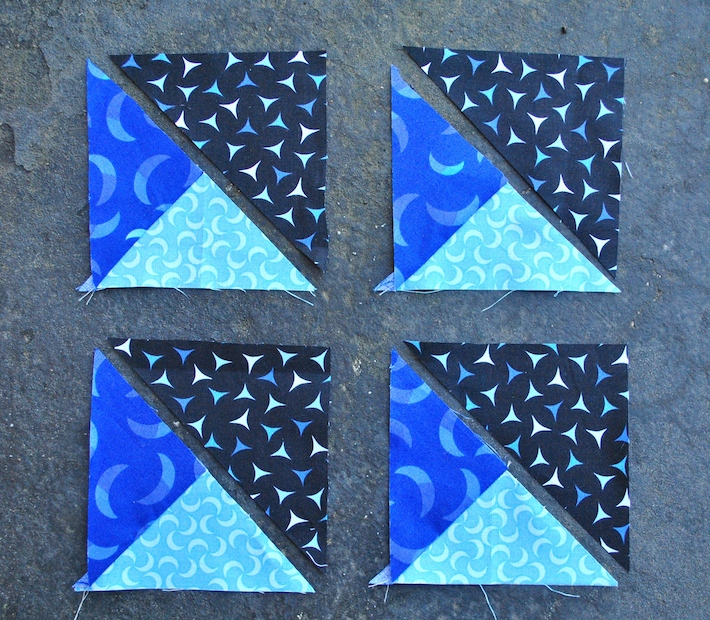
2. Pair each set you just made with a half-square triangle (black), so the long sides of each large triangle touch. Stitch with rights sides together, and press the seam toward the black.
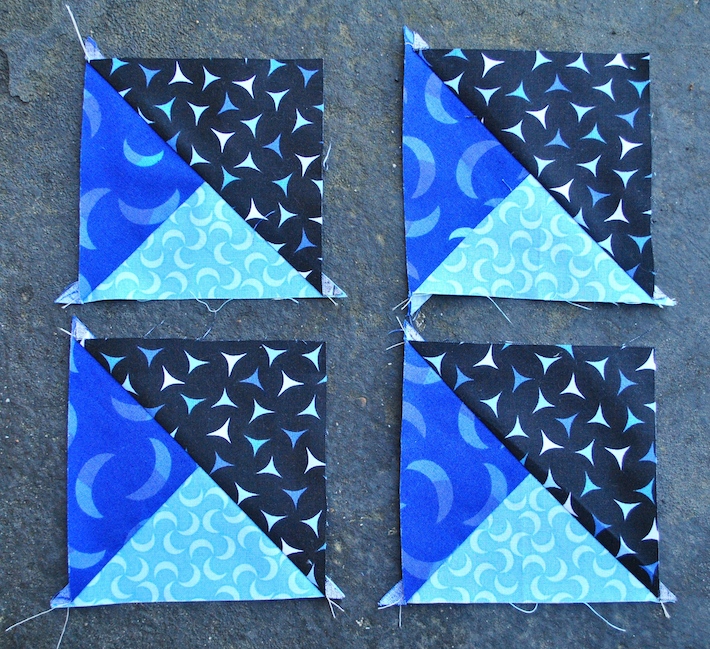
3. You’ve already finished the trickiest part of this block! Wasn’t that easy? Here are your four quarter-half-square triangle units.
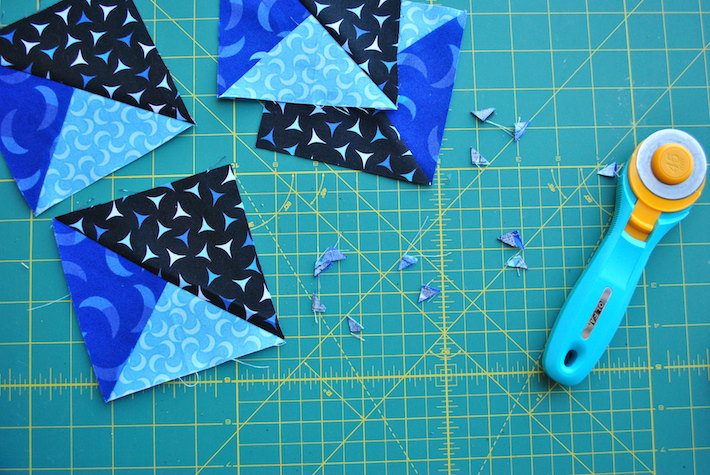
4. Go ahead and take this opportunity to trim off the dog ears from each unit. I like to use a rotary cutter for this, to make a few quick and easy cuts.
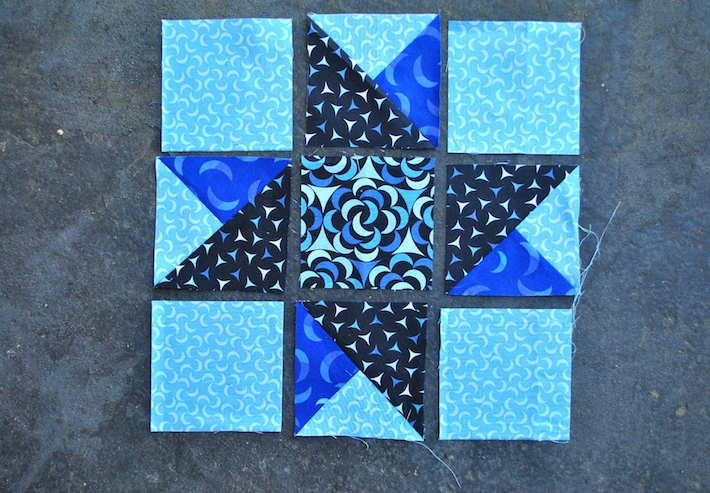
5. Align your units in three rows and two columns as pictured. The single 4 1/2″ square goes in the center, and the matching 4 1/2″ background squares (aqua) go in the corners. Make sure each of the pieced units has the background (aqua) triangle pointing out toward the border.
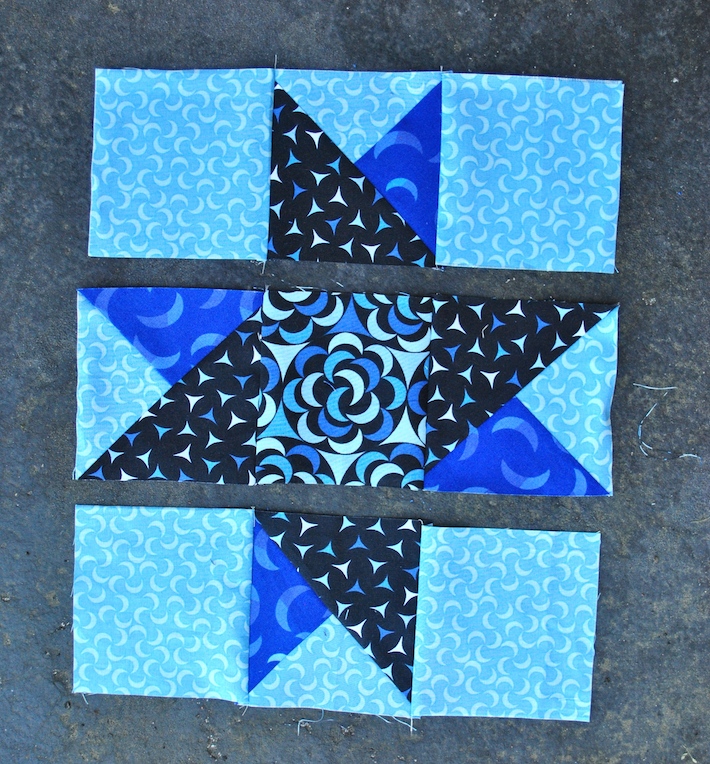
6. Sew together the three units in each row, and press the seams out toward the aqua fabric. Then, pin the rows together and stitch, making sure the seams align at each row. I like to press the final two seams open to eliminate excess bulk.
I hope you enjoyed this tutorial for a beginner-friendly spinning star block! For a more advanced version of the spinning star check out Craftsy’s online class Magical Blocks: Out of the Box.
It would be fun to have measurements for 9" or 6" blocks as well.