Machine tension is paramount to beautiful sewing, quilting and embroidery, but it is such a vicious beast at times. Good tension, nobody notices. Bad tension, nobody forgets.
Photos via Debbie Henry
Few things are more frustrating than sitting down to stitch and having a myriad of thread problems. Most of the time, the issue is really about tension. Even simple tasks can be easily sidelined when tension runs amok.
Here are 10 tips for taming the tension monster:
1. Bird nest? Check the thread path
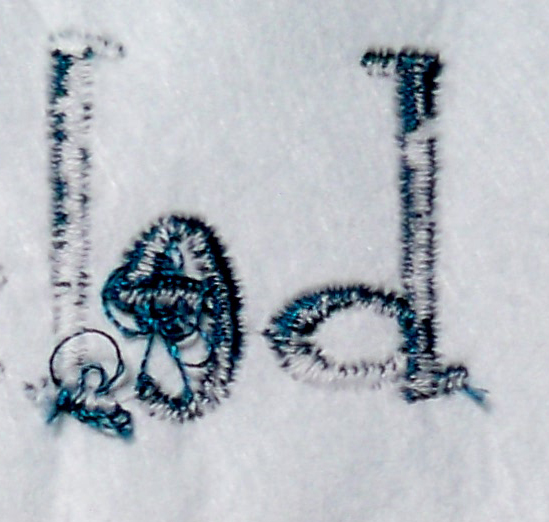
Sometimes the thread can slip off of the take-up arm, which leads to an ugly bird’s nest under the fabric. Thread nests can become so embedded that you end up ruining your fabric. It is just one more reason to never walk away from your machine while it is stitching.
When nesting occurs, re-thread the machine. If the problem continues, try another solution.
2. Check the needle
Needles can become dull or damaged and produce a burr that tears stabilizer, fabric and thread. Use the sharpest needle for the project and change needles often.
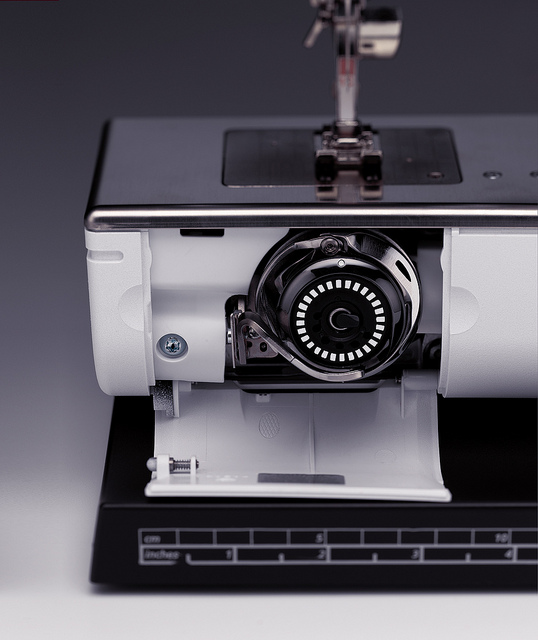
Photo via Bernina
3. Bobbin bunnies
Bobbins adjust bottom tension. If the bobbin is not threaded properly, it can create tension problems. Clean your bobbin area regularly as even the most minute fleck of lint can hang up bobbin thread in the case.
Most machines come with a brush for cleaning around the bobbin case. Use a vacuum instead of blowing dust with canned air, which only relocates it to wreak havoc in another area.
If you are brave enough to adjust the bobbin tension screw, buy a spare bobbin case and use a permanent marker to mark the original screw position. Make slight adjustments until you have the desired result.
4. Loops or speckles? Adjust upper tension
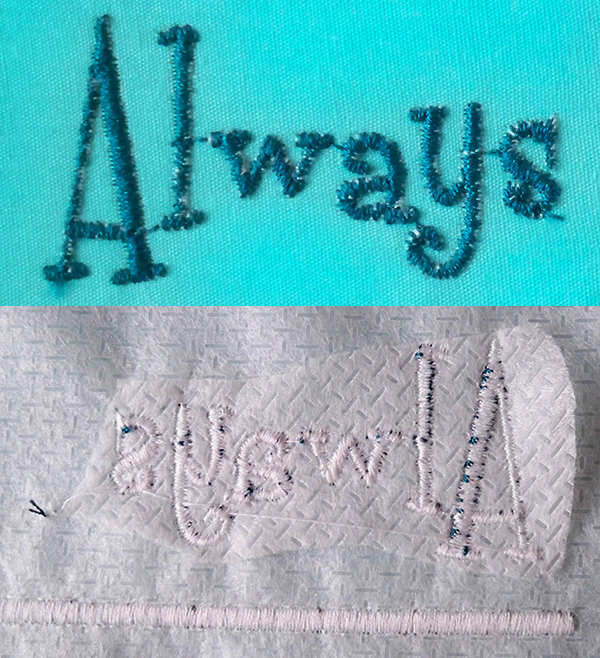
If thread is looping on top of the fabric, upper tension is too loose. If bobbin thread is showing on top, upper tension is too tight. Experiment with settings on a test stitch-out and record what works with certain designs and fabric weights. Ideally, tension on the back of embroidery should be one-third bobbin and two-thirds spool thread.
5. Thread weight
Most embroidery designs are digitized for 40-weight thread. Using heavier or lighter threads makes a difference how the design stitches out and you many have to adjust the tension accordingly.
You can use the same thread in the bobbin as that with which you are stitching but, for the most part, use bobbin thread. It is finer than standard embroidery thread and has less drag.
6. Location, location, location
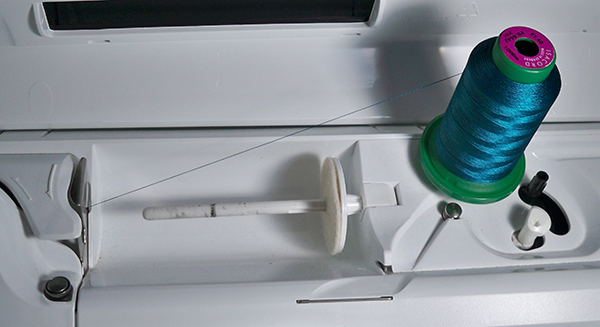
Where your thread is located is often as important as the type and weight of thread used. Some brands prefer to pull off of the spool in a clockwise fashion, while others may work better pulling counter-clockwise. Some threads work better on a vertical peg. Larger spools may need placed on a thread stand.
7. Consider the fabric type
The materials you sew on determine how tension reacts. Always test stitch your design on the same or similar fabric to evaluate the combination of thread, tension, and stabilizer. Even though many modern embroidery and sewing machines adjust tension automatically, they often need adjustment for optimal results.
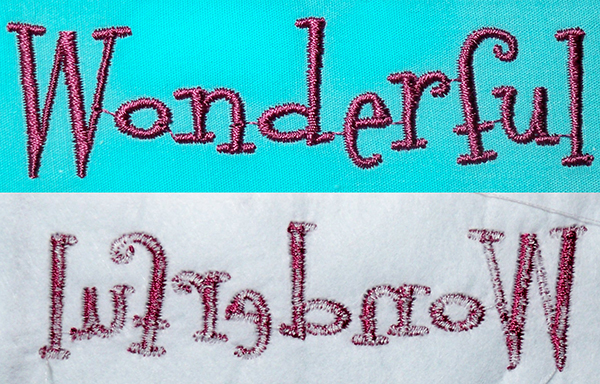
Designs are digitized to an average, typically a medium-weight woven fabric. Lighter weight fabrics stitched with designs that contain heavier fills or satin stitching may pucker even with heavy stabilizer and reduced tension.
8. Slow down!
Sometimes just slowing down the machine will help alleviate issues with tension.
9. Stabilize properly
Adhesive stabilizers and heavy cut-away stabilizers create more drag on the thread, which may affect tension. Use only stabilizers recommended for embroidery as they are manufactured specifically with that in mind.
10. Quilting? Loosen up!
If quilting or stitching on several layers of fabric and stabilizers, thread tension may need to be reduced to compensate for the layers
Sometimes, getting the right combination takes some experimentation but it is well worth the effort in the future.

Very helpful tips!! Thank you!