
If they’re not already, popover tops will soon become a staple in your wardrobe! A popover top is a twist on the traditional button-front shirt. Instead of having a sewn-on button band, the popover has a short placket at the center front. The best part? To make one at home, you can use an existing shirt pattern and design a new placket to create a shirt that you can pop over your head!
[Want to save this tutorial for later? Click here to download a free printable version of the post.]
Here’s how to make a popover top at home.
Step 1: Gather your tools

For this shirt adaptation, you will need a basic shirt pattern (like this one), with or without a collar, plus paper, pencils, a measuring tape and a long ruler (preferably a gridded ruler as shown), and all your go-to sewing tools.
Step 2: Adjust your shirt pattern front piece
Take a look at the shirt front pattern piece. If it does not have a sewn-on button band, look for the line marking the center front of the shirt. This is where the two shirt fronts will overlap when buttoned and worn. Fold back the pattern edge up to that center line, then place the pattern piece on the fold to cut out.
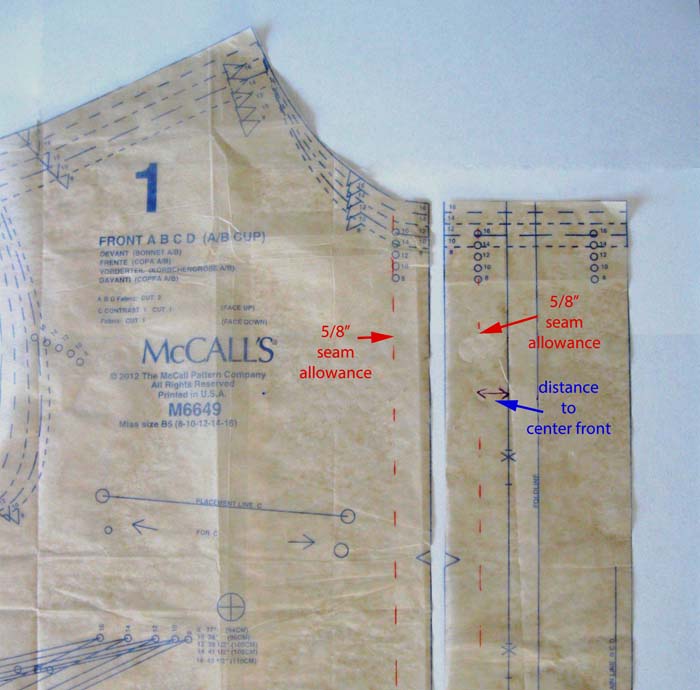
If your shirt does have a sewn-on button band, there are a few more steps. Take a look at the shirt front and the button band. The center front is marked on the button band. In this example it is 1/2″ from the stitch line, so we will create a 1″-wide placket and the collar stand will fit exactly on your popover shirt as it did on the original version. The adjustment on your shirt front is to fold away 1/8″ from the edge of the pattern piece, and then cut the shirt front on the fold of the fabric. It is really important to cut the shirt front on the fold for a popover version.
Step 3: Make your placket pattern
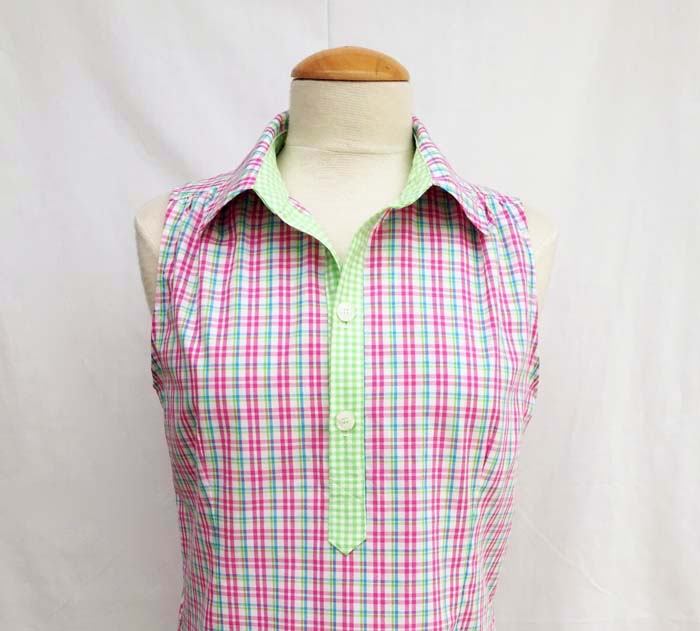
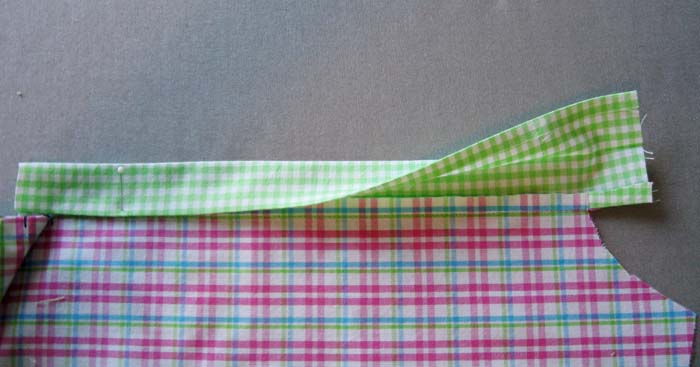
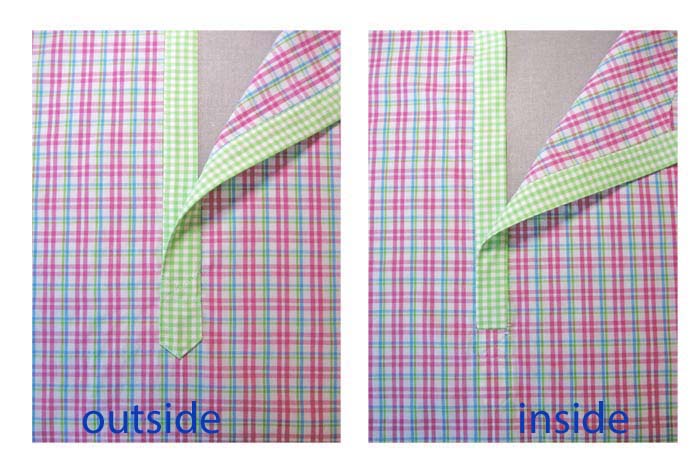
Decide how long you want your placket to be. In the example shown at the top of the post, the placket is 12″ from the collar stand to the bottom point. Don’t be tempted to make it too short — you need to get the shirt over your head! To test different length options, button up an existing shirt, pull it on over your head and measure to see where that lowest button should be.
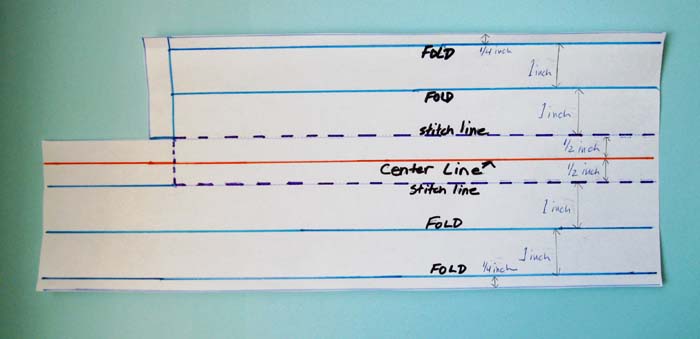
For a 1″-wide placket, start with a piece of legal-size paper folded in half lengthwise. Then mark the center line on that fold.
From there, mark a line 1/2″ away from the center line on either side. Connect the two lines at the bottom. This will be the stitch line.
Add 2 1/4″ outside each side of the stitch line — this makes the pattern piece. You don’t need to mark or draw the fold lines; however, they are noted here so you can see how the pattern piece comes together. Continue these lines at least 4″ past the bottom of the stitch — if the bottom tab is too long, you can always cut it shorter. Here, the bottom of the placket side that will be hidden is trimmed away — you can do that now or leave it to trim after sewing.
Step 4: Prepare your shirt front
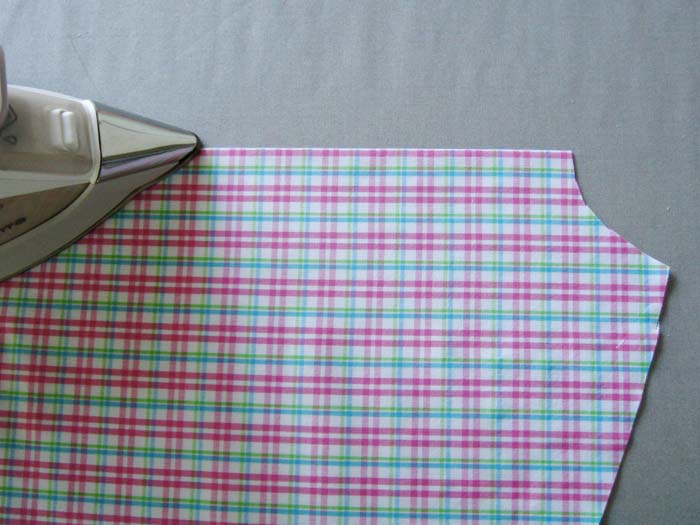
Cut out the shirt front on the fold and then press the center front to create a sharp crease. You’ll use this crease to place the placket piece on the shirt front.
Step 5: Prepare the placket piece
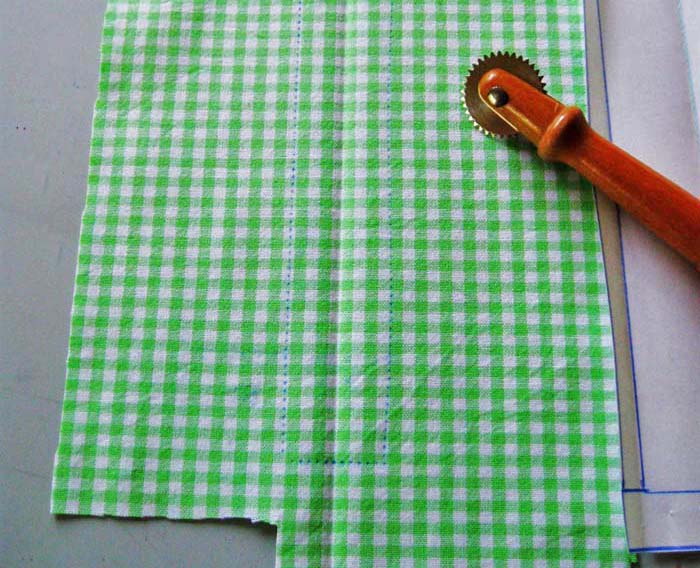
Press your placket in half lengthwise to create a crease at the center (just like in the previous step). Marking the stitching line on the placket is really helpful for accurate sewing. Here I have used a tracing wheel and dressmakers’ carbon to mark the line. Alternatively, you can mark with chalk or a light pencil, measuring from that center line crease. Be sure to mark on the wrong side of your fabric.
Step 6: Pin and stitch the placket

Pin the placket onto the shirt front with right sides together, carefully matching the center crease lines and the bottom point where you want the button band to end.
For this placket, which will be about 12″ long, there is some excess at the top. Don’t cut that off — just leave it for now, since it will accommodate the curve of the neckline and will be trimmed off later. Stitch the placket piece to the shirt front on the marked stitch line.
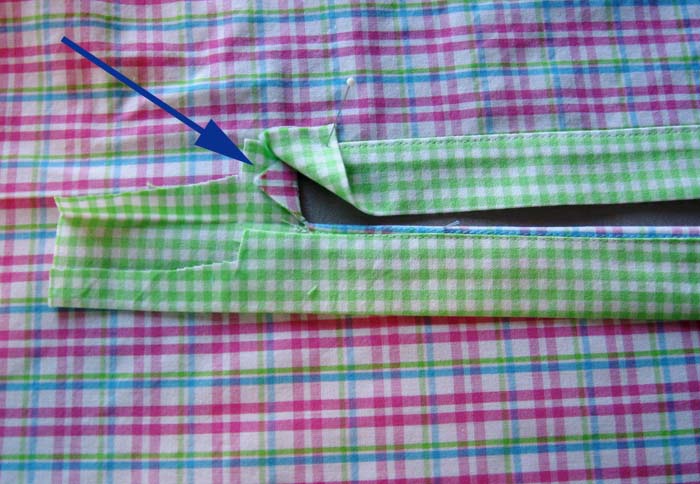
Step 7: Cut the placket down the center line
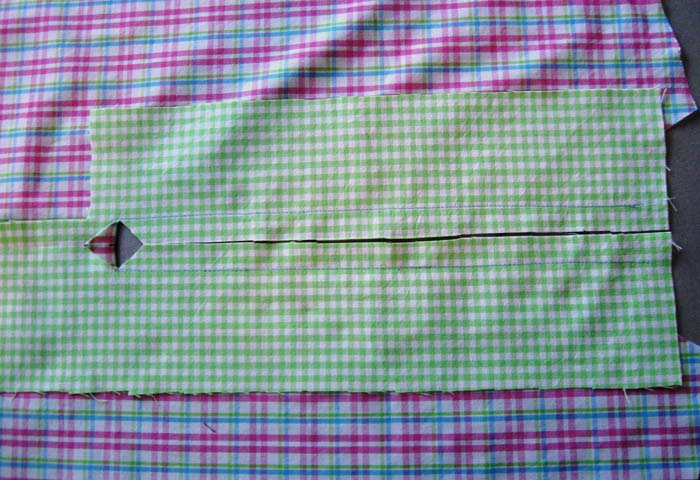
Cut down the center of the placket, stopping about 5/8″ from the bottom. Snip diagonally into the corners, just up to but not through the stitching, creating the small triangle. Press this down as shown, on the outside of the garment. When the placket is completed, this triangle will be enclosed by the placket and give you a clean finish on the inside.
Step 8: Create the placket by folding and pressing
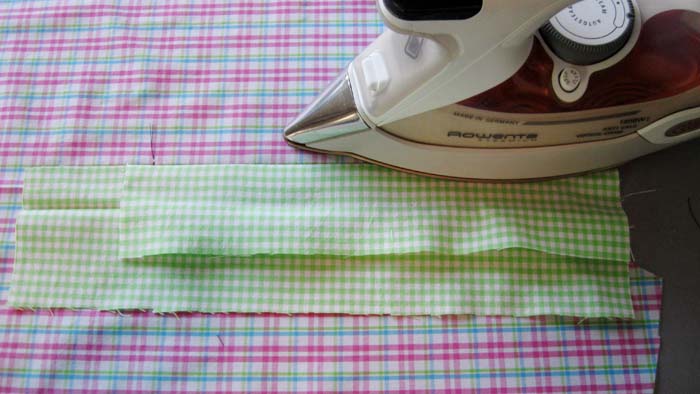
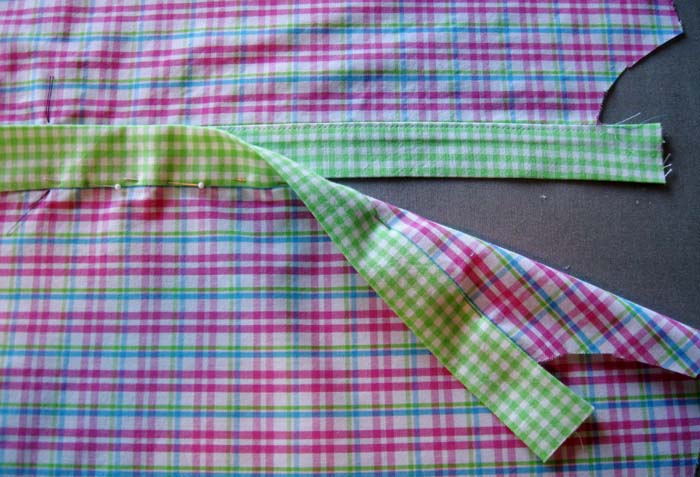
Start with the side that will house the buttons — let’s call this the lower placket side. Press the fabric along the stitching line toward the center of the garment as shown.
Tuck the rest of the garment front away so you have a clear view of this lower placket side. Fold again and press, making sure you have an even 1″ band all the way down this side. You can see the remaining 1/4 inch at the neckline edge.
Flip the garment over and tuck this 1/4″ under to create a clean finish on the inside.
Step 9: Stitch the lower placket side
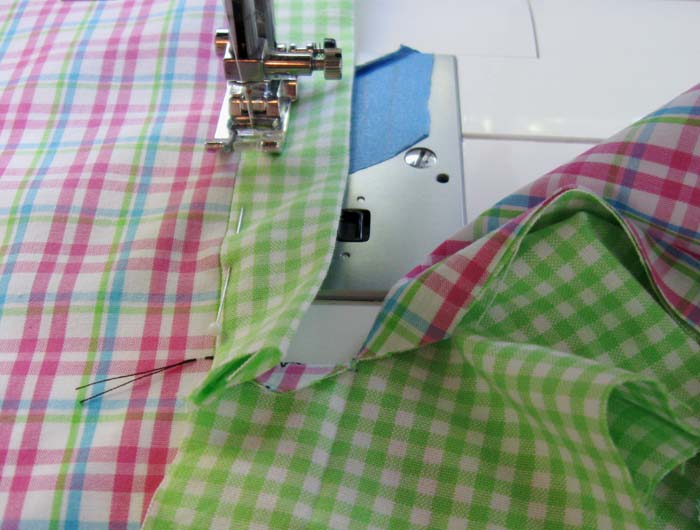
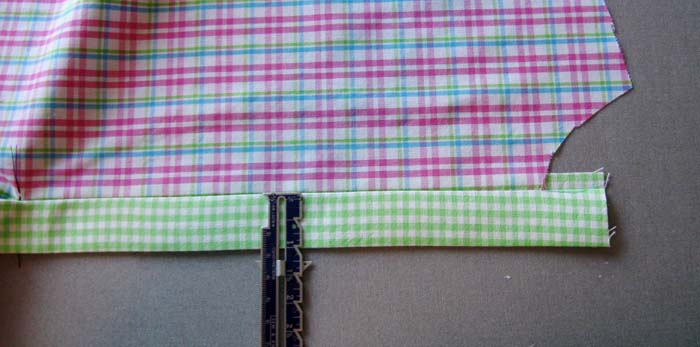
Stitch this lower placket side to enclose the edge. Stop just at the end where you clipped the triangle. This will leave some folded fabric at the bottom, but it will be enclosed along with the triangle when the placket is finished.
Step 10: Fold, press and sew the upper placket side
Follow the same process to create the upper part of the placket, which will have the buttonholes. Fold, press and stitch this side, stopping your stitching at the bottom of the placket just to the diagonal clip -(same as on the lower placket side).
When folding and pressing the upper placket, take care that it overlaps nicely on the lower placket, particularly at the bottom where they will be stitched together. If you need to adjust the fold a few millimeters, that is perfectly fine.
If you know where you want to place the buttonholes, it can be easier to sew them now before the bottom of the placket is sewn shut. With some machines, the design of the buttonhole attachment might make it tricky to get the fabric under the buttonhole foot or attachment.
Step 11: Press and stitch bottom of placket
Now that both plackets are sewn and edges are enclosed, there is just one more step: sewing the bottom section. Making sure the triangle is pressed toward the placket as shown, fold the two placket sides toward the center and pin.

Pin the bottom of the upper placket and stitch to enclose, catching all layers of both placket sides. Here it is folded into a point, but it could be square if you prefer. Place a pin across the placket as shown, catching the edge of the triangle — this will enclose the edge on the inside and result in a clean finish.
That’s it! Your placket is complete and now you can continue sewing your popover top. Trim the excess at the neckline to match the original pattern design, and continue sewing the collar as usual.
very well explained , thank you