
Learning all of the ins and outs of photography is a long process, but there are many ways to go about it. While a traditional brick-and-mortar school can be beneficial for some photographers, it’s not practical for everyone. Luckily, there are plenty of other options online. I decided to do a small correspondence course in professional photography as well as one for Adobe Photoshop.
The best part? Online photography classes typically cover the same content as traditional schools at a fraction of the cost and on your own timeframe, which makes them a fantastic way to learn new skills.
If you’re just getting started with photography, you’ve come to the right place! Here, I’ll share some of the best photography tips for beginners I’ve learned.
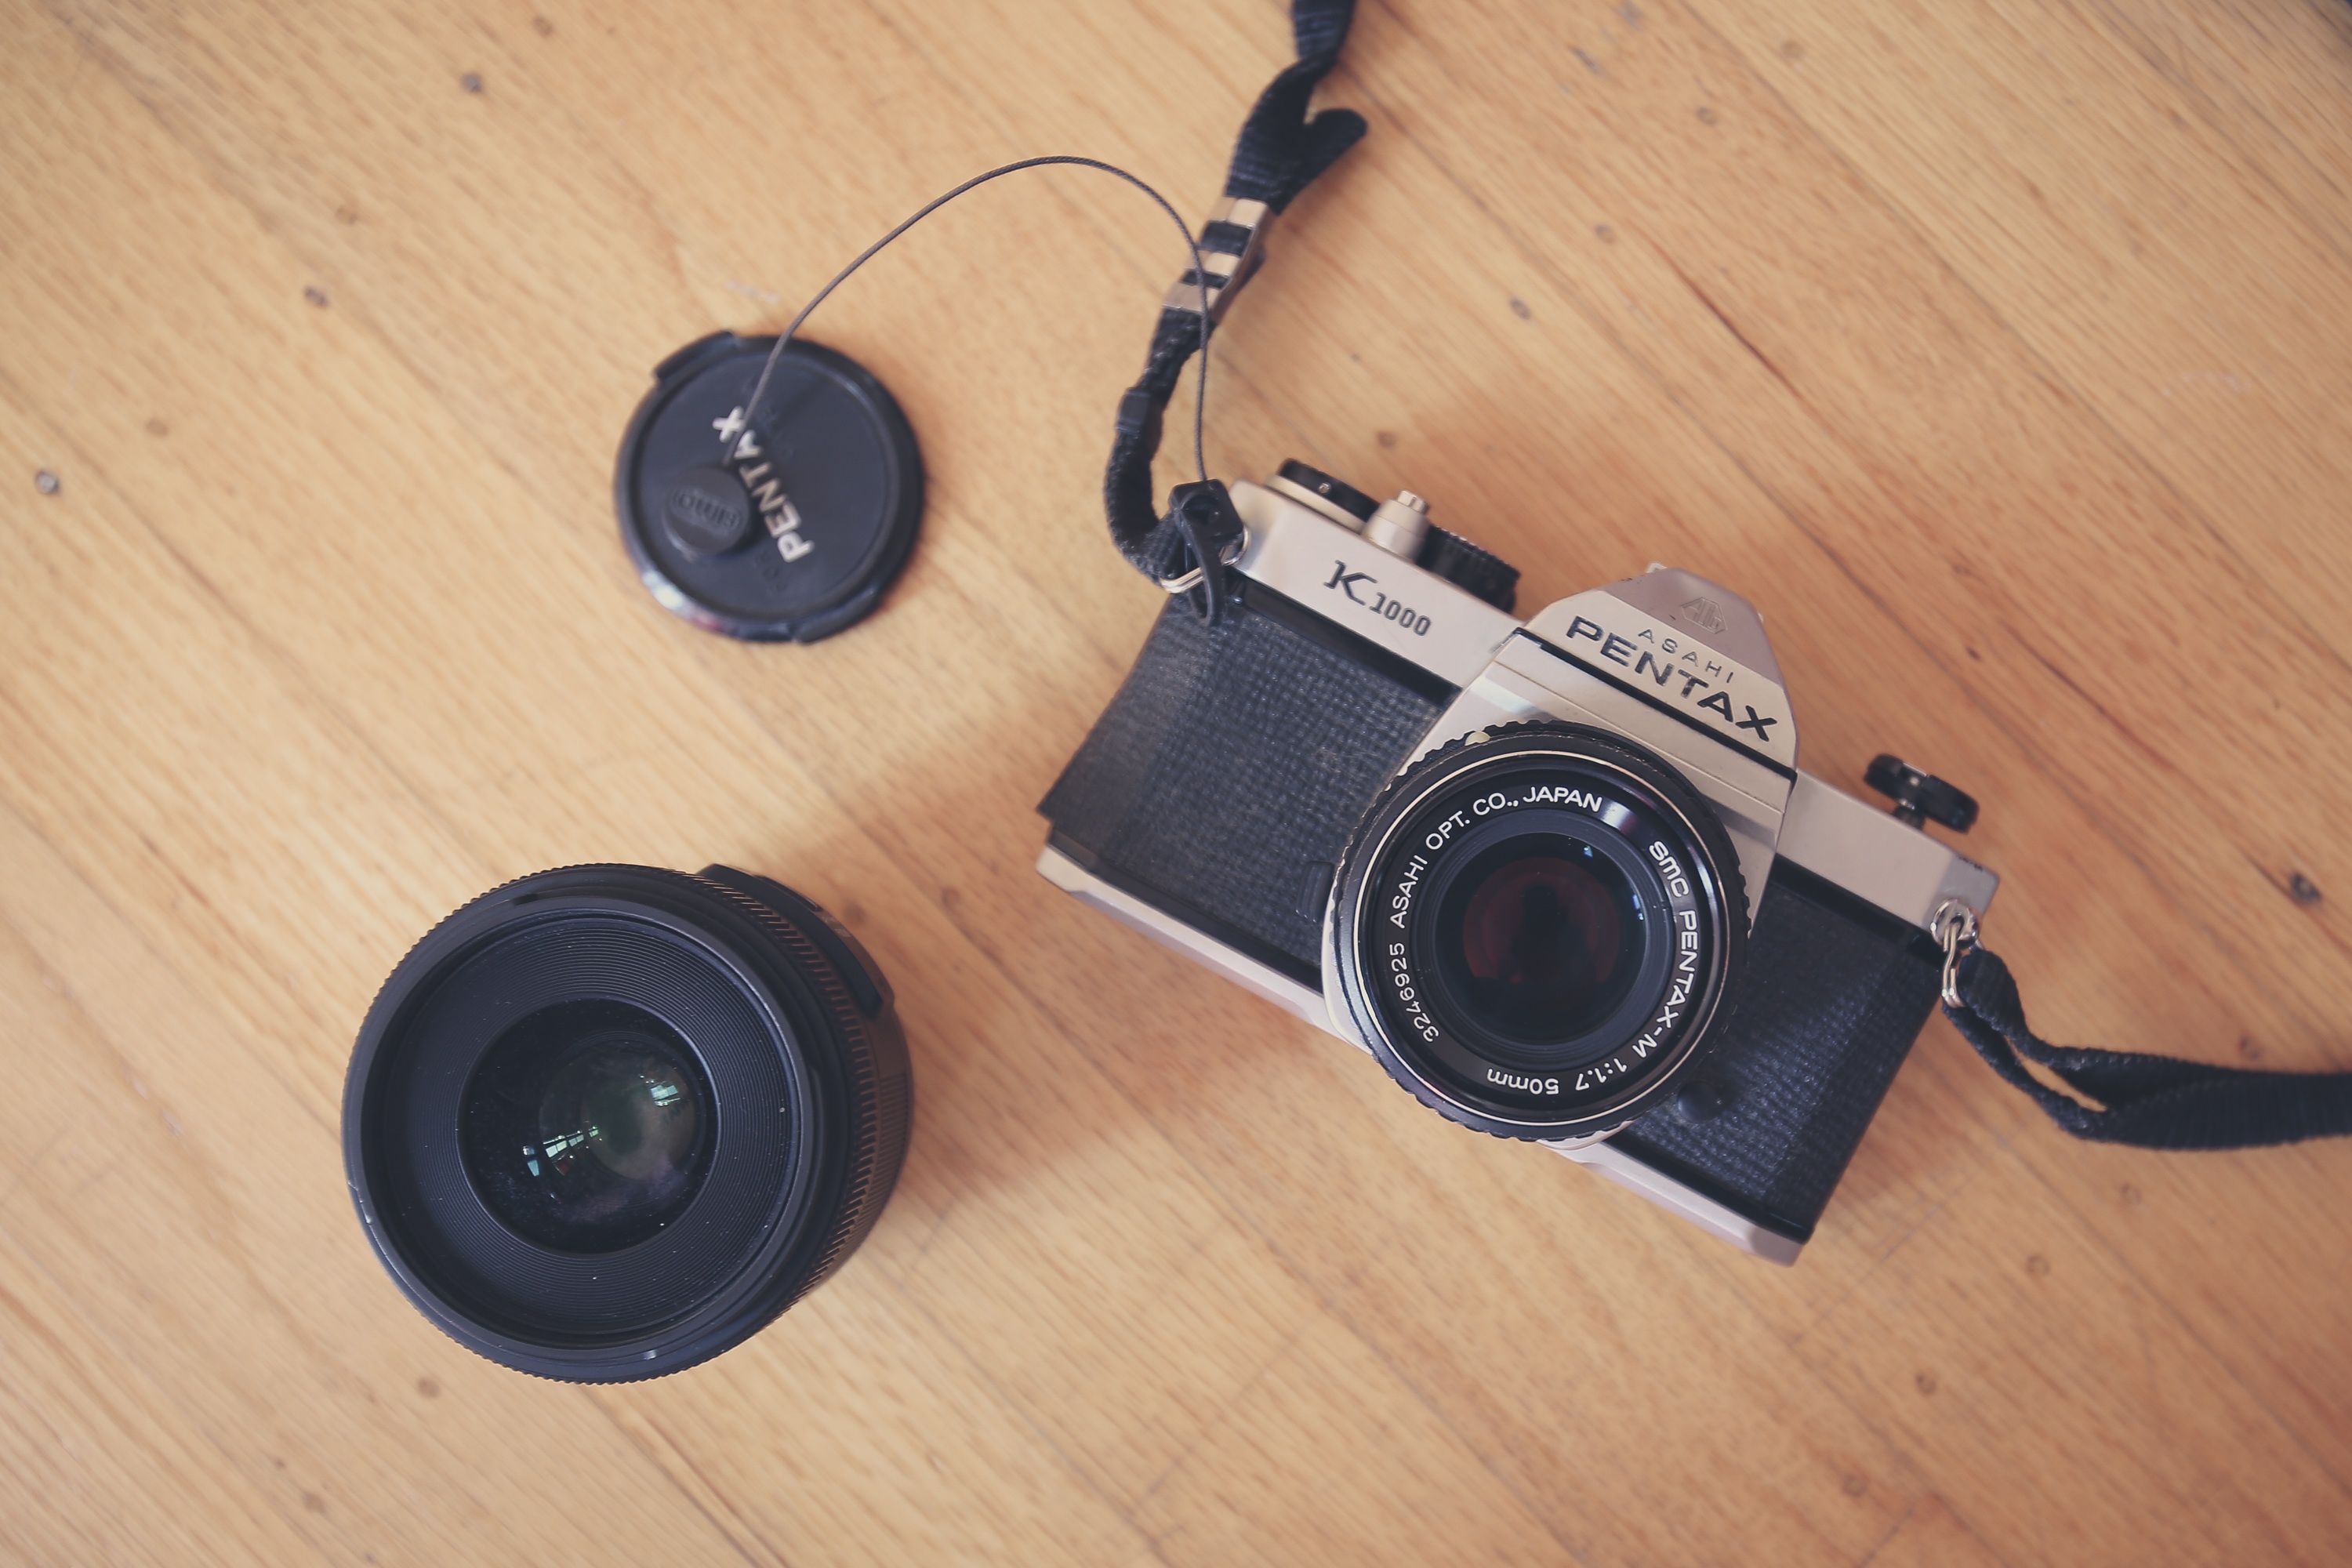
Tip #1: Know your equipment
Get to know your camera inside and out. Take the time to learn what each setting is and how it functions. Craftsy’s Basics of Digital Photography video class is a good starting point to help you learn everything you need to know about photography. No matter how well you know your camera, don’t expect to be an expert in 20 minutes. Be patient with yourself and take the time to practice with different settings on your camera. Eventually, you will be the person your friends and family go to when they need help with their own cameras!
Tip #2: Develop your eye
Knowing what to shoot that can be the most difficult part of photography. Before you take a picture, take a moment to really “see” what you are trying to capture. I usually take a few shots, look at them and then decide what I really want to reflect in my image. If you have to (or if you can), stand on a ladder, squat close to the ground or change your perspective to find the scene you want.
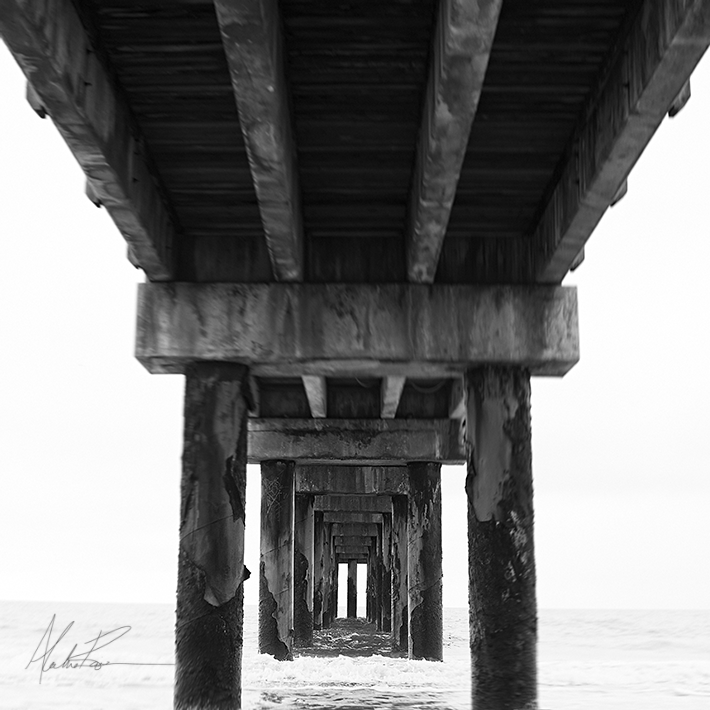
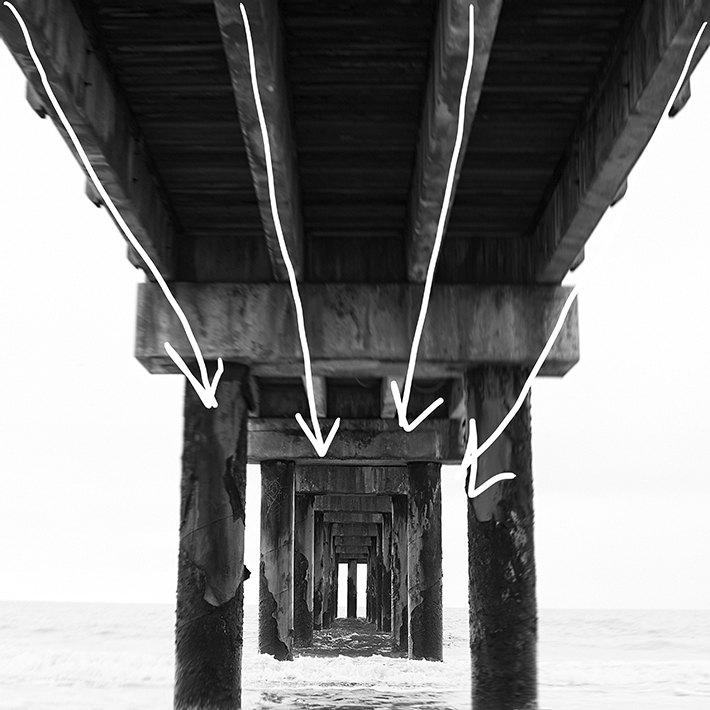
Let’s use a day at the beach as an example. We have all seen the typical photos of a beach with the expected seagulls and sand. Instead of producing an overdone image, try to find something that catches your eye. Below is an image I took of the pier at St. Augustine beach here in Florida. Piers are a dime a dozen, so I wondered how could I capture the same object in a way that meant something to me. I squatted down and focused on the end of the pier. to create leading lines that ended in what looked almost like a window.
Tip #3: Learn the light
Photography revolves around light. You cannot have an image without it. There are many ways you can work with light, whether it is natural light, flash or studio lighting. Learning the basics of all these types of lighting will change the way you take photographs. You will find yourself seeking out that perfect time of day or noticing how nicely lit your menu is at your local restaurant!
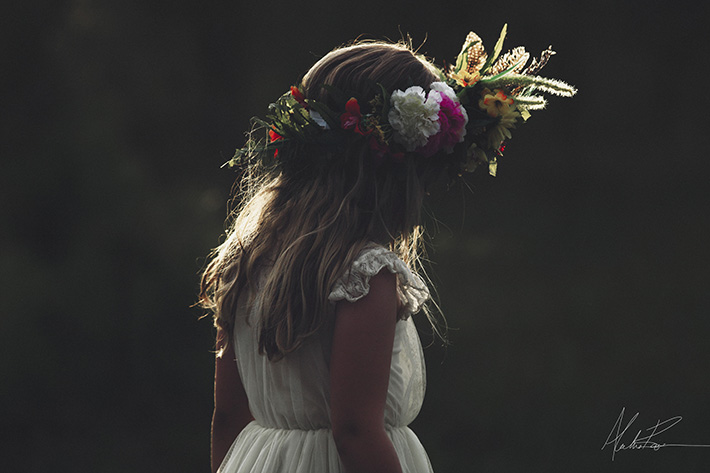
In this black-and-white photo of my daughter, I used side lighting. It was late in the day and the sun was directly in front of us. I liked the shadows the light created, and to keep her from having to look into the harsh light, I had her turn her back and only slightly turn towards me so the light.

This was taken on the same day, after the sun had dipped lower in the horizon. I liked the rim of light created by the sun so much, I left it to be an underexposed shot.
Tip #4: Understand camera angles
In one of my photography lessons, I had to submit weekly photos for grading, and it was a nail-biting experience to listen to my instructor’s reviews. One of the most common remarks was about my tilted photos. My instructor said that tilted images were akin to falling off the Titanic. Perhaps not the best feedback, but it has stayed with me in my photographic career. Since I no longer take many off-kilter shots, I made one for an example:
Tilted

Level

Another tip: Don’t shoot from too far below the subject (think: nose hairs), from too far above (think: forehead wrinkles from looking up), or from too far to the side (you’ll get too much white in a person’s eye).
Tip #5: Avoid fad editing techniques
Beware of fads. Selective coloring, sepia coloring, over vignetting and the glamour glow are just a few of the fads that should be taken into account. The purpose of the photo is to capture a moment, a feeling or to record special events. For day-to-day photos the fads you choose to use won’t matter —the images are just for you, and you might want to remember when it was cool to color only the blue parts of the photo.
However, pay attention to how the photos are portrayed. Just scrolling through the photography projects here on Craftsy, you notice the photos are not depicting any sort of fad. They are capturing moments how they happened and aren’t full of current trends.
Tip #6: Try different types of photography
If you only shoot landscapes, how would you ever know if you had a knack for newborn photography? Explore different types of photography. Each one has its own unique set of rules and techniques, which will help you expand your skill set. You never know — you may find yourself going from a wedding photographer to a street scene photographer.
Tip #7: Utilize leading lines, depth of field and the rule of thirds
Rules of composition are rules for a reason! They can make your photos easier on the eye and more compelling to the viewer. While we could talk about each of these topics for a long while, here are just a few basic tips to get you started.
Leading lines
In the image below, you can see how the leading lines direct the viewer’s eye. The more you practice looking for leading lines, the more easily you’ll find them in your everyday surroundings.
Depth of field
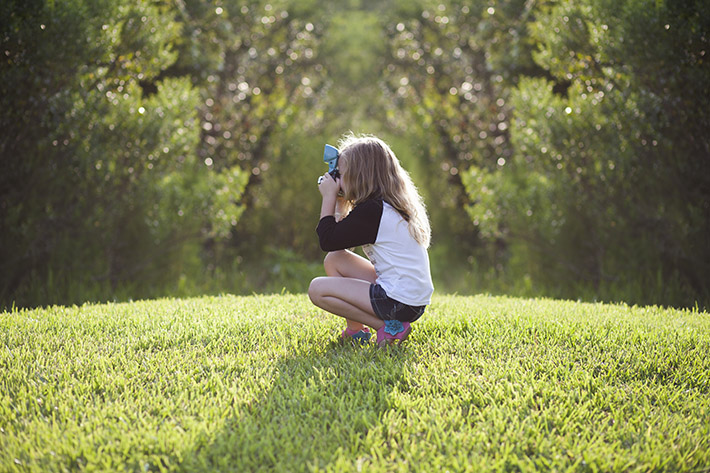
In this photo, I made sure my daughter was pulled away from the woods as much as possible to achieve a greater depth of field. It’s basically how deep the field of view is in your image. The image below has a shallow DOF; if more of the scene were in focus, then the depth of field would be greater.
Rule of thirds
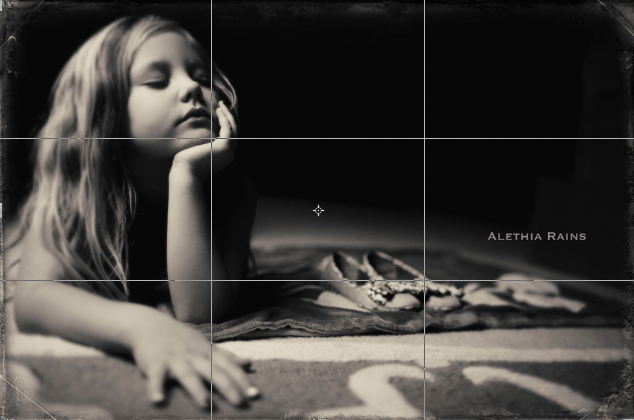
The rule of thirds uses a 9-part grid to help determine where to place your subject. I like to break rules, so the majority of my images have a center or off-side composition. Still, the rule of thirds is a great rule to follow. You generally want your subject to fall within one of the points on the diagram. Here, the subject’s chin falls at the upper left point.
Tip #8: Have patience
Patience is a virtue. It really is. Don’t give up because you are not getting the shots you want in the first week or even month you start photography. Keep it up — practice will make perfect. Always be up for learning new things, and don’t be afraid to step out of the box.
Tip #9: Give film photography a shot
The “film look” has taken off in recent years as a sort of retro type of photography — getting back to our roots, so to speak. If you haven’t thought about it, it might be fun to give it a try. You can usually get film cameras pretty cheap at your local thrift or camera stores if you look hard enough, and the film can be found online. A quick Google search will land you plenty of places to have the film developed.
Tip #10: You can make money in photography
Many photographers open a business and work in family photography, weddings and such. But are there other avenues for work? Yes! Product photography, real estate, aerial surveys, sports and events, stock images, forensic imaging and medical photography are just a few. Keep looking for opportunities and there will be a fun-filled career at your fingertips.
Thanks. Great information!