
Shutter speed, aperture, and ISO are things every photographer learns about or at least should familiarize themselves with when starting out in the photographic learning process. These are all relatively easy to find information on, starting with the good old camera manual.
Here I’m going talk about effects and techniques you won’t find in the manual, and may not easily find while searching online either. All of them will help improve your photography and make your images stand out from the crowd.
Get creative with depth of field
More often than not, landscape photographers strive to capture the most depth of field possible in a scene. We want everything from the immediate foreground to the distant background to be in apparent sharp focus.
A good example can be found in this photo below captured over Lonesome Lake in New Hampshire’s White Mountains. Everything from the drifting patterns in the foreground snow to the distant mountains appears to be in focus. This is easily done by using a wide angle lens set to a small aperture and focusing using either the calculated hyper-focal distance, or my preferred method of focusing approximately 1/3 into the scene.
 For this next photo I wanted to do something a bit different and accentuate the bright white flower on the hobblebush in the foreground. The waterfall in the background is still an important part of the photo, but it doesn’t dominate the flower like it would had I used a greater depth of field.
By setting my camera very close, the front of the lens was about 4 inches from the flower, and using a mid aperture of f/8, I was able to get the flower sharp while rendering the background and the waterfall slightly but not completely out of focus. This set the scene for the flower keeping its composition unlike if I had chosen to compose the photo with a greater depth of field.

Use long exposures
 Whether you’re photographing vehicle lights at night or the surf along the seacoast, the long exposures will enable you to capture the scene in a way that only your camera can see. No matter how hard you try, your eyes will see the tail lights of passing cars as nothing but red dots as they come and go through the scene.
Your camera, on the other hand, is capturing the smooth transition as the lights enter and pass through the scene, leaving you with an image like the one above showing the tail lights of the traffic passing through Market Square as red streaks, and not the single pinpoints of light they would be if a faster shutter speed were used.
 Long exposures are also an effective way to photograph moving water. By using a long exposure while having your camera mounted on a sturdy tripod you’ll be able to capture the silky smooth flow of the water yet have objects such as the plant in the above photo rendered in sharp focus. Not something you can do while hand holding the camera.
I’ve found long exposures are best attempted in low light situations such as at night or on overcast days. Otherwise it will be very difficult to get the light trails or silky smooth water without overexposing the photograph. There are exceptions to this rule, of course. Using neutral density filters, such as the Lee Big Stopper, which reduces the light reaching the cameras sensor by 10-stops, enables you to use much longer exposure times during much brighter lighting conditions than you could without the use of filters.
Be there in the blue hour
 Far too often when people set out to photograph sunrise or sunset they will arrive just before sunrise and leave as soon as it sets. Big mistake! During the blue hour, the time before sunrise and after sunset, the light has a deep blue quality to it that makes some of the most spectacular photos. The photo above of the lake I live on may look like it was taken at sunrise, when in fact sunrise was still approximately 15 minutes away.
Other than the chance of capturing a killer sky, another benefit of photographing during the blue hours is that it’s easier to get a good exposure compared to when it’s fully dark. The contrast between the brightest light and the darkest darks is much less when there is still some residual light in the sky. As you can see in the clouds over Nubble Light, there’s still a bit of color after the sun has gone down too.

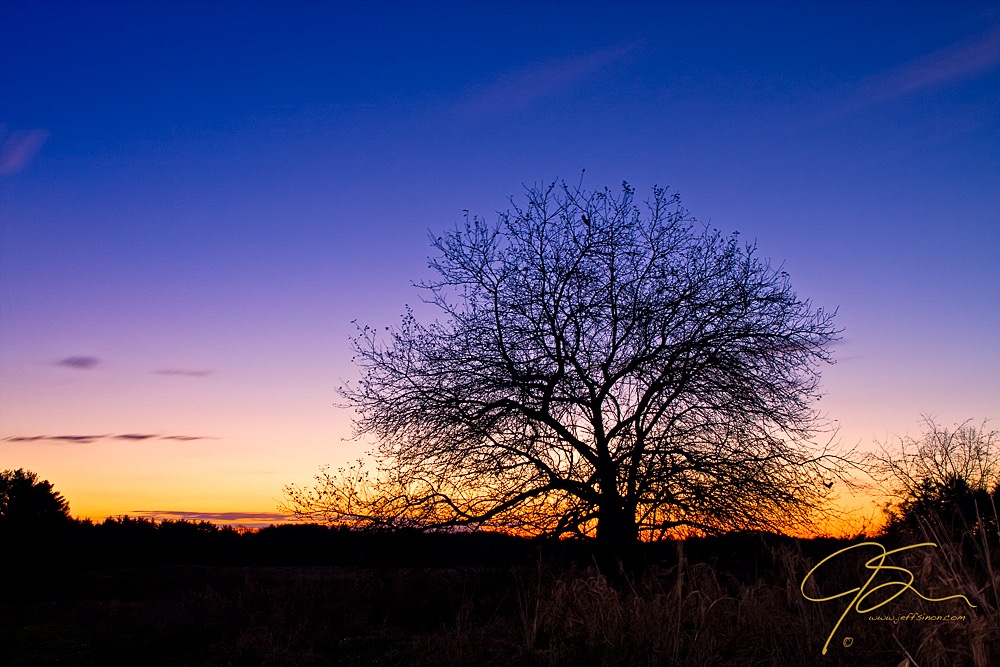
Use silhouettes
 This one goes hand in hand with photographing during the blue hour. I like to be where I want to photograph at least 30-45 minutes before sunrise. I do this so I can work out compositions before the show really starts. There’s nothing worse than running around trying to get set up and trying to find a decent composition as the light is starting to get good. By showing up as early as I do, I’m also able to photograph the landscape in silhouette.
True, you sacrifice detail when photographing in silhouette. However you more than make up for it by focusing on the shape and line of your subject. Photographing the landscape in silhouette is relatively easy: simply meter and set exposure off of the sky and let everything else fall to black.
There are many tips and techniques out there that can aid in improving your photos, these are just four of them. Go out and try a few and see if your photos don’t come out just a little bit better as the result of trying something you may not have tried before.
What are some of your favorite photography effects? Let us know in the comments!
Share tips, start a discussion or ask one of our experts or other students a question.
No Responses to “4 Effects Every Photographer Should Know”