
You may be familiar with bead weaving – either you’ve given it a go yourself, or you’ve seen other people’s work. Bead-woven work can be to be terribly daunting; it appears intricate and complex, and it certainly can be time-consuming! However, please don’t let first impressions put you off having a go. Yes, bead weaving takes time and patience, but it is very much worth the effort!
A good place to start is with peyote stitch beadwork. Peyote stitch, also known as gourd stitch, has been around for centuries. The stitch is common in historic and contemporary Native American art, and examples have been found as far back as Ancient Egypt. People have been using this stitch to create decorative and functional art for as long as there have been beads and threading materials! It is a nice, straightforward stitch to get you started on your bead-weaving journey and it makes up quicker than some other stitches do.
There are many variations – even-count, odd-count, circular, tubular, and 1-, 2- and 3-drop variations of each of these. We are going to start with even-count 1-drop peyote. I will show you how to get started with this stitch, and how you could make a flat strip of peyote-stitch beadwork. Peyote stitch looks just like a brick wall made from beads.
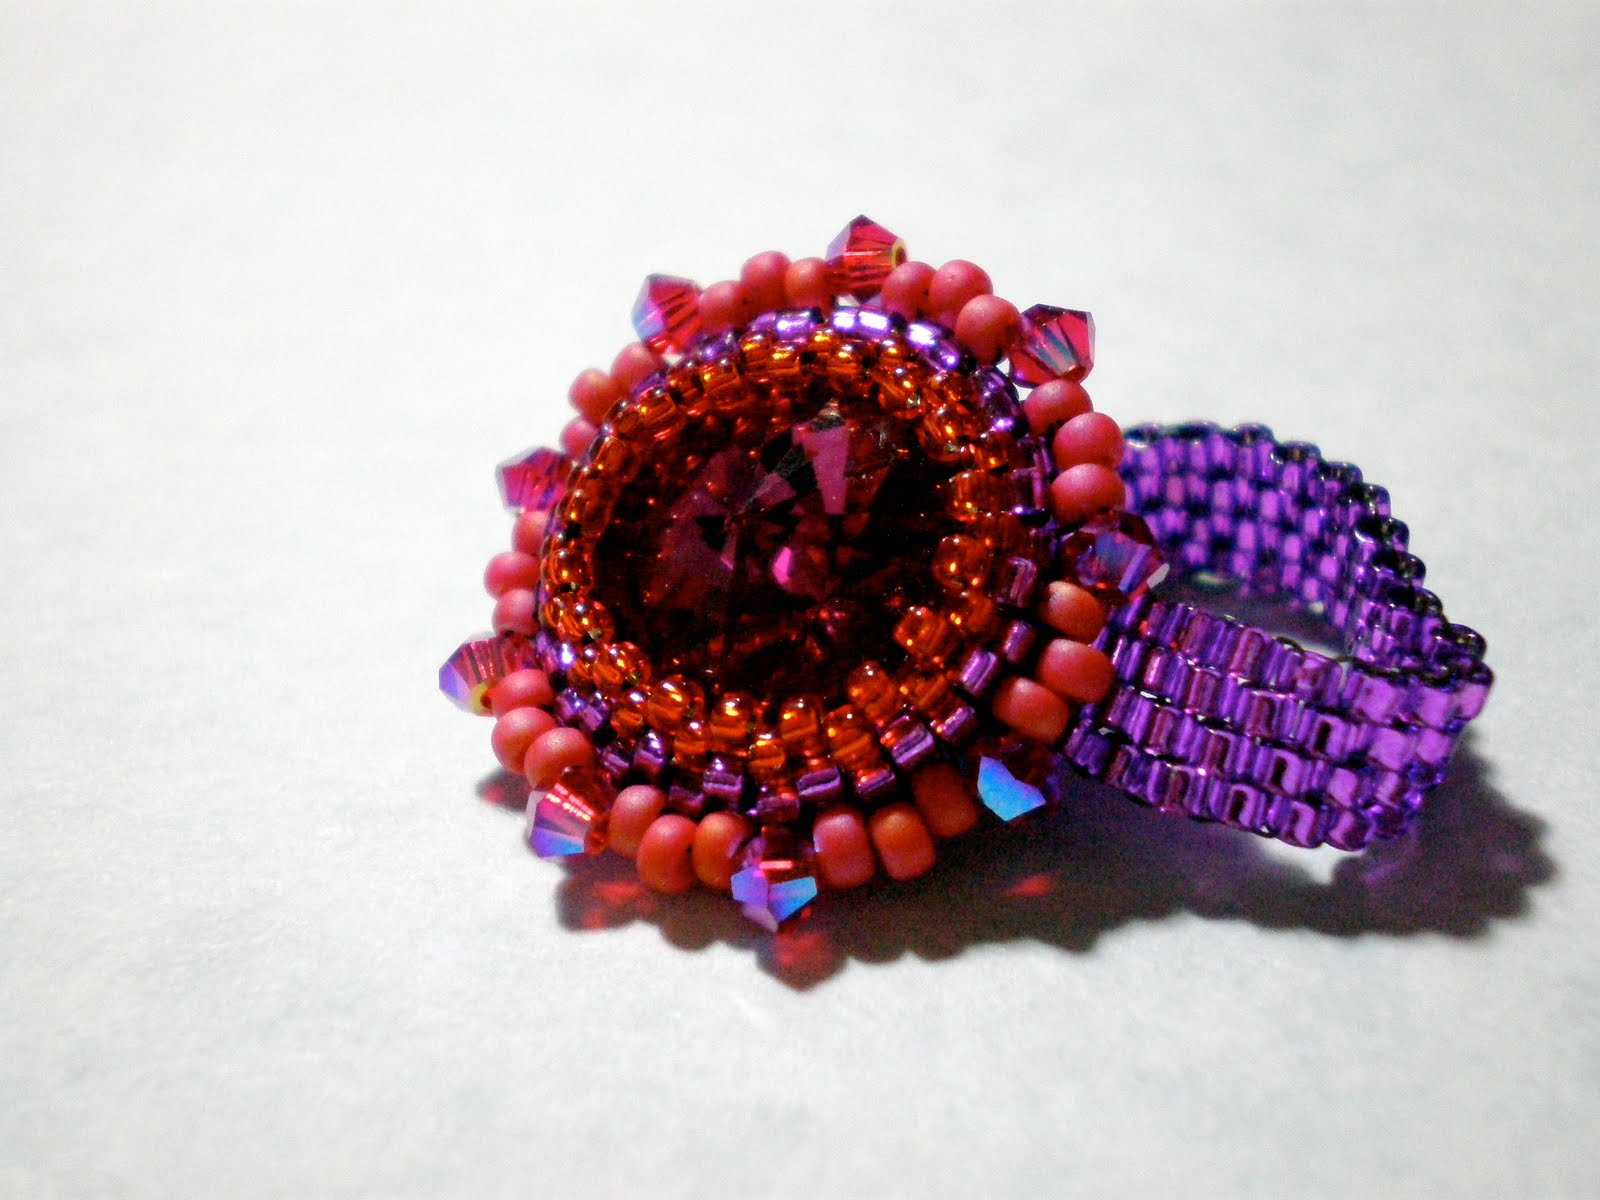
Example of a peyote stitch ring – peyote stitch in the round, increasing and decreasing, even-count peyote band.
First of all, you need to gather your materials.
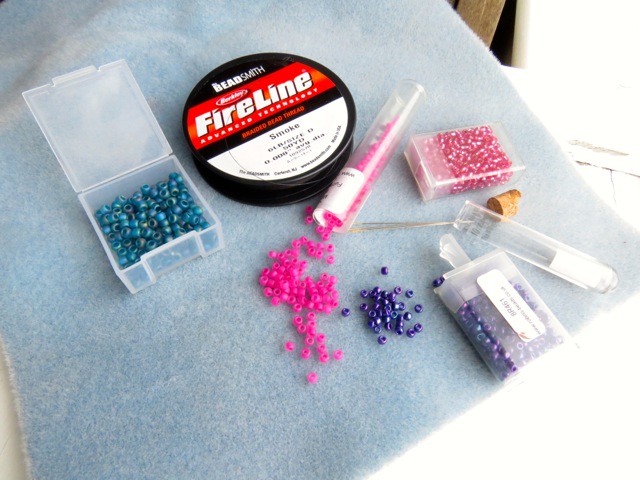
Beads first!
Seed beads are available in many different sizes and colors, and for a stitch like peyote, you want beads that are fairly even in shape and size. Miyuki and Toho are probably the most well-known brands and they are both high-quality choices for stitching with. (They are slightly different in shape and size to each other however, so I don’t recommend mixing brands for bead-weaving projects.) Size 11 seed beads are perhaps considered the ‘standard’ seed beads, but I would recommend beginning your bead weaving with much larger beads, so that you can really see what you’re doing. They will also work up quicker, too, which is always heartening! The instruction photos I am sharing today are of size 6 seed beads, which are approx. 3.5mm. That’s still pretty small, I know, but trust me – once you get going with bead weaving, they will seem huge!
Needles
Needles, like seed beads, decrease in size as they increase numerically. I would recommend starting with size 10 beading needles. It is very important to use beading needles rather than simply standard sewing needles. They are longer, more flexible and have a very slim eye – important when you are passing them through tiny glass structures. My needle size of choice for working with beads as small as 1mm is a size 12, but start with a 10 – just a little thicker and sturdier, and easier for beginners’ fingers to manage.
Thread
Thread choice is important, and very personal. There are many different brands on the market, and I know that my favorites are particular to me, and the type of bead weaving I do. Nymo, C-Lon, Miyuki beading thread amongst others – they are all popular choices and all have their merits. However, for bead weaving that you want to last, I personally recommend selecting Fireline.
Fireline is a thermally-bonded, braided thread, originally from the fishing industry. You can even purchase it from fishing shops where you can get very big spools, if like me, you go through a lot of it! Why is it so good? Well, it is super strong, has no stretch at all, and is also very thin. It comes in 2 colors – black and white – and is available in different lb levels (from its original fishing line use). 4, 6 and 8 lb can all be used for bead-weaving. It’s worth saying that as Fireline is so tough, you may want to have designated scissors for cutting it. It can ruin your nice embroidery snips! An inexpensive pair of nail scissors or even some children’s craft scissors will do the trick. Whatever thread choice you make, just like the needles, it is important that you work with thread that is specifically purposed for bead weaving. Cotton thread simply isn’t strong enough for bead stitching with.
Other tools
There are a few other tools you may want to invest in as time goes on, but the great thing about bead weaving is that you really just need beads, needles and thread, and you are good to go! One tool I haven’t mentioned yet is a bead mat. You probably have one already, but if you don’t, I recommend getting one before starting. They are indispensable for beading, but particularly for bead weaving. They are also pretty inexpensive, which is always good.
A tutorial for getting started with peyote stitch beading
Note:I’ve used different colored seed beads to try and make the pictures as clear as possible for you, and I recommend you doing the same when you begin. Start with approximately 1m of beading thread of your choice on a size 10 needle, and work with large seed beads to make things easier — at least size 6 (3.5mm).
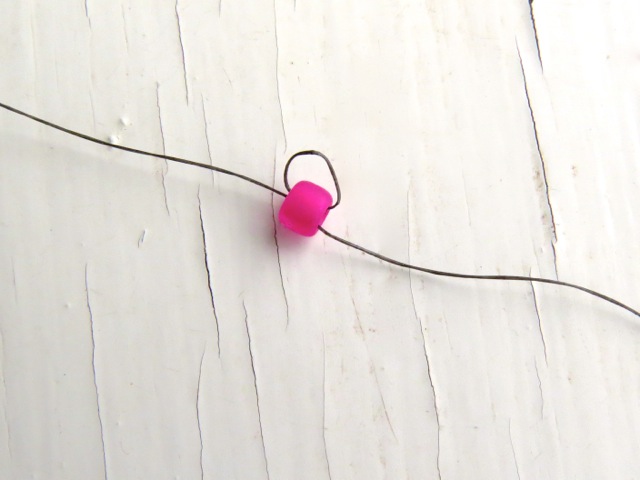
Tip: Start by adding a stopper bead when beginning peyote bead weaving. Simply thread a single bead onto your working thread (usually a different color from the color you are about to stitch in, so that you don’t accidentally stitch it into your work).
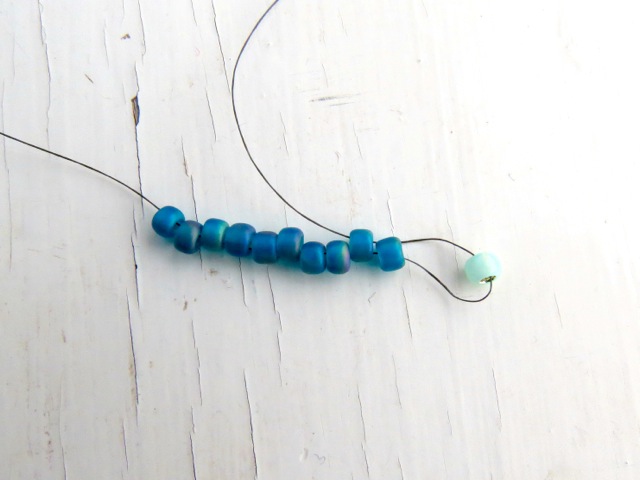
Step 1:
Thread on 10 seed beads. Pick up one more bead and pass your needle back through bead 9.
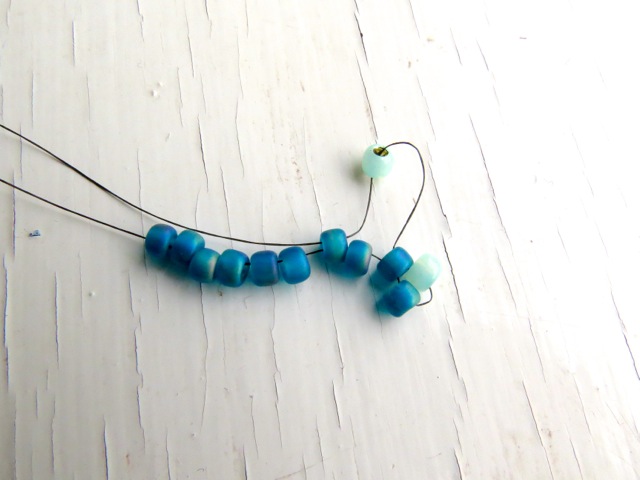
Step 2:
Pick up another bead and pass your needle back through bead 7.
Step 3:
Pick up another bead and pass your needle back through bead 5.

Step 4:
Pick up another bead and pass your needle back through bead 3.
Step 5:
Pick up another bead and pass your needle back through bead 1.
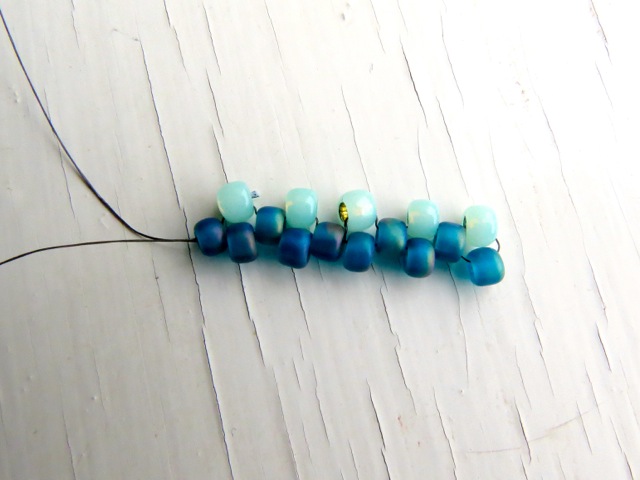
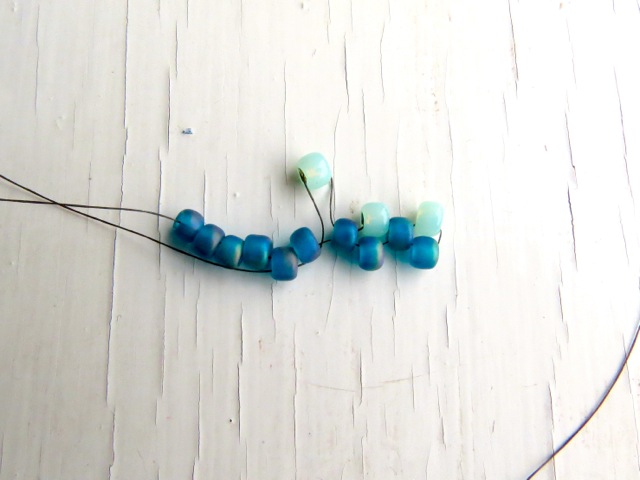
Step 6:
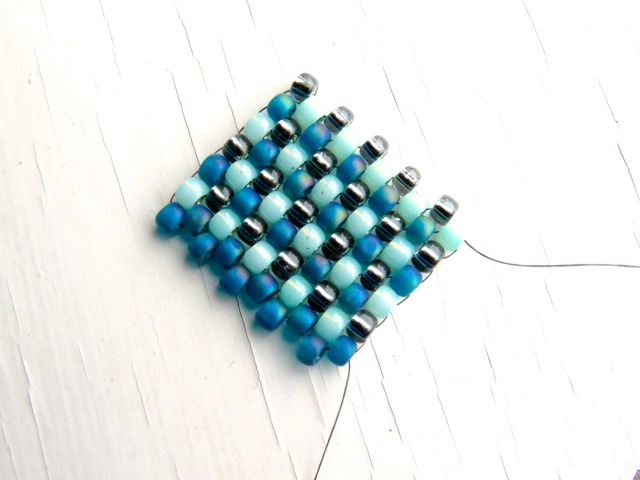
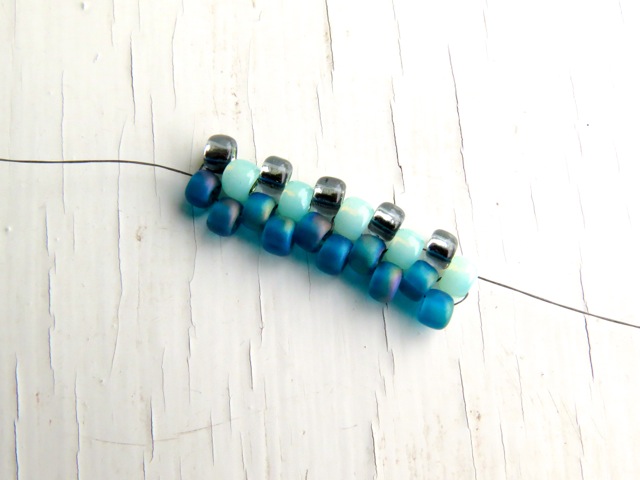
Getting started is definitely the trickiest part. Can you see that you now have a small piece of beadwork resembling a hopscotch pattern? This is the beginning of your ‘brick wall’ of Peyote stitch. Let’s carry on…
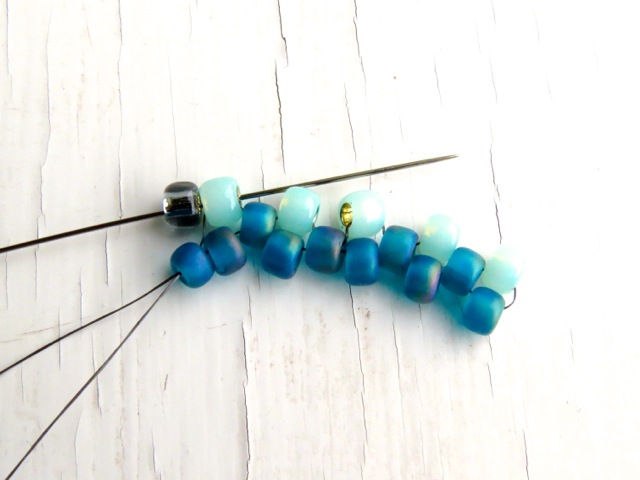
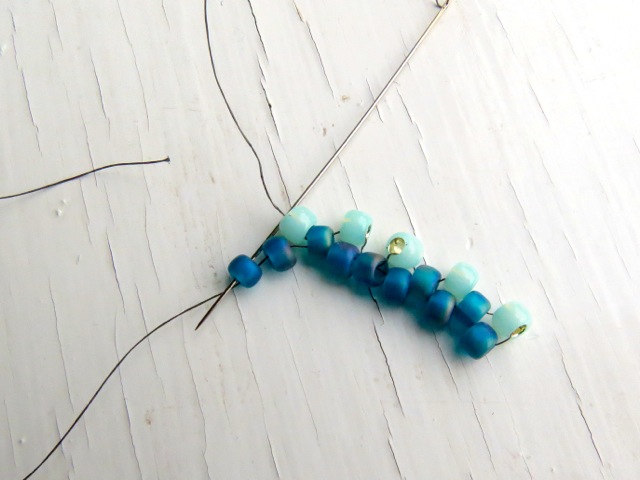
Step 7:
Pick up another bead and pass your needle back through the first ‘up’ (mint green in my example) bead.
Step 8:
Pick up another bead and pass your needle back through the second ‘up’ bead.

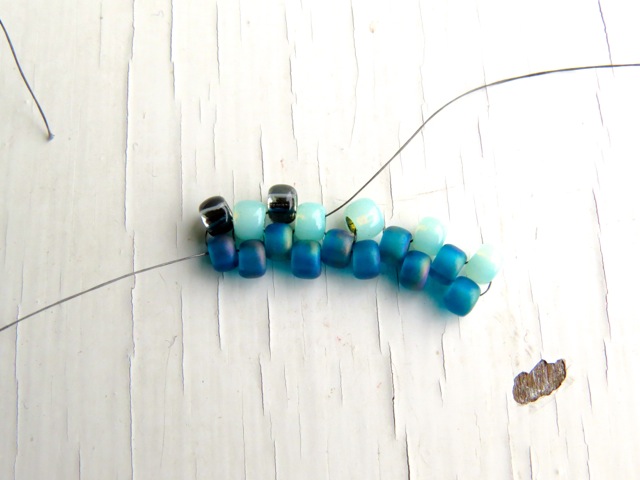
Step 9:
Pick up another bead and pass your needle back through the third ‘up’ bead.
Step 10:
Pick up another bead and pass your needle back through the fourth ‘up’ bead.
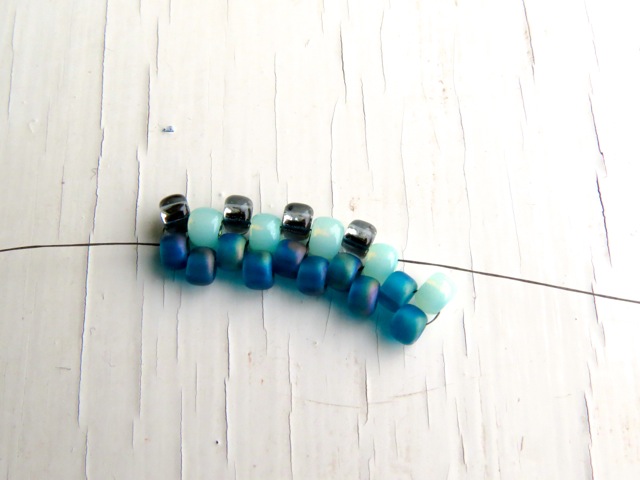
Step 11:
Pick up another bead and pass your needle back through the fifth ‘up’ bead.
Can you see how the brick wall is beginning to grow? Repeat this process and you will gradually build up a strip of peyote stitch beading that you can turn into a bracelet, a bookmark, a tube to surround a jar…the sky’s the limit. It is important to note that each row (in the case of my example) is FIVE beads long, not TEN. The first 10 beads you picked up in Step 1 form rows one and two. You will be able to see this clearly from my example if you follow the different colors I have used to clarify each row.
This is just the beginning of your peyote stitch journey! As I mentioned previously, there are many variations from the basic peyote stitch to create circular, tubular, geometric, patterned work, and beyond. You can work with 2 or 3 beads rather than simply picking up single beads, for a glass fabric that works up quicker than 1-drop peyote, and there are even variations on exactly how the stitch is worked.
[box type=”shadow”]
Ready to learn more?
Advance your peyote stitch beading techniques with help from Nancy Cain in her Bluprint class Bead Stitching: Shaped Peyote. You’ll learn how to make pieces of jewelry that look incredibly expensive, including exquisite necklaces, bracelets and earrings with the shaped peyote stitch.
[/box]
Where do you get your FIRELINE thread?
I been trying to learn the peyote bead tubular technique and purchased patterns but no luck getting to start