
On the one hand, drawing with pencil is pretty easy. Simply put the pencil to paper, and draw. True, this is the way to begin. But how do you refine your technique so that you can use different line qualities to create visual representations?
Photos via CakeSpy
By learning about the different types of pencils and mastering some easy pencil techniques, you’ll be equipped with valuable knowledge and skills that can be applied in your artwork. Using the proper pencil for your project will help ensure success, and mastering these easy pencil drawing techniques will instantly increase your range. Whether you’re creating a landscape perspective drawing, a cartoon or practicing your portrait drawing techniques, these pencil techniques are the building blocks of creating art with pencil.
What type of pencil should I use for drawing?
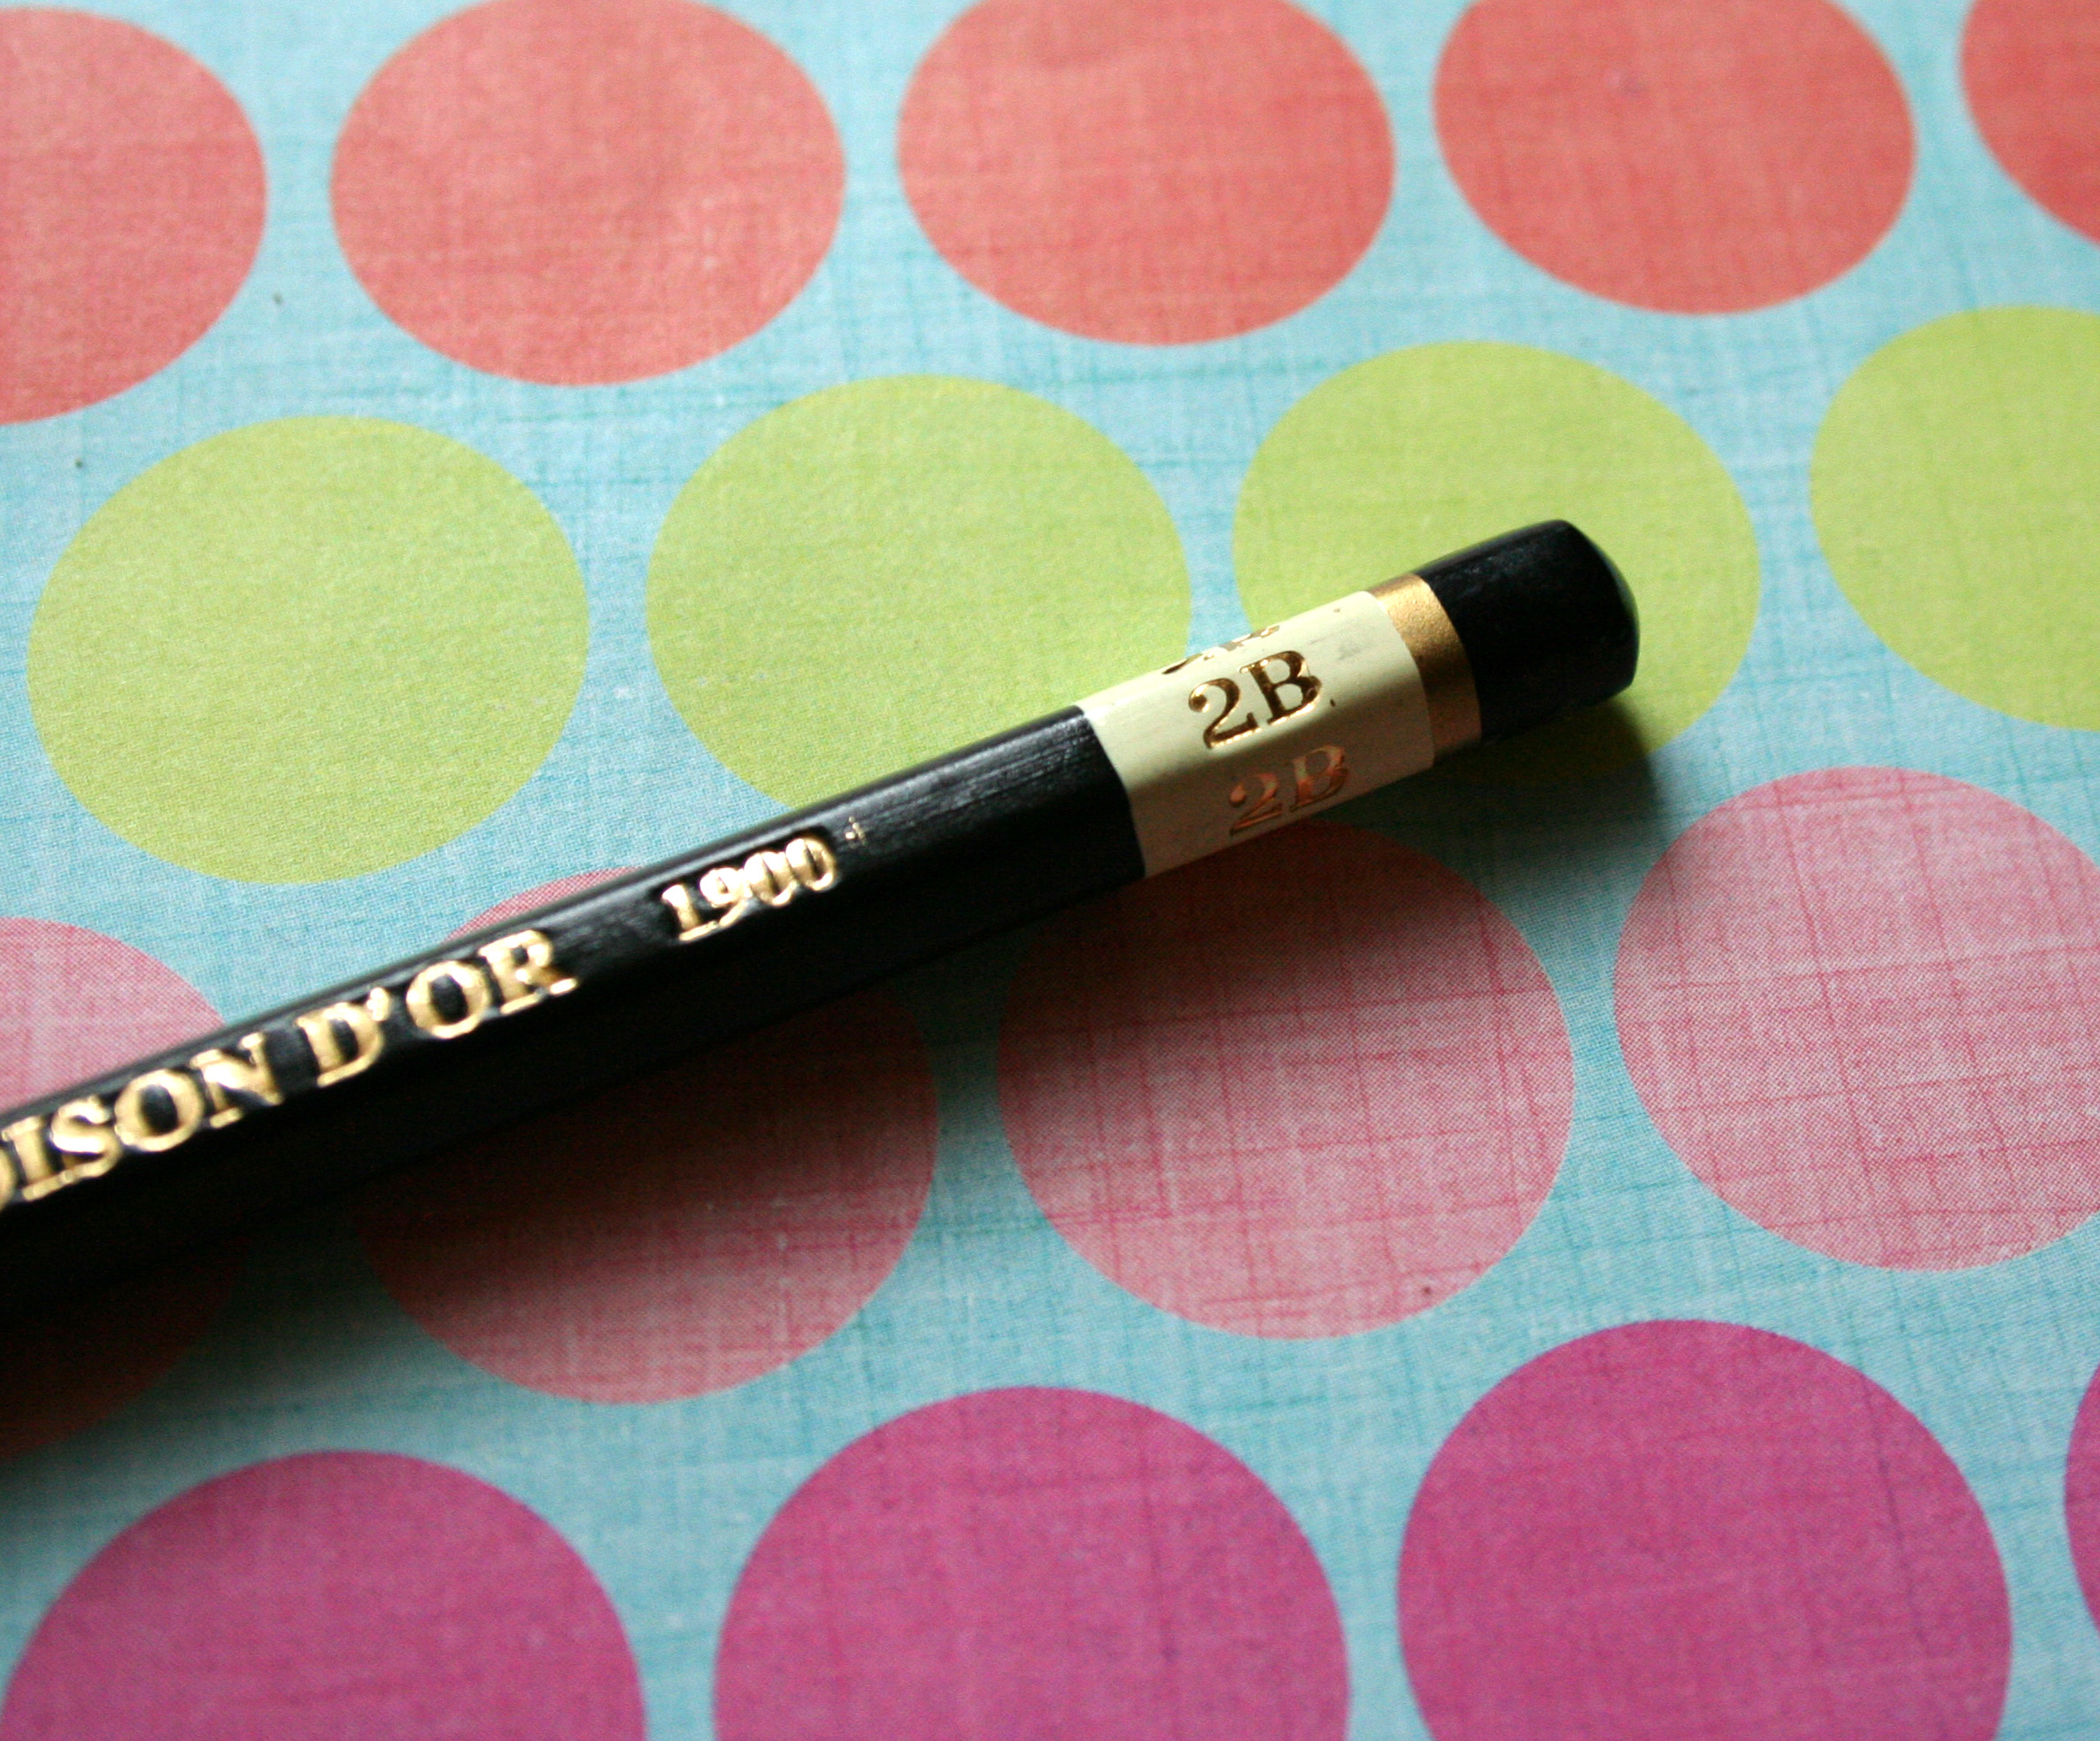
When you look at a pencil, you will typically see a number and a letter, such as 2B or 6H. What does this mean, exactly?
The number is meant to indicate the hardness of the graphite core.
The higher the number, the harder the core — and the harder the core, the lighter the mark you’ll make when pencil is put to paper.
The lower the number, the softer the writing core, meaning that it will leave a darker imprint. These softer pencils will become duller faster, because the pressure of the paper will degrade the pencil tip quicker, so they will require more frequent sharpening.
The letters “H” or “B” refer to the hardness of the line.
In general, “B” will indicate blackness, and “H” will indicate lightness (or hardness). So, for instance, a low-numbered B pencil, such as 2B, will be very black and leave a strong imprint. A high-numbered H pencil, such as 6H, will have very hard graphite, and will leave a much lighter imprint.
Or to give you another example, a 2B pencil will be much softer and blacker than a 2H pencil, although the 2H pencil will be darker than a 6H.
So what does all of this mean in terms of your pencil choice?
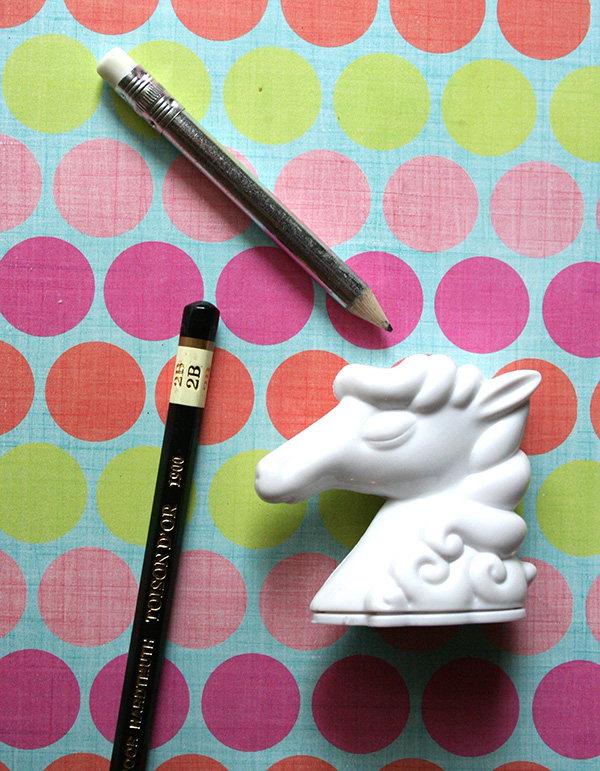
If you are working on a delicate, highly detailed piece, you’ll want to use a harder pencil. This will allow you to make finer lines and create more detailed drawings.
If you are working on a cartoon piece or something that requires strong lines, a softer pencil is better.
Another thing to note is that the softer the pencil, the easier it is to erase marks from the paper. Harder pencils, while they make softer lines, have a harder surface so can indent the paper where they are used. Softer pencils are better for sketching lines that are intended to be erased later.
One final note is that pencils can vary from manufacturer to manufacturer, much like in clothing, a size small from one vendor might be equivalent to medium in Is your head spinning? Don’t worry. This introduction is not meant to confuse you — it’s meant to educate you so that you can move forward in trying out a variety of pencils you think might work for you. Try out a number of different hardnesses and you’ll quickly see what works for you.
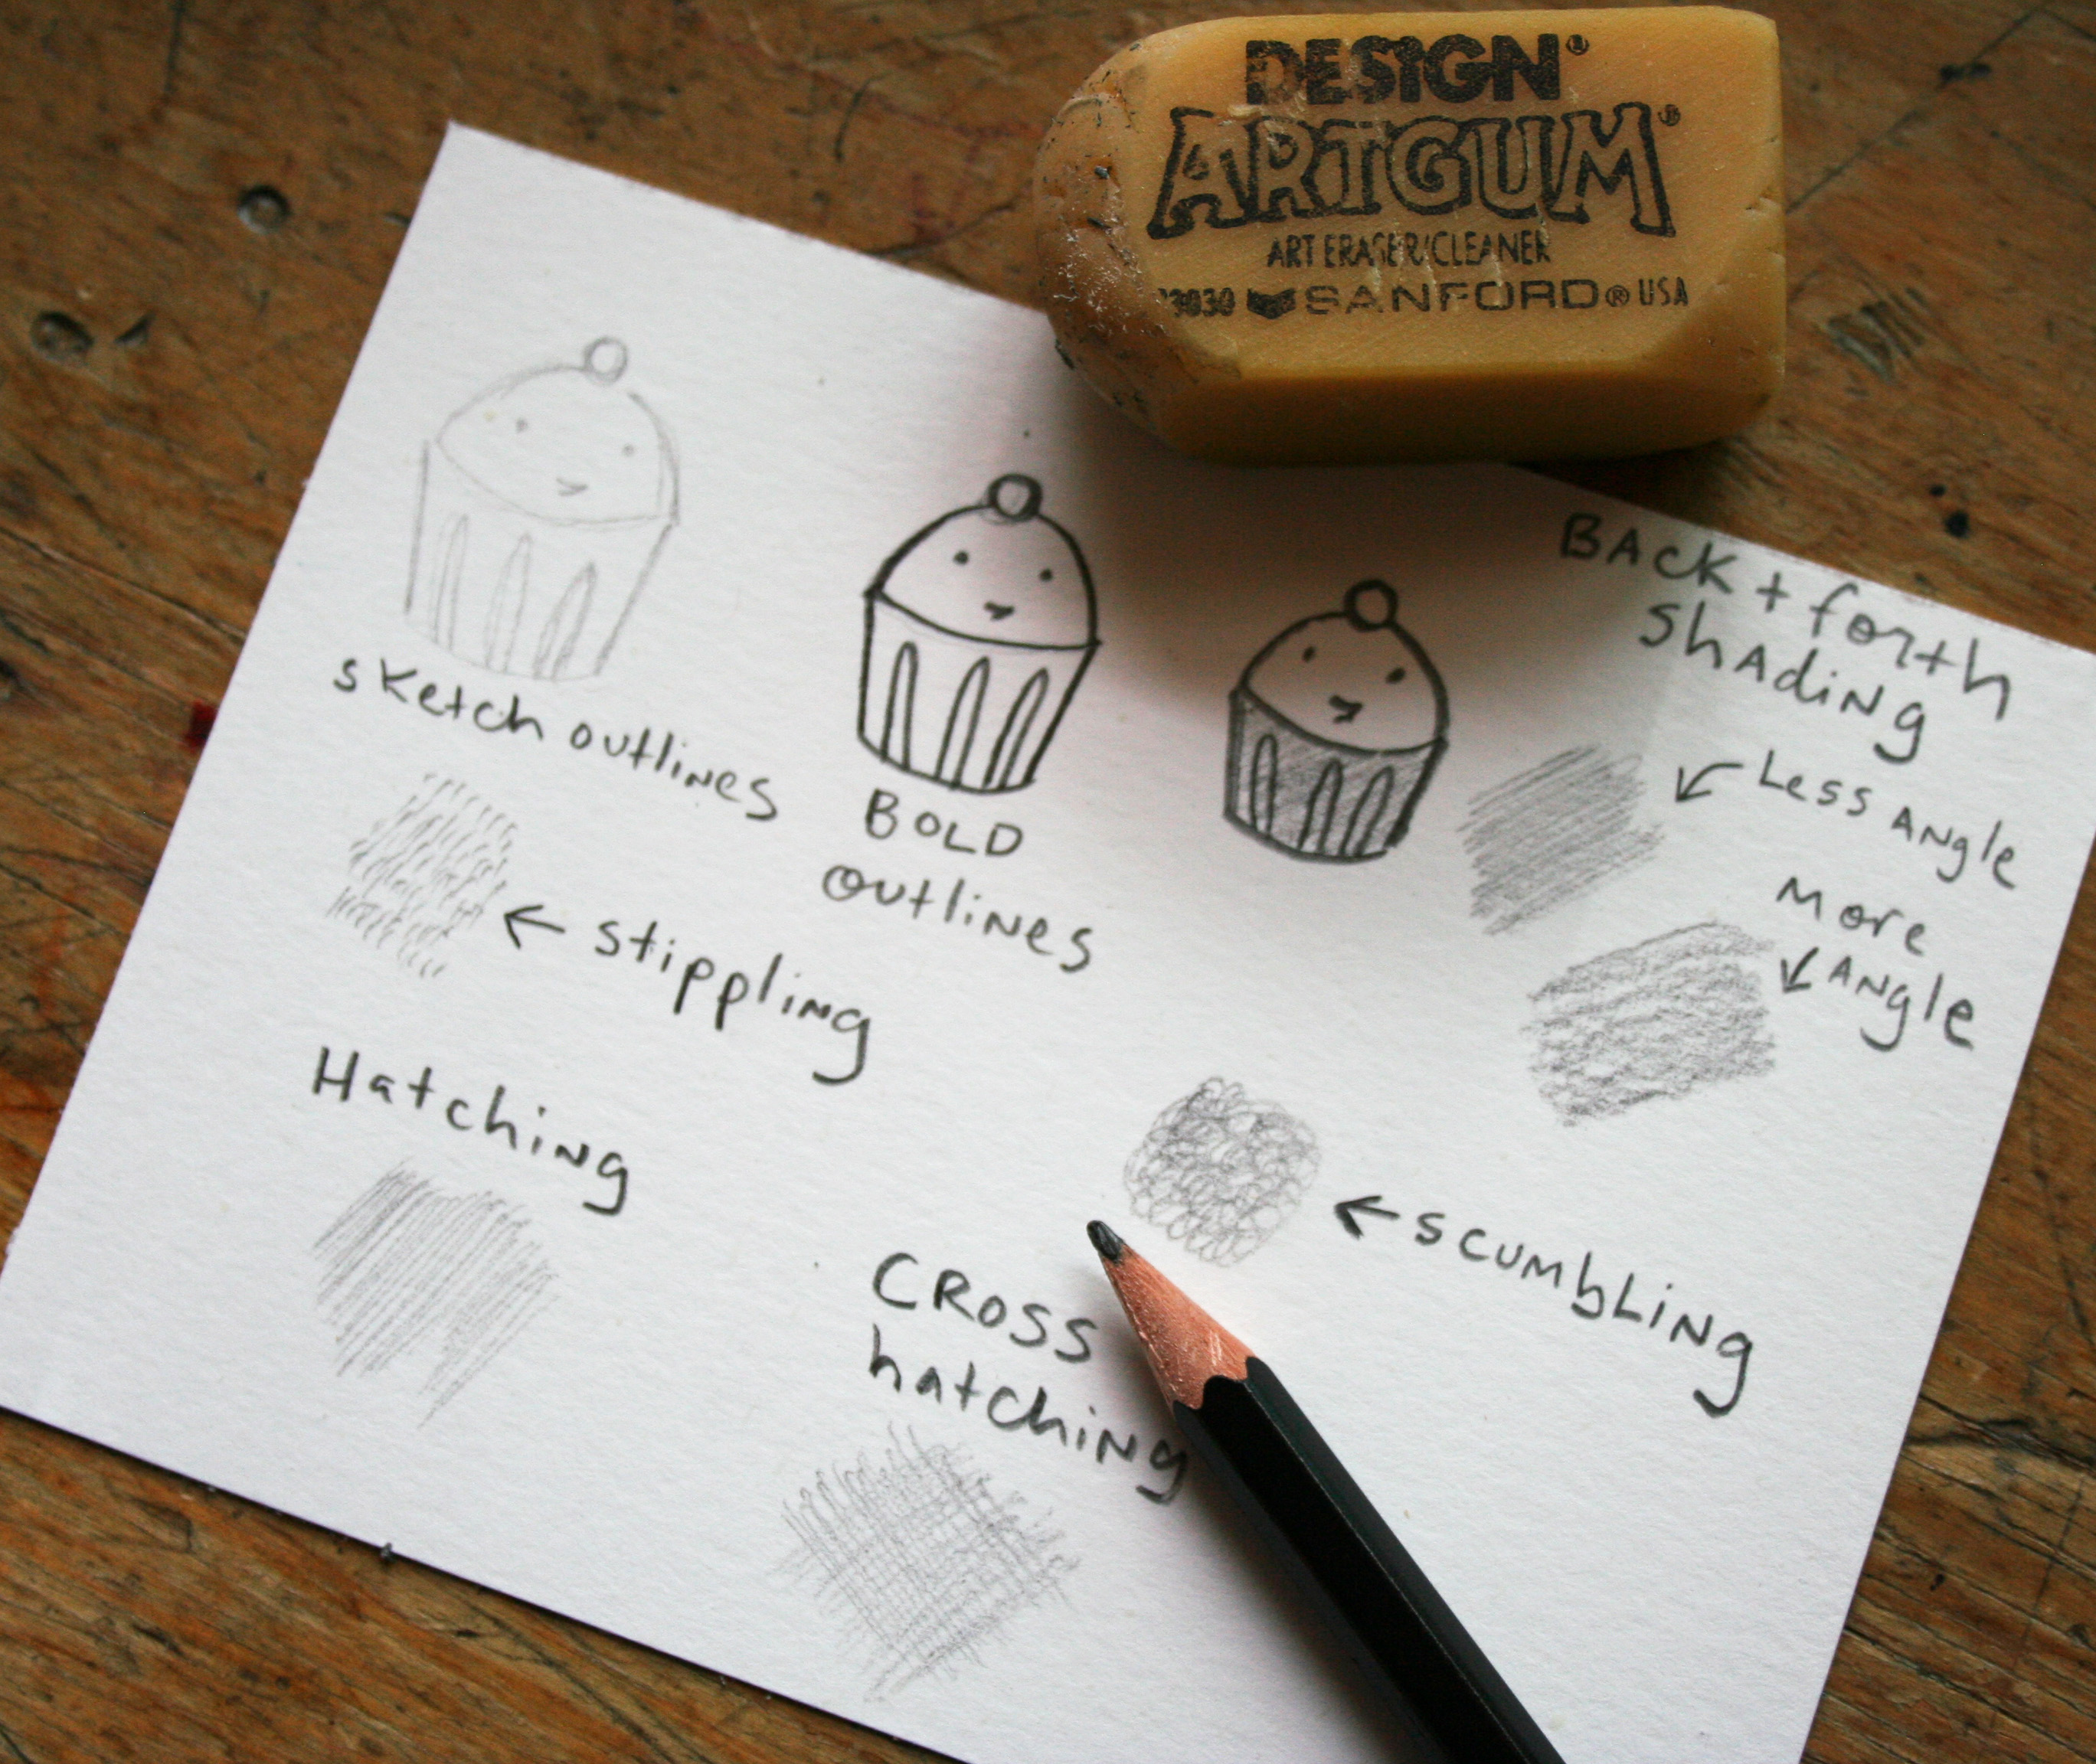
Easy pencil techniques
Once you’ve decided which pencils to try, here are some simple techniques to make the most of your pencil of choice. They will work with any type of pencil, though the various hardnesses will yield different visual results.
Gentle outlines
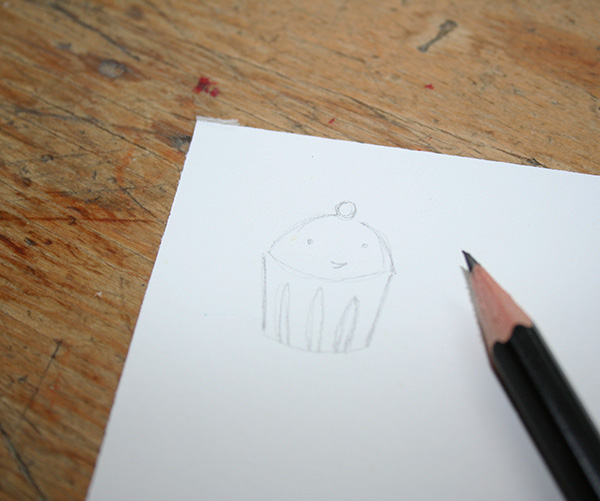
Using a gentle pressure, you can use a sketchy stroke to create light outlines. This is an ideal method of using your pencil to create a sketch which you will then go over with pen and ink or another medium. A very sharp point on your pencil is not important for this technique.
Bold outlines

For a heavy outline, you’ll use an assertive pressure to create a dark line. This is the type of line you’ll use for a finished drawing; you’ll treat this type of line as if it is being made in permanent ink. Have a good point on your pencil for the most control.
Back and forth shading
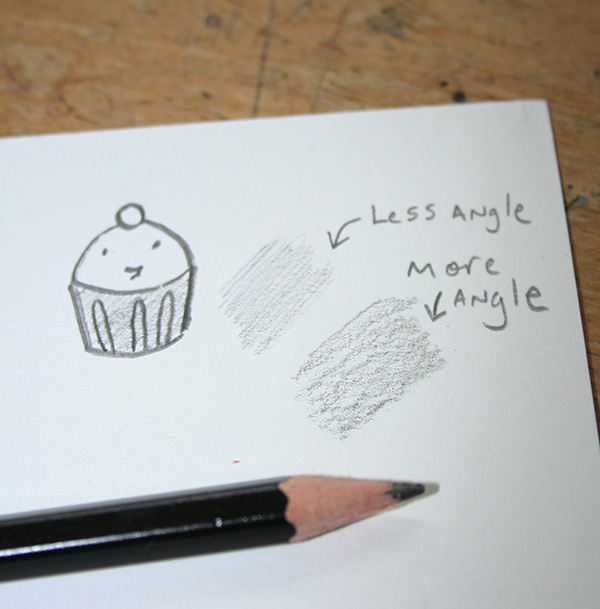
urning the pencil at a slight angle so that the side of the graphite rather than the point is hitting the paper, draw the pencil back and forth, not lifting the pencil from the paper, in zigzags so tight it looks like straight lines. You can control the softness of the line by angling the side of the pencil more or less. The more you work in this method, the flatter the side of the point will become, so rotate the pencil occasionally with this method.
Hatching
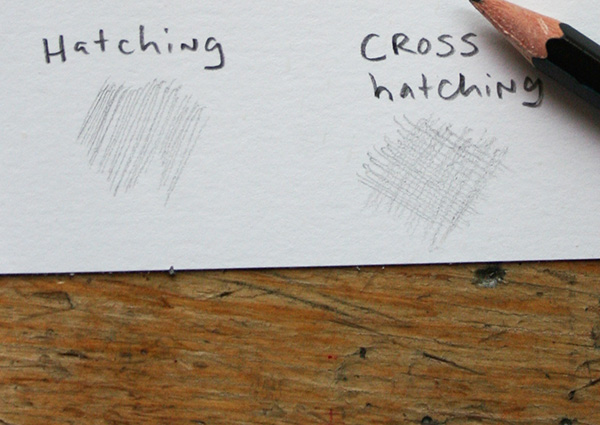
Similar to back and forth shading, but for hatching, you will use the point of the pencil, and only draw the pencil in one direction, lifting it and bringing it back next to the last line drawn to make a second line very close by. Using a very strong point on your pencil will result in a more delicate, defined series of line, whereas a duller point will yield a softer look.
Cross-hatching
Once you’ve created a hatched area, create a second set of hatching going in the opposite direction directly on top. This is cross-hatching. It’s perfect for shading and adding dimension to different areas.
Scumbling
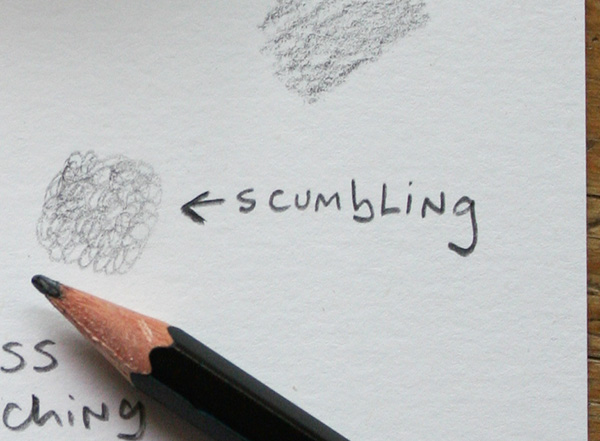
It’s a funny word, but oddly appropriate: drawing sketchy little loops (think: Chia head hairdo) will result in a textural areas, and is perfect for blending tones and shading together. Like hatching, using a very strong point on your pencil will result in a more delicate, defined series of line, whereas a duller point will yield a softer look.
[box type=”shadow”]
 Easily improve your drawing skills and achieve more realistic results with help from acclaimed artist Patricia Watwood in her class 10 Essential Techniques for Better Drawing. Sign up today to master foundational techniques for working with pencil, pen and ink, charcoal and more.
[/box]
What makes online Bluprint classes great?

Learn for life! With lifetime access to your classes, you can watch lessons at your preferred pace and easily revisit your favorite concepts with just a click.

Kick up your feet! Enjoy classes anytime from the convenience of your home or even on-the-go with our mobile apps.

Get personalized guidance! Ask your instructor questions to receive all the answers and feedback you need to succeed.

Love it! There’s no risk in trying with our 100% money back guarantee.
Share tips, start a discussion or ask one of our experts or other students a question.
No Responses to “2B or Not 2B? A Guide to Pencil Drawing Techniques”