
Photographers use many types of creative techniques to generate special effects in their images. One of these techniques is the “Orton effect” named after the photographer Michael Orton, who developed it because he liked the way watercolor paintings looked with pen and ink outlines along with the color. Inspired, he created “Orton imagery” or the “Orton effect.”
The origin of the Orton effect
This technique involves taking the initial image or “focus” image though properly exposing the image or overexposing by one to two stops. The next image is taken out of focus and also ranges between exposed properly and overexposed one to two stops.
While this might sound difficult at first, a similar effect can be achieved in photoshop. To start, we will take a short look at Michale Orton’s original slide film technique to achieve this look. By sandwiching multiple images, the photographer was able to create an ethereal effect.
While film is making a small comeback, most photographers today use digital cameras to create their images. You can easily create the Orton effect by combining shots from a digital camera in photoshop.
Here are the steps to creating your own Orton effect in Photoshop:
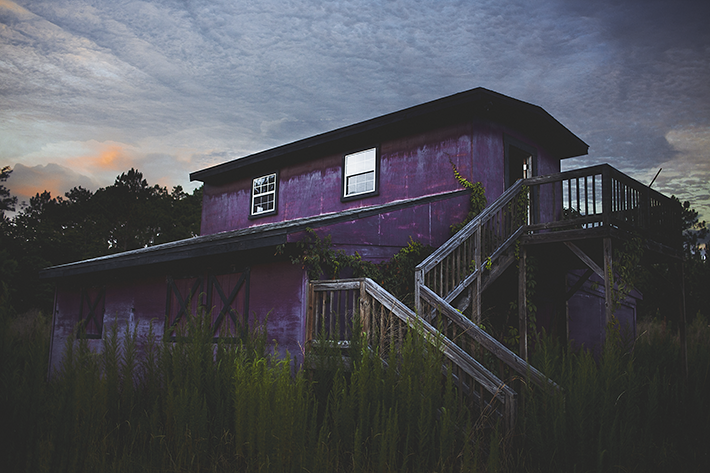
Open the image you wish to use. Orton effects work best on landscape photographs but a portrait will work too.
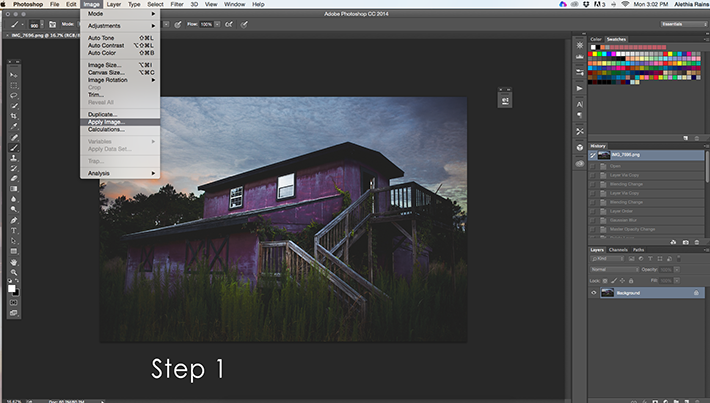
Step 1:
Go to> Image>Apply Image.
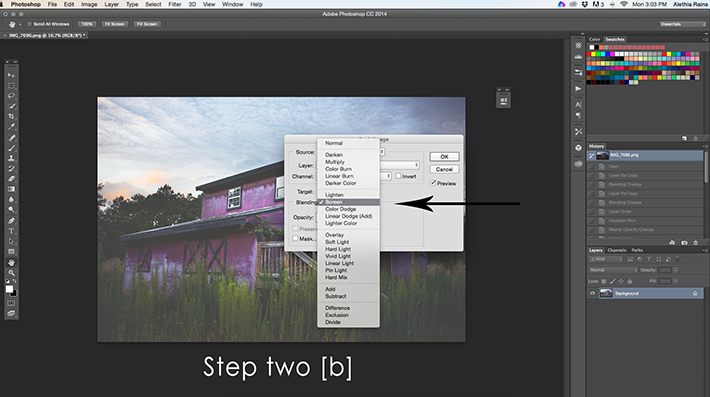
Step 2a:
When the “Apply Image” dialog box pops up, you will see an option to change the “blending” of the image.
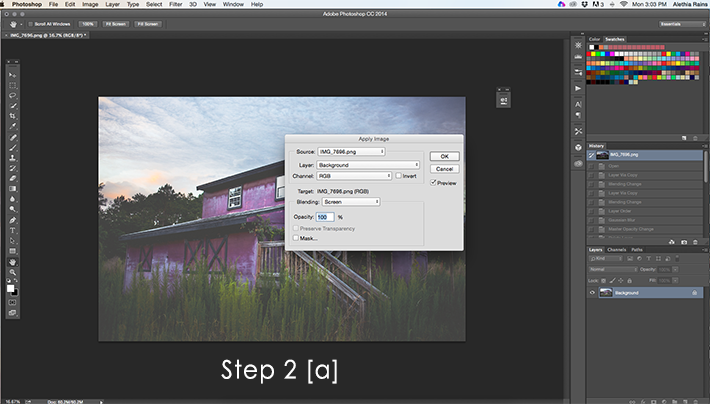
Step 2b:
Select the “Screen” mode.
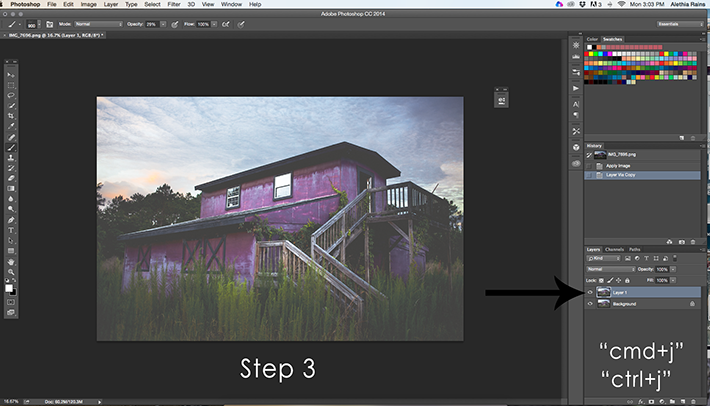
Step 3:
Duplicate your background layer. Make sure your background layer is selected and use the keyboard shortcut “cmd+j” for mac or “cntrl+j” for pc.
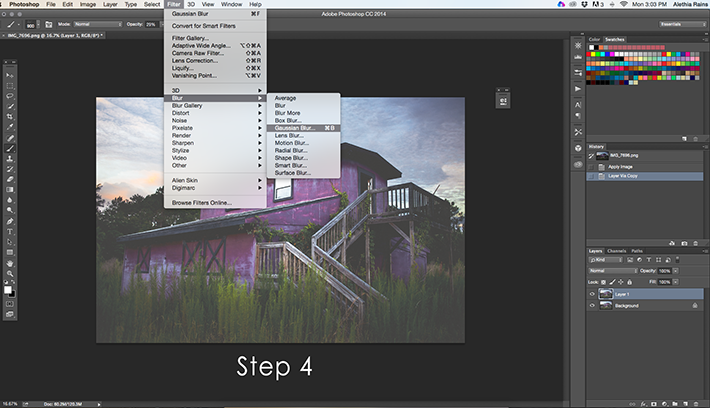
Step 4:
Select the new layer. Then go to> Filter>Gaussian Blur
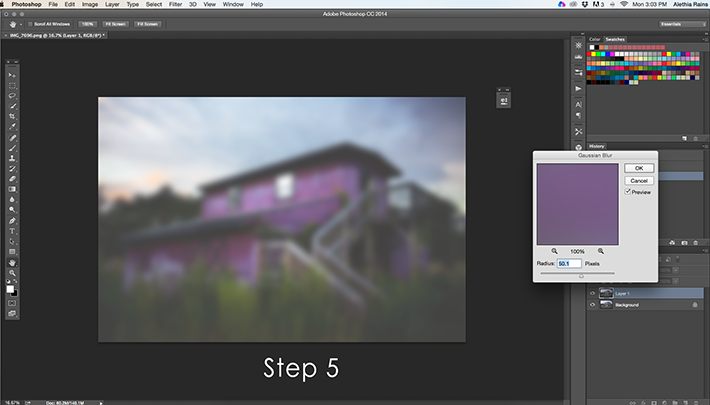
Step 5:
You will now blur the image until it becomes a colorful blob. 25-50% blurriness should be enough.
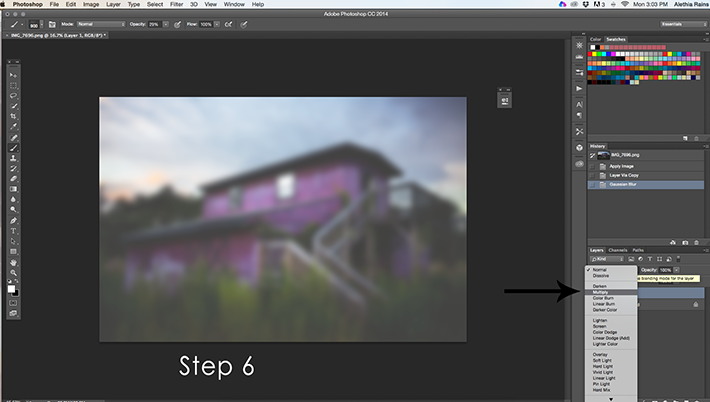
Step 6:
Set this blurred layer to “Multiply” blending mode.
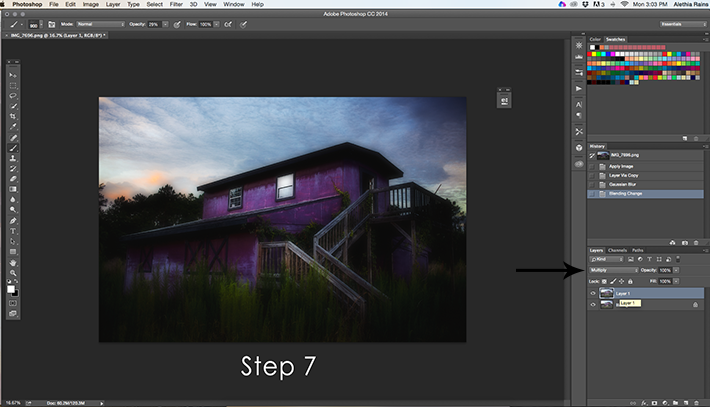
Step 7:
This shows the image after applying the multiply blending mode.
Almost done!
Finally, flatten your image and save it however you like.
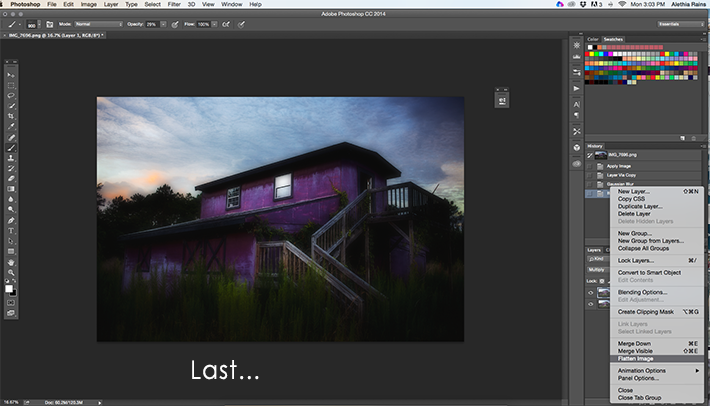
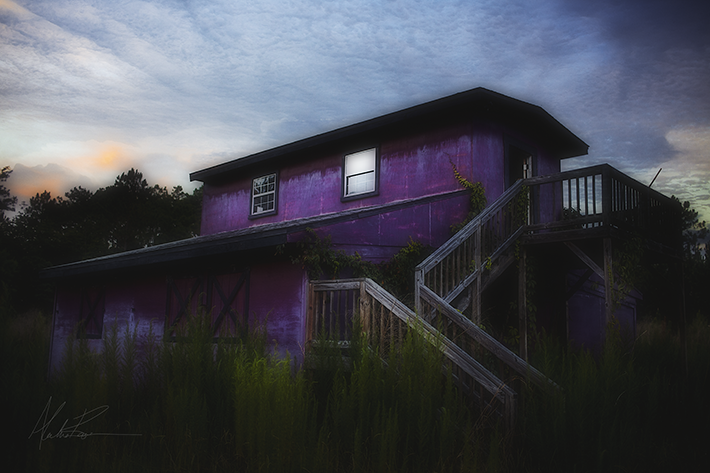
The final image should look something like this, with a slight glow to it and saturated colors.
FREE Guide: Explore Essential Photoshop® Functions

Transform your photos with valuable Photoshop tips and techniques!
Share tips, start a discussion or ask one of our experts or other students a question.
No Responses to “Create Ethereal Images With This Easy Orton Effect Photoshop Tutorial”