
 Photos by Kathryn Vercillo of Crochet Concupiscence
In a few steps, you can turn granny squares into a crochet blanket!
Step 1: Lay out all of your crochet granny squares.
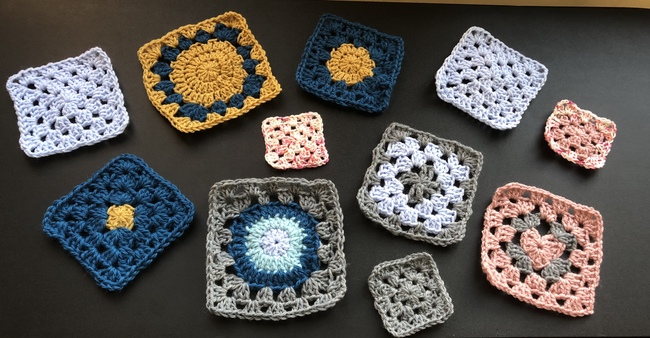
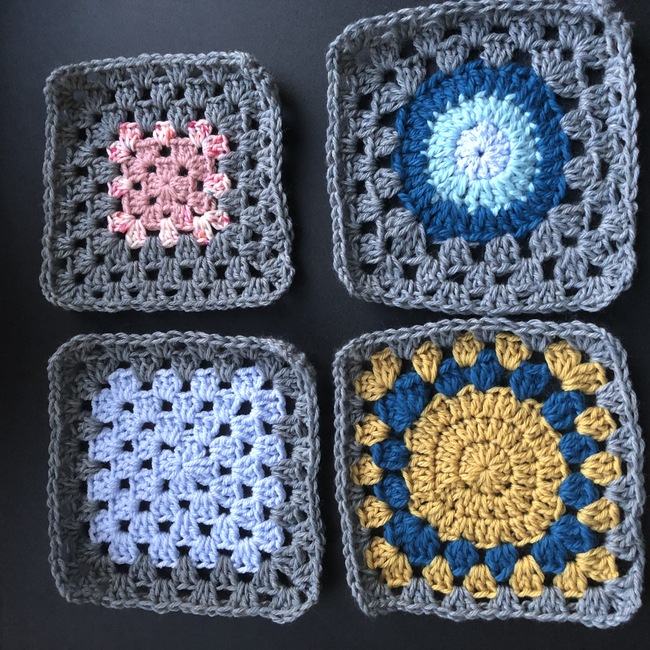
First, figure out what you’re working with. Find a space where you can lay out all of your finished granny squares.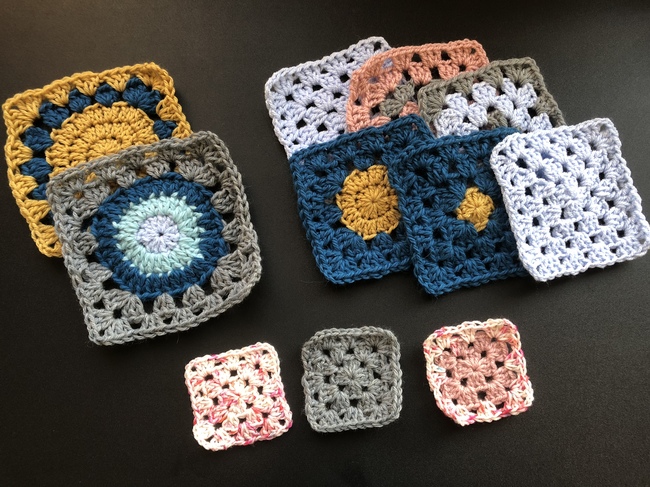 Organize them in this space, grouped by size — and I mean actual size measured in inches or centimeters, not merely the number of rounds used in the granny square.
 Keep your piles in place — we’ll come back to them soon.
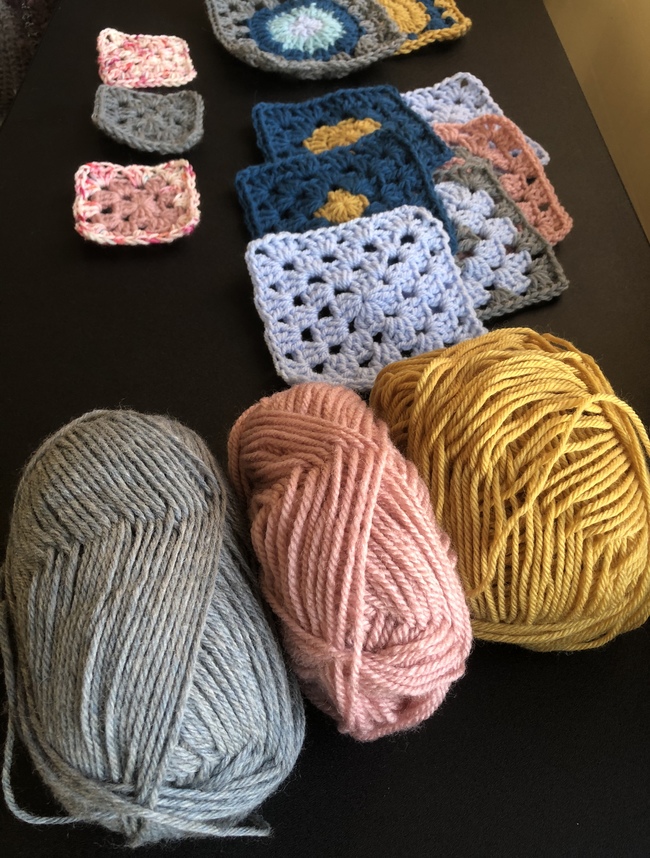
Step 2: Find a yarn that matches all of these granny squares
To create a cohesive design, you’ll add a border around each of these granny squares. This helps make potentially mismatched colors look great together. A neutral color of yarn (like white, black or gray) would work well for these borders, but you can choose any color that feels right.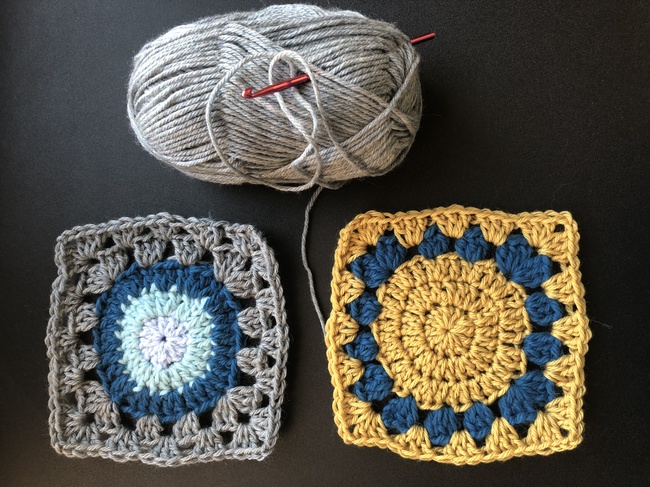 When selecting your yarn, you should consider all of the yarn weights used in your blanket. You may want to select a yarn that’s
- The same weight as that used in the majority of the squares
- Aa medium (worsted) weight, especially if you have a great variety of weights in your squares
- A bulky weight, which can give you a heavier blanket. However, it can be difficult to add a bulky yarn around very lightweight (sock weight) yarn.
What about hook size?
Use a crochet hook that’s the right size for your border yarn or one that works with the yarn and also goes well with the majority of your granny squares. So for a worsted weight yarn, you want a mid-sized crochet hook. If most of your granny squares are lightweight, you might choose an F or G, but if most of your granny squares are mid-weight or bulkier, choose an H or I.Step 3: Add a border to your largest granny square.
 Since you already have your granny squares organized by size, you can easily locate your largest granny square. (If you have more than granny square that are this largest size, use all of them in this step.)
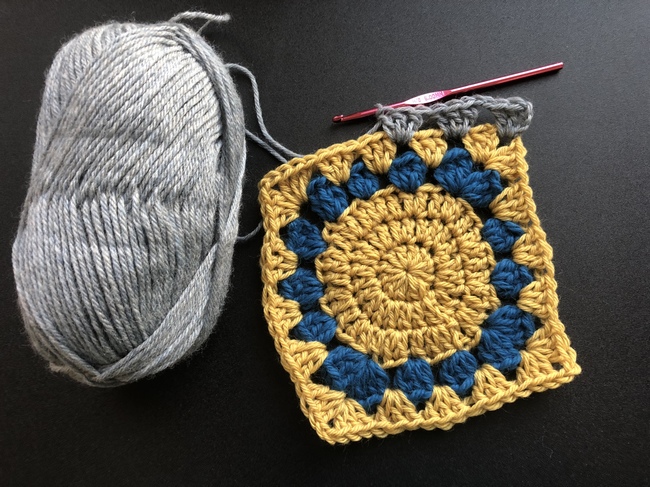
Now it’s time to add a border to this block. You can simply continue the design of the granny square with one extra round, or add another simple, flat-edged border (such as a round of single crochet). Make your border just for just one round.
Since you already have your granny squares organized by size, you can easily locate your largest granny square. (If you have more than granny square that are this largest size, use all of them in this step.)
Now it’s time to add a border to this block. You can simply continue the design of the granny square with one extra round, or add another simple, flat-edged border (such as a round of single crochet). Make your border just for just one round.
Step 4: Add borders to all of the other granny squares to get them to the same size.
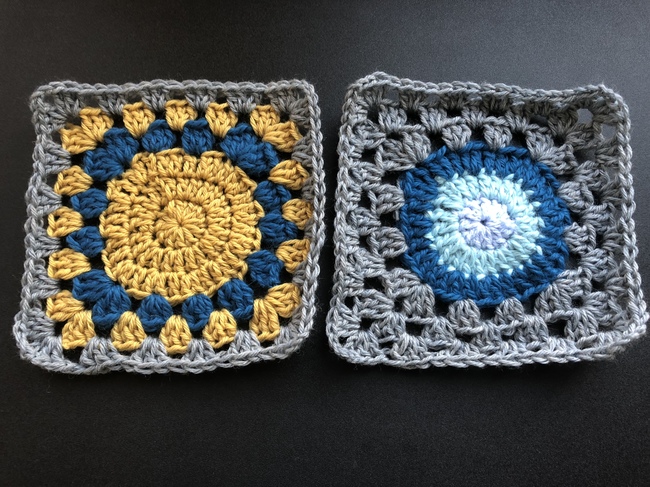
Using the same yarn, add a border to all your other granny squares. But this time, instead of adding just one round, you’ll adding enough rounds of the border to bring each square up to the size of the largest granny square. The idea is that you’re creating granny squares that are all the same size by adding these additional rounds. Doing this in the same yarn brings a cohesive look to the project and evens out the weight that may be thrown off by different weights.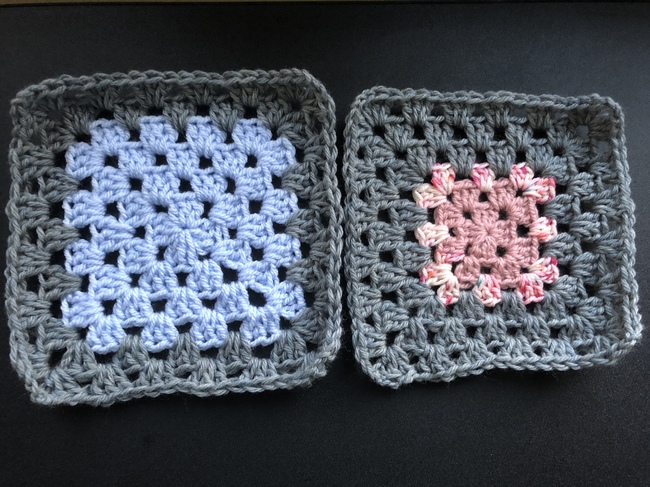 It might be hard to get all your squares to the exact same size — that’s OK. Just get it as close as possible, making it slightly smaller (not larger) than the other squares. Then you can use blocking to stretch the square, add an additional round of single crochet, or stretch the square in joining to get it to fit right with the other squares.

Step 5: Play around with layout.
After all your squares are finished, lay them out in the shape and size of the blanket you want to create. If you have too many squares, decide which ones don’t belong; you can use them in another project. Physically moving the squares around will help you find the color arrangement that works best for you.Step 6: Make more crochet granny squares if necessary.
You might find that you don’t have quite enough granny squares to make a blanket. You can always create more granny squares sized to the final size of your other granny squares. Creating these as solid color granny squares in the same color as the borders will bring extra cohesion to your blanket design. However, you can dig into your stash and make other colorful granny squares if you like.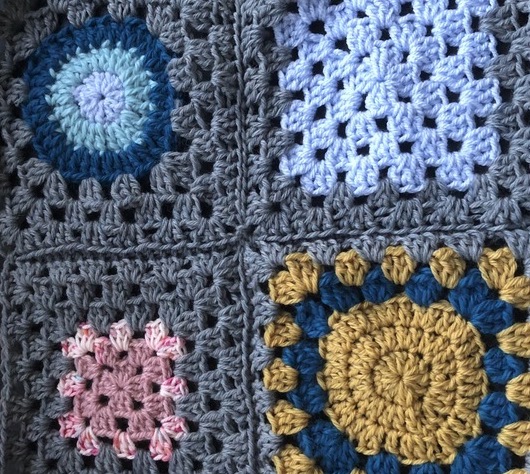
Step 7: Join all of the crochet granny squares into a blanket.
Once you have the right number of same-sized crochet granny squares and have decided on your layout, you are ready to join your granny squares! You can use any joining method you prefer for your blanket (this class will show you lots of options).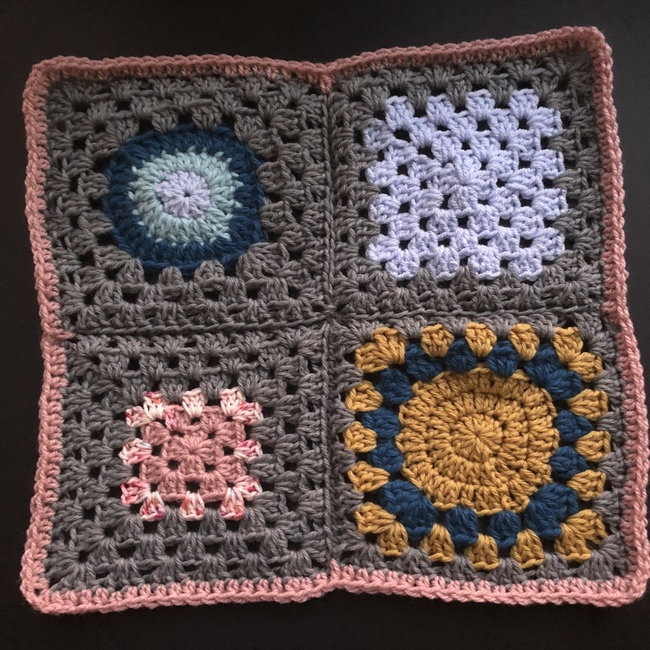
Share tips, start a discussion or ask one of our experts or other students a question.
No Responses to “A Stash-Busting Project for All Those Mismatched Granny Squares”