
TBH, we still get all tingly when we watch a straight row of knitting suddenly transform into a mitered square. It’s like magic: The simplest stitches turn into a totally new and beautiful shape, thanks to two easy decreases.
If you’ve never knit a mitered square or need a refresher, follow our easy tutorial below — and stick around for tips on how to join your modular squares to make spectacularly colorful work.
What Exactly are Mitered Squares?
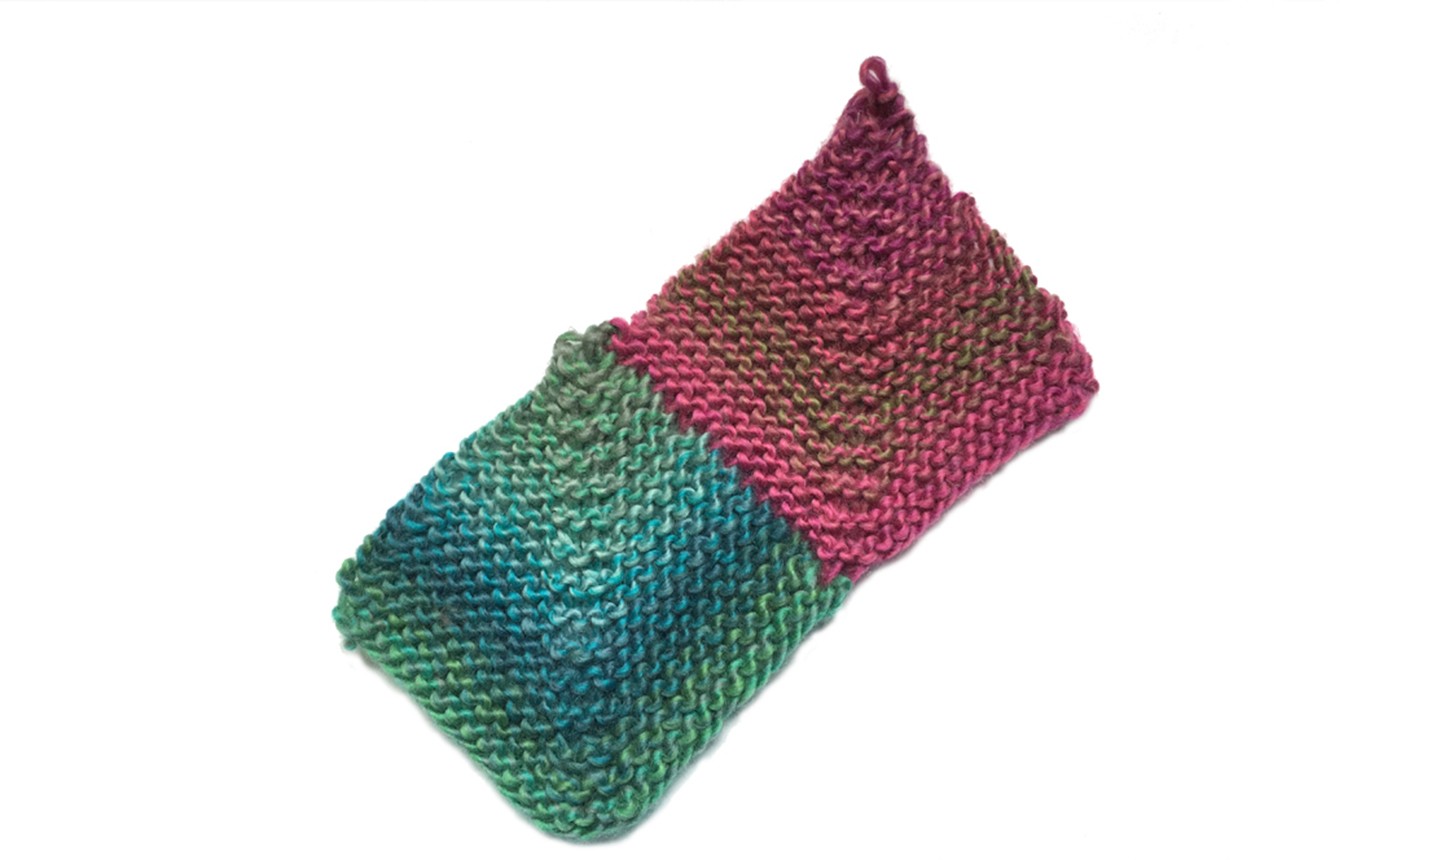
Mitered squares have a directional texture that’s perfect for showcasing multi-colored yarn and stripes. The modular design makes the squares versatile: You can use them in endless projects, from stash-busting patchwork afghans to ultra-stylish clothing and accessories.
Mitered squares get their name from the beveled joint between two pieces of wood. In knitting, decreases make the knitting look like it’s turning at right angles, forming a diagonal line of stitches from corner to corner.
You can create all kinds of cool effects by placing mitered squares in different positions next to one another.
How to Knit and Use Mitered Squares
1. Cast On
The first thing you’ll do is cast on the number of stitches you need for one side of the square. Place your stitch marker. This is the halfway point of the cast-on and will form the corner of the square.
Complete the cast-on by adding on another set of stitches equal to the first set. Each set of cast-on stitches on either side of the stitch marker will form an edge of the square.
2. Start the Miter Stitch Pattern
Row 1 (WS): Knit across, slipping the marker.
Row 2 (RS): Knit to two stitches before the marker, k2tog, slip marker, ssk, knit to end of row.
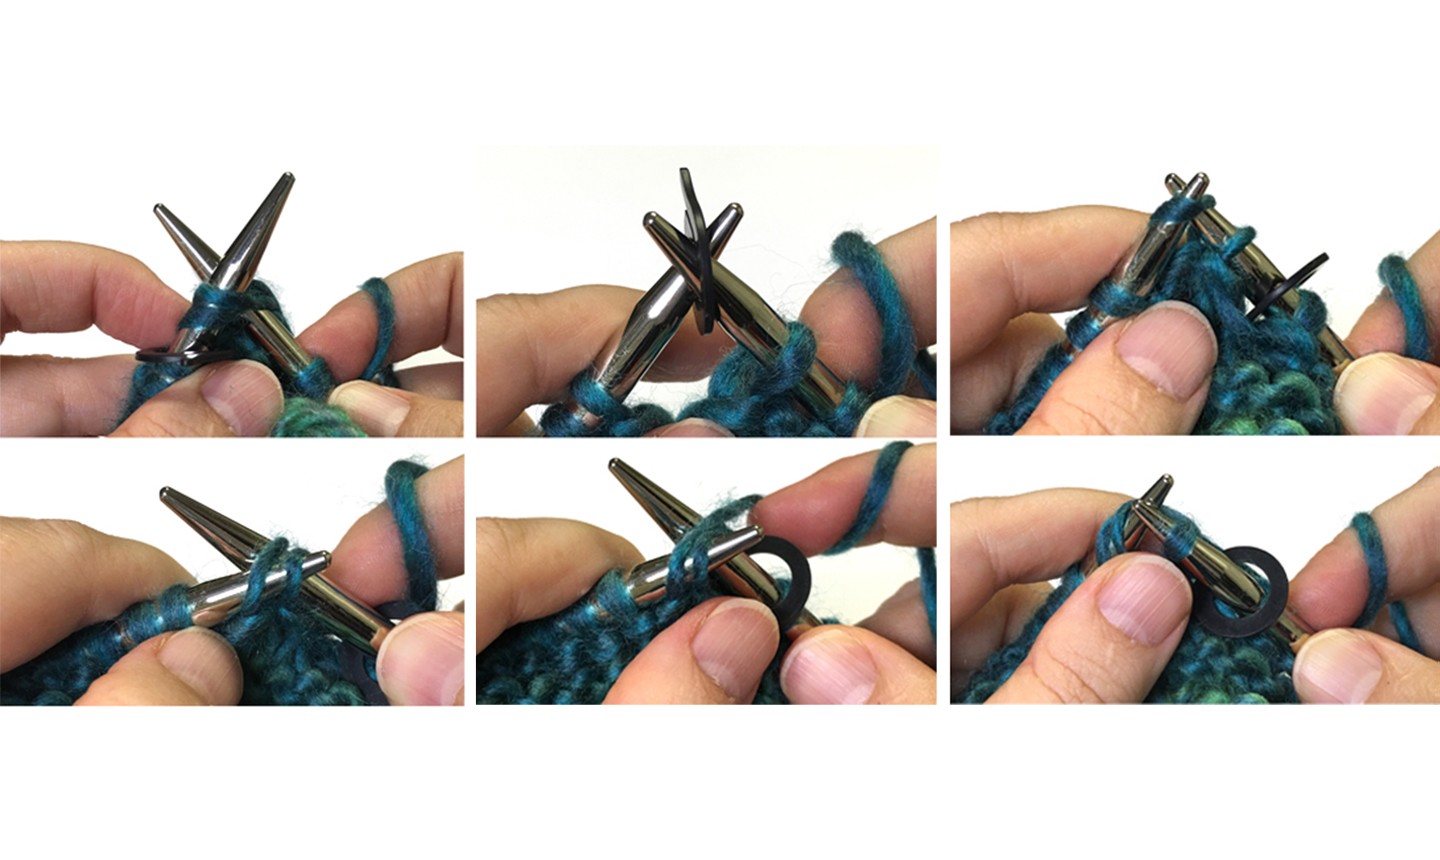
If you need a little more detail, here’s a step-by-step walk-through of Row 2:
Knit to two stitches before the marker. Then knit the next two stitches together. Slip the next two stitches knitwise. Then put your left needle in through the front of the slipped stitches on the right needle, wrap the yarn over the right needle, and pull the yarn through both stitches to knit them together.
For Row 2, you can substitute other decreases. The first should be a left-leaning decrease, and the second should be a right-leaning decrease. If you prefer a different right-leaning decrease like s1, k1, psso, you can use that instead of ssk.
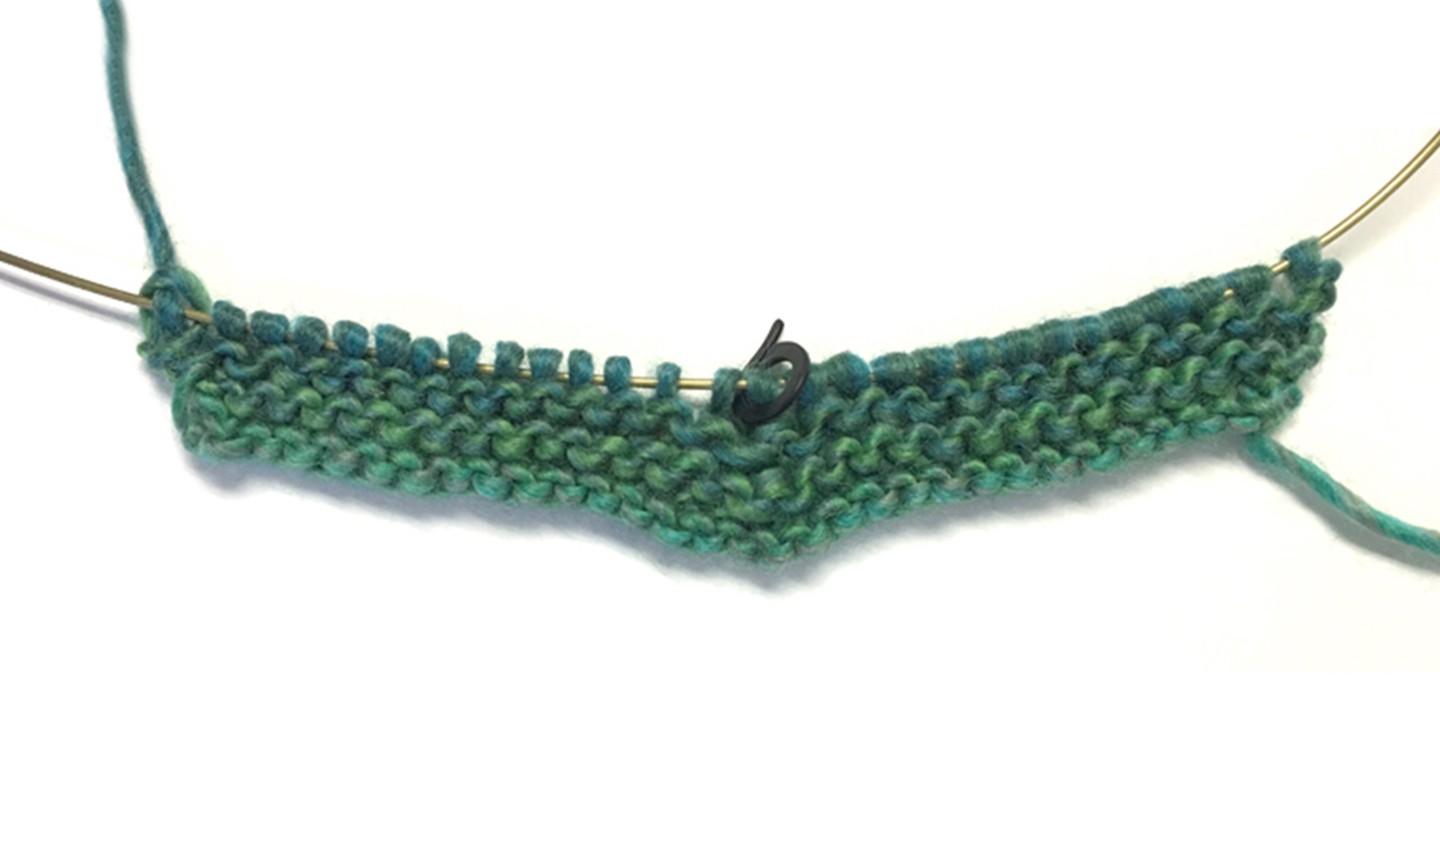
3. Repeat These Two Rows Until You Have Four Stitches Left
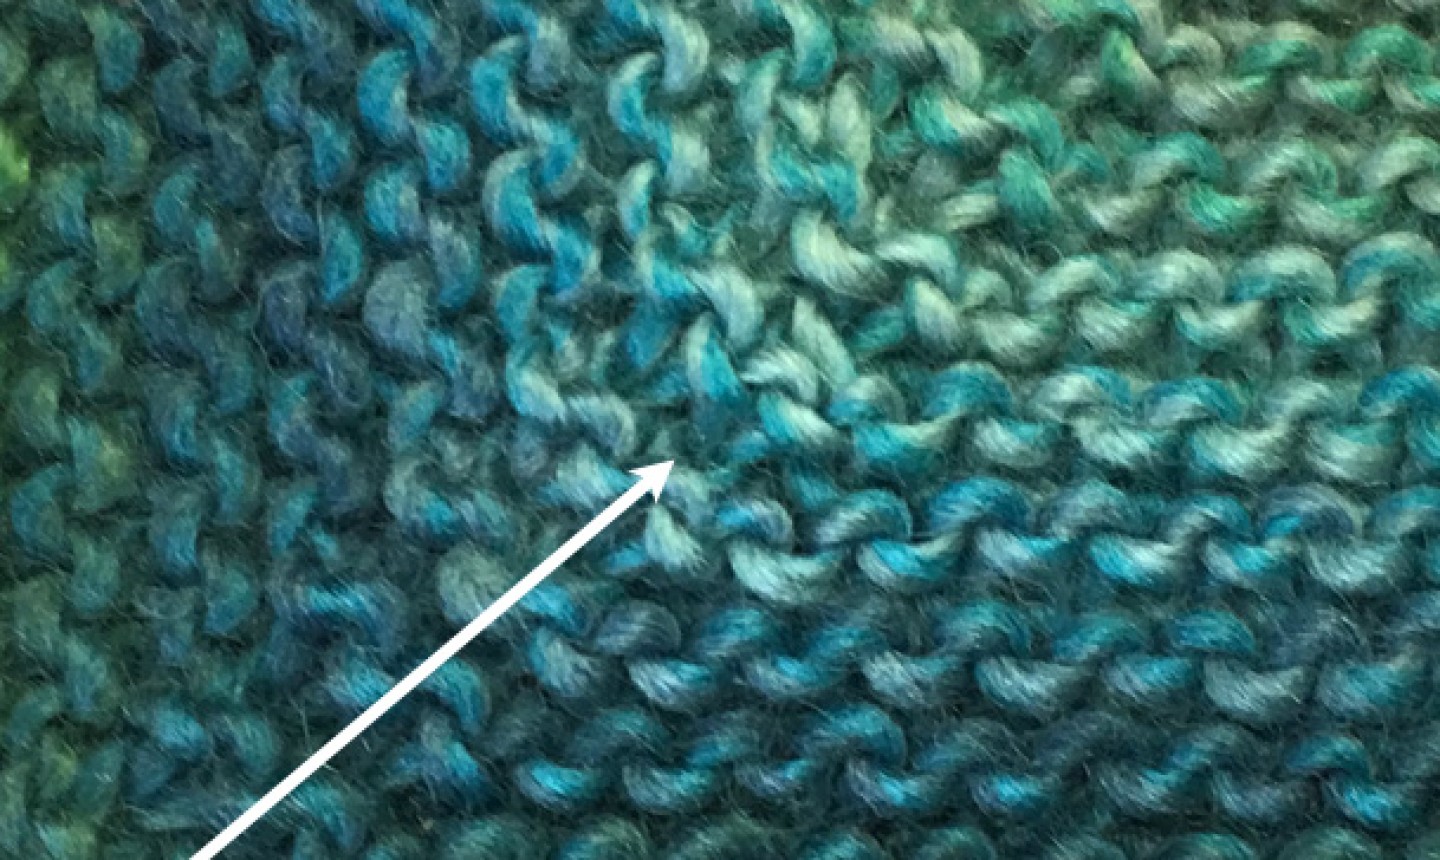
After a few repetitions, you’ll see the corner forming as the decreases pull the fabric on either side of the center of the work.
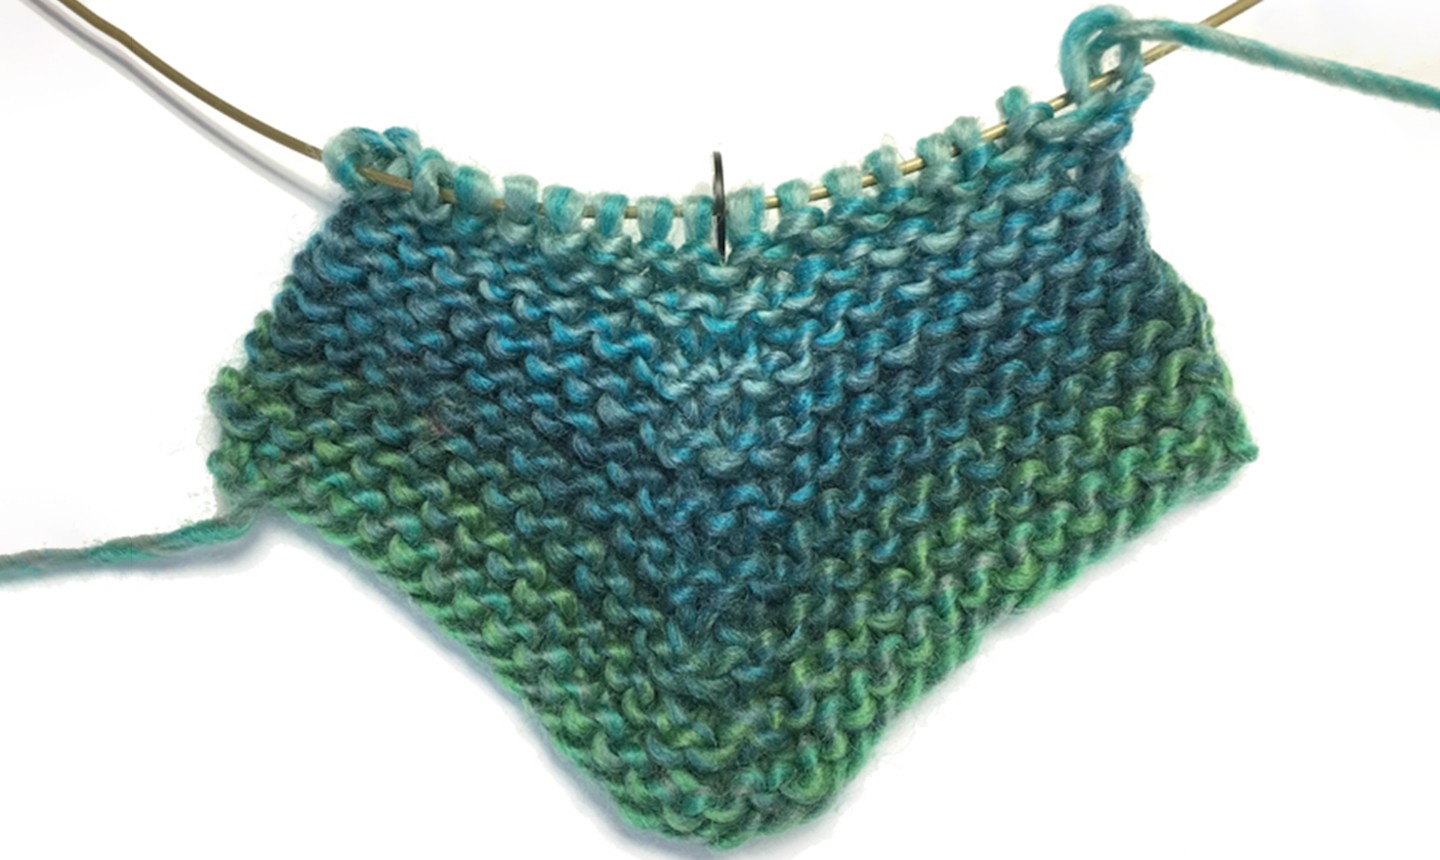
When you’re halfway through the square, you’ll start to see it take shape.
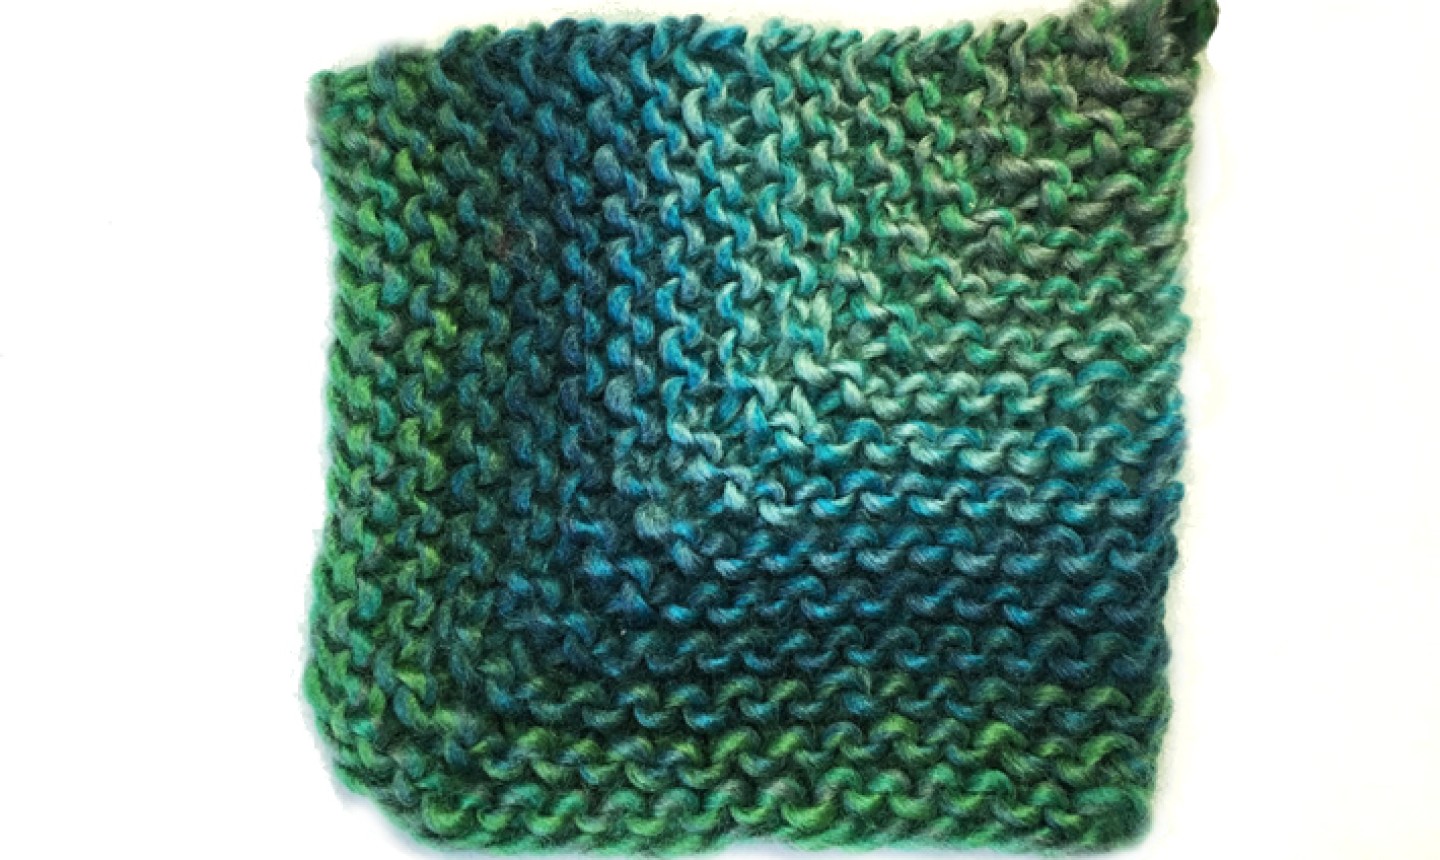
4. Finish the Square
Knit until you have have four stitches left on the needle after completing a wrong-side row.
On the right side, knit your first decrease, remove the stitch marker, and knit your second decrease. You now have two stitches left.
On the wrong side, bind off with the standard knit bind-off. You just knitted a mitered square!
Joining Several Mitered Squares
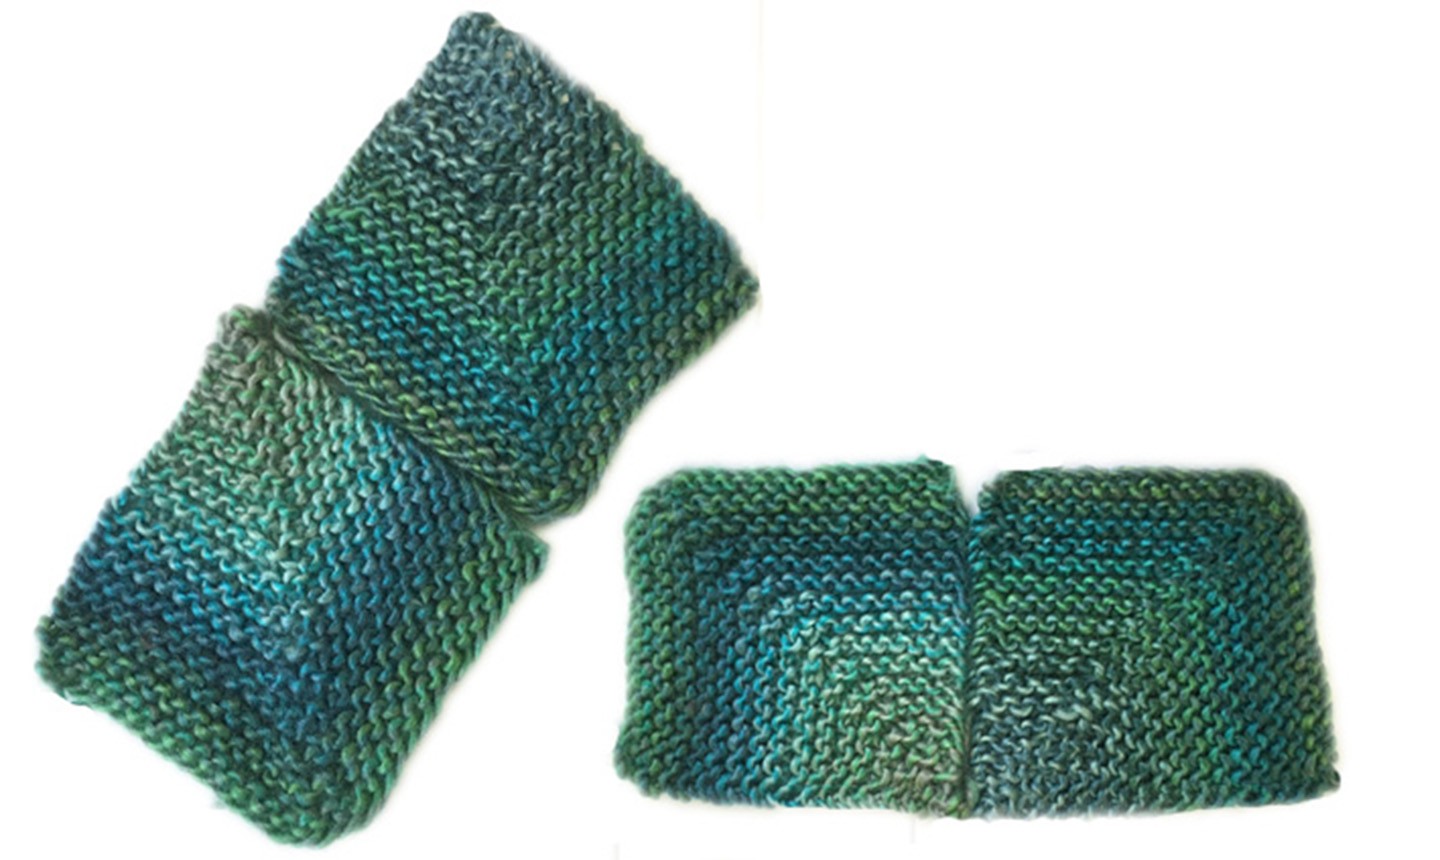
Although you can use a single mitered square as a coaster or dishcloth, you probably won’t want to stop there. Chances are you’ll want to connect your square to other squares or other pieces of knitting to complete your project.
You can connect the squares by seaming or by seamless joining as you go.
Seaming
Use mattress stitch or another seaming technique to join the squares. You can reduce the finishing workload by using the tails to sew the seams, eliminating the need to weave in ends.
Sewing the mitered squares together is a good option if …
You prefer to keep your project portable by knitting one square at a time.
- The sections are large.
- The sections are part of a garment with other seams.
- You want to decide later how to place the mitered squares in relation to each other, as in a patchwork project.
- Joining As You Knit
- Many knitters prefer to join mitered squares as they knit, by using stitches picked up from previous squares to start the next square.
Joining as you go is a good option if …
- You want to avoid seams (though you still have to weave in the ends).
- The mitered section is not a distinct square but flows into or overlaps other areas.
- Adding a new square involves a combination of picking up stitches and casting on, depending on where your mitered square is located in the project. Most patterns will provide a schematic to show you where to cast on and pick up stitches for different locations of your square.
In the example below, the second square is placed to the right of the first square.
1. Place your first square so that the right side is up with the cast-on edge at the bottom.
2. Cast on enough stitches for one side of your square (half the total cast-on for your first square). Slip a stitch marker onto your needle.
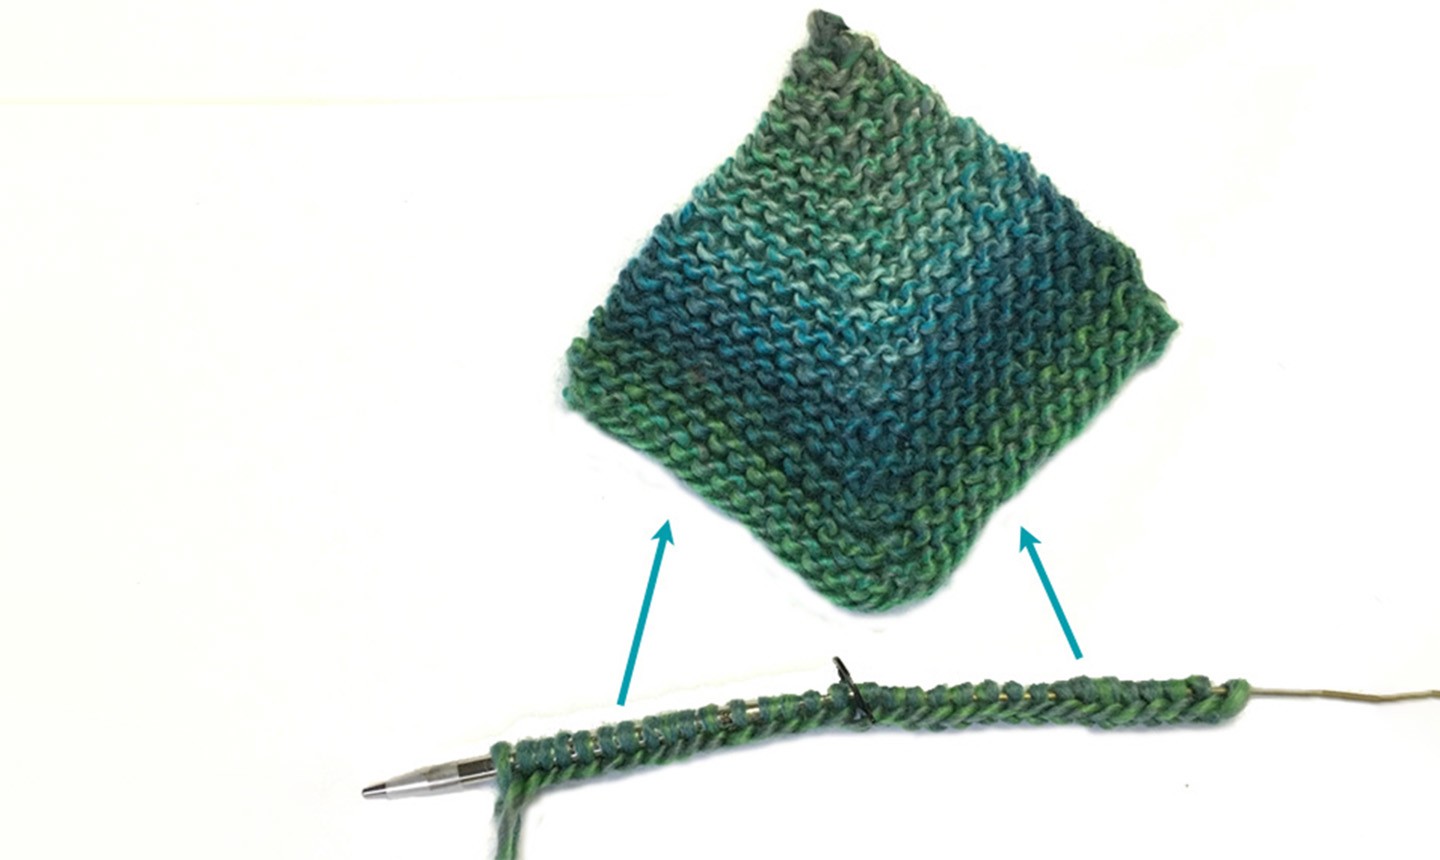
3. Beginning at the bottom right of the first square’s cast-on edge, start to pick up stitches along the right edge of the first square. These stitches will go on the right needle after the stitches you cast on in the previous step.
4. Pick up enough stitches to form the left side of the second square, half the stitches of your original cast-on.
In the illustration below, a stitch is picked up every knit row. You might find it easier to use a crochet hook to pull the yarn through and then transfer it to the needle.

5. Knit the first row along the wrong side, knitting the picked-up stitches and the cast-on stitches.
6. Knit the second row of the square pattern, and continue repeating the rows as you did for the first square.

Looks good, doesn’t it?
Adding Mitered Squares in Other Positions
Left of a Square
With the right side facing you, start at the top left edge of the square, and pick up half the stitches of the original cast-on to form the right edge of the new square. Place a stitch marker, then cast-on the rest of the stitches for the left edge. A cable cast-on is a good idea. Continue as above.
Between Squares
To add a mitered square between two squares if you’re building up, pick up half the stitches from the upper left edge of the right square, and then the other half of the stitches from the upper right edge of the left square. Continue as above.
Mitered squares really are magic!
I like it. . Going to try today
My mitred squares are wonky and fluted around the edges, despite repeated pressing to make them square. What am I doing wrong?</strong>
New to knitting starting with your mitered square
I wish to make a blanket with mitered squares added as I go. Is there a specific pattern as to where to attach each square? Like add a square to the right of the first square. Then add to the top of the first square. Next add the missing corner square. But where next?
Can you make mitred squares in any other stitch? Does it have to be garter??
There are easier and better ways of knitting mitred squares. Do the decreases on each row instead of alternate rows. Decrease by knitting into the backs of the two stitches to be decrease. Or slip the first of the two decreases, knit the next stitch then pass the first stitch over the second. DC.