
If you want to work wood you need a marking gauge, a cutting gauge and, at least for handwork, a mortise gauge.
Here we’ll examine the basics of these fundamental tools and also take a look at some related variations.
But can’t you just measure?
In woodworking, it is almost always more accurate to incise a measurement, such as with a gauge, than to mark a measurement from a rule or tape. The physical certainty of the action of a gauge is more reliable than eyeing a measurement and placing a mark freehand. In fact, for most woodworking, the relationships among parts and consistency are more important than absolute measurements.
Further, a gauge’s incised mark often serves as a physical reference for the next tool. For example, the knifed line made with a cutting gauge to define the baseline of dovetails serves as a firm registration for placing the chisel when chopping the waste.
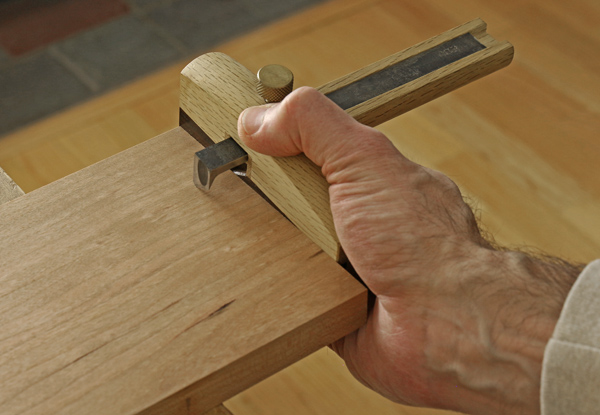
Basics
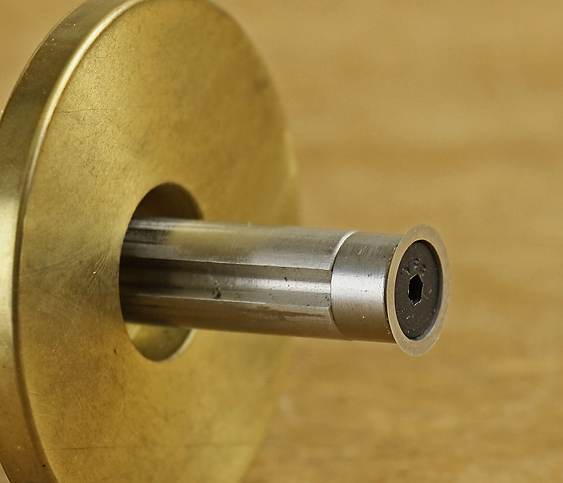
A gauge of any sort consists of a fence through which passes an adjustable stem that is set for the desired measurement and secured with a screw knob. At or near the end of the stem is a point or cutter that makes the mark. In use, as shown in the top photo, the fence is held firmly against the wood and pulling or pushing the gauge makes the mark.
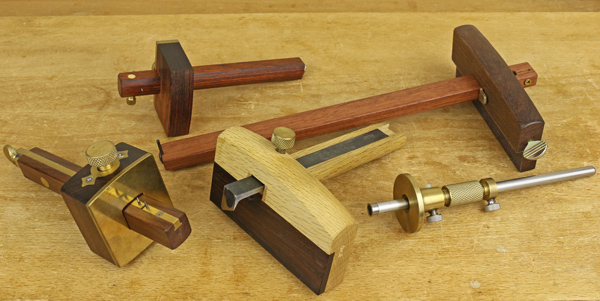
Marking gauge
This tool is used to make a mark along the grain parallel to a straight edge of the wood. It has a simple conical point or, in some models, a half point, that plows a minute “V” mark without a tendency to be diverted by the grain of the wood. Common uses include defining rip cuts and gauging the thickness of a board for dimensioning by hand.
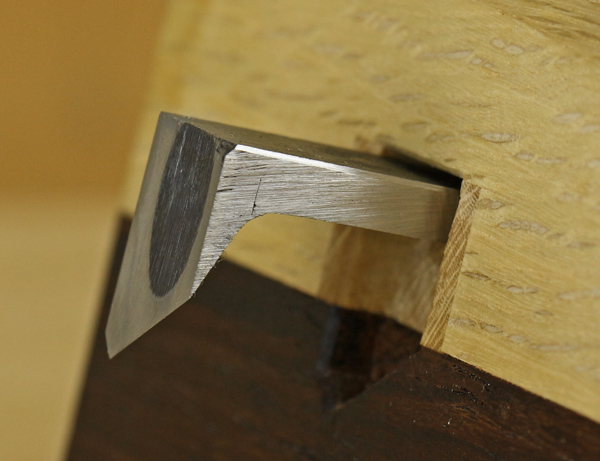
Cutting gauge
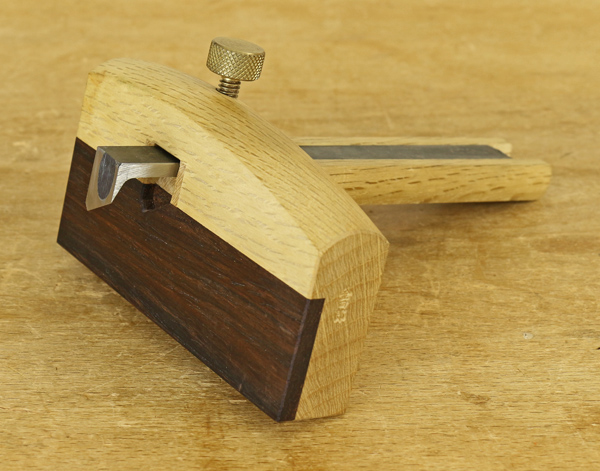
Used to mark across the grain, this tool employs a sharp knife edge that severs the wood fibers. The cutter has a V-point (sometimes asymmetrical like the one shown here) or a rounded edge. The quintessential use for a cutting gauge is to mark the baseline of a dovetail joint but it is also used in many other joints and various tasks to make a clean line across the grain.
Mortise gauge
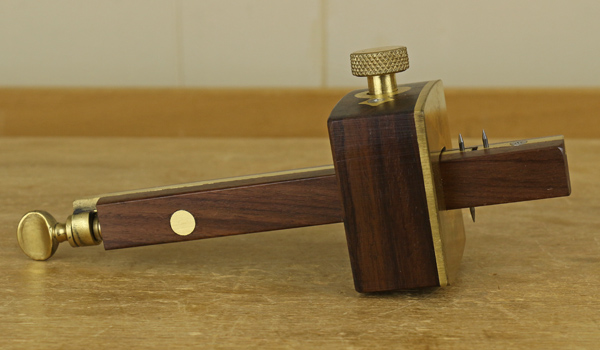
This gauge has two pins, one moveable by a slider or, as in the model shown here, a screw feed, that are set to mark both the width of a mortise and its mating tenon. It is a must for making a mortise, a tenon, or both by hand. Note that many mortise gauges, including the one shown here, also have a single marking gauge point on the other side of the stem to make it two gauges in one.
Please see the post “Understanding tools for mortising by hand” for more on the mortise gauge.
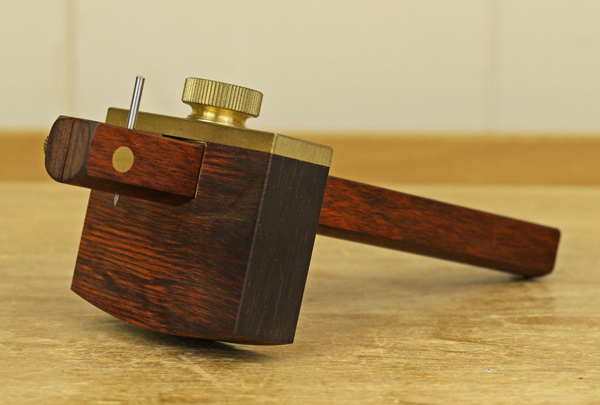
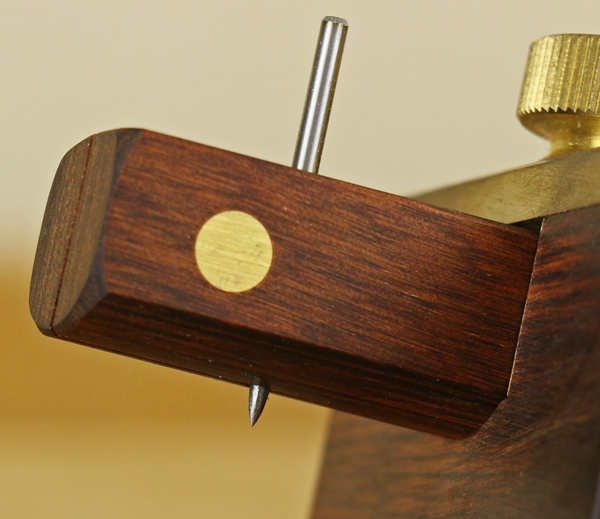
Wheel gauge – another way
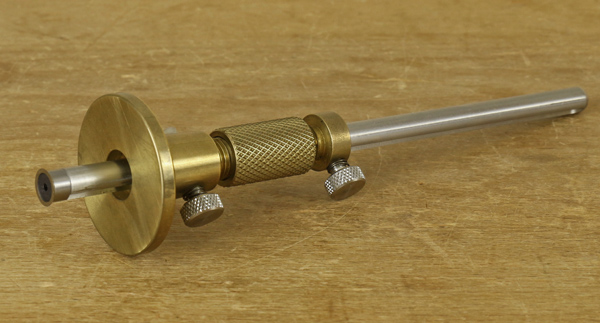
This versatile gauge uses a very sharp round cutter to mark across or along the grain. The best versions, like the one shown here, have a very handy micro-adjustable mechanism that makes accurate settings very easy. It also functions as an excellent depth gauge. Some models can also be fitted with two cutters to function as a mortise gauge.
The fence can be simply pushed or pulled along the edge of the board but some woodworkers prefer to also rotate it, particularly when working across the grain.
For many woodworkers, this one gauge can do it all. In my view, it is a very handy all around gauge but a traditional dedicated cutting gauge makes a better knife line and with more control. For working along the grain, I find the mark made by a traditional marking gauge to be more visible.
Panel gauge

This is a cousin of the marking gauge used to define much wider rip cuts. The fence is larger and often has a step, as in the one shown here, to help stabilize the fence against the edge of the board. A panel gauge is best pushed or pulled with both hands, one on the fence and the other near the far end of the stem, to prevent the tool from twisting.
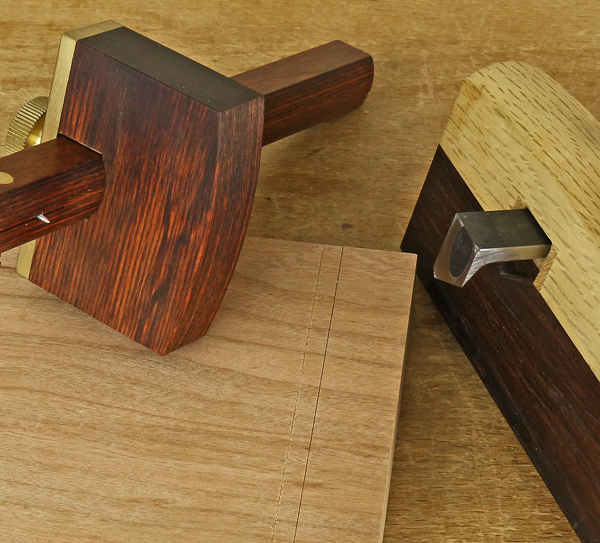
Why you need a marking and a cutting gauge
In the photo below, the cutting gauge knife has made a clean line across the grain. By contrast, the line to the left made by the point of the marking gauge is ragged and would not be a good registration for the placement of a chisel.
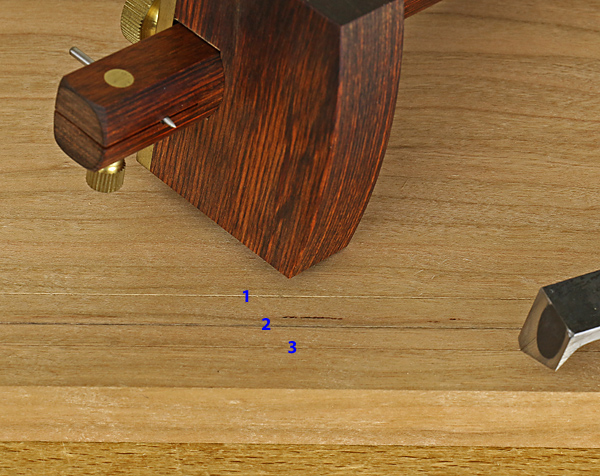
Working along the grain, in the photo below, the marking gauge has made a clean line (1). By running a 0.5 mm mechanical pencil point in another marking gauge line (2), its visibility is enhanced. The thin line (3) made by the knife of the cutting gauge is barely visible. In some cases, the cutting gauge will also tend to follow the grain pattern of the wood and therefore be inaccurate.
Special Savings on Popular Woodworking Classes

Learn from the best instructors. Get up to 33% off classes you can watch anytime, anywhere, forever.Enroll Now to Save »
Share tips, start a discussion or ask one of our experts or other students a question.
No Responses to “Tools to Get Started in Woodworking: Gauges”