
Do you have bottles of color sprays and misters in your craft stash that are gathering dust? I know I used to. I couldn’t stop myself from buying them in their cute little bottles with bright colors and shimmers peeking through, and then I would get them home and have no clue what to create with them. Then I started getting into the stencil craze that’s been sweeping through the card making community this year, and now I’m hooked!
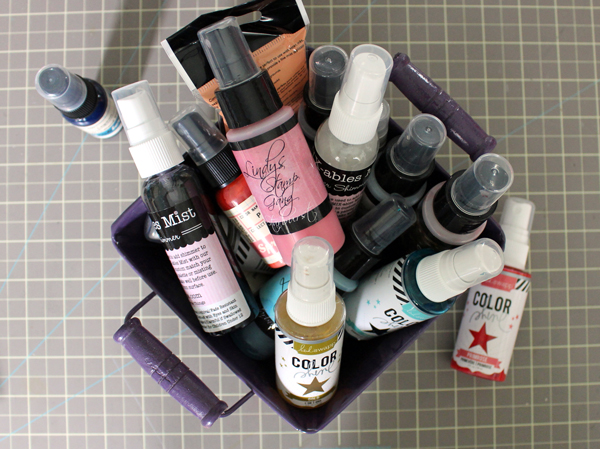
There are many different brands, colors and finishes of color sprays out there, and most will work really well with this simple technique. I suggest trying out your sprays with different types and colors of card stock, as I’ve found certain sprays that I assumed didn’t have great color payoff actually showed up quite shimmery on a darker card stock.
If you don’t have any you can make your own with a spray bottle, a few drops of dye ink (ink pad refills are great for this!) and some water. If you have some PearlEx powders (another item that tends to gather dust!) or Ranger Perfect Pearl powders, you could add a bit of that too to your custom spray for some added shimmer and you’re good to go!
How to make your own pattered paper
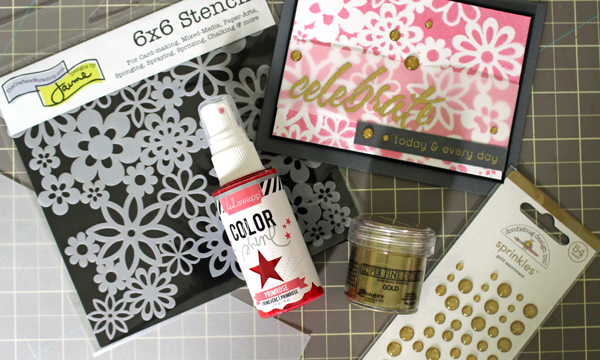
Supplies needed:
- Color spray
- Card stock
- Stencil
- Stamps and embellishments to complete your card
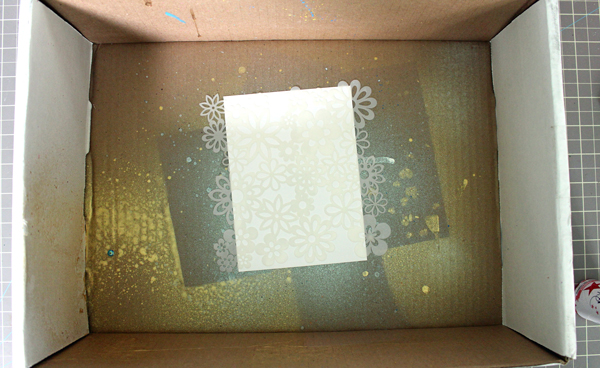
Step 1:
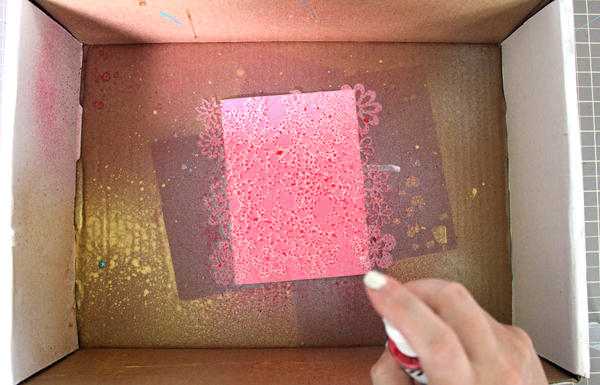
I have a cardboard box that I cut the lid off of that I use to protect my work surface (and floor) when I do techniques like this. An old bowl works great as well, but I prefer the cardboard, as it’s sturdy and I can just keep the box stored under my desk when I’m not using it.
Lay the card stock in the bottom of your box and position your stencil over it. Unlike other stencil techniques there’s no need to tape down the card stock or the stencil.
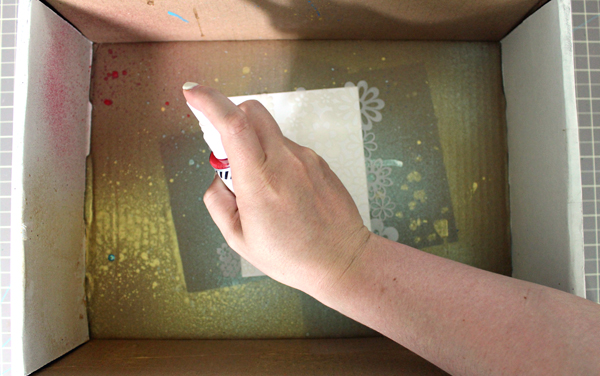
Step 2:
I highly recommend testing your spray out before actually using it over the stencil. I like to spray it a couple of times in the corner of the box (especially if it’s a brand new bottle) to see how it sprays and to make sure it’s not clogged.
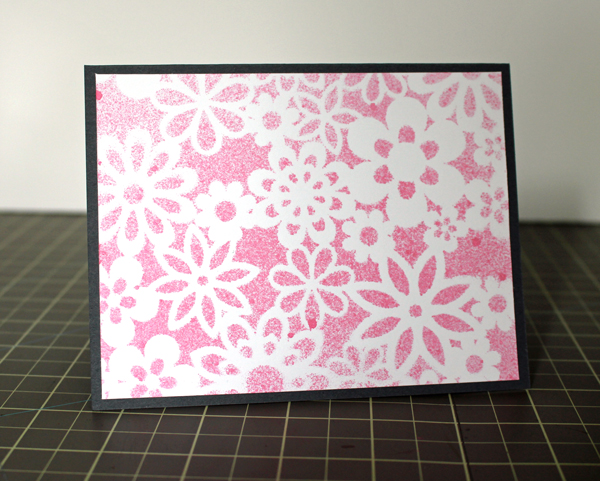
For today’s card I’m using Heidi Swapp Color Shine Spray in Primrose. I am really liking these sprays as they have great color payoff and a nice shimmer!
Step 3:
Spray over your stencil. The amount of time you spray will depend on the kind you’re using. Here I sprayed a good 7 or 8 times to get the color I wanted. Don’t be surprised if you get some larger splatters — it’s the nature of using products like this. There are bound to be some splatters and not a 100% perfect, fine mist. I just go with it.
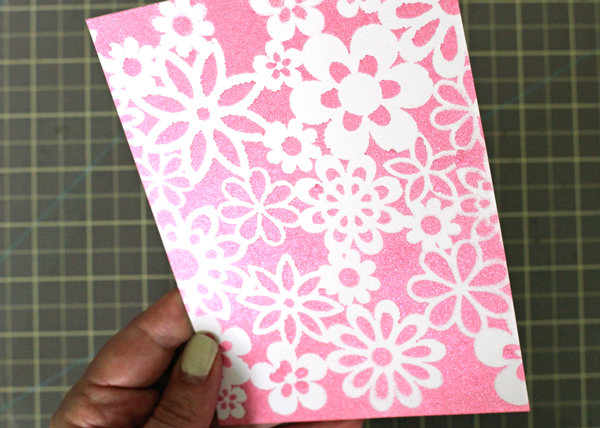
As soon as you’re done spraying you can remove the stencil and either wipe it off with a baby wipe or rinse it in the sink with warm water.
Step 4:
Allow the card stock to dry. This should only take a few minutes. You now have a fun patterned paper to use on your next card! Keep reading to see how I used mine.
Step 5:
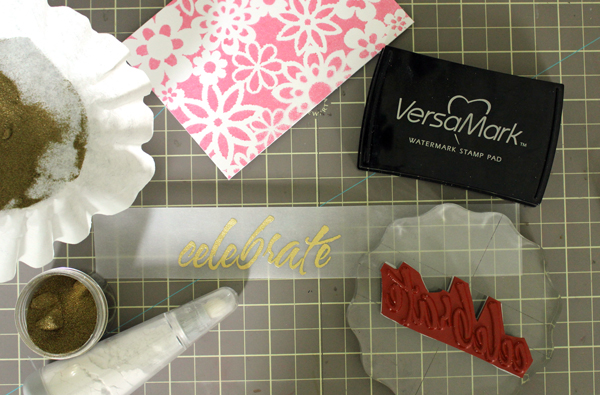
I stamped and embossed the sentiment from the Scripted Sentiments stamp set onto a strip of vellum using VersaMark ink and gold embossing powder. I ended up adding a second smaller sentiment that I stamped and embossed onto a strip of dark gray card stock.
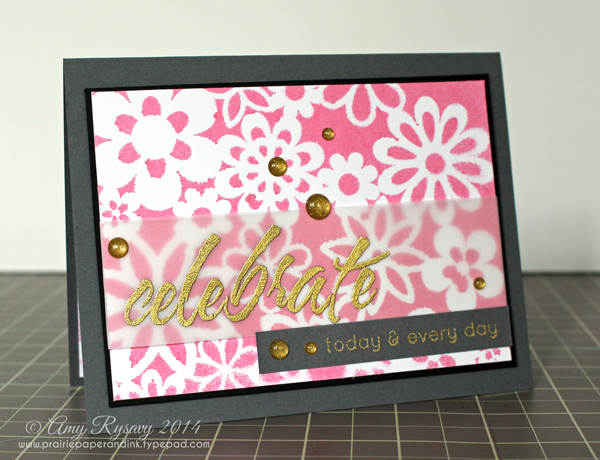
And here is my finished card!
I wrapped the vellum around the stenciled cardstock and adhered it on the back where it wouldn’t be seen. Using the vellum ensured that most of the pattern I have created with the spray and stencil would still be visible.
Of course, I had to add some gold enamel dots as embellishments as I can’t seem to stop using them!
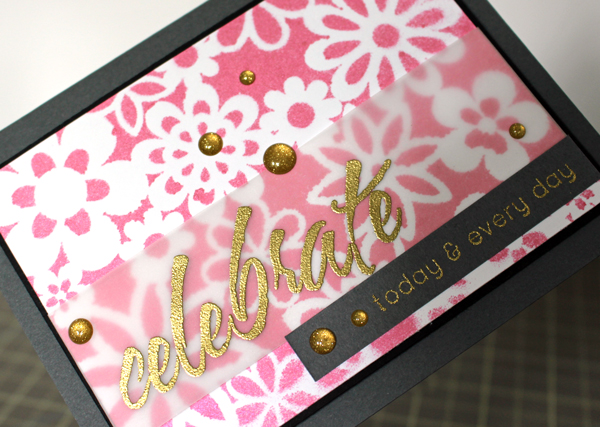
The shimmer of the gold embossing powder plays well with the pink color spray!
To complete the inside of the card I followed the same steps, but this time I only sprayed 3 or 4 times to get a lighter pattern. That way you will still be able to write your message to the recipient and be able to see it!
Share tips, start a discussion or ask one of our experts or other students a question.
No Responses to “Using Color Sprays & Stencils to Make DIY Patterned Paper”