
If you’re getting serious about making jewelry and metalsmithing jewelry, you’ll need to invest in the right tools that will help bring the beautiful designs you’ve dreamed up into fruition. Below is a list of 5 must-have tools for your jewelry making toolbox that are perfect for making metal jewelry for beginners. Have your favorite tools for making jewelry and metalsmithing made the list?
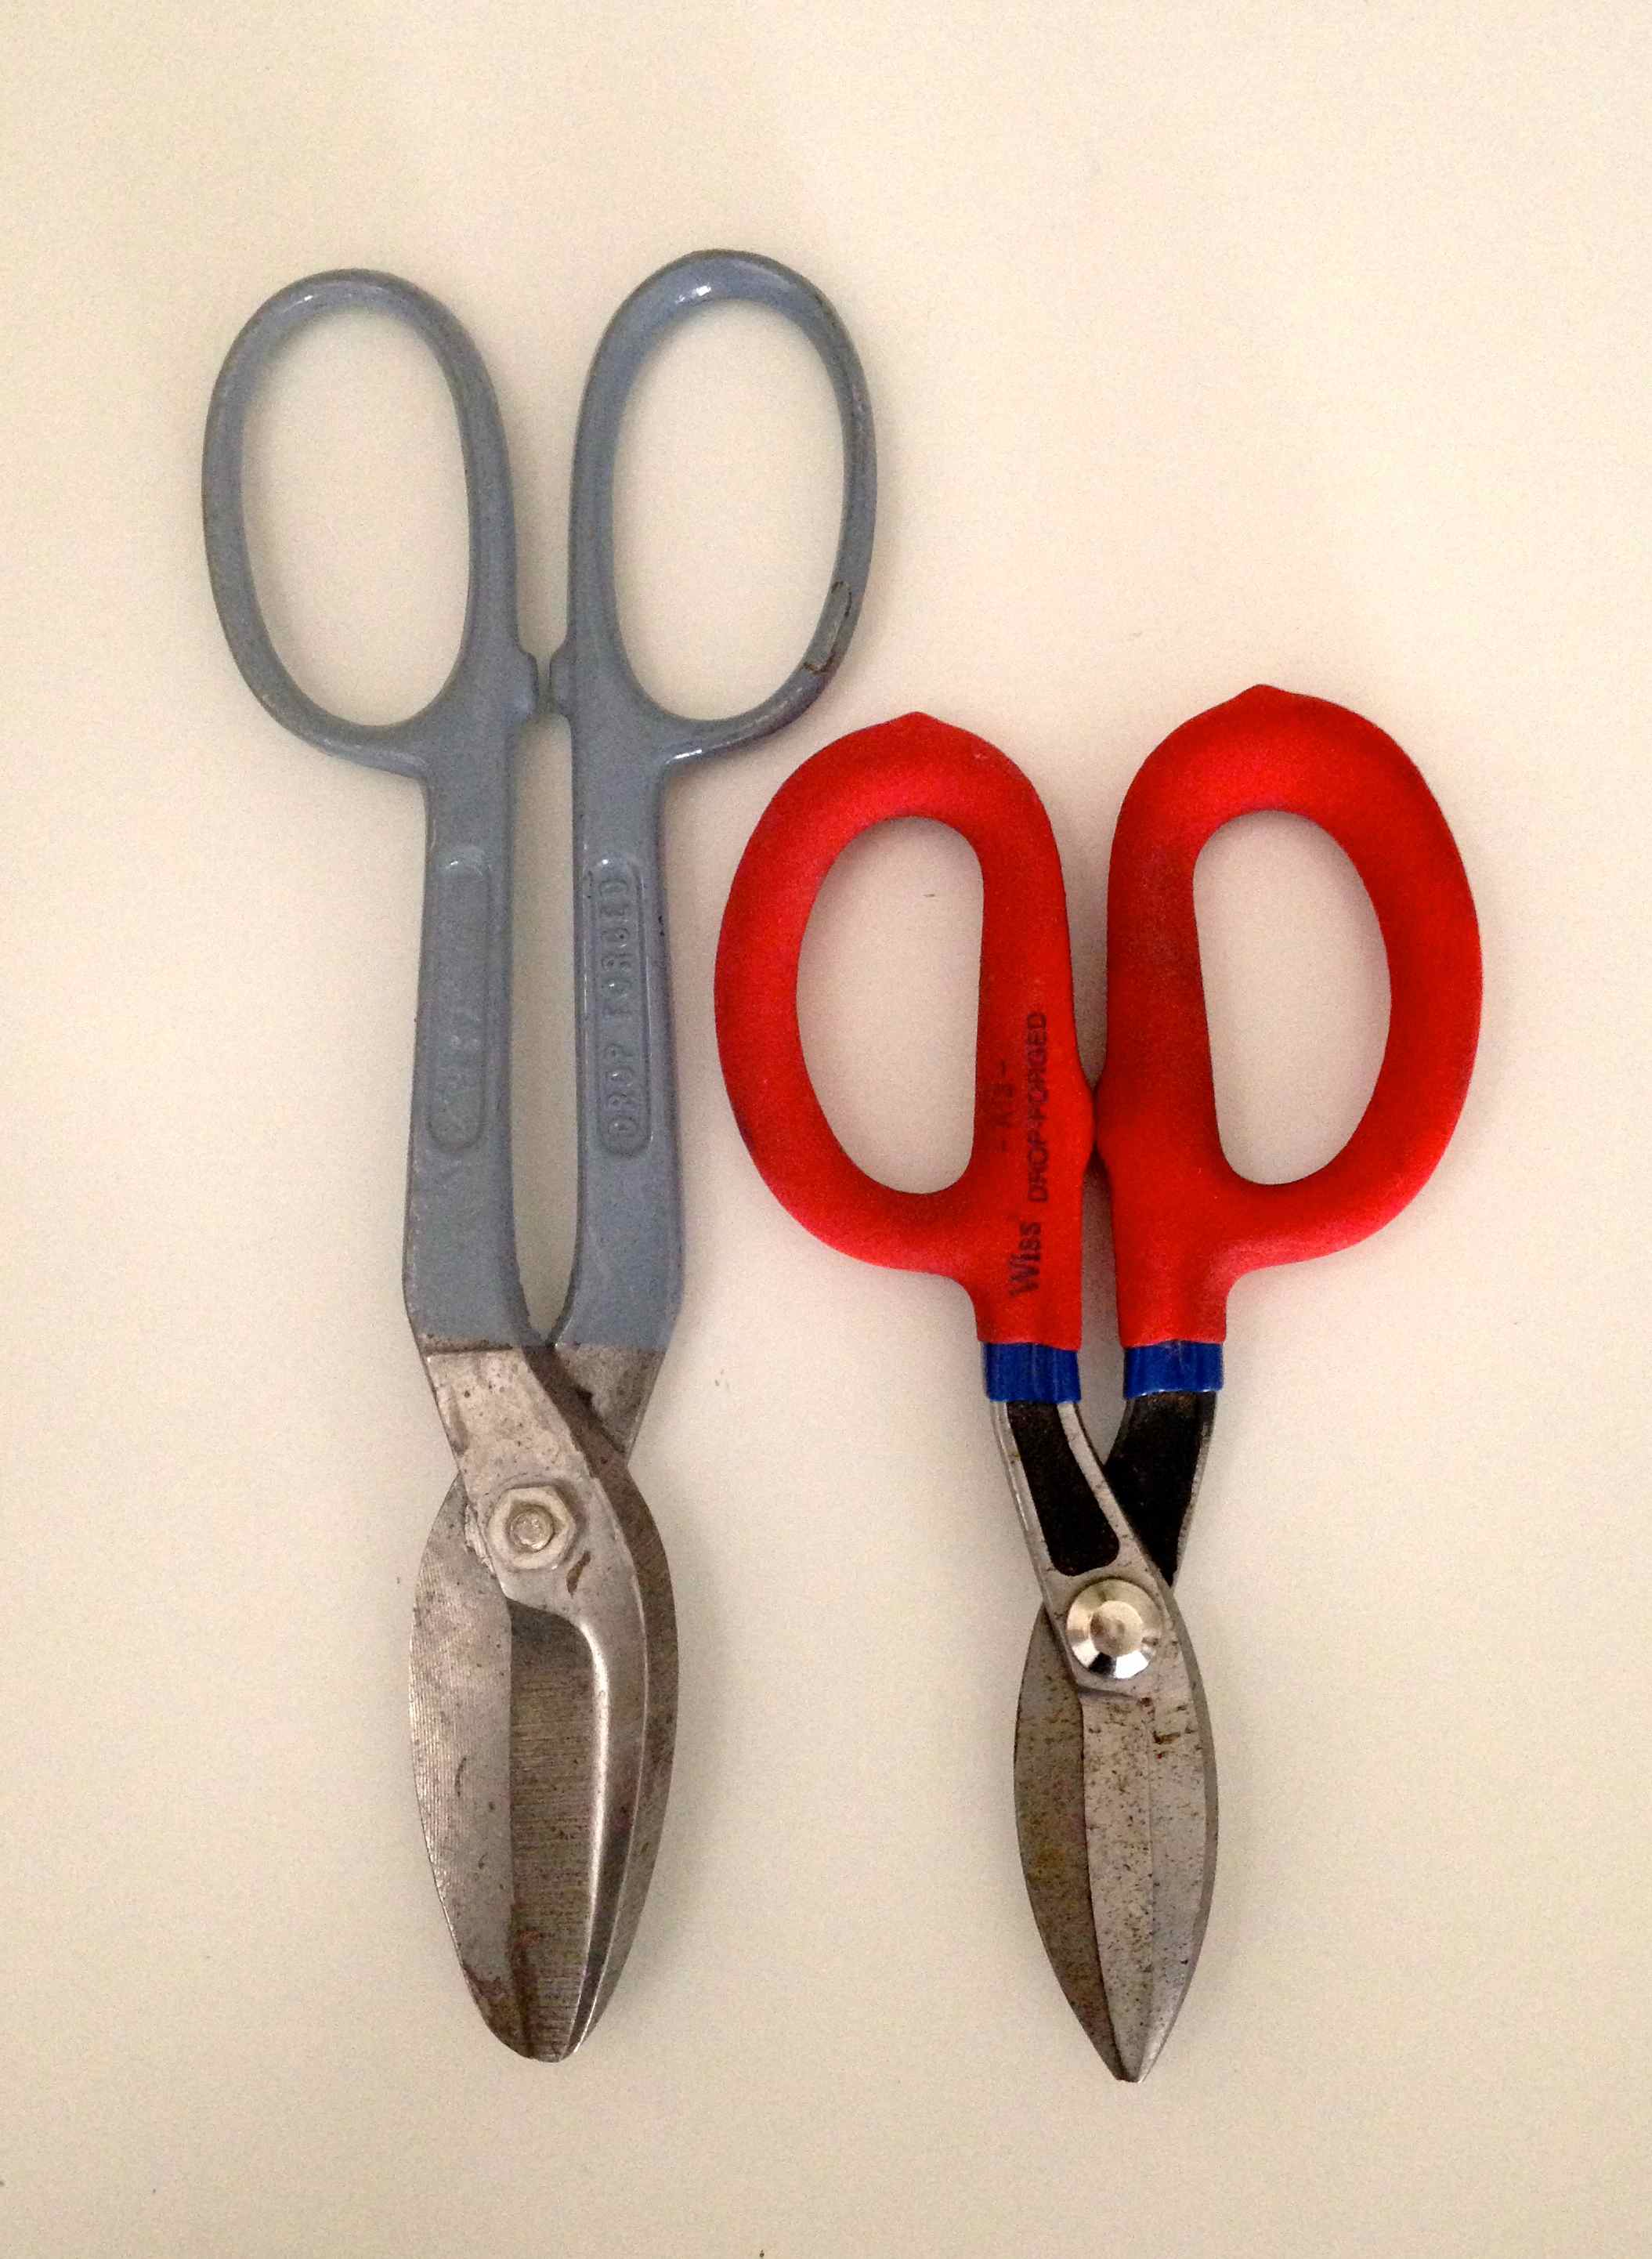
1. Metal shears
One of the very easiest tools is also the most easily accessible. The humble metal shear is also known by the names shop shear or utility shear. You should be able to find these at your neighborhood hardware store. I love using metal shears for jewelry and metalsmithing because they have the added benefit of being relatively easy to transport.
While great for cutting straight lines, (think triangles and squares), they can be a little tricky for rounded edges. When buying them, make sure that the blades of the scissors are flat. There are some out there with blades that are slightly serrated on their edges. Sure they cut great but they also make a TON of extra work for you. When you have to file all the sharp edges off of your pieces you’ll understand.
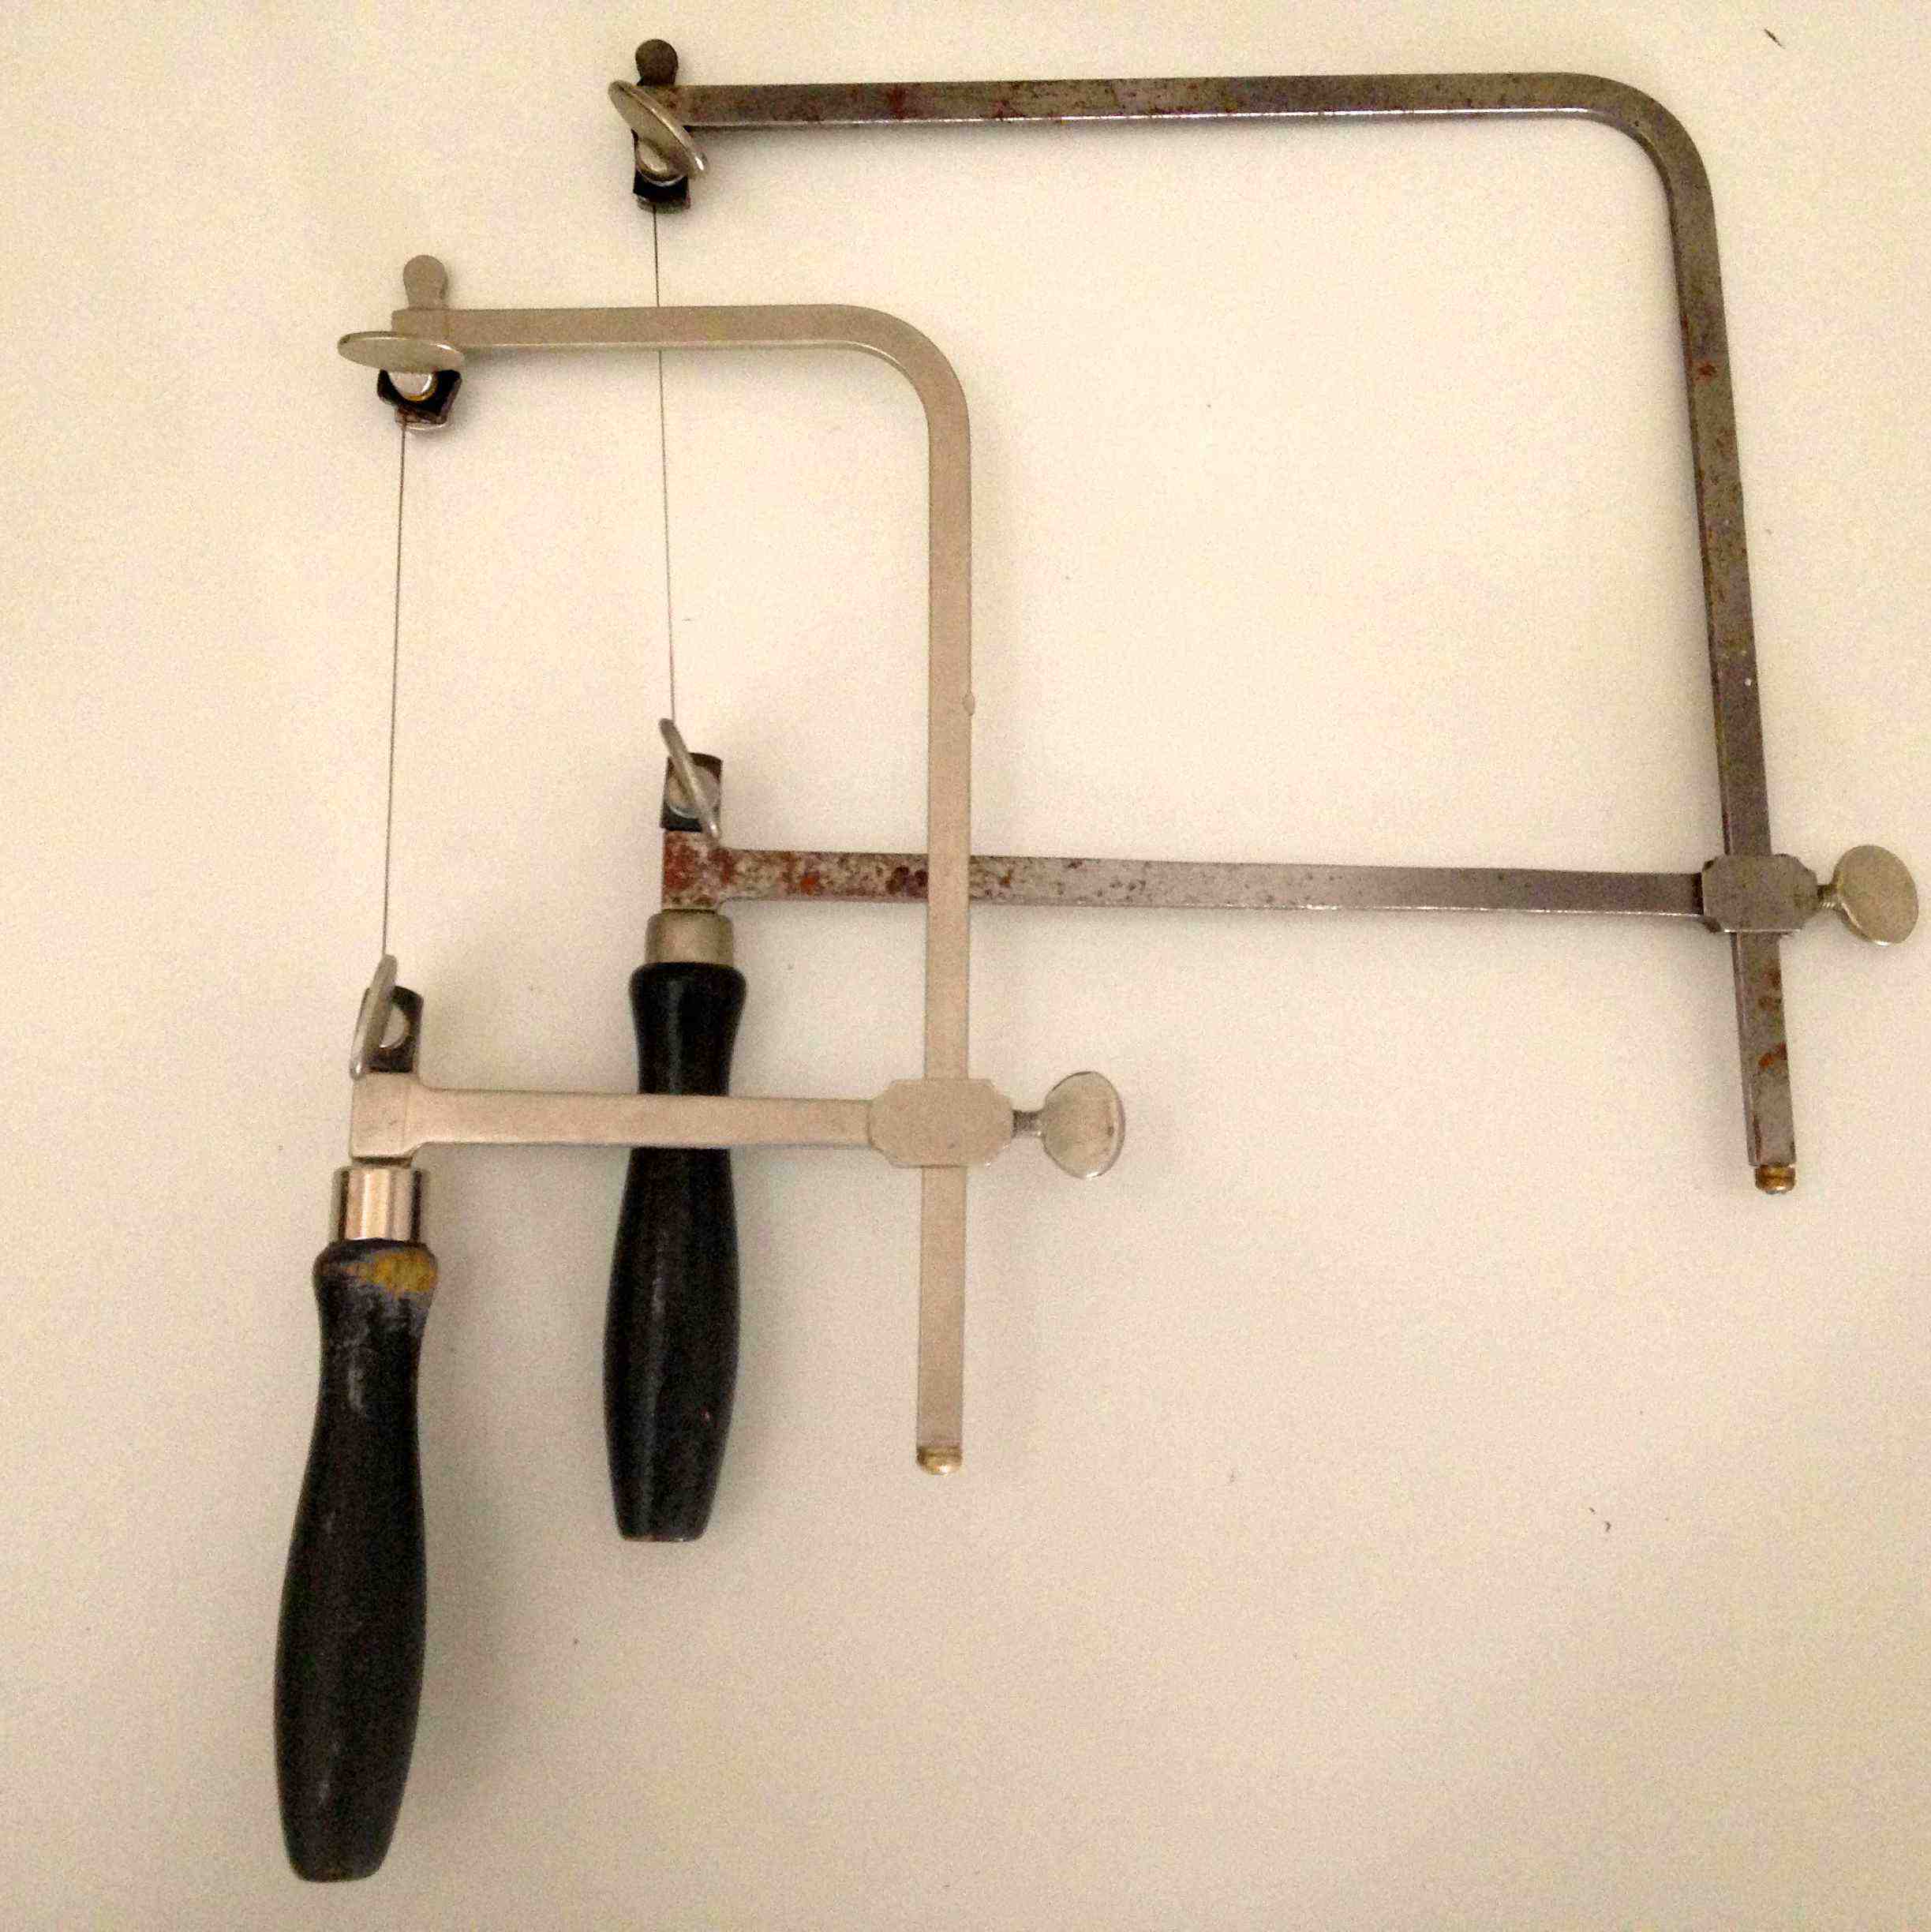
2. Jeweler’s saw
Are your designs pretty small and do they dictate lots of little intricate cuts? Then the good old jeweler’s saw will probably be your best bet for projects like these. They give you the freedom to make tiny cut lines and really get into the detailed work of a piece. Blades come in sizes that range from barely parting the metal to stronger and thicker ones, which of course remove more metal.
Regardless of the blade size you use, I recommend a lubricant to help keep your fingers safe from catches, reduce the chance of breaking a blade, and preserve the cutting edge. Just run your blade through a little before cutting and I promise an all-around smoother experience. Bur-Life is the lubricant you’ll find on my bench.
There are blade frames that are a standard size, (shown on the left) and ones with a deeper throat depth, (shown on the right). The deeper one will allow you to make long cuts if you’re working with a long piece of metal or a larger piece. My small jeweler’s saw gets a lot more use than my rusty, old one. That’s because a smaller frame is easier to control, which is something to keep in mind if you decide to invest in one.
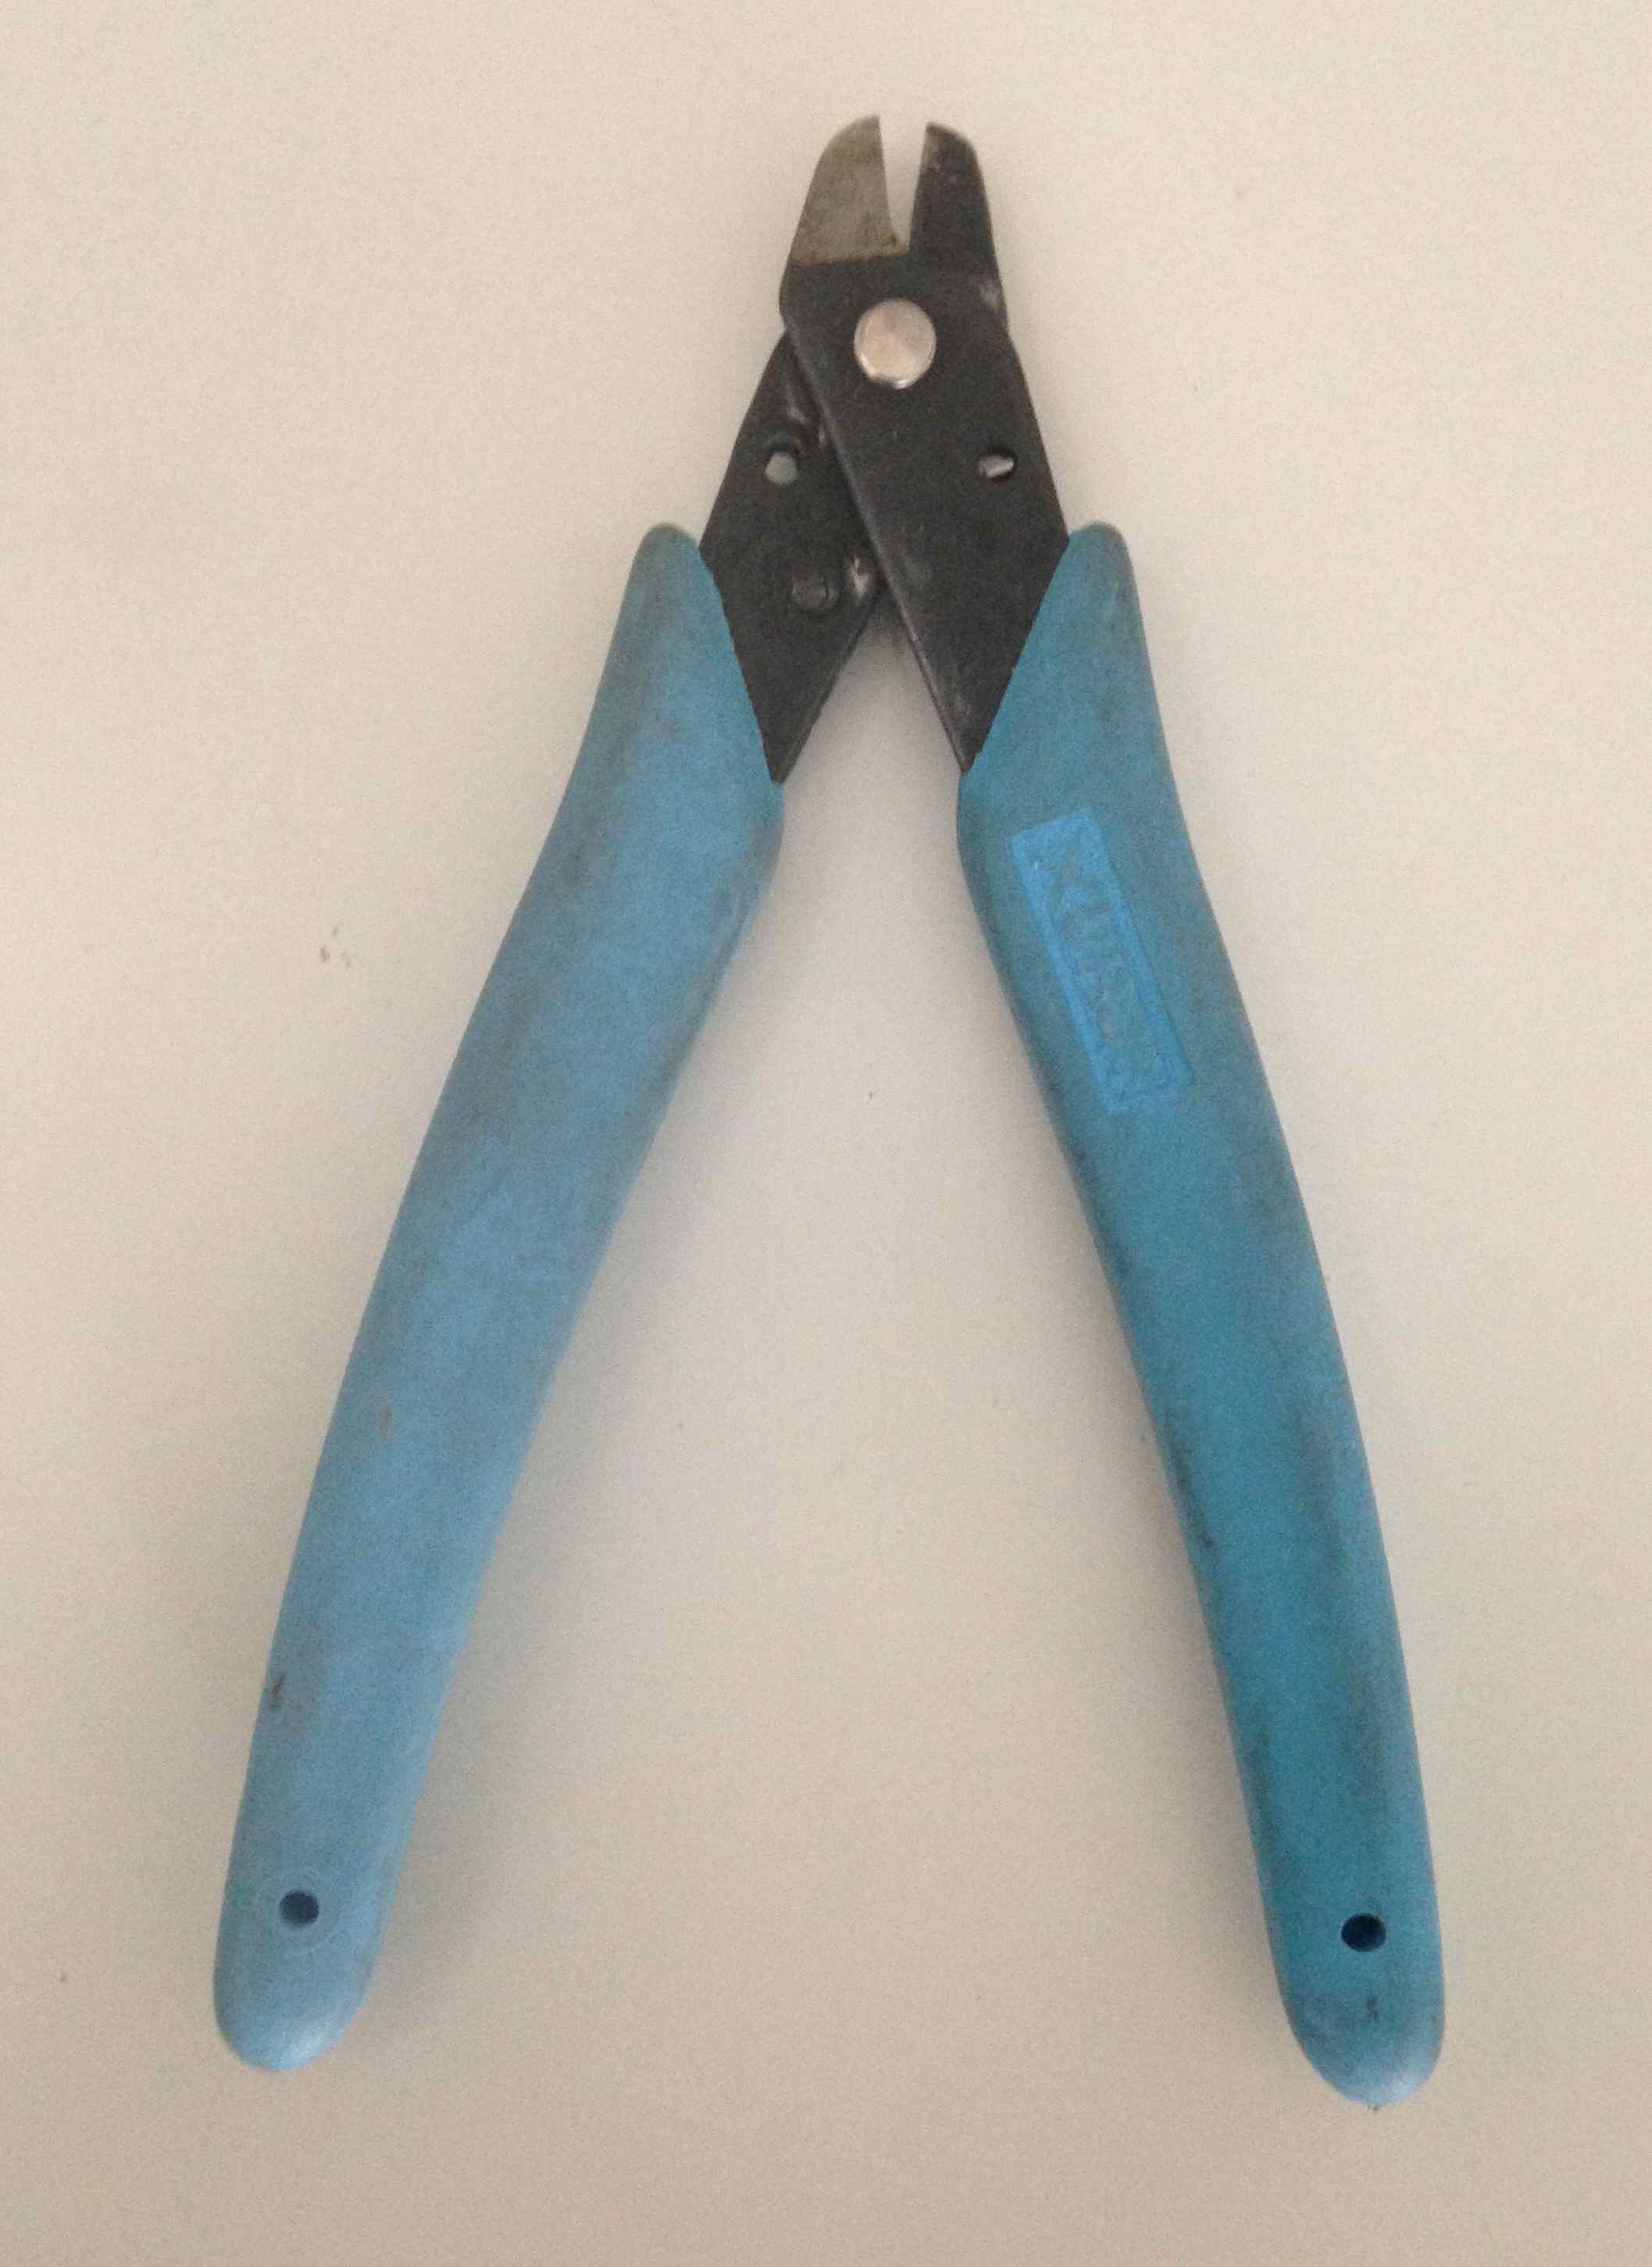
3. Flush cutter
Cutting lots of wire for all those new wire-wrapping techniques you’re learning? Consider a flush cutter. You will use them the way that you would good regular wire cutters, but end your experience without the aesthetic nightmare of pinched ends. I don’t recommend doing what I did, which was to try to cut thicker metal than is recommended. Mine are now pretty much worthless. Tools come with instructions for a reason — a lesson learned the hard way.
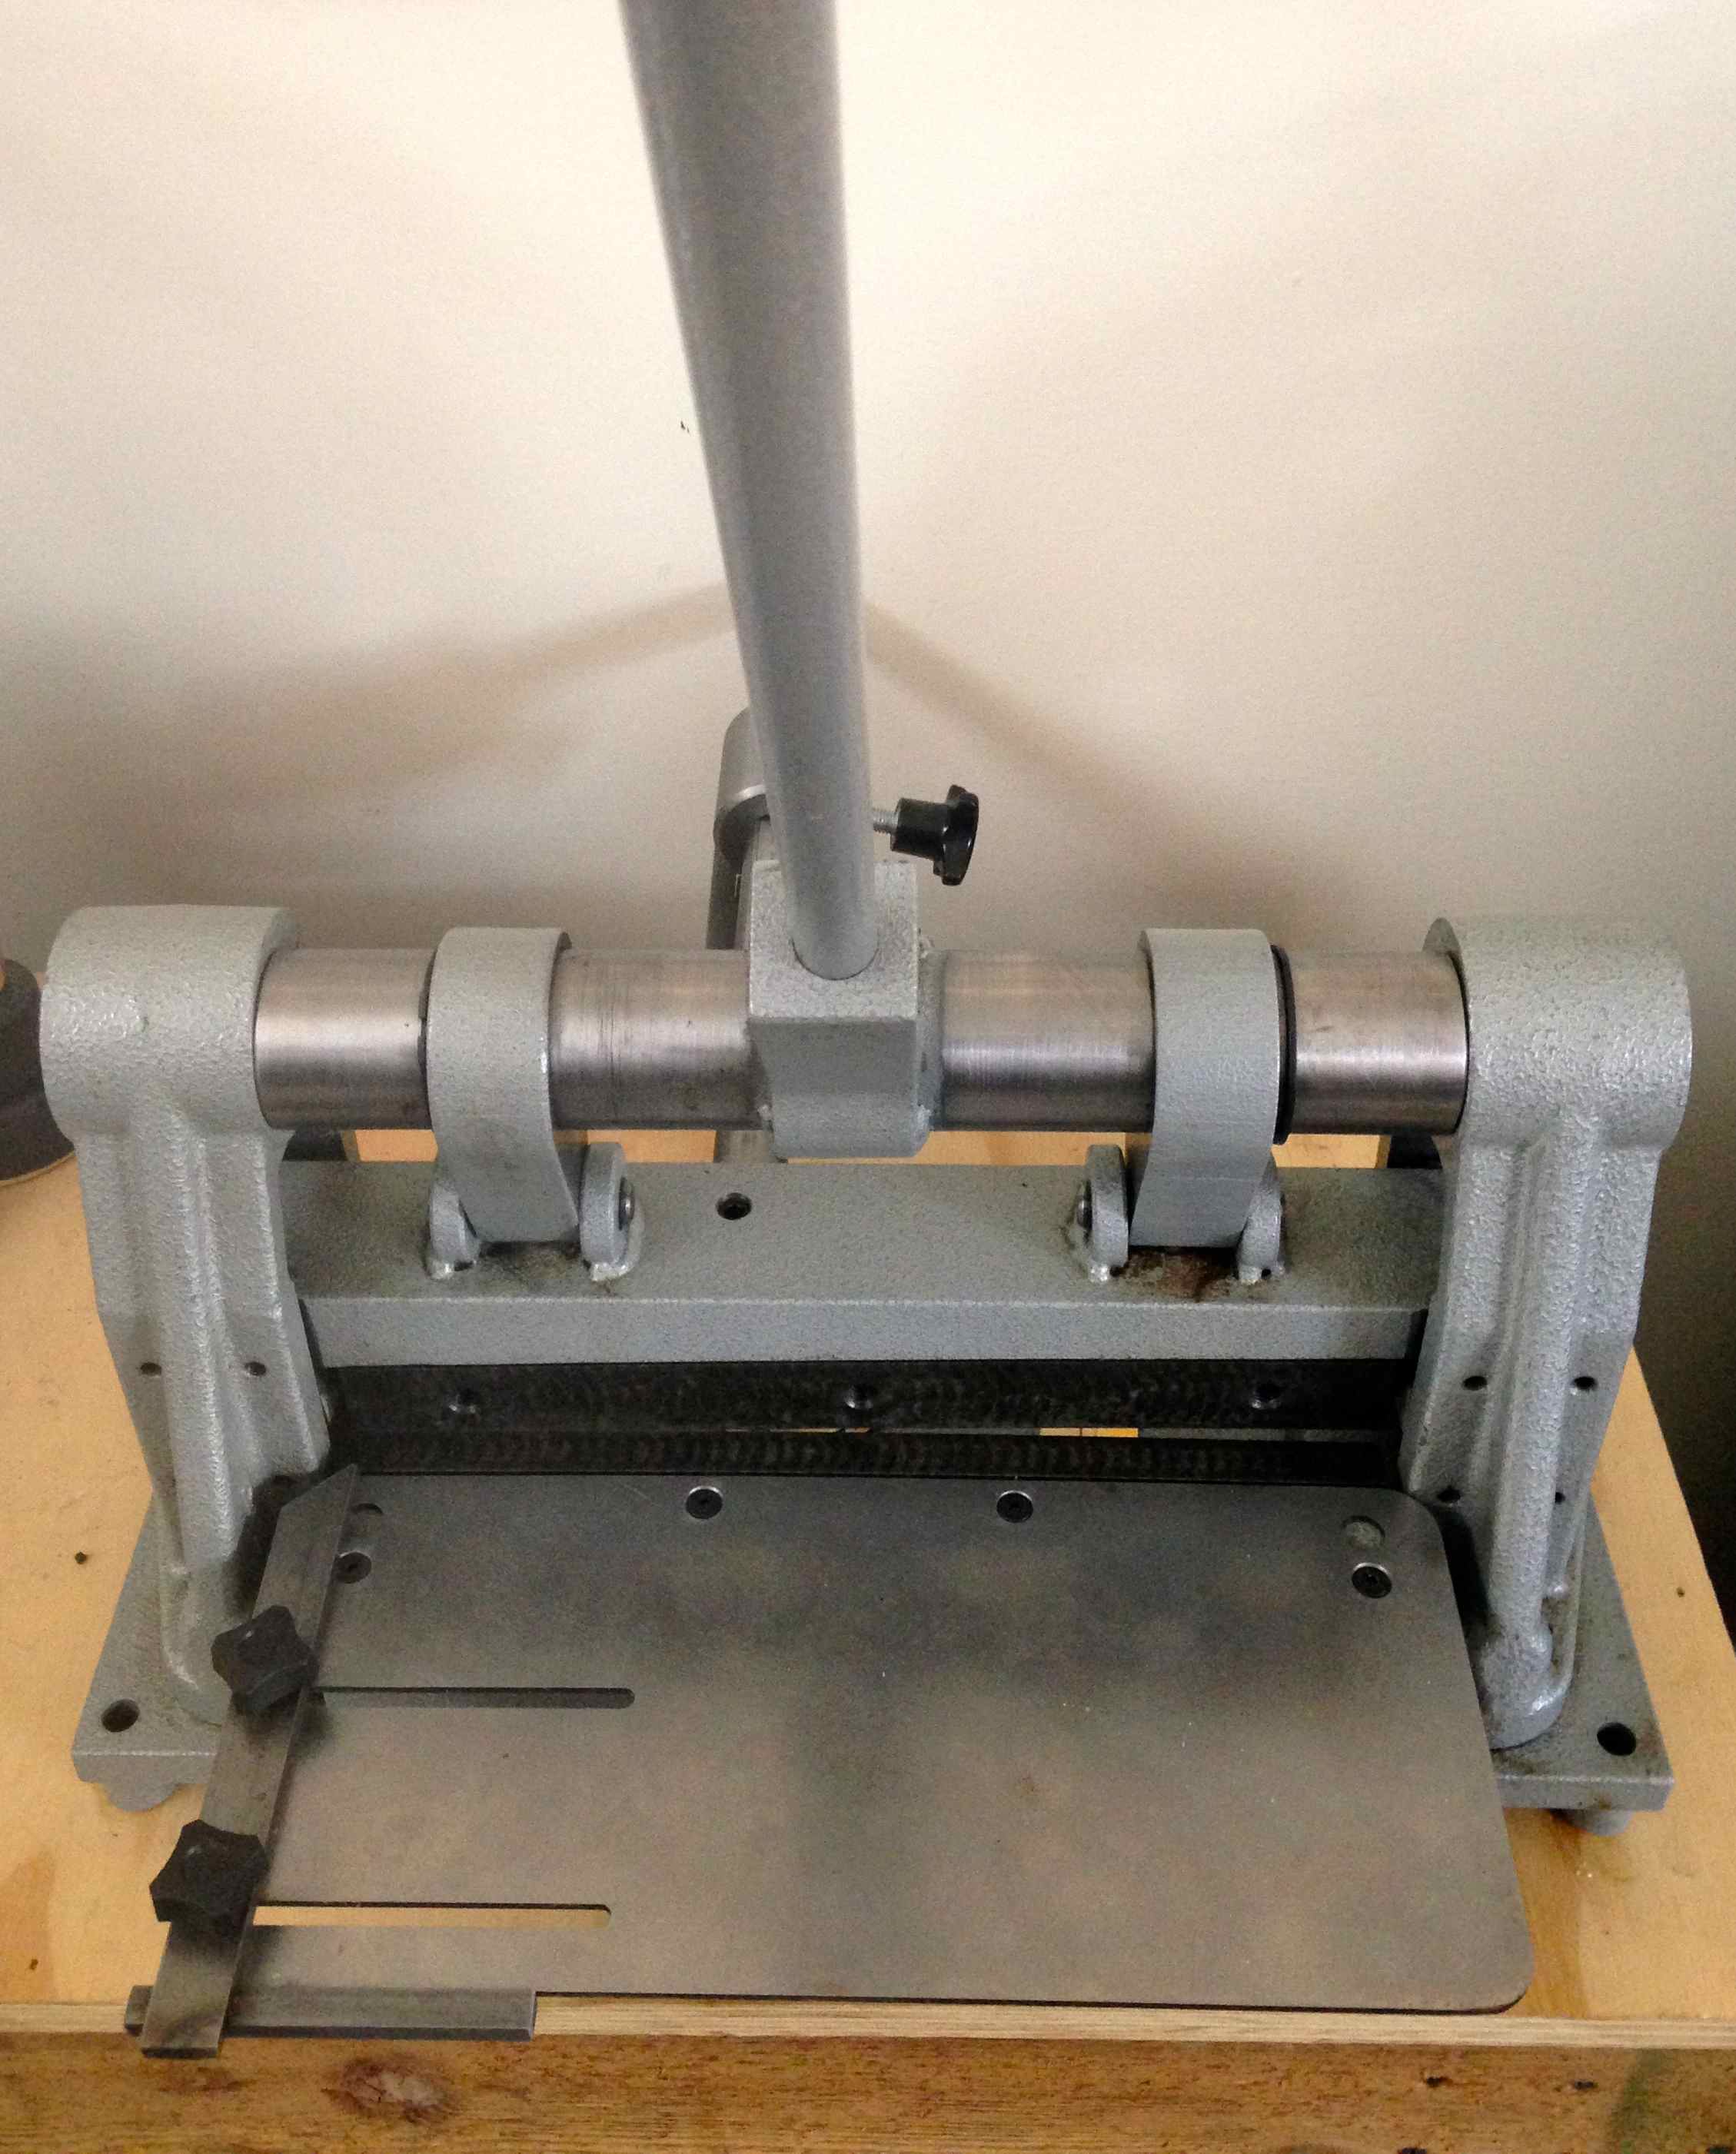
4. Bench shear
If you make a lot of long, straight cuts, you may want to consider investing in a bench (aka a guillotine) shear. These babies are not cheap but oh the joy! What once was cutting with a jeweler’s saw then filing to make the edges clean, this tool does in mere moments. You’ll want to think first about what you’re looking to cut with this tool. Super thick gauges or certain types of metal might prove tricky or impossible. Just research their abilities when scouting one out and be prepared that their price reflects how much they’ll be able to do.
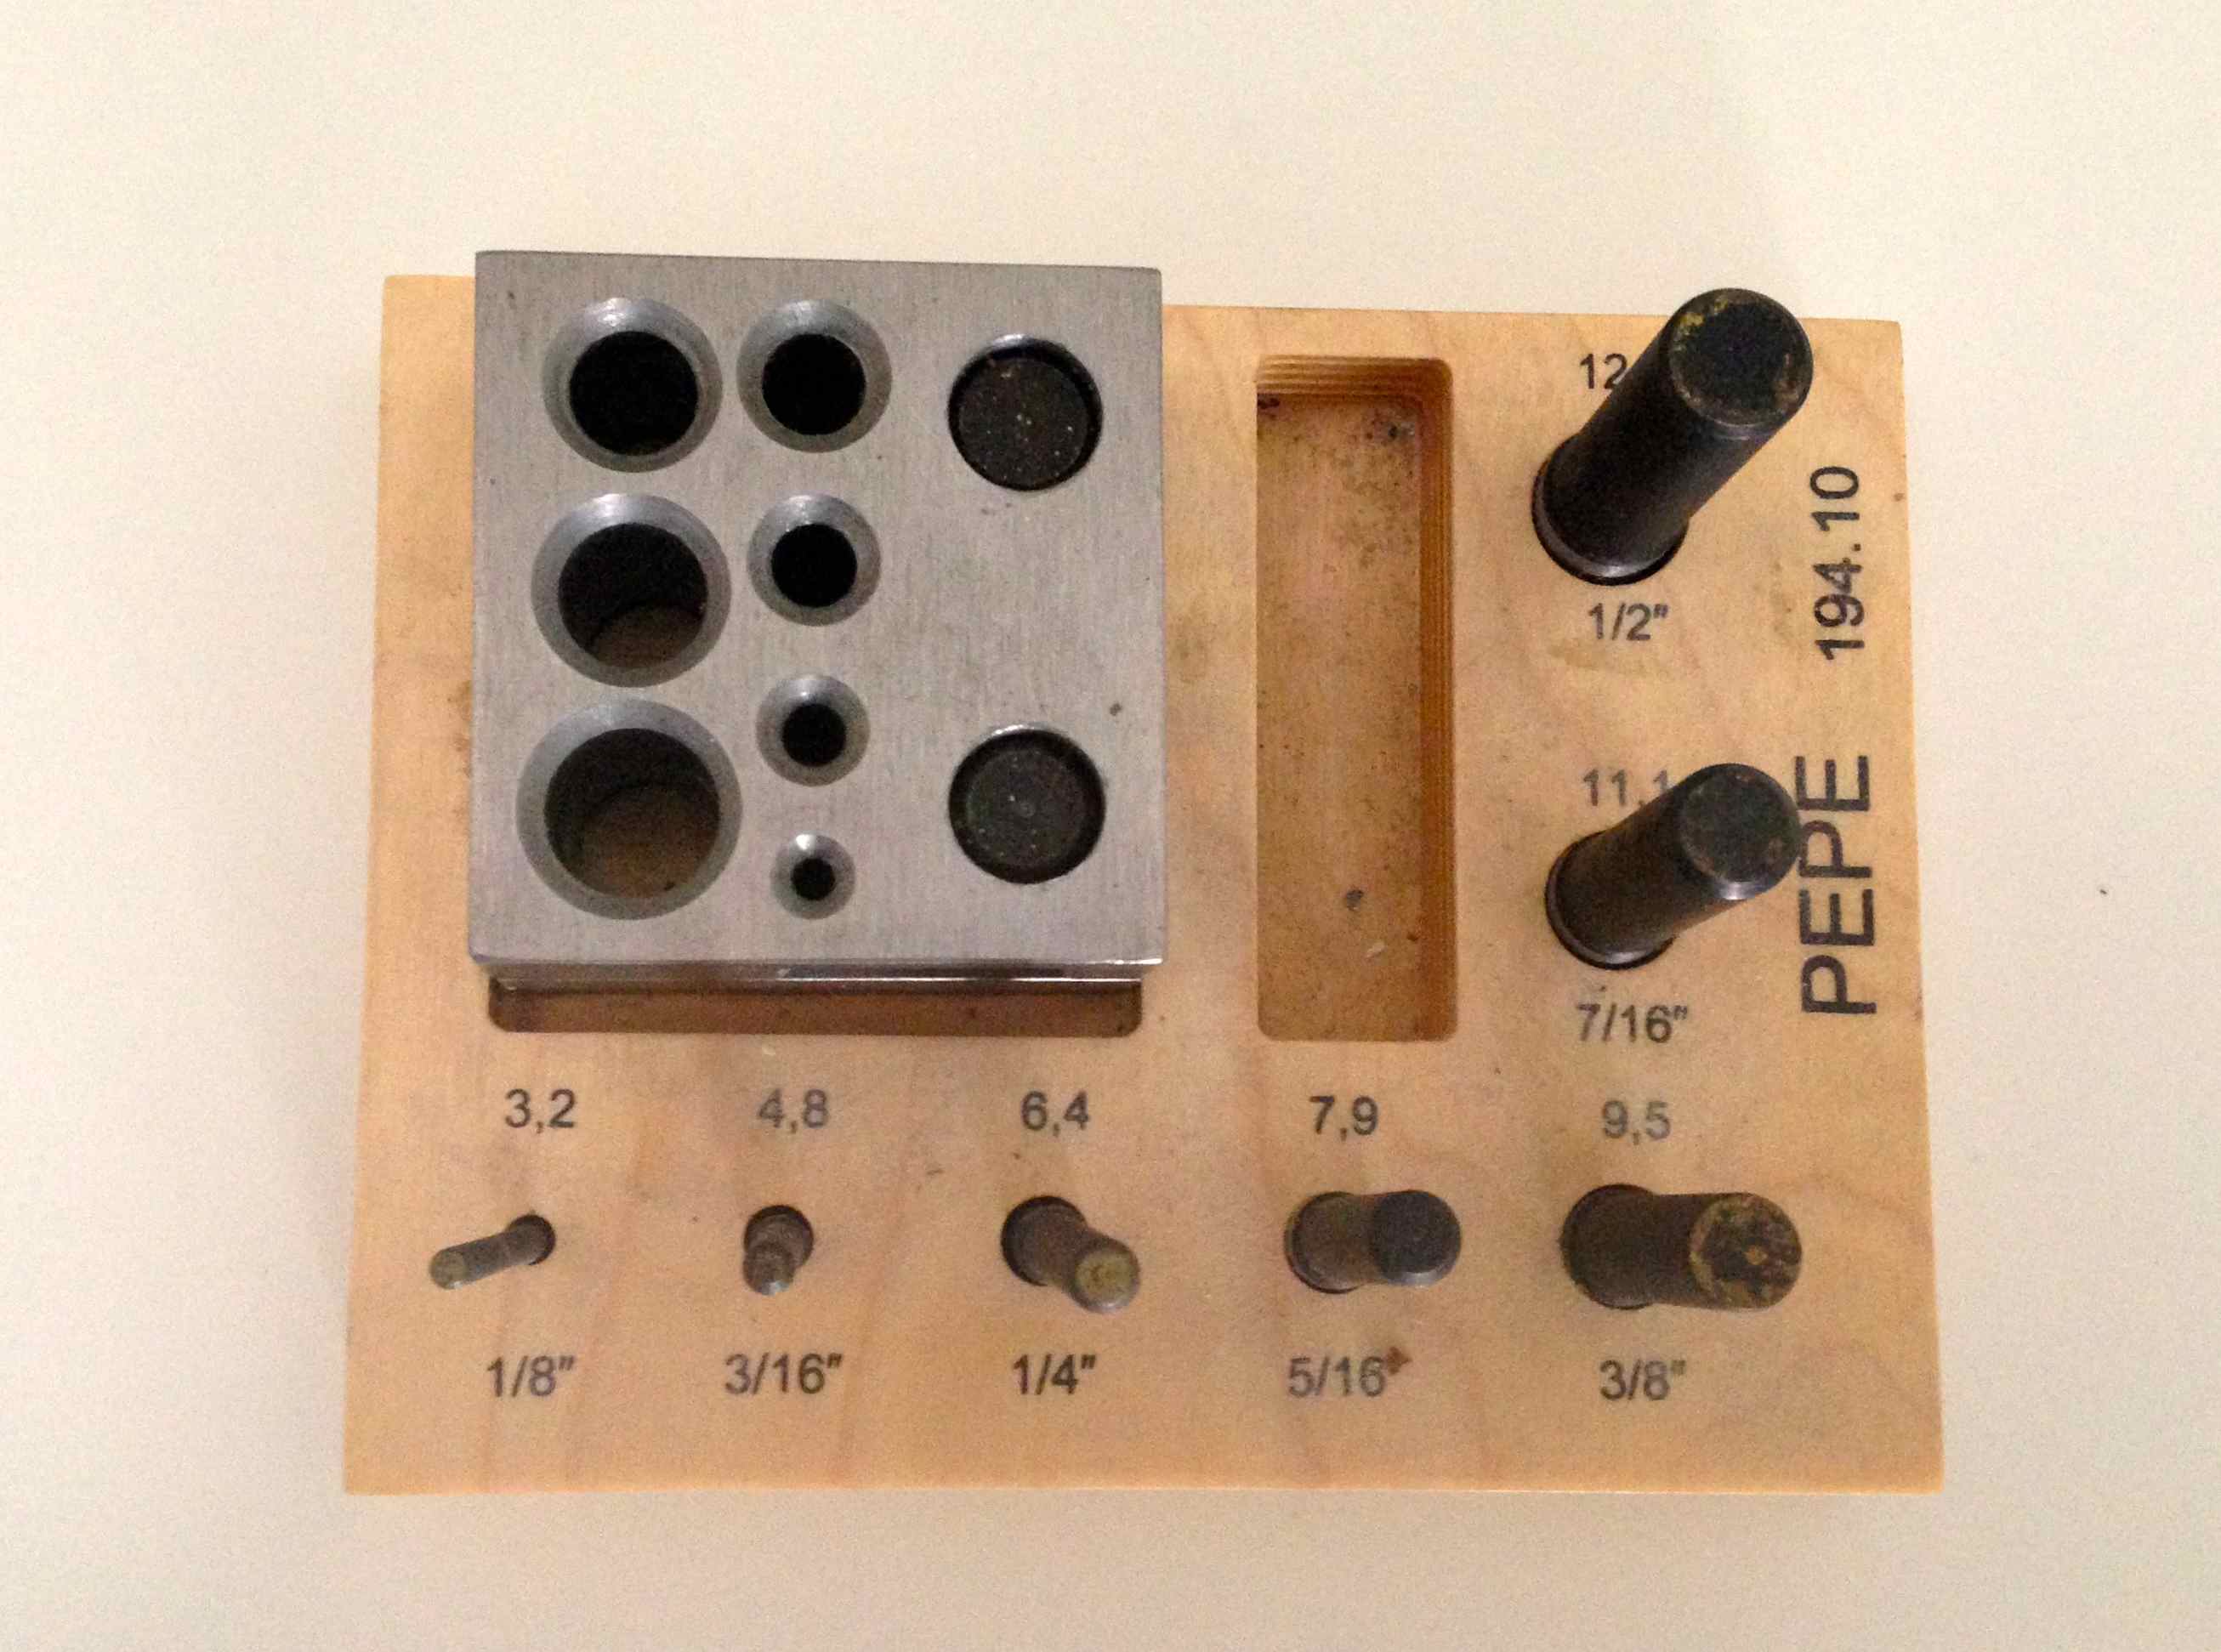
5. Disk punch
Do you want to cut circles, squares or even hearts, evenly and repeatedly? Look no further than a disk punch, a tool that will consistently produce these shapes. To use a disk punch, you simply sandwich a sheet of metal in between the two layers, insert the proper circle and hammer out a disk. I’ve found that a brass hammer works best due to the fact that it’s heavy enough to give you lots of extra power, yet soft enough that it will land a strong blow without a lot of bounce back. Again, price = ability to produce the same results and save you time.
[box type=”shadow”]
Dive into the creative world of metalsmithing with the Bluprint class Metalsmithing at Home. You’ll learn how to make curvy copper earrings, chunky silver stack rings and more while mastering splendid finishing techniques like heat patina and high polish.
Or, if you’re just beginning your exploration of metal jewelry making, sign up for the FREE Bluprint class Micro Torch Basics, where you’ll learn how to shape, secure and finish one-of-a-kind metal jewelry that’s uniquely you!
[/box]
Share tips, start a discussion or ask one of our experts or other students a question.
No Responses to “5 Must-Have Tools for Making Jewelry and Metalsmithing”